
Private Status Page
Private Status Pages are similar to public status pages, but only authorized users are allowed to access them. Private Status Pages are not available to the general public. Authorization is handled by OpenID SSO, and is independent from PagerDuty SSO.
Packaging Information
PagerDuty offers two Status Page packaging options, one which includes public status pages, and a premium package that also features private status pages. Depending on the package you choose, other features items such as Page Subscribers, Premium Account Subscribers and Total Account Subscribers may vary.
Please contact our Sales Team for more information.
Create a Private Status Page
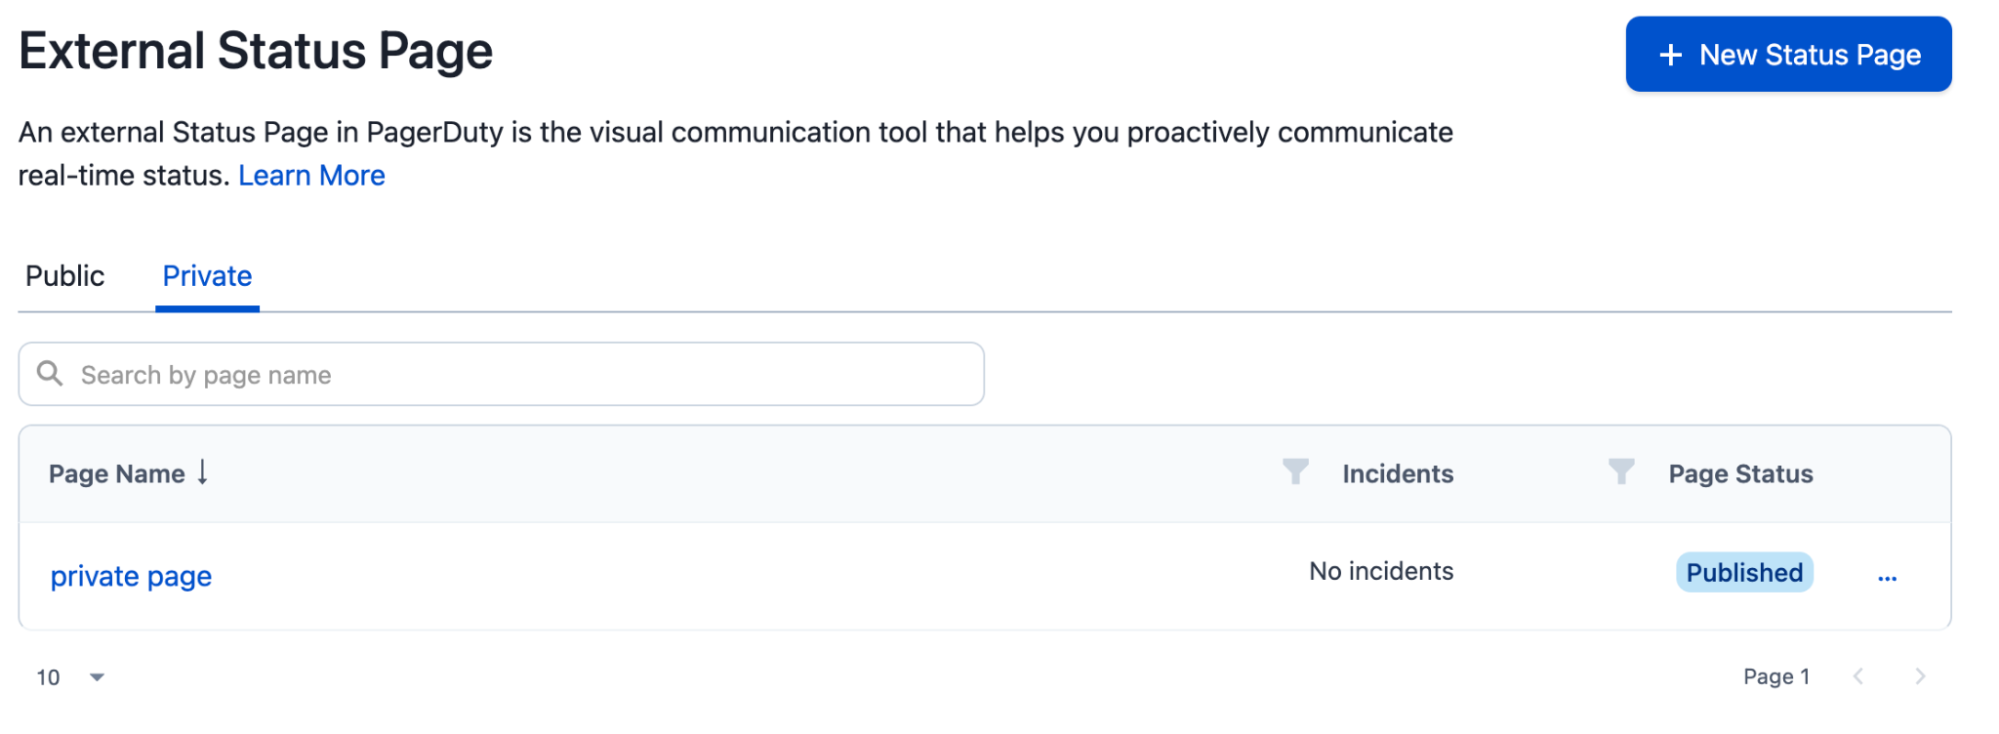
- Navigate to Status External Status Page.
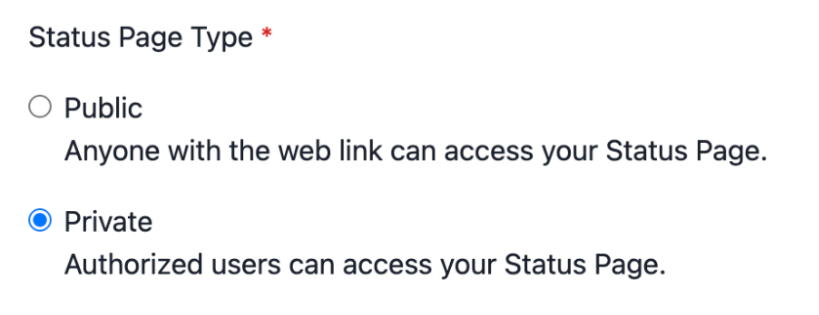
- ClickNew Status Page and, under Status Page Type, select Private.
Initial setup
- Continue setting up the status page using the instructions from Create an External Status Page.
Configure Single Sign-On (SSO)
Private Status Pages use the OpenID Connect (OIDC) protocol to allow users access.
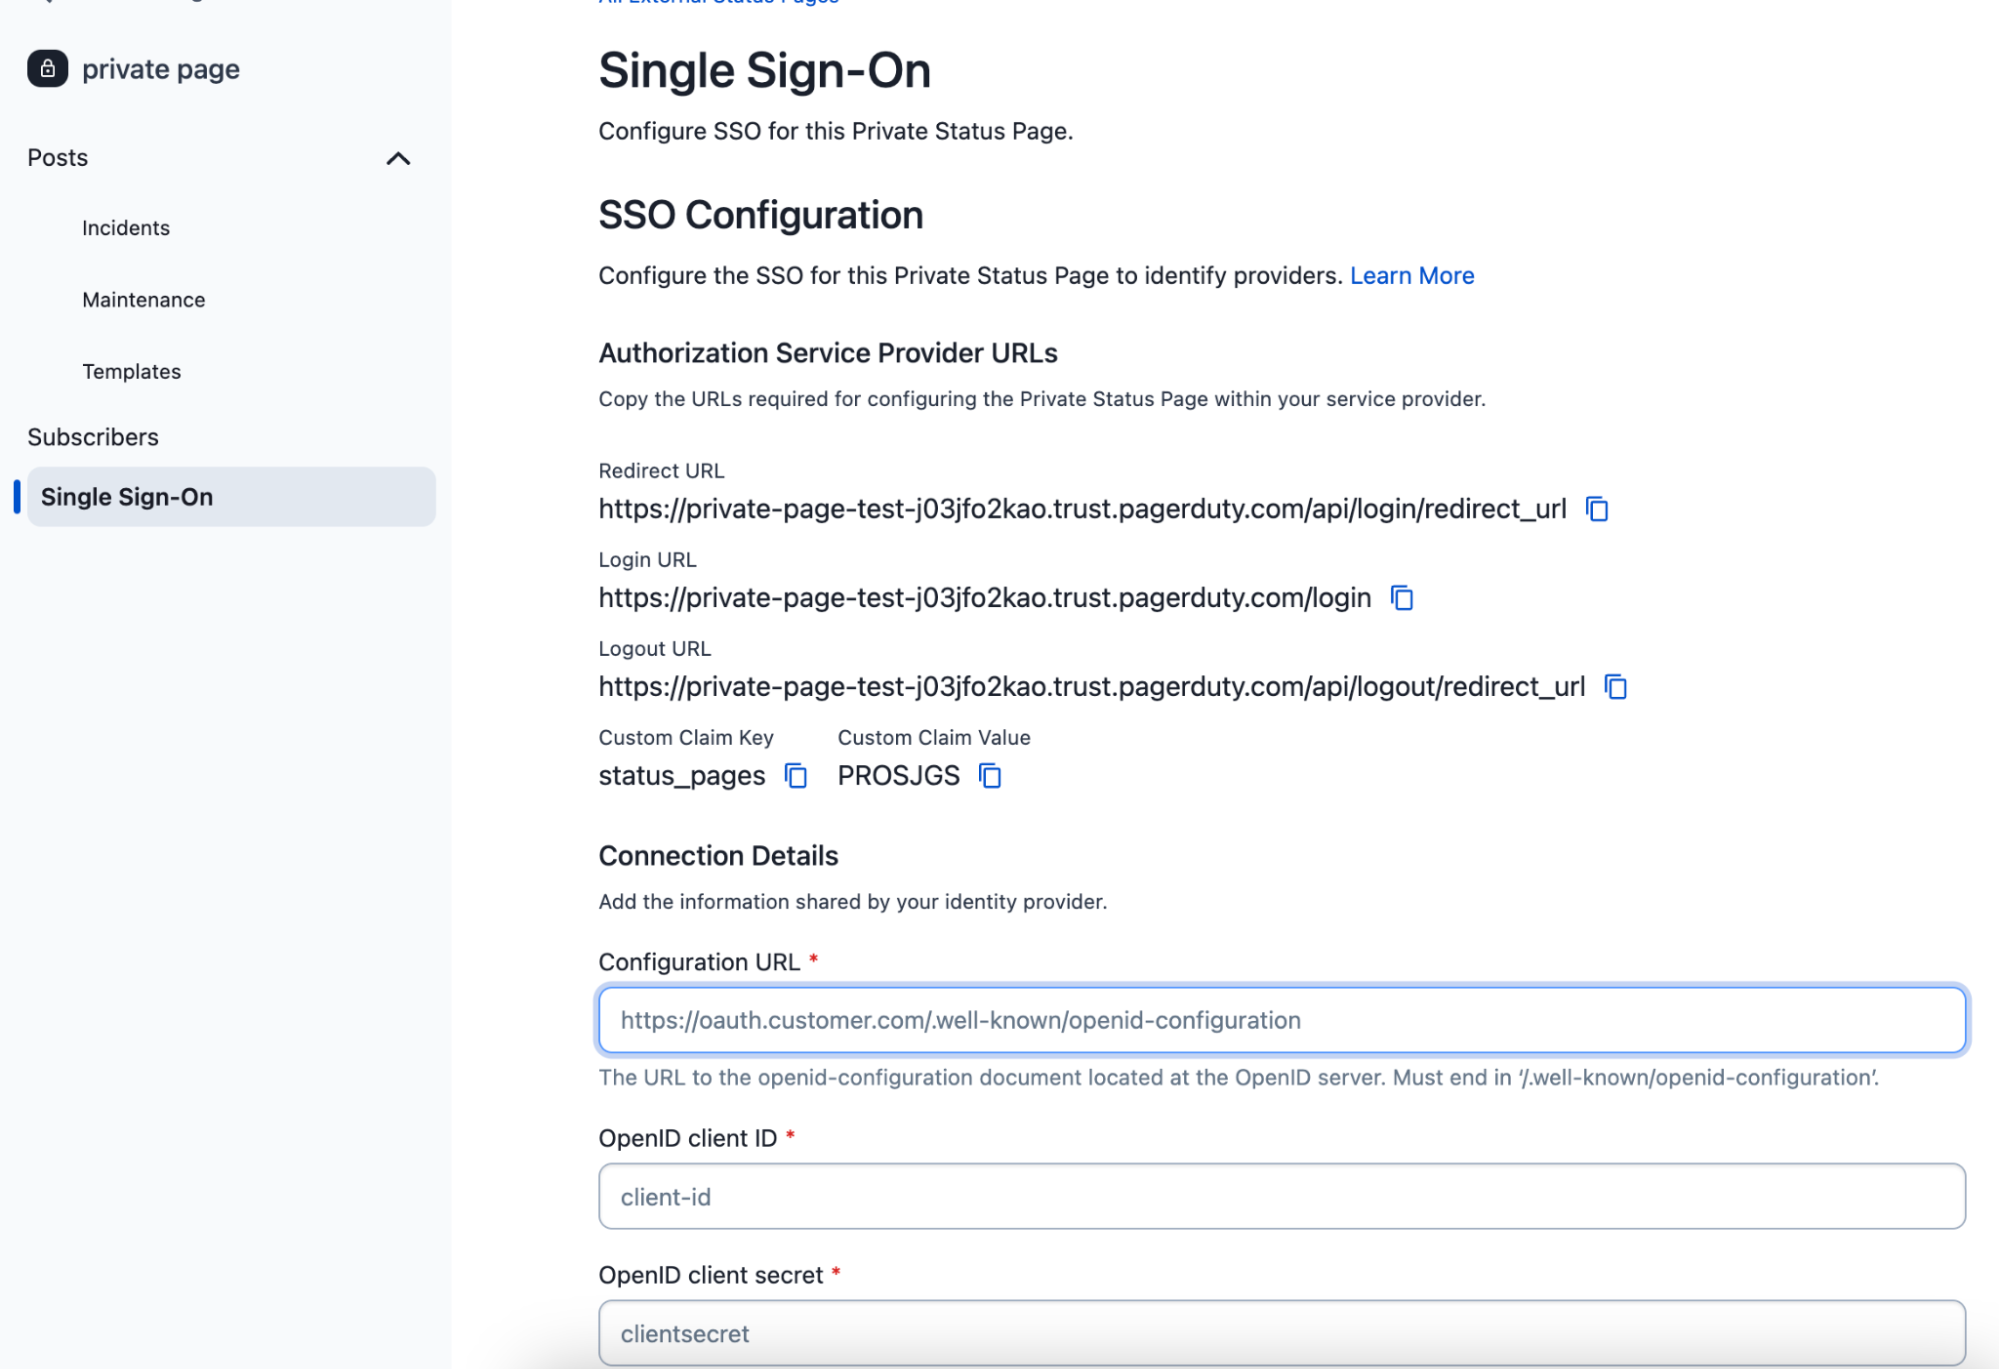
- In the PagerDuty web app, navigate to Status External Status Page, select the Private tab, and click the name of the page you want to configure.
Select Private tab
- Select the Single Sign-On tab and enter the following:
- Configuration URL (i.e., the URL on your OpenID server that ends with
/.well-known/openid-configuration) - OpenID client ID
- OpenID client secret
- Configuration URL (i.e., the URL on your OpenID server that ends with
SSO configuration
The instructions below detail how to integrate with common SSO providers. You're free, however, to integrate with the SSO provider of your choice:
Okta
Expand
Create the Application
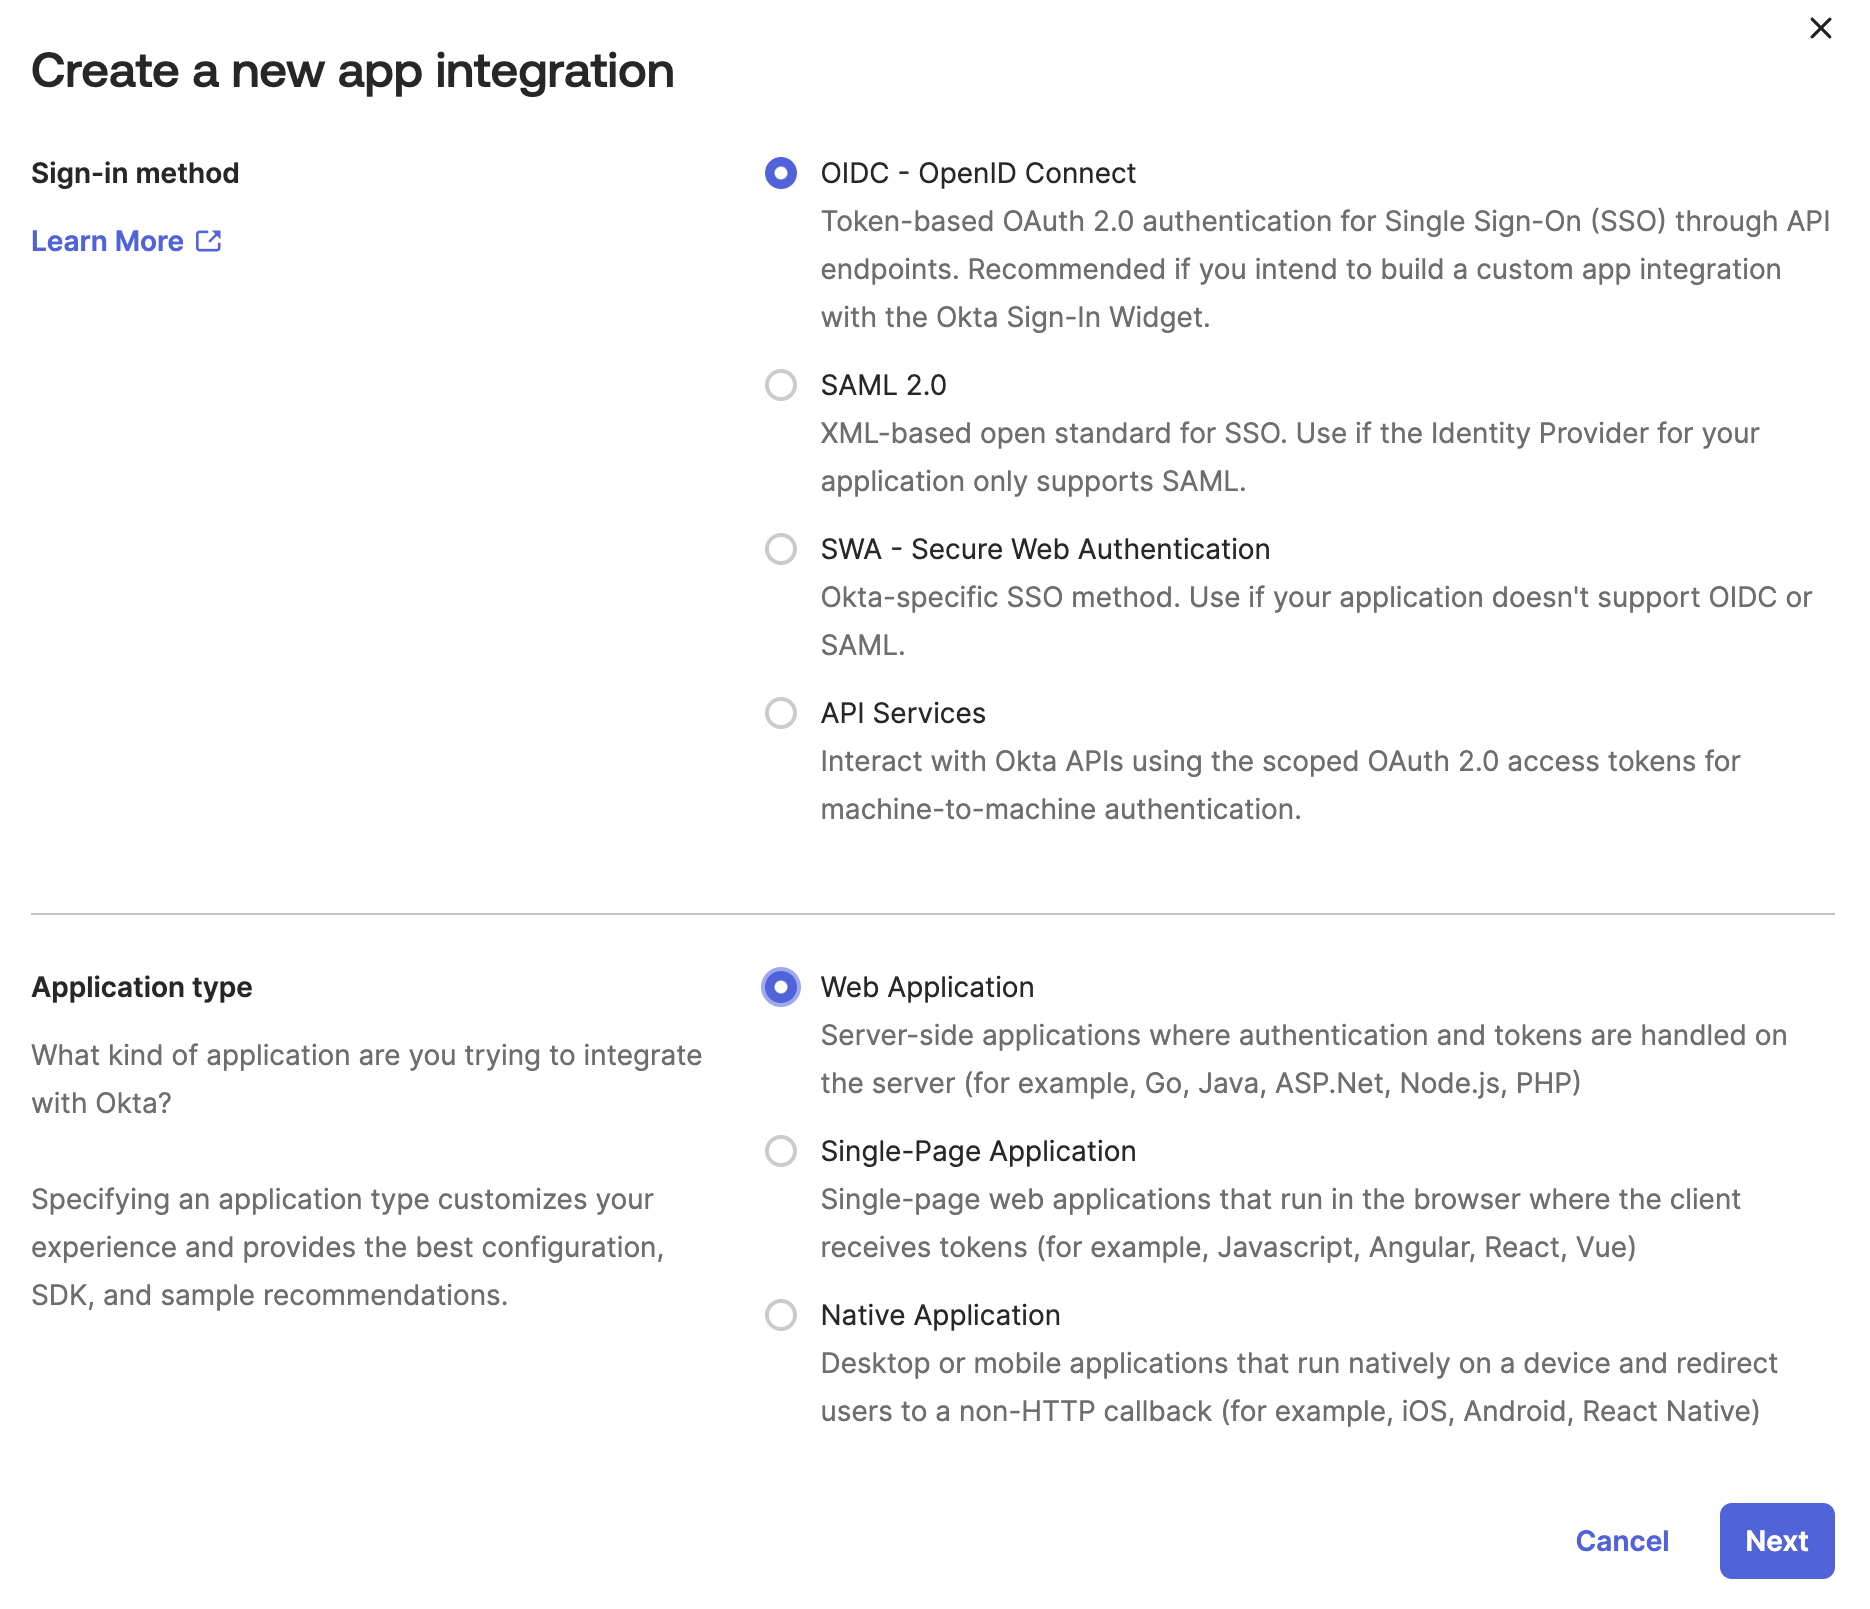
- Go to Applications Create App Integration.
- For Sign-in method, select OIDC - OpenID Connect, and for Application type, select Web Application. Click Next.
Create a new app integration
- Under Application, enter a name for the application.
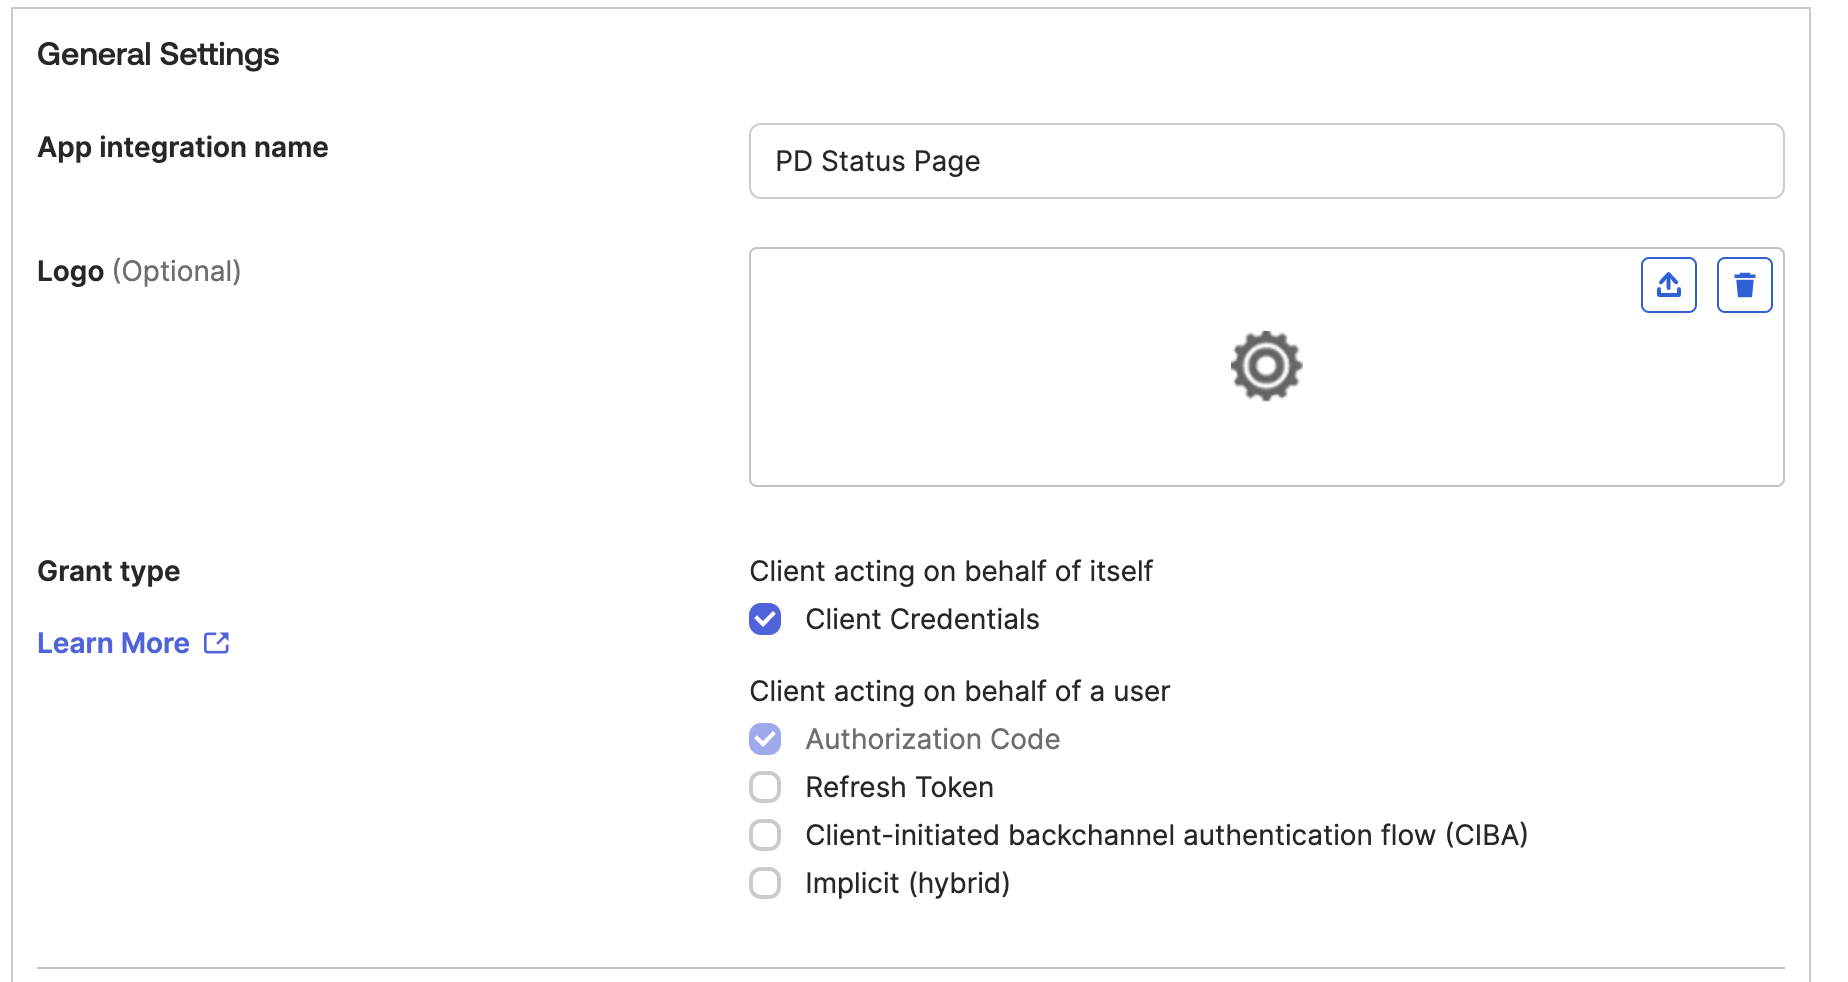
General settings
- Copy the Redirect URL from the SSO configuration in PagerDuty and paste it into the Sign-in redirect URI. Do the same for the Login URL and the Sign-out redirect URIs.
- Select how you would like to assign the application, and click Save.
- On the next page, copy the client ID and client secret, and paste it into the OpenID client ID and OpenID client Secret fields on the PagerDuty SSO configuration page.
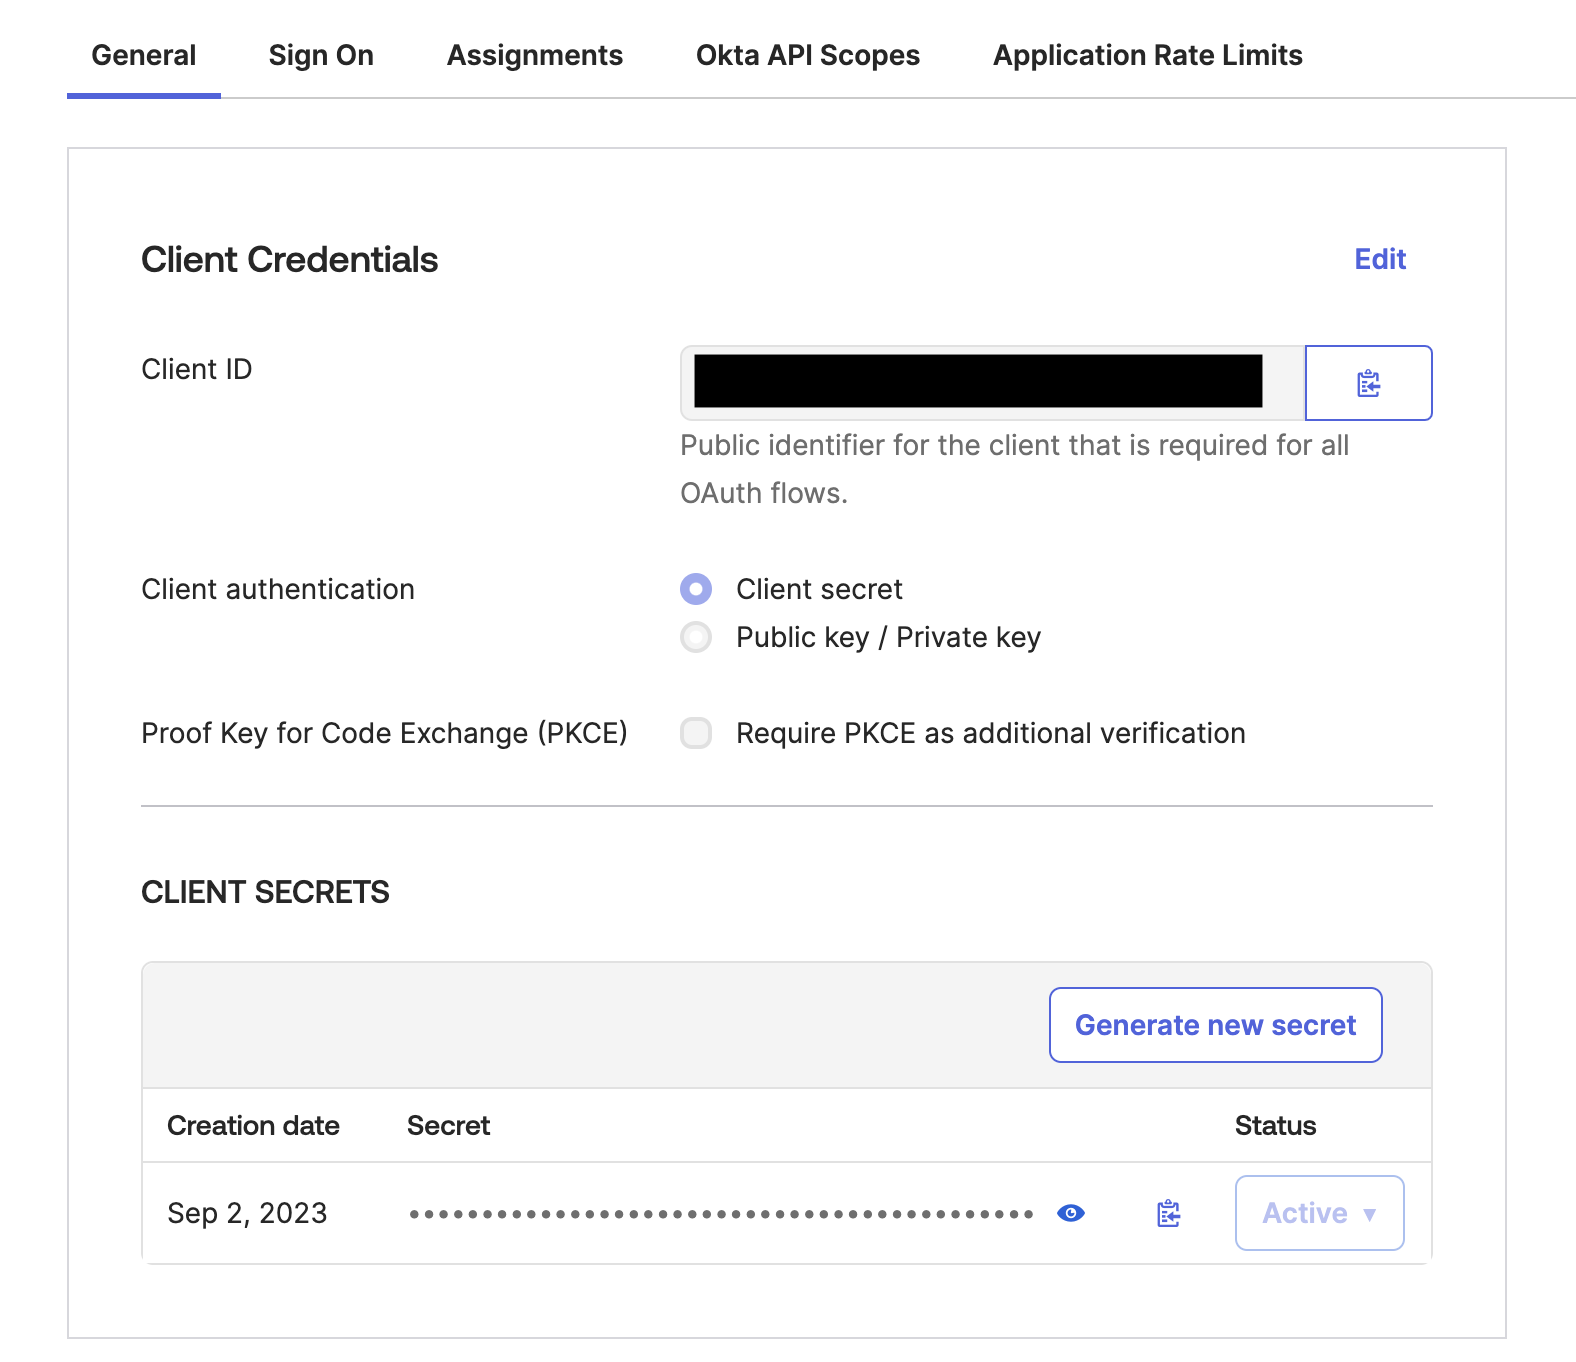
Client credentials
- Go to Security API and select the Authorization Server you want to connect.
- Copy the Metadata URI and paste it into the Configuration URL field in the PagerDuty SSO configuration page.
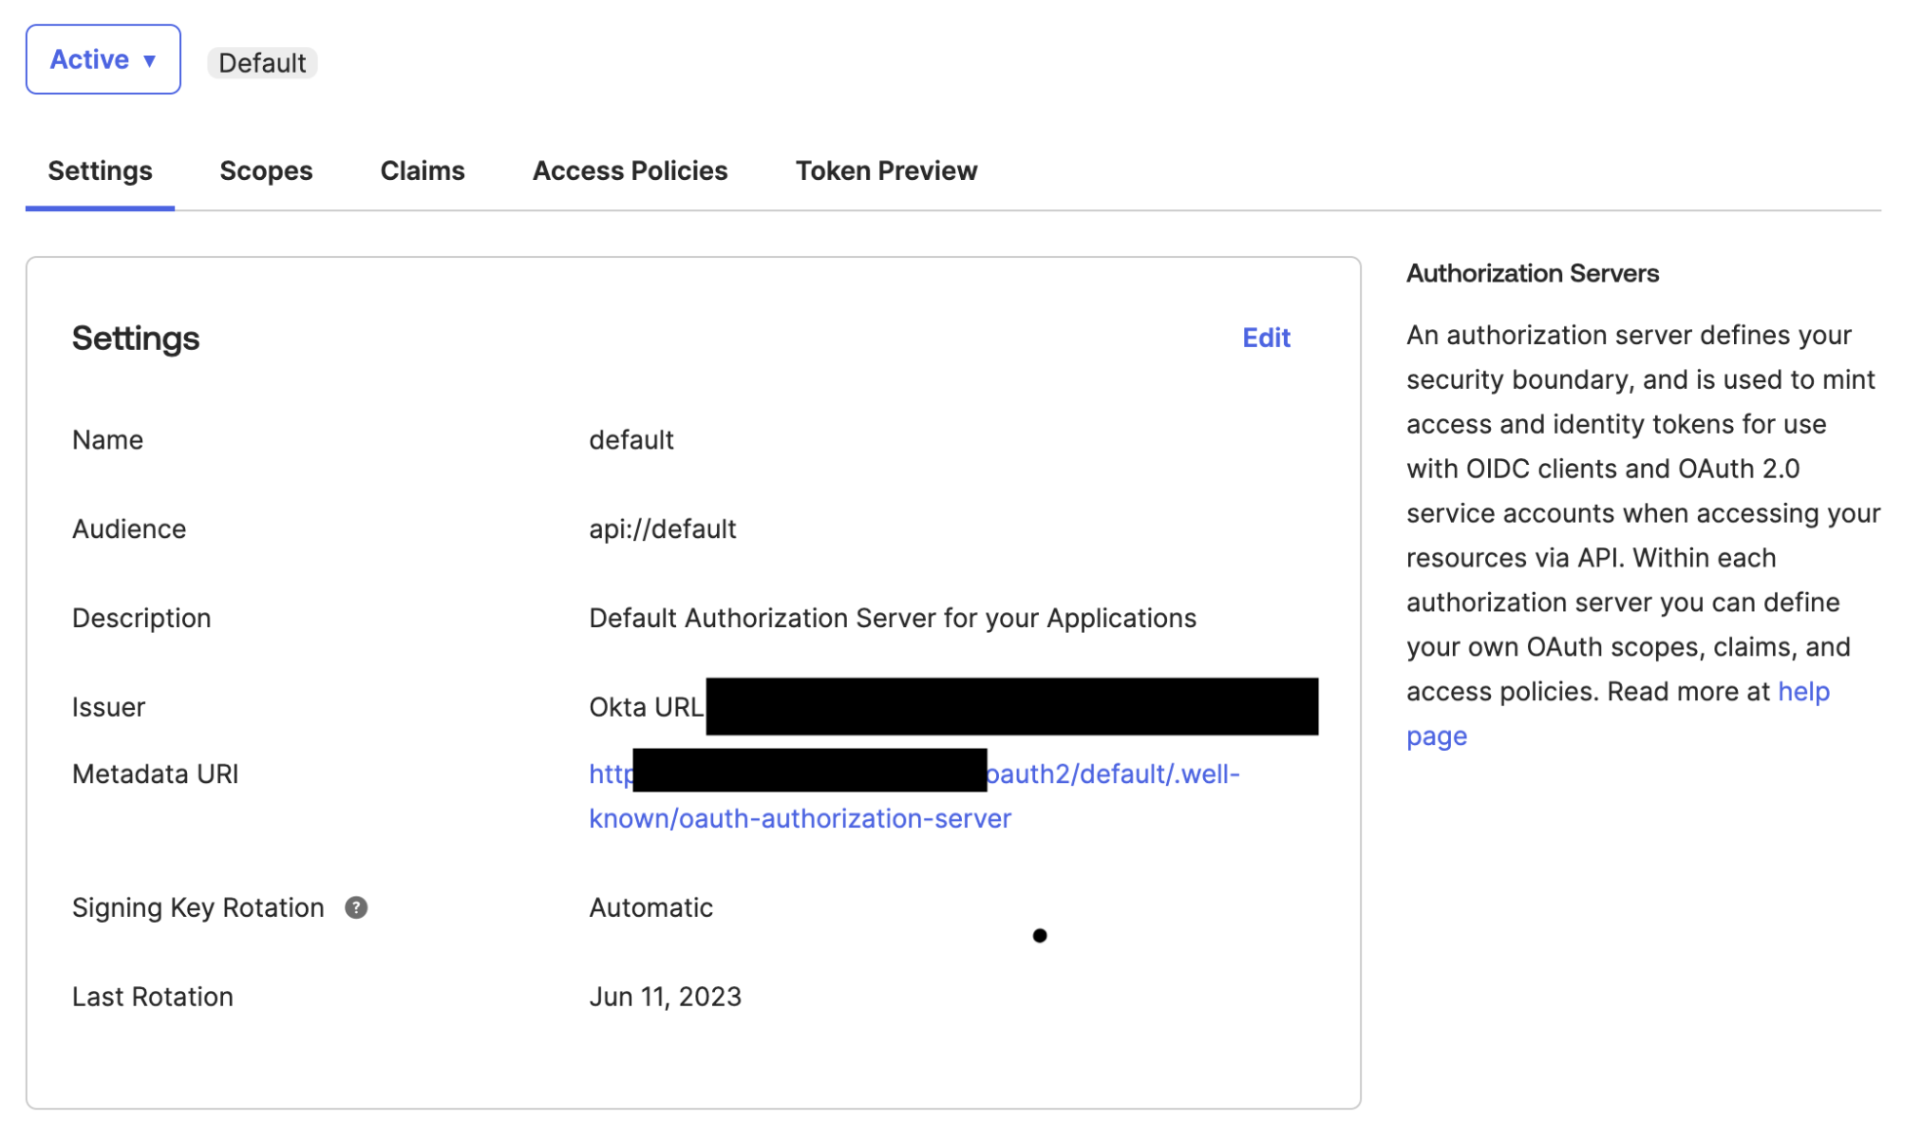
Metadata URI
- Replace the end of the url (
oauth-authorization-server) withopenid-configuration. The URL in PagerDuty must end with/.well-known/openid-configuration. - Save the SSO configuration.
Profile Mapping and Custom Claims
- Go to Directory Profile Editor and select your application.
- Click Add Attribute. For the Data type, select string. Enter a Display name. For the variable name enter
pd_status_pages. Select Greater than for Attribute length, with a value of 0. Select Yes for Attribute required and click Save.
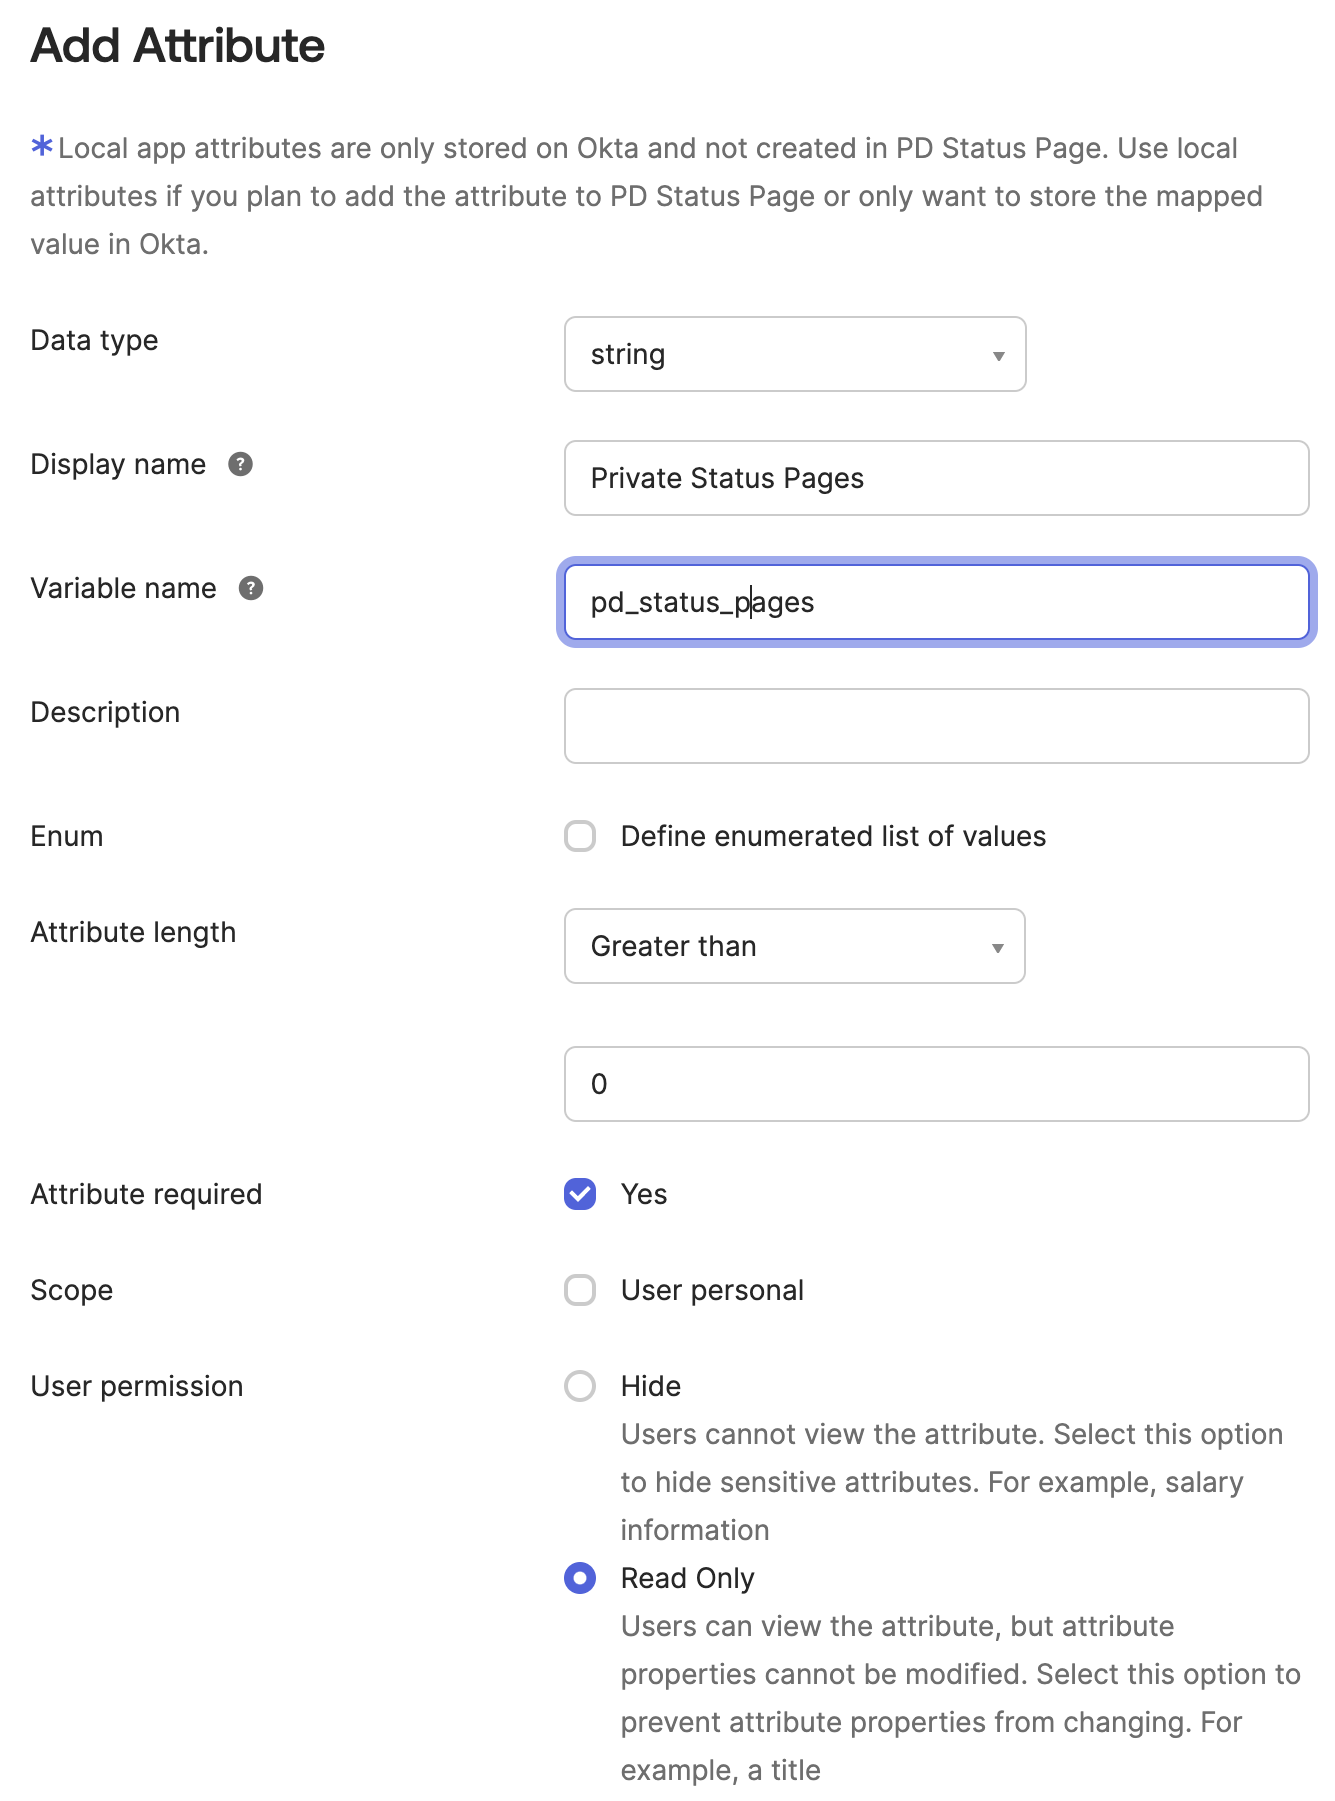
Add attribute
- Click Mappings, and find
pd_status_pages. Ensure that Apply mapping on user create and update is selected (the green arrow). Enter the custom claim value from the PagerDuty SSO configuration page, surrounded by single quotes, and click Save Mappings.
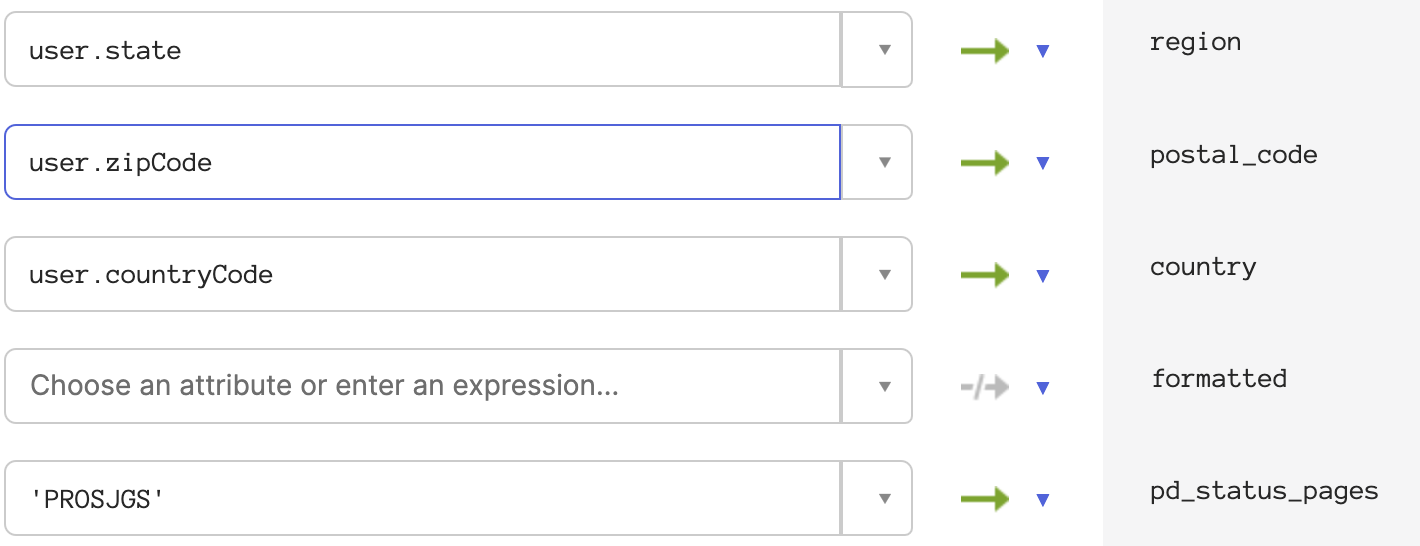
Custom claim value
- Go to Security API and select the authorization server you will be using. Then click on the Claims tab, and click Add Claim.
- In the Name field, enter the name found under the Custom Claim Key on the PagerDuty SSO configuration page. Select ID Token as Always. Under Value, enter
appuser.pd_status_pages.
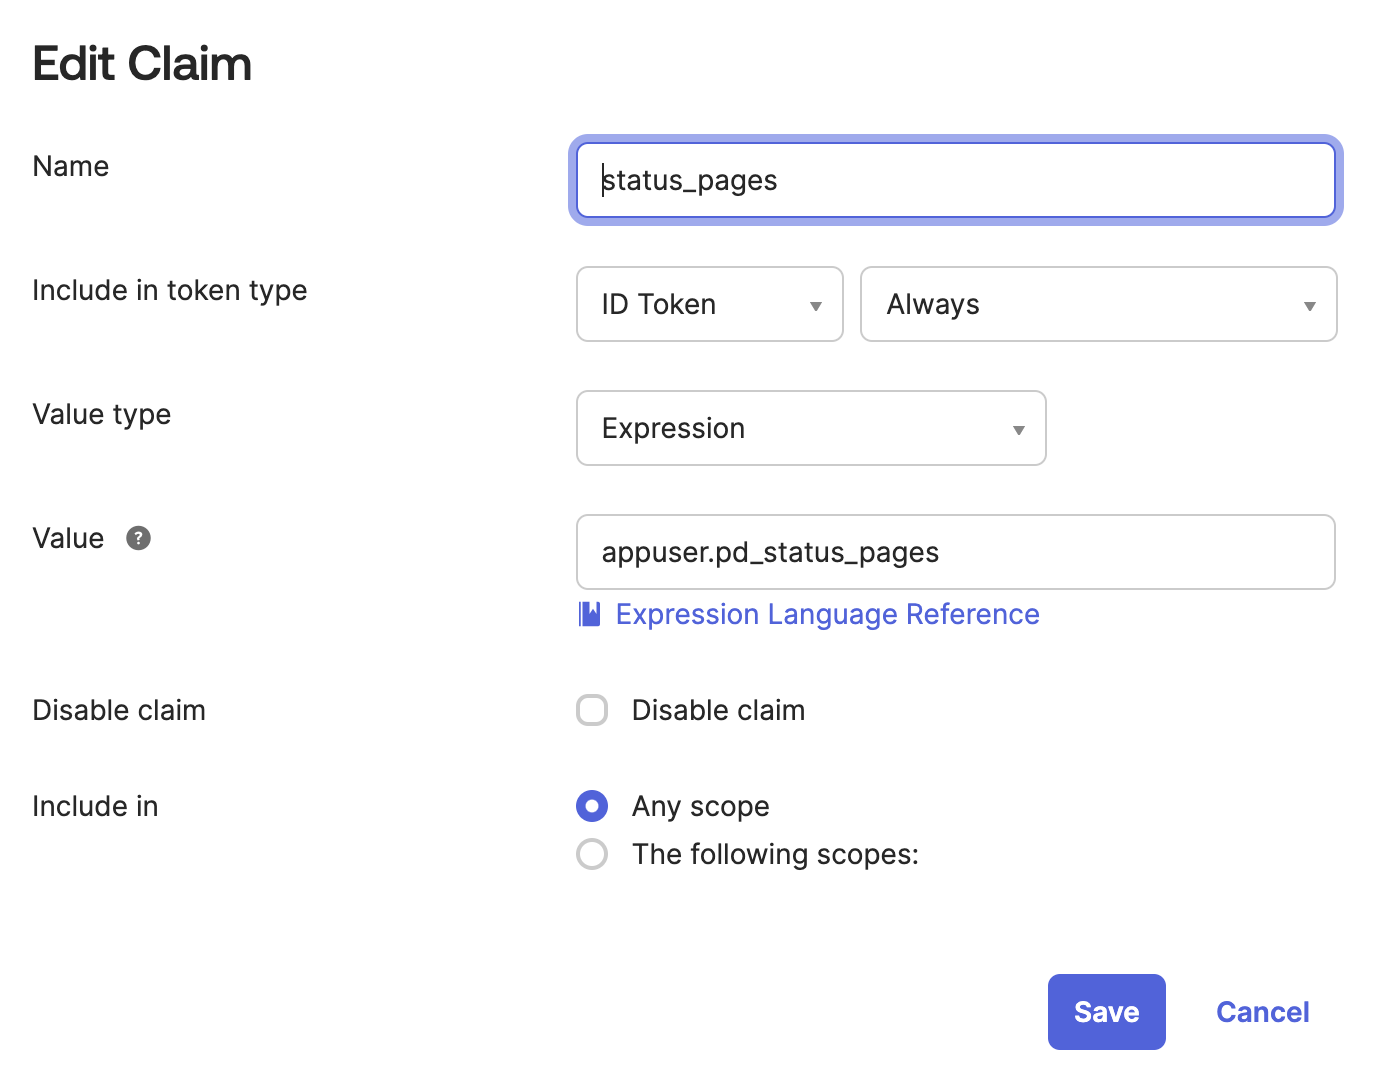
Edit claim
Data Requirement
The name of the claim must match the Custom Claim Key name.
Azure
Expand
Create the Application
- In the Microsoft Entra Admin Center, navigate to App Registrations New Registration.
- Enter a name for the app and the Redirect URI from the PagerDuty SSO Configuration page.
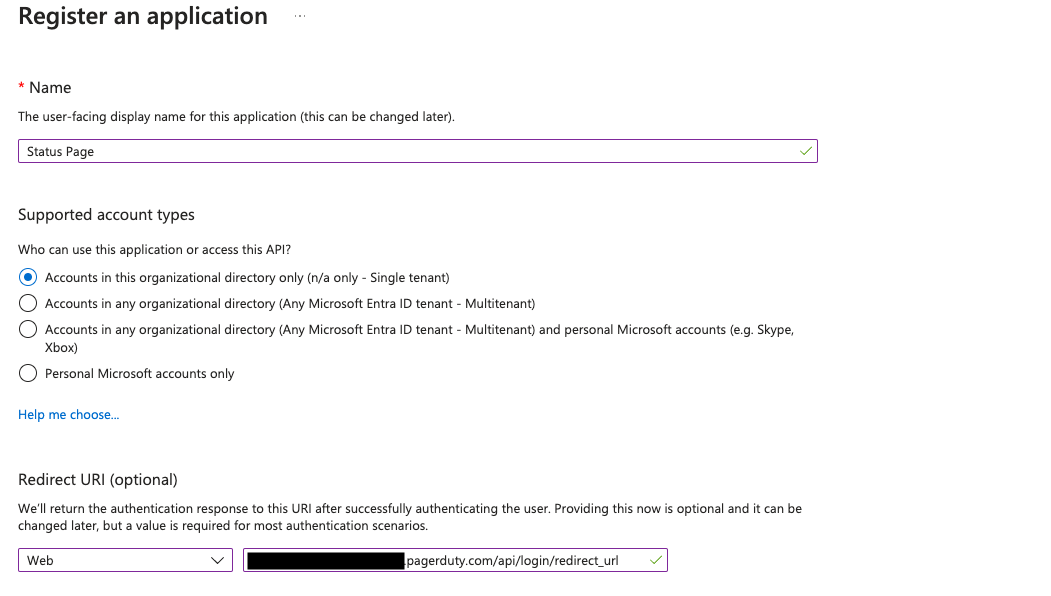
Register an application
- Find the newly created app under App Registrations and select it. Then, click Add a certificate or secret to create a client secret. On the next screen, click New Client Secret.

Add a certificate or secret
- Copy newly created client secret and paste it into the PagerDuty SSO configuration page. Then go back to the previous page and copy and paste the Application (client) ID.
Note: you will be presented with an array of values associated with your client secret.- Typically the values will include the following fields: "Description", "Expires", "Value", "Secret ID".
- What you should be looking for is the Secret's "Value" field.
- Note: Please do not use the data in the Secret's "Secret ID" field, which is UUID and not intended for the secure operations of interest.
- Go back to the previous screen and click Authentication. Under Front-channel logout URL, add the logout URL from the PagerDuty SSO Configuration page and Save.

Redirect URL
- In the same menu where Authentication was found, select Manage Branding and Properties. In the Home page URL field, enter the login URL from the PagerDuty SSO Configuration page and click Save.
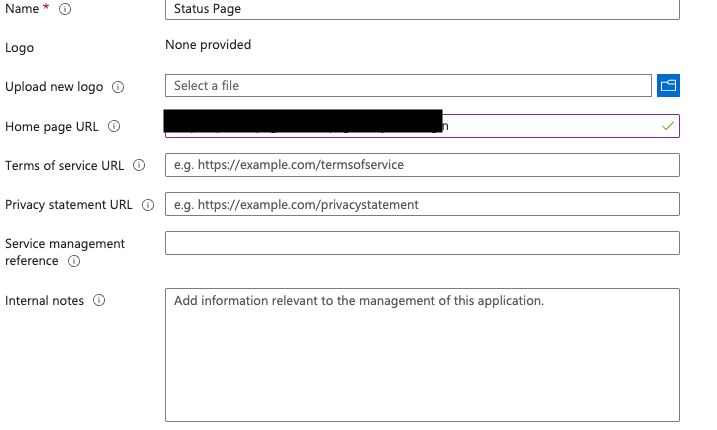
Home page URL
- Go back to the created application (as in step 3), and click on Endpoints. Locate the OpenID Connect metadata document url and copy it and paste it into the Configuration URL on the PagerDuty SSO Configuration page.
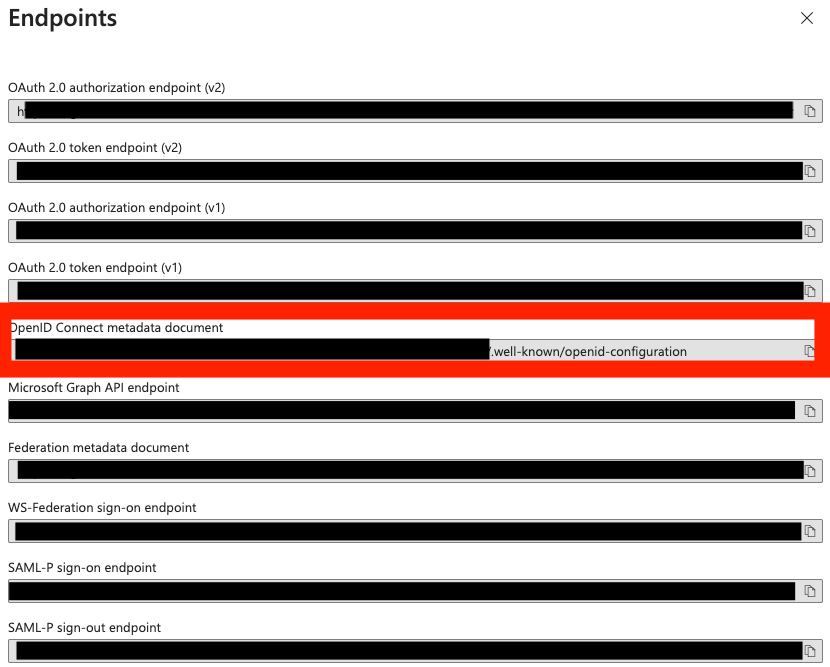
OpenID Connect metadata document
Profile Mapping and Custom Claims
- On your app page (from app registration), select Manage App roles.
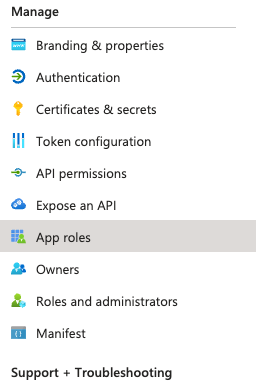
App roles
- Click Create Role, and enter the custom claim key and custom claim value found on the PagerDuty SSO configuration page. Click Apply.
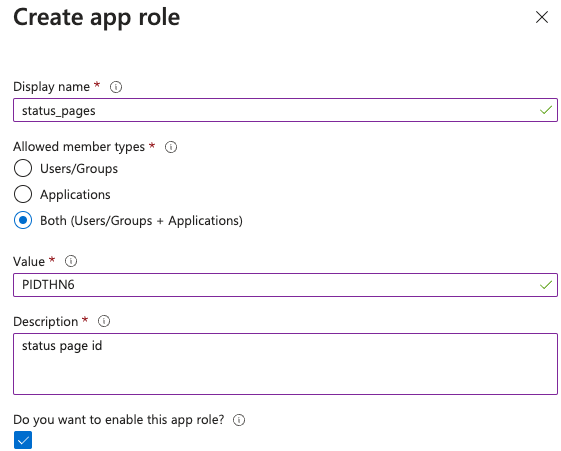
Create app role
- Under Manage, select Manifest. In the JSON representation, update
acceptMappedClaimstotrueand save. - Go to Applications Enterprise Applications, select the application, and go to Single Sign-On. Click Edit next to Attributes and Claims.
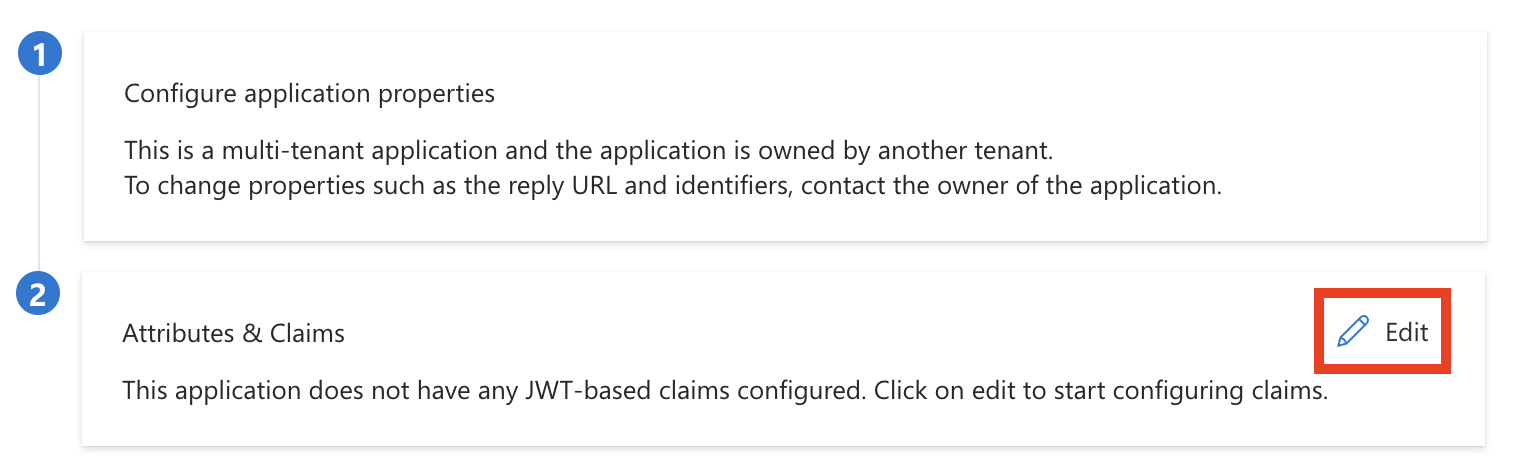
Attributes and Claims
- Click Add New Claim. Enter the custom claim key (
status_pages) for the name. Under Source, select Attribute, and under Source attribute, enterusers.assignedroles. Click Save.
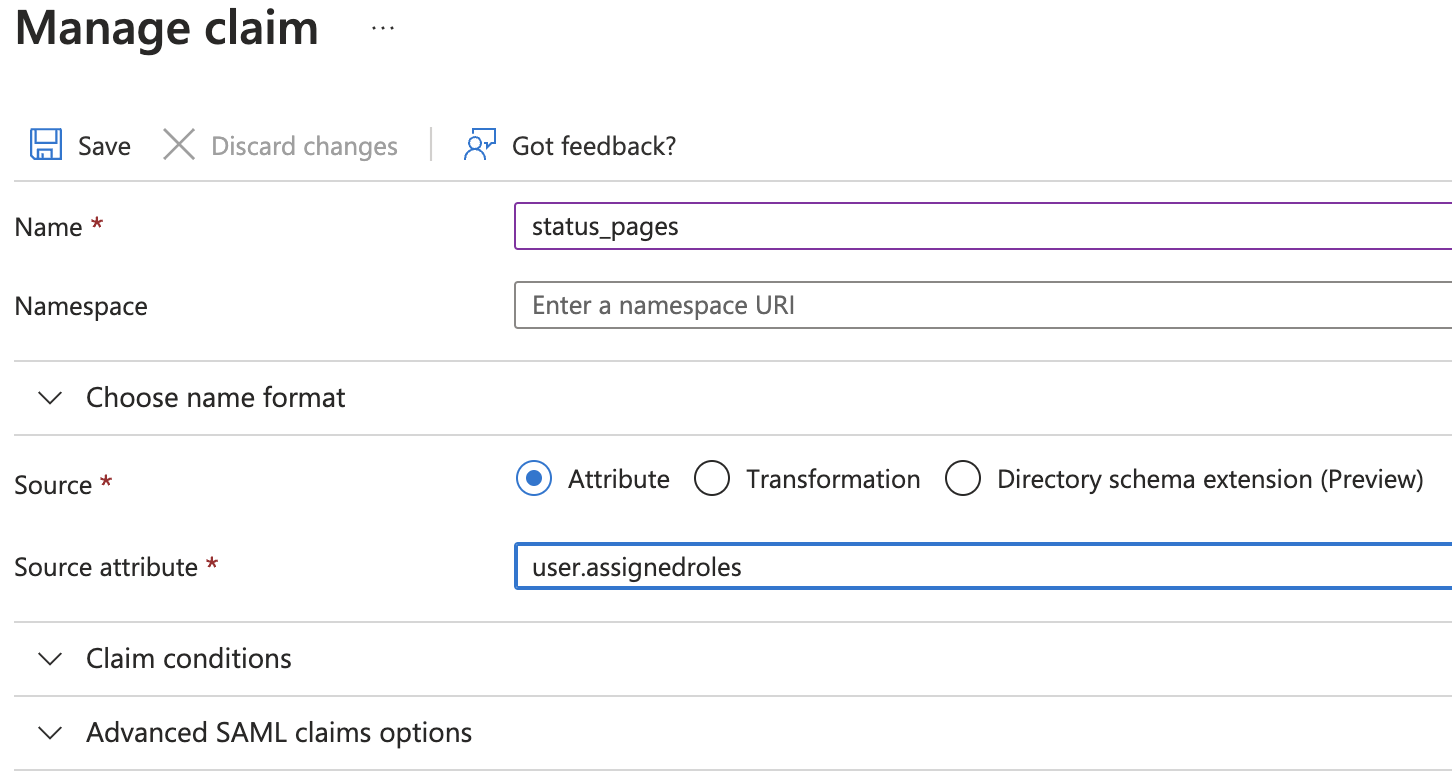
Manage claim
Salesforce
Expand
Create the Application
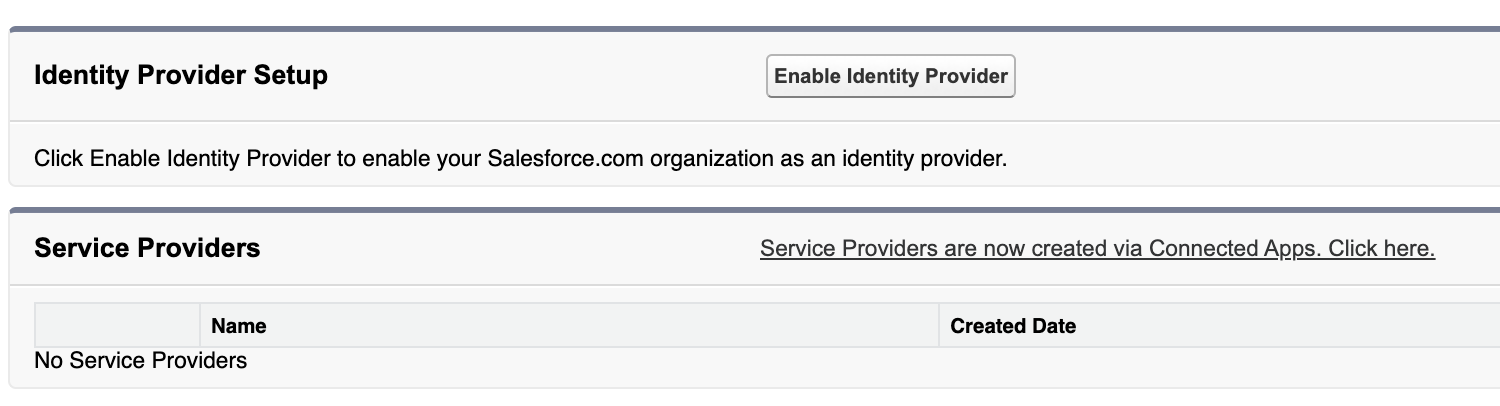
-
Ensure that the Identity Provider is enabled in Salesforce. In the Setup view go to Settings > Identity > Identity Provider, and click Enable Identity Provider.
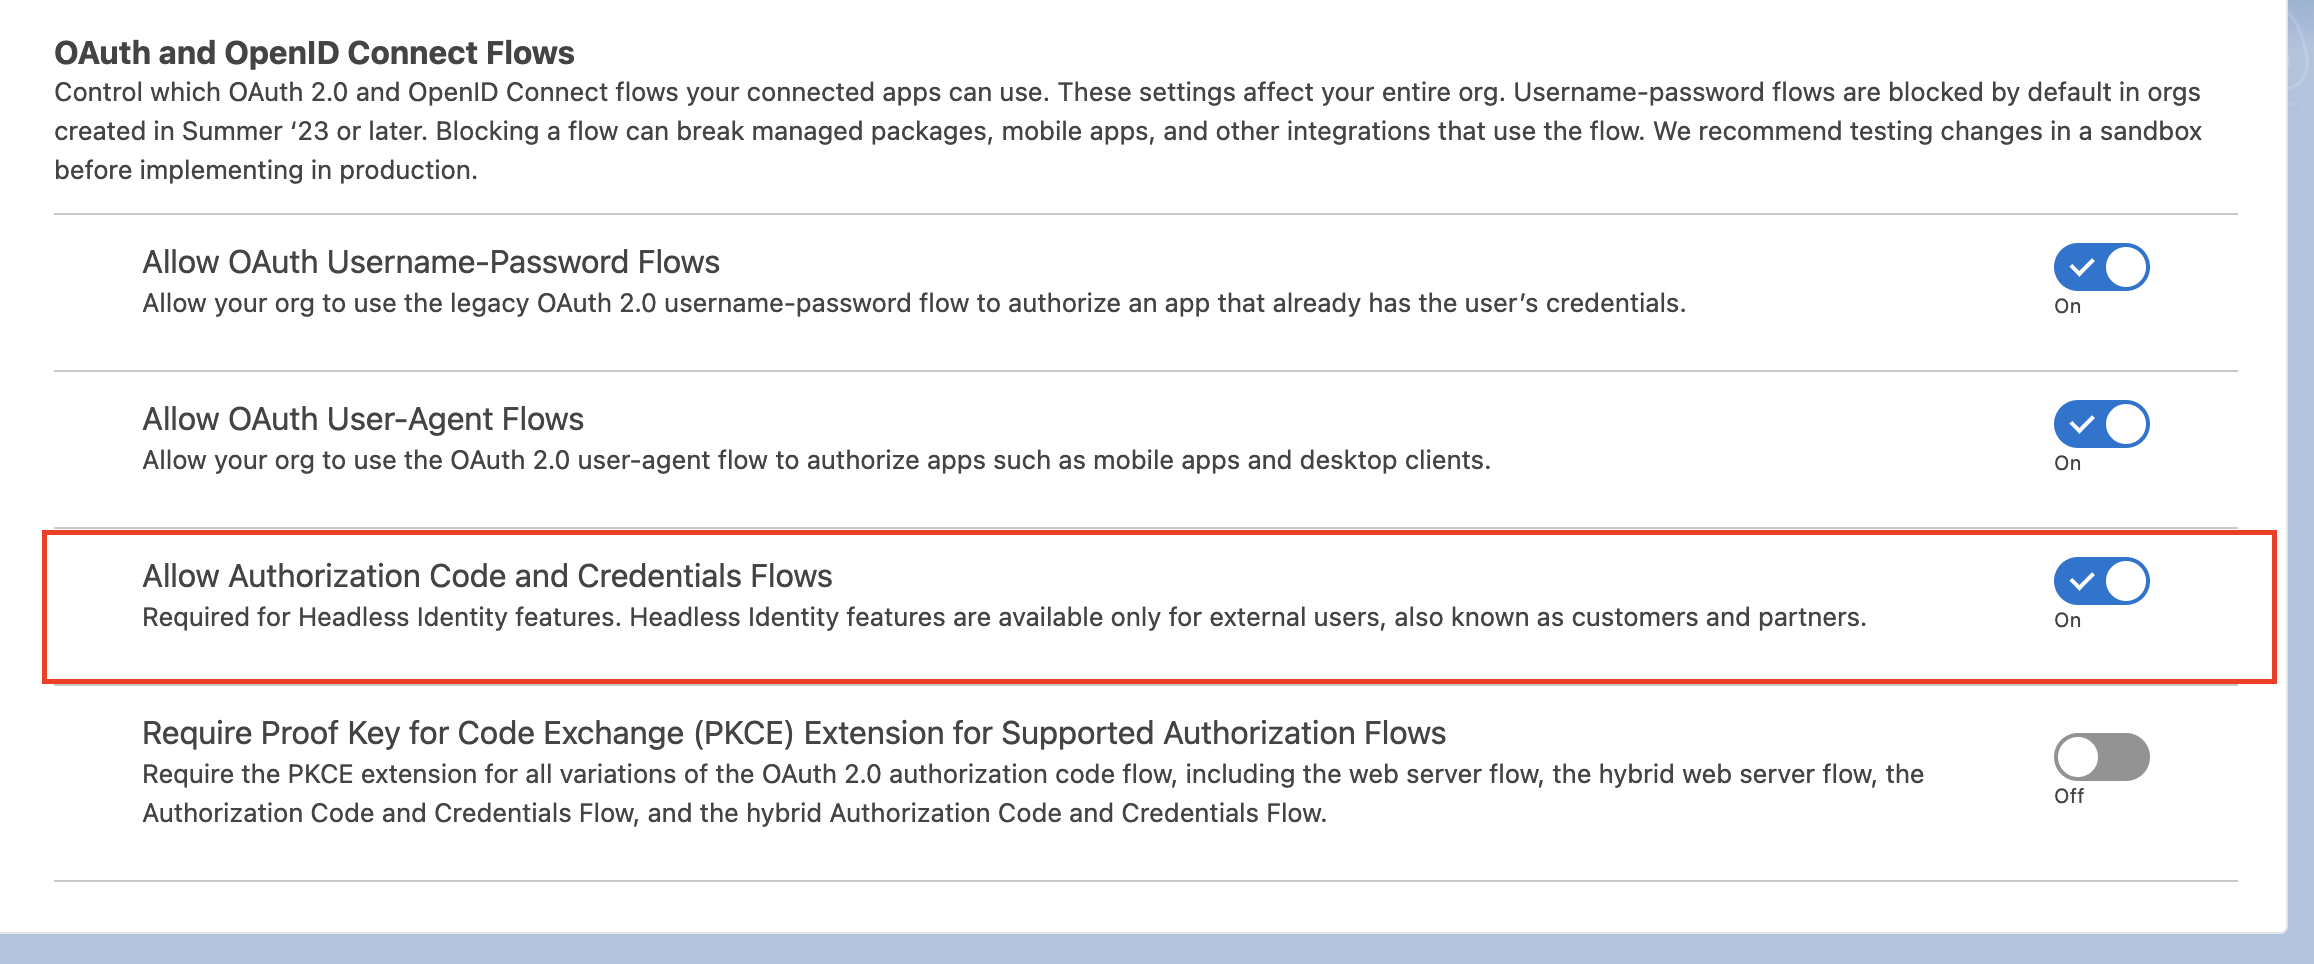
-
Go to Settings > Identity > OAuth and OpenID Connect Settings and ensure that the Allow Authorization Code and Credentials Flows option is enabled.
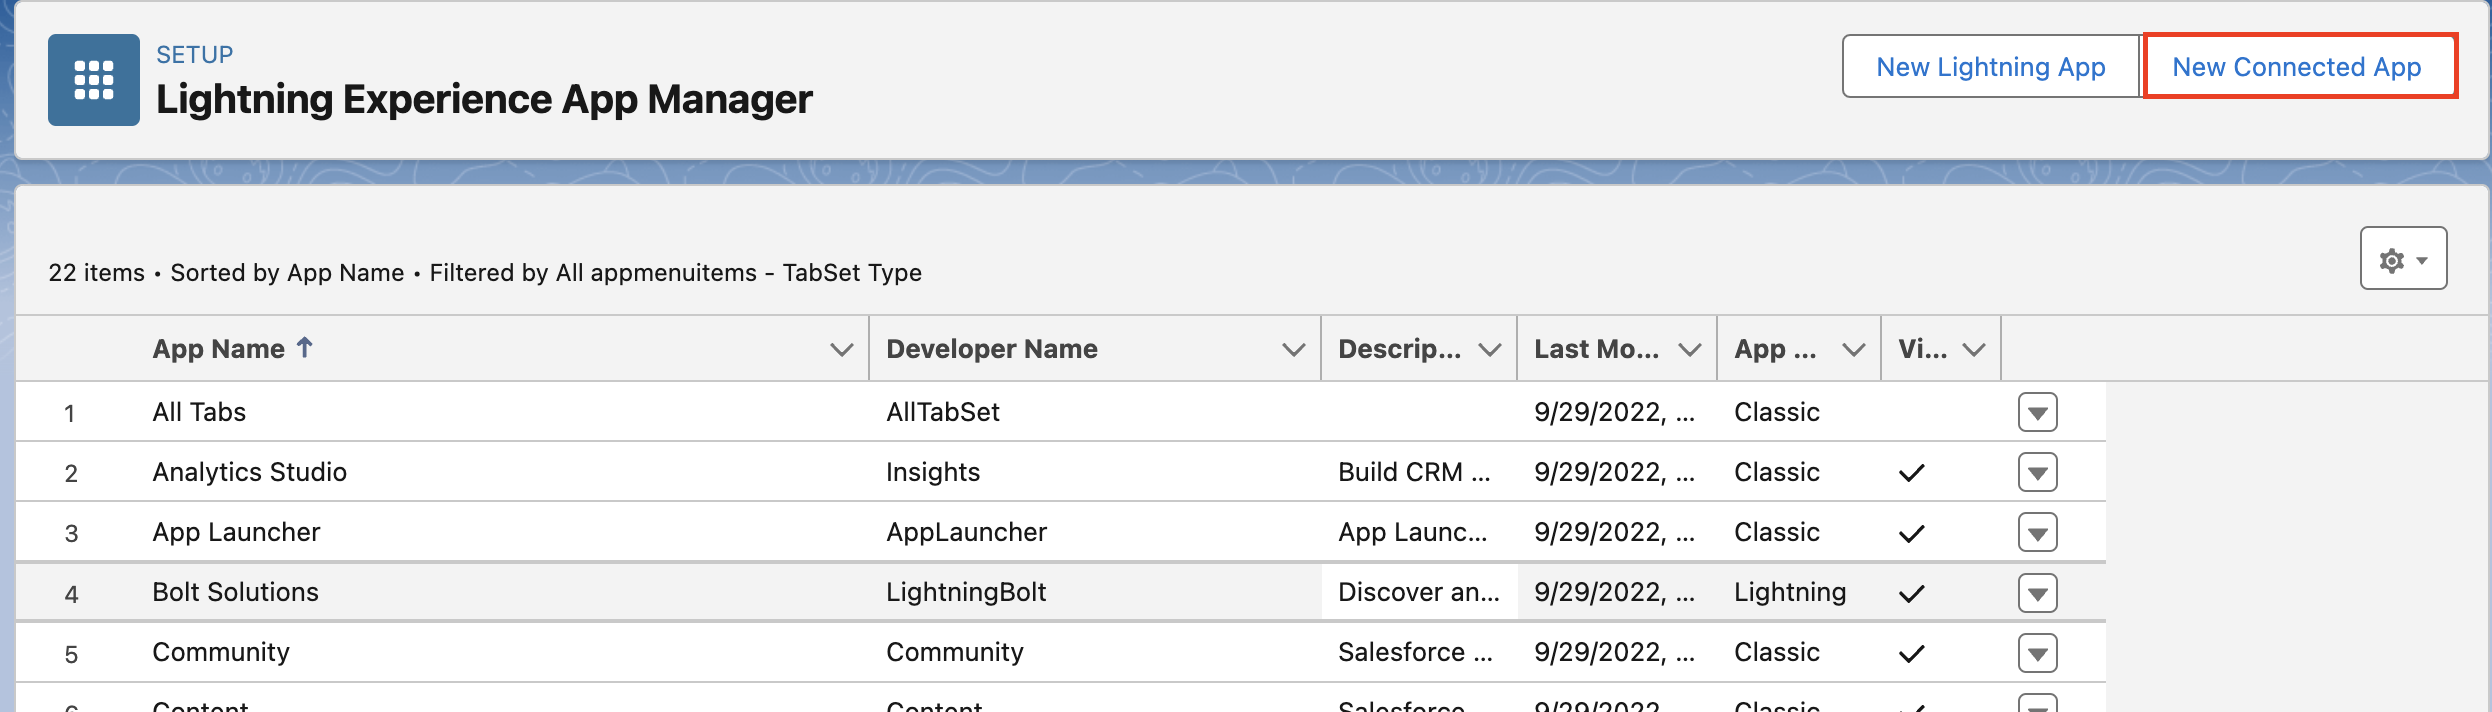
-
Go to Platform Tools > Apps > App Manager and click New Connected App.
-
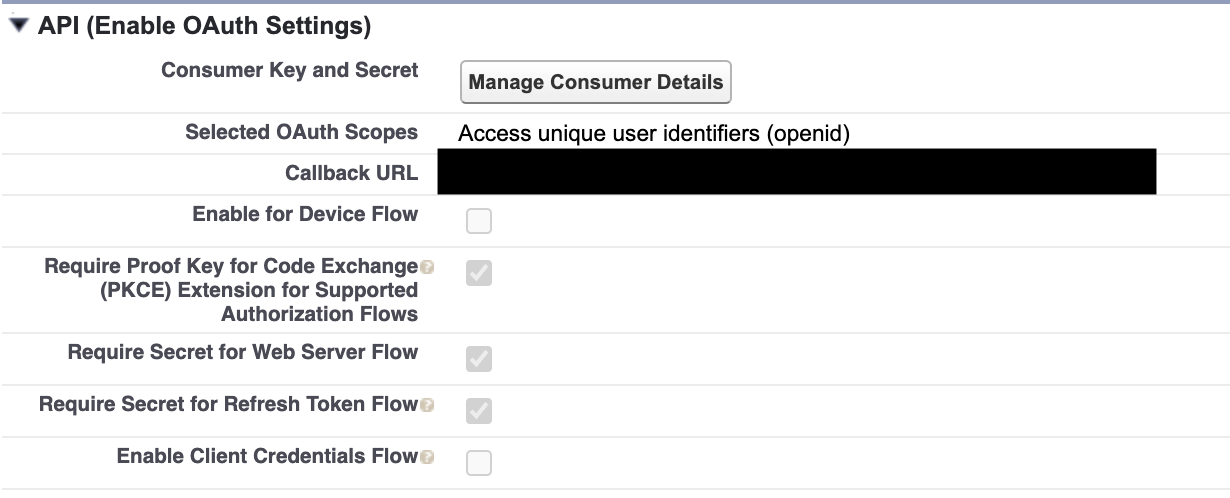
Enter basic information, then enable OAuth settings and populate the following fields, and save:
-
Callback URL: use the redirect URL from your PagerDuty Private Page
-
Selected OAuth Scopes: Add Access unique user identifiers (openid)
-
Enable Authorization Code and Credentials Flow: Enable
-
Require user credentials in the POST body for Authorization Code and Credentials Flow: Enable
-
Require Secret for Web Server Flow: Enable (optional)
-
Issue JSON Web Token (JWT)-based access tokens for named users: Enable
-
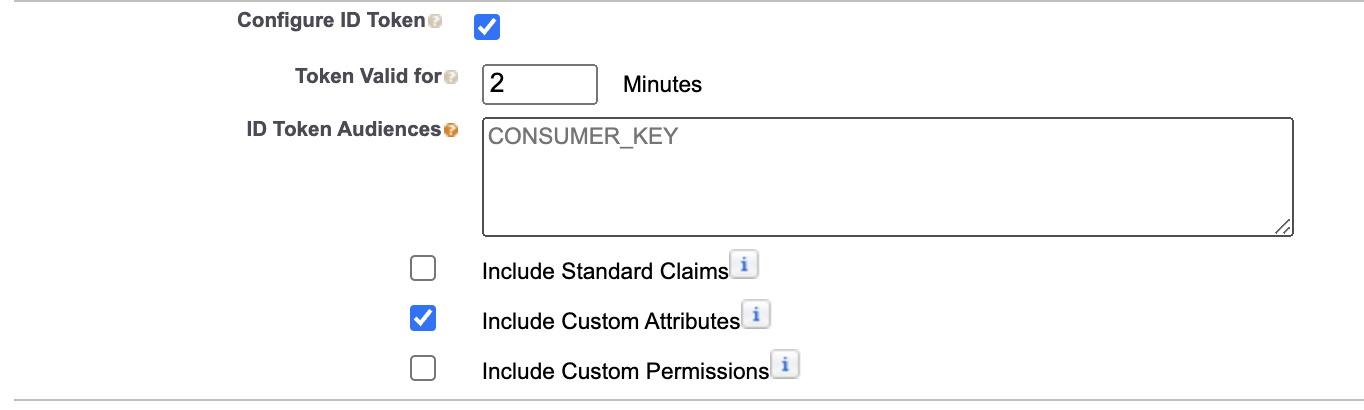
Configure ID Token: Enable
-
Include Custom Attributes: Enable

-
-
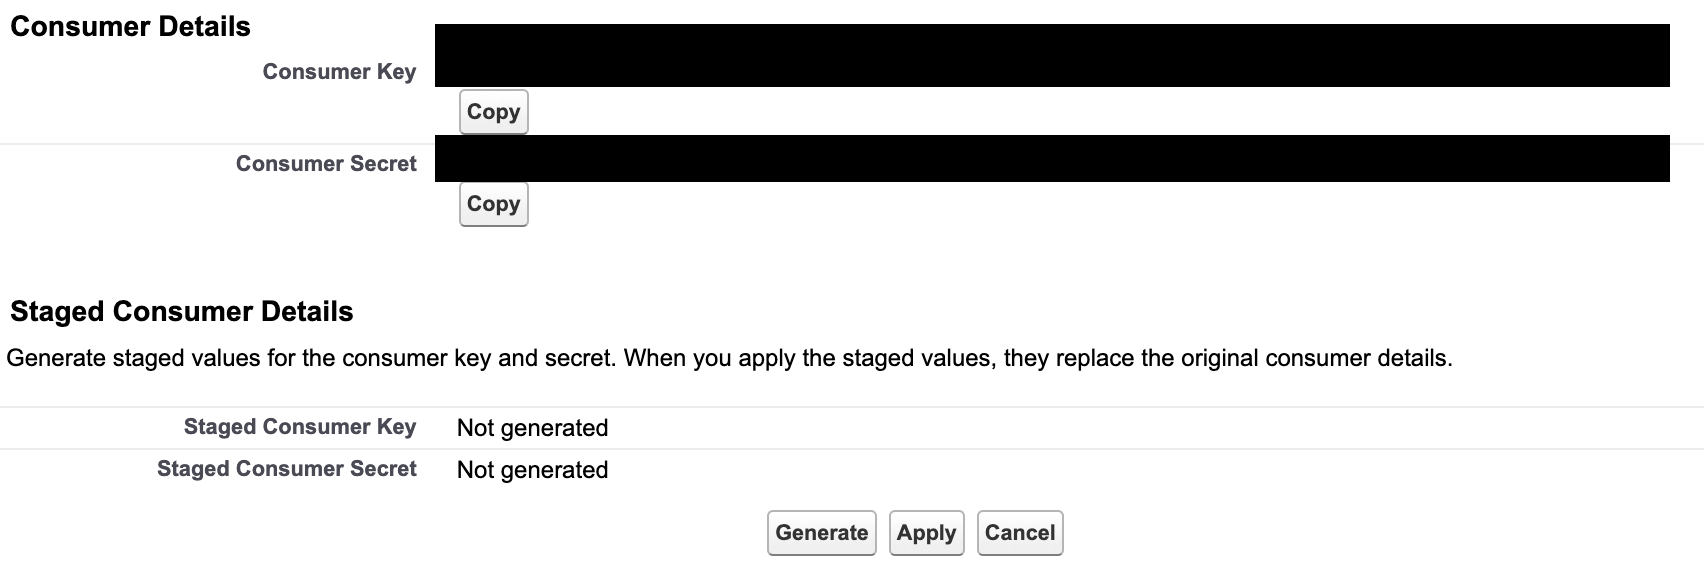
After saving, click on Manage Consumer Details to get the Consumer Key and Consumer Secret.
-
On your PagerDuty private page Single Sign-On Settings, populate the following fields and save:
- Configuration URL: https://{{your-workspace-domain}}.my.salesforce.com/.well-known/openid-configuration
- OpenID client ID: {{Consumer Key}}
- OpenID client secret: {{Consumer Secret}}
Profile Mapping and Custom Claims
-
Back in Salesforce, grant permissions to the groups that you want to be able to access the page (if users are not self-authorizing). To do this, go to Apps > Connected Apps > Manage Connected Apps and click on Manage Permissions under the Permission Sets field.

-
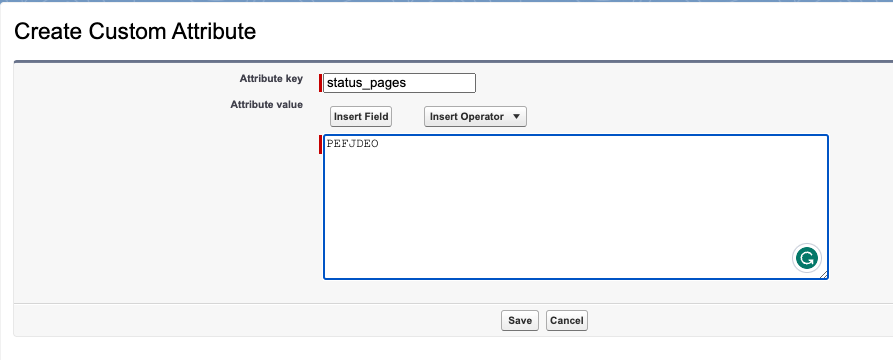
Finally, to add the status page ID, go back to the previous view (Manage Connected Apps) and click New next to Custom Attributes.
-
Paste the Custom Claim Key and Custom Claim Value from the PagerDuty SSO settings, into the attribute key and attribute value fields.
Ping Identity
Expand
Create the Application
-
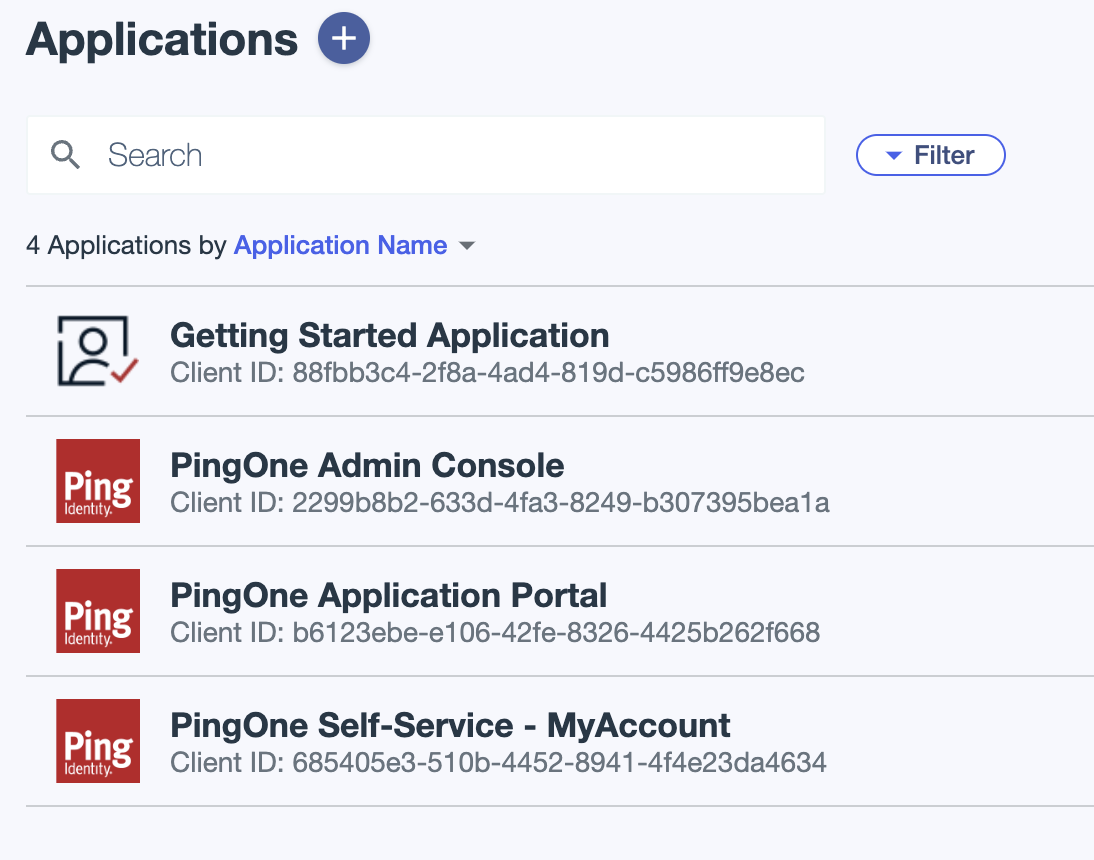
Go to Applications, and click the + button to add a new application.
-
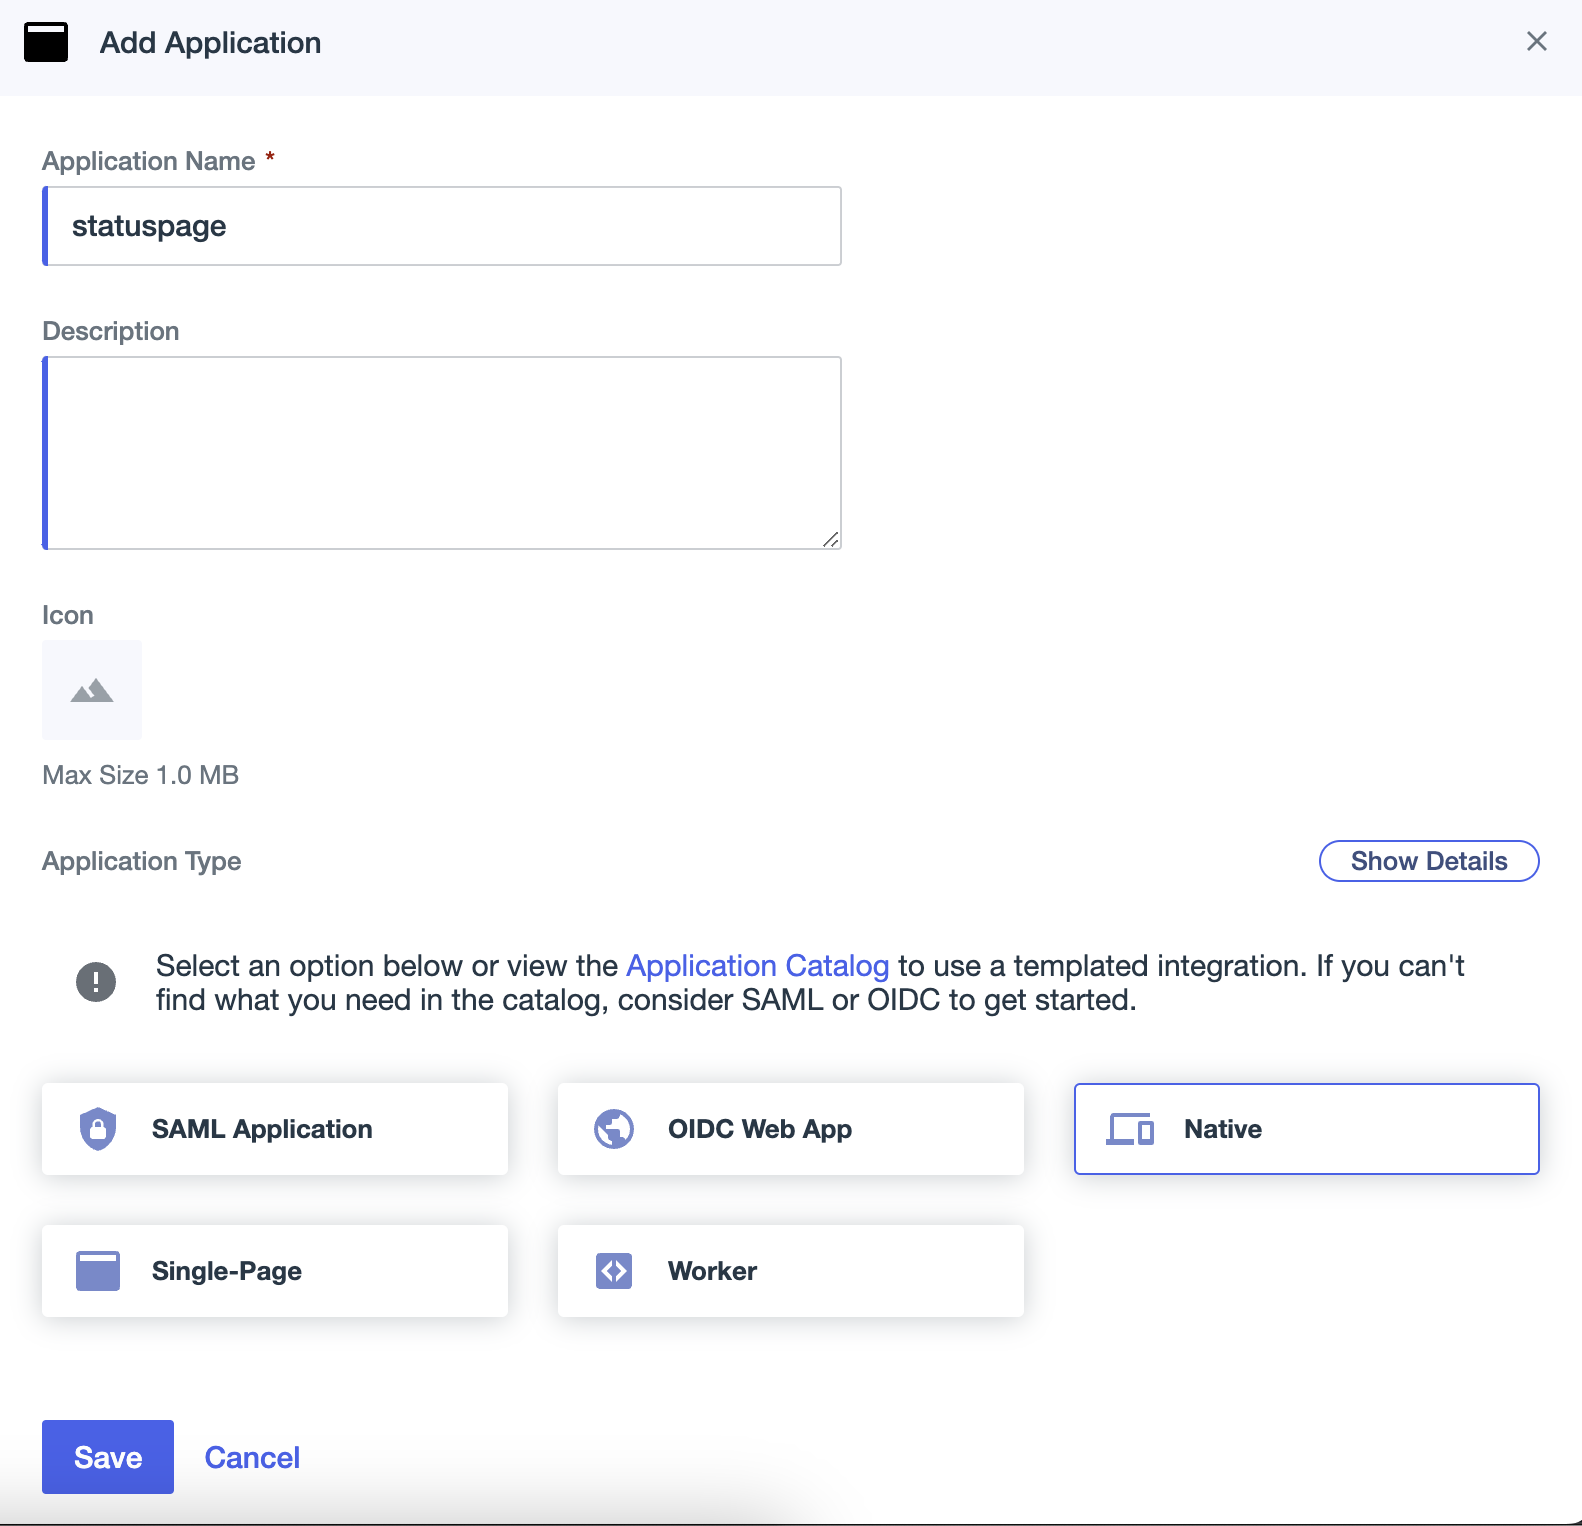
Enter an application name, select an application type, and click Save.
-
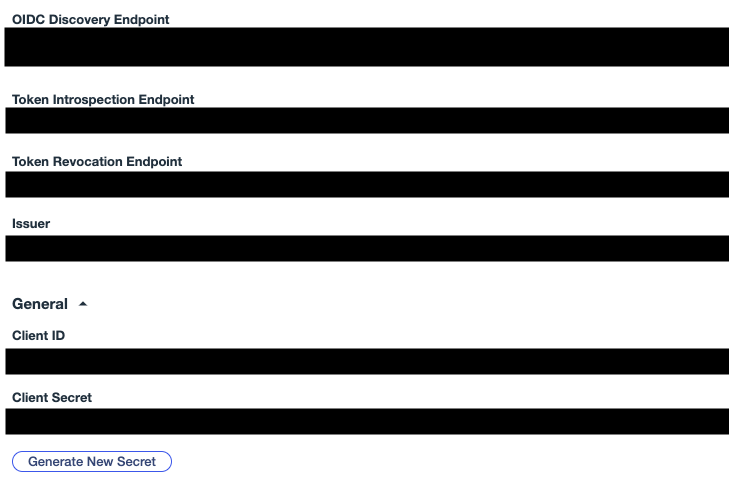
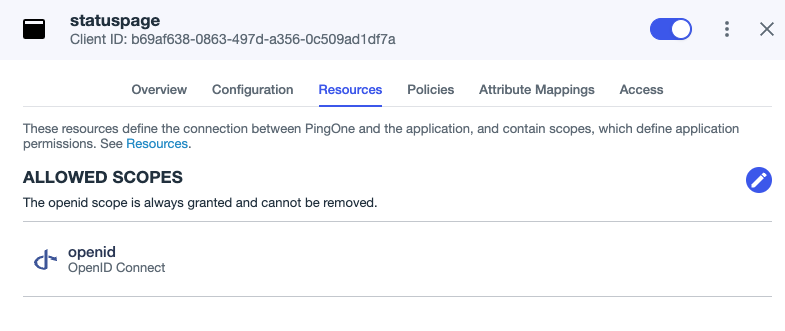
Click on the Configuration tab and the URLs dropdown.
-
Copy the OIDC Discovery Endpoint, the Client ID, and the Client Secret, and paste these values into the PagerDuty private page Single Sign-On Settings.
-
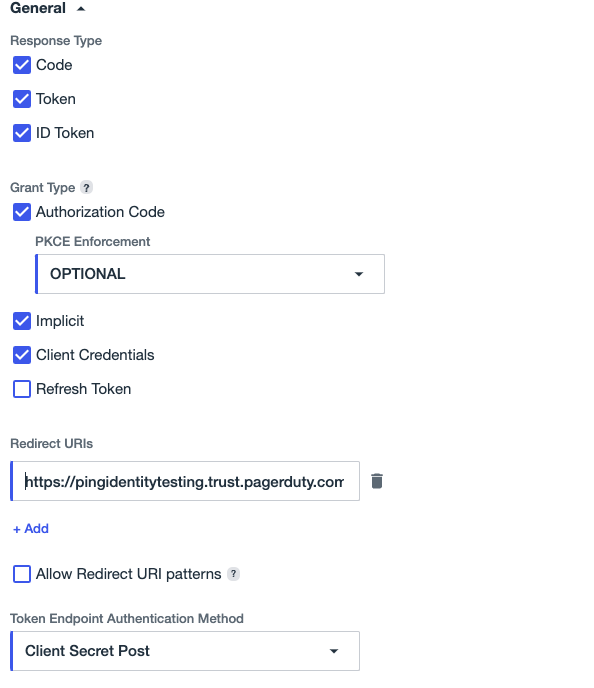
Edit the configuration by clicking the pencil button in the top right corner, update the following fields, and save:
- Client Credentials: Enable
- Redirect URIs: the redirect URL from the PagerDuty Single Sign-On page
- Token Endpoint Authentication Method: Client Secret Post
- Initiate Login URI: Login URL from the PagerDuty Single Sign-On page
- Signoff URLs: Logout URL from the PagerDuty Single Sign-On page
-
In the resources tab, check that the openid scope is available.
Profile Mapping and Custom Claims
-
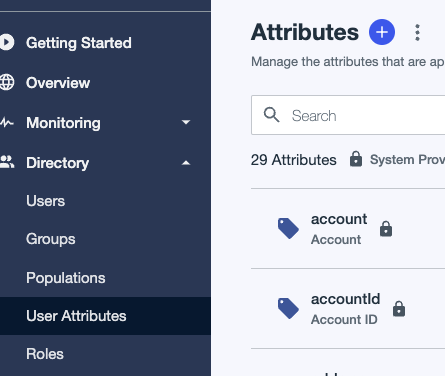
Go to Directory > User Attributes and click the + button to add a new attribute.
-
Select Declared, enter a name for the attribute and save it.
-
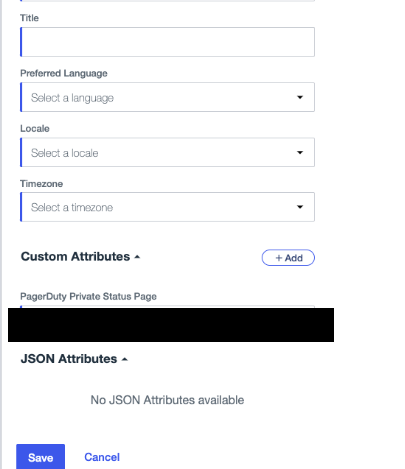
Go to Users, edit any users you want to grant access and click the + button next to custom attributes. Enter the custom claim ID value found on the Single Sign-On page.
-
Go to Applications > Resources, find the openid resource that is being used, and select it.
-
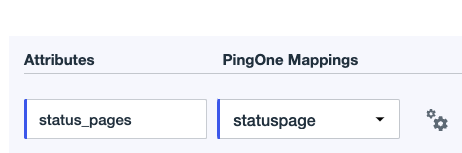
Go to the attributes tab and click the pencil button to add a new attribute.
-
Enter the Custom Claim Key from the Single Sign-On page and select the attribute that you created in steps 1-3.
Updated 2 days ago