
Service Profile
An overview of each service's details
The service profile provides a high-level view of a service’s current details. When collaborating across teams, you can see at-a-glance who owns the service, who is on call, or how to contact the Team responsible for the service. To access a service’s profile, navigate to Services Service Directory and click the desired service’s name.

Service profile in the web app
Required User Permissions
Full Stakeholders, Observers, Responders, Managers, Admins and Account Owners can view all services. Restricted Access users will only be able to view services that they have been added to via team or object permissions. Limited Stakeholders cannot view services.
Service Details
Service Name and Description
The name and description of the service. Managers of a service and Global Admins can edit a service’s name and description by clicking Edit. For best practices on naming your services, please see our Full Service Ownership Guide.
Status
The status is the current state of the service with regards to whether there are any open incidents.
- No Open Incidents: There are currently no open incidents on the service.
- Awaiting Response: There are one or more open incidents on the service with a triggered status that have not been acknowledged yet.
- Response in Progress: There are one or more open incidents on the service with an Acknowledged status.
- Disabled: The service is currently disabled and will not trigger any new incidents.
- Maintenance: The service is currently in maintenance mode.
When determining which status to display on a service’s profile, PagerDuty follows this order of precedence:
Disabled Maintenance Window Active with/without incidents.
For example, a disabled service with active incidents will still show as Disabled.
On Call Now
The current user(s) on call for the service. This will display the full list of users on call at the first level of the escalation policy. If no one is currently on call for the service, this information will be highlighted so that you can easily identify gaps in on-call coverage.
Cached Value
For performance's sake, our system caches this value for up to 10 minutes. While updates to escalation policies are immediate, there may be a short delay displaying the most current responder(s) in the UI after updating an escalation policy.
Escalation Policy
The Escalation Policy that the service uses. You may click the name of the escalation policy to view its details.
Team
The Team that is associated with this service. If your account does not have the Teams feature available, the escalation policy associated with this service will be displayed instead.
Communication Channel
The Communication Channel field allows you to configure a link back to your preferred communication channel where the service’s owner and/or Team can best be reached. This may be an email address, URL to a Slack channel, or a link to another form of contact.
To configure a service’s Communication Channel:
- Navigate to Services Service Directory and select the name of your desired service.
- To the right of Communication Channel, click .
- Enter a Link or email address and a Communication channel name (optional).
- Click Save.
Communication Channel
The Communication Channel added here is for your Teams’ internal use, and doesn’t impact any webhooks you may have configured.
Service Standards
Please read our Service Standards article for more information.
Activity Tab
The Activity tab gives an overview of your service’s activity related to incidents, change events, suppressed alerts and maintenance windows.
Open Incidents
The Open Incidents table allows you to view open incidents on your service, search by incident ID, and take bulk actions such as acknowledge, resolve, merge or snooze. You may view alerts from each incident by clicking Show Details under the incident's Title.
Recent Changes
If your service has a change events integration configured, the Recent Changes section will provide a list of the most recent change events. You will be able to view the change event Summary, Type of integration and the Created date and time. To view more details about the change event, click the Summary title.
If your service does not have a change events integration configured, there will be an empty table with the ability to Add a Change Integration on the right.
Resolved Incidents
The Resolved Incidents table allows you to view resolved incidents on your service, search by incident ID, or merge resolved incidents.
Suppressed Alerts
If you have configured Event Orchestration to suppress specific alerts on your service, you can view the most recent alerts in the Suppressed Alerts table.
Maintenance Windows
If you have Maintenance Windows on your service, they will be listed in the Maintenance Windows section in the order that they are scheduled.
Integrations Tab
The Integrations tab includes any integrations and extensions that you have configured on a service.
Integrations
In the Integrations section, you can view and configure the inbound integrations that send events to the service. You can view and copy an integration key by clicking to the right of the integration and then to the right of the key:

Copy integration key
Add an Integration to a Service
Please read our Services and Integrations article for instructions on how to create a new service and add integrations, or add integrations to an existing service.
Edit an Existing Integration
Please read our Services and Integrations article for instructions on how to edit an existing integration.
Extensions and Add-Ons
In this section you can view and manage your extensions and add-ons. Please read our Extensions and Add-Ons article for more information on managing extensions.
Webhooks
In this section, you may view and manage your service’s webhooks. Please read our Webhooks article for more information on managing webhooks via the service details page.
Workflows Tab
The Workflows tab displays Incident Workflows associated with the service. Click Associate Workflow to associate a workflow with the service.
Settings Tab
The Settings tab includes settings that help your team respond to incidents.
Assign and Notify
Assign and notify your responders when an incident triggers with an escalation policy, notification behavior, and re-trigger and auto-resolve actions.

Assign and Notify settings
To edit these settings, you can click Edit and then adjust the settings. There are four options to configure how your team is notified for an incident:
- High-urgency notifications, escalate as needed: Any incidents triggered with this setting will notify the on-call responder based on their high-urgency notification settings. The incident will escalate using the rules defined in the service's escalation policy.
- Low-urgency notifications, do not escalate: Any incidents triggered with this setting only notify the current on-call responder based on their low-urgency notification settings. The incident will not escalate the incident.
- Dynamic Notifications based on alert severity: Notify users about incidents classified as either high-urgency or low-urgency based on an alert’s severity.
- Based on support hours: Responders will only be notified within your predefined Support Hours. You may designate specific notification settings during and outside of Support Hours. Optional: You may also choose to check the Raise urgency of unacknowledged incidents to high checkbox.
Learn more about Notification Urgency in our Configurable Service Settings article.
Reduce Noise
Reduce the noise of incoming alerts with Alert Grouping and Auto-Pause Incident Notifications.

Reduce Noise settings
Coordinate Responders and Stakeholders
Coordinate responders and stakeholders by automatically adding a default conference bridge to incidents on this service and immediately run an Incident Workflow to engage stakeholders.

Coordinate Responders and Stakeholders settings
Event Management
Automate how the service manages incoming alerts with Event Orchestration.
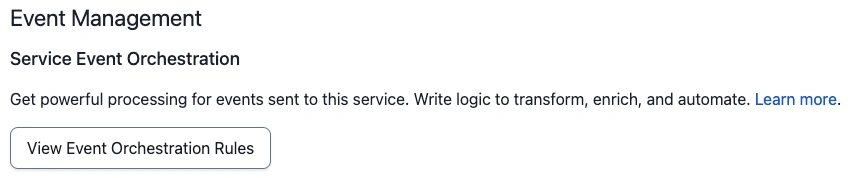
Service Event Orchestration
Remediate
Remediate incidents faster with a link to your team’s runbook for triaging incidents, or a custom incident action.

Remediate settings
Service Dependencies Tab
Required User Permissions
Users with permission to view each service in a dependency relationship will be able to see Service Dependencies. If a user does not have permission to view one or both of the services, they will not be able to see the dependency relationship.
Service dependencies can be used to define the relationship between this service and other technical services or Business Services. If an issue arises on your service for one of the dependencies you have configured, you can use the Service Dependencies tab to quickly assess the impact's scope.

Service dependencies chart
You can expand each technical service to see details such as the associated escalation policy and who is currently on call.
Add or Remove Service Dependencies via the Web App
Required User Permissions
Managers, Admins and Account Owners can add or remove service dependencies.
-
Navigate to Services Service Directory and click the title of your desired service.
-
Select the Service Dependencies tab.
- There are two sections: Add/Edit Services that this service uses or add/edit ones that this service is used by. Click Add Services or Edit Services depending on your desired use case.
-
In the Edit Services modal, you may search by service name, or select one from the Business Services or Technical Services tabs.
- To add a service dependency: Click to add your preferred service(s); you may add multiple business and technical services. Optional: You may also create a new business or technical service from this screen by selecting Create a new business service or Create a new technical service on their respective tabs. This will open the Business Service or Technical Service configuration screen in a new tab.
- To remove a service dependency: Click next to a service’s name.
-
Click Save Changes.

Edit service dependencies
Add Service Dependencies via API
You may add service dependencies using our REST API.
Service Dependencies in Incidents
You may view and add service dependencies from incidents using our Define Technical Service Dependencies feature.
Suggested Service Dependencies
Suggested Service Dependencies uses machine learning to suggest other services that may depend on your service, or that your service depends on. If incidents on your service tend to be followed by incidents on another service, or vice versa, Suggested Technical Service Dependencies will be provided. This feature ensures that a service’s dependency topography is continually up-to-date as your technical infrastructure evolves and changes. You may view Suggested Service Dependencies on individual services’ Service Dependencies tabs or on an active incident, which will have a blue pill with the number of suggested dependencies, if they are available:

Service dependencies indicator
View and Add Suggested Service Dependencies
- Navigate to Services Service Directory, click your desired service’s name, and select the Service Dependencies tab.
- Note: If your service has suggested dependencies, you will be able to view them by clicking the blue Suggested Technical Dependencies dropdown. If the machine learning algorithm has not detected any suggested dependencies, this blue dropdown will not be available.
- To accept a Suggested Service Dependency: Click next to the service name.
- To dismiss a Suggested Service Dependency: If you do not feel that a Suggested Service Dependency correlates with your service, click next to the service name to dismiss the suggestion. Please Note: Once you dismiss a suggestion, it will never be shown again as a suggestion. If you change your mind, however, you may always manually add the dependency at a later time.

Suggested service dependencies
Service Dependencies in the Mobile App
You can view service dependencies in the mobile app by navigating to Services select your desired service tap the Dependencies row. This will take you to the Service Dependencies screen, which will list the business or technical service(s) it uses or is used by.

Service dependencies in the mobile app
FAQ
I already have a Slack channel configured for my service, why is it not appearing under Communication Channel?
Communication Channels are configured for a service separately from Slack extensions. You may have a channel where you’ve configured your PagerDuty notifications to appear, but the Communication Channel should be where other teams can best reach out to your team. This may or may not be the same as the channel where your Slack extension is configured.
Updated about 2 months ago