
Edit Schedules
Add users or create overrides on a schedule. Pause a schedule or restore previous versions.
As people join and leave your on-call rotations, you must edit your schedules so that the right people are on-call and notified at the right times.
Create a ScheduleIf you are creating a schedule for the first time, visit our article on Schedule Basics.
Schedule ChangesAny changes made to a schedule (including adding and removing people) do not affect the historical record of that schedule — changes apply only to future dates and times. When adding or removing people, check the effective date to rotate schedules on the right date and time.
If you want to revert a schedule to a previous version, see the section Restore a Schedule to a Previous Version.
Required User PermissionsYou can add any role to schedules, with the exception of Limited and Full Stakeholders.
The following roles can add or remove Teams while editing:
- Global Admin
- Account Owner
The following roles can make other edits to on-call schedules:
- User role
- Admin/Global Admin
- Manager base roles and team roles.
- Manager Team roles can only manage schedules associated with their Team.
- Account Owner
Add Users to Existing Schedules
To add additional people to an existing on-call schedule:
- Navigate to People Schedules. Click the icon to the right of your desired schedule and select Edit.
- In the Select a user dropdown, find and select a person.
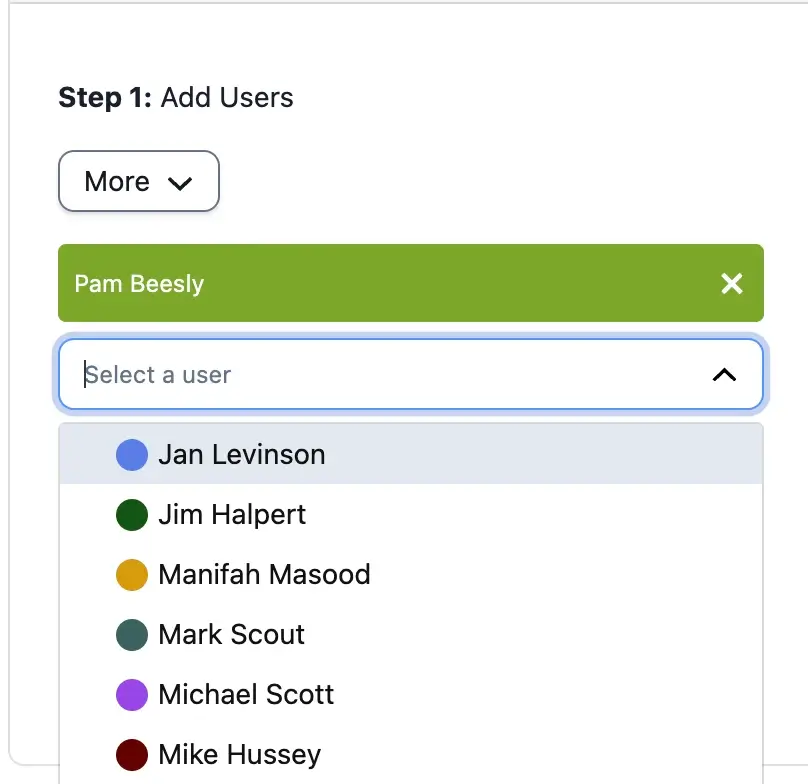
Select a user
- Repeat the previous step until the required people are in the rotation. People move through the rotation in top-to-bottom order. You can drag and drop names to adjust the rotation order.
- Click Save Schedule in the bottom right corner of the screen.
Inactive UsersIf you see "inactive" next to a person's name on a schedule, it means that their account is deleted. To add this person to a schedule, create a new account for them in Users and then add the new account to the rotation.
Copy Users
If you use the same people in multiple layers, you can copy a layer’s participants and paste them into another layer.
- Navigate to People Schedules. Click the icon to the right of your desired schedule and select Edit.
- Under Step 1: Add Users, click More and select Copy Users.
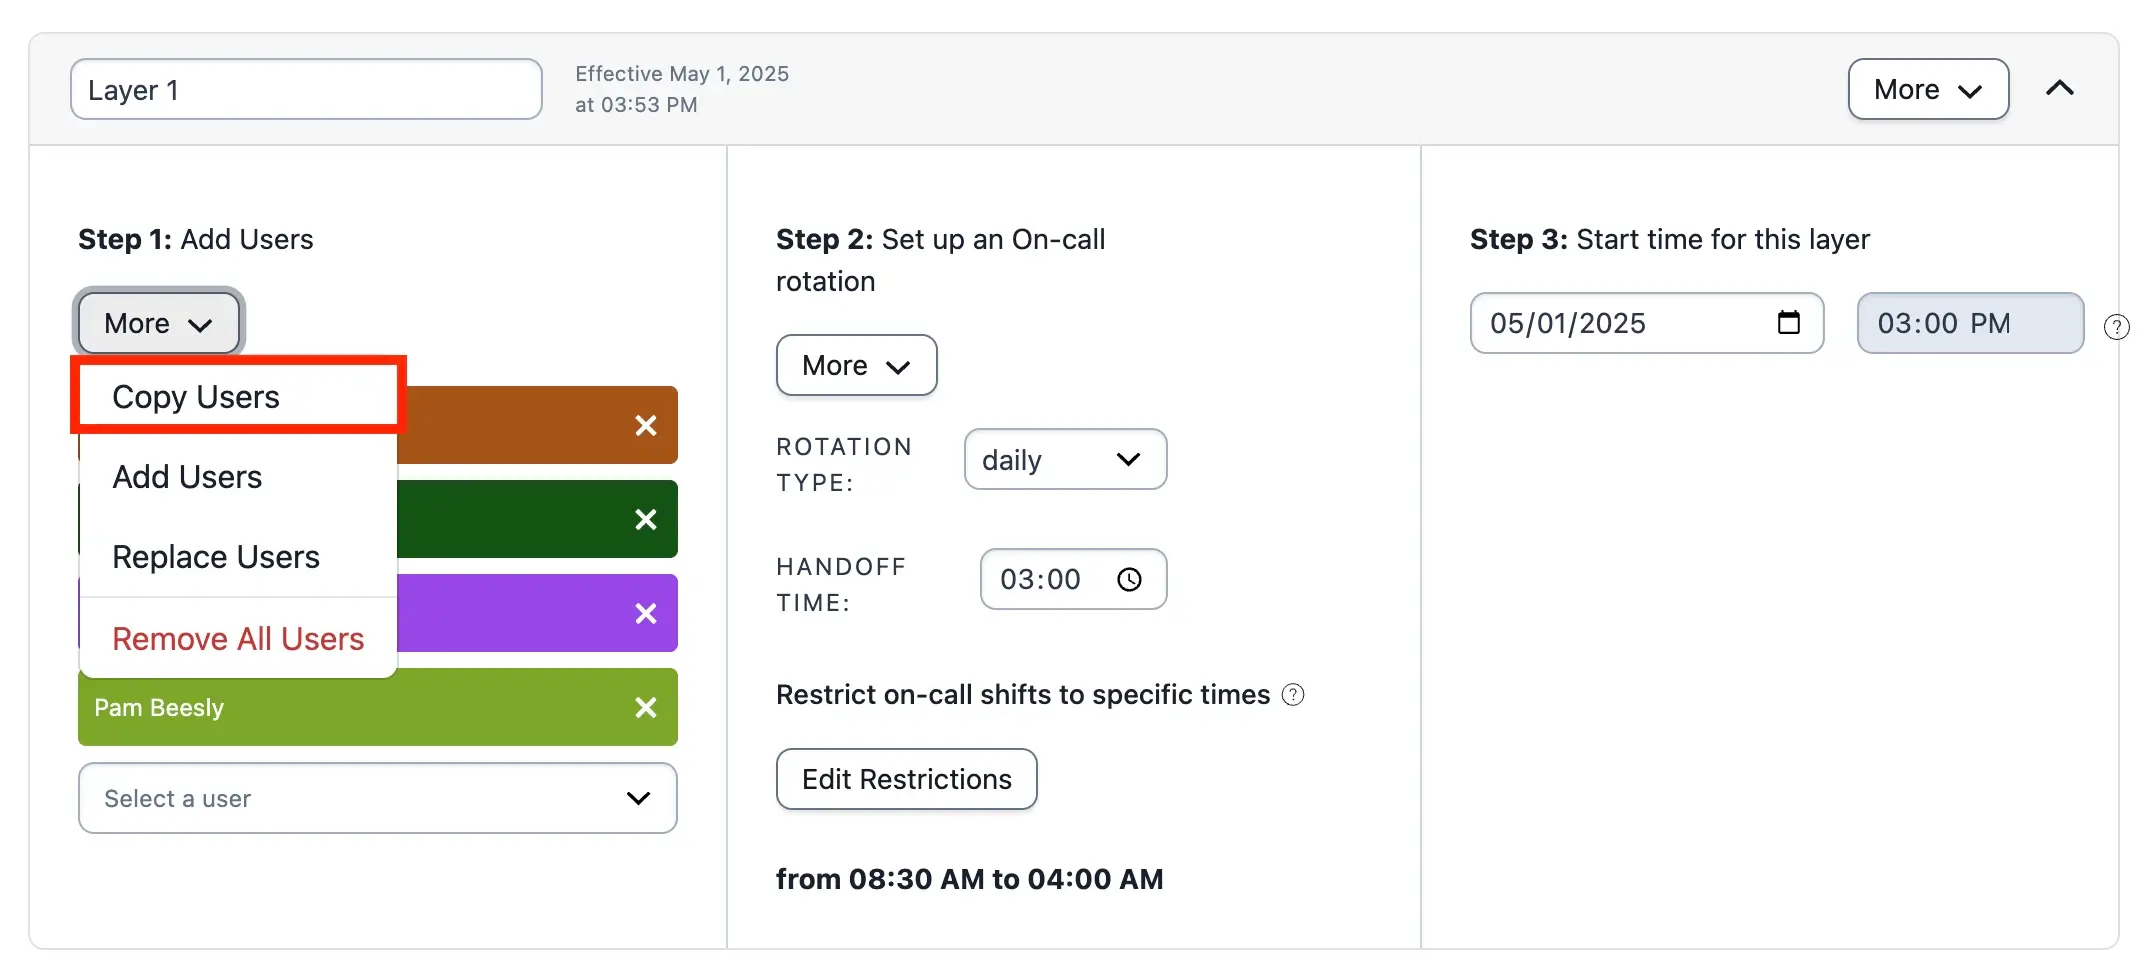
Copy users from a layer
-
Select one of the following options:
- Navigate to the target layer, click More and select Add Users. This option adds the copied people to the existing ones in that layer.
- Navigate to the target layer, click More and select Replace Users. This option overwrites the existing people in that layer.
Remove Users From Existing Schedules
To permanently remove a person from an on-call schedule:
- Navigate to People Schedules. Click the icon to the right of your desired schedule and select Edit.
- Click the icon next to the name of the person you want to remove.
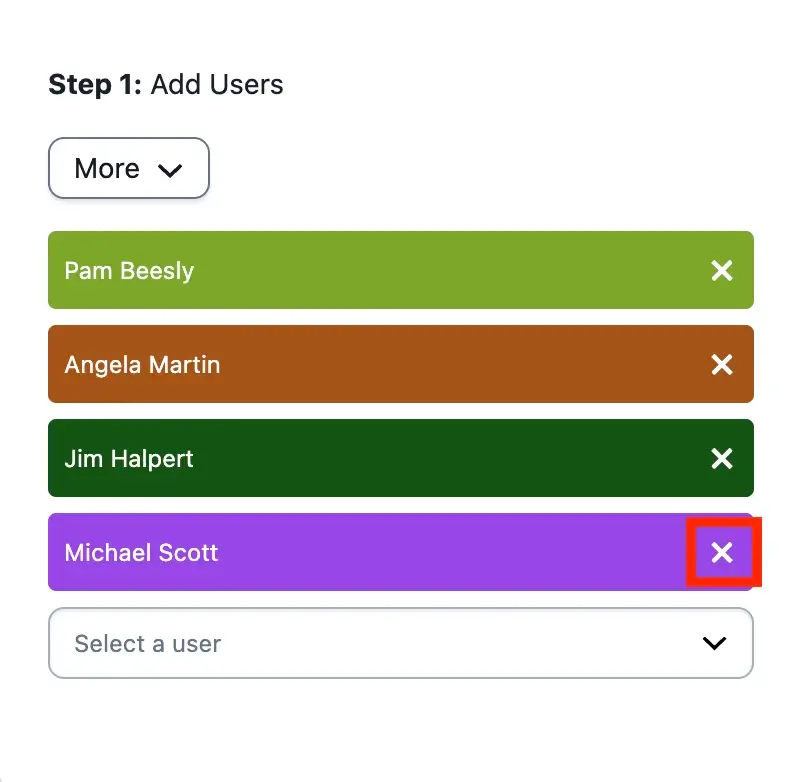
Remove a user
- Click Save Schedule in the bottom right corner.
OverridesRemoving a person from a schedule does not delete their future overrides, if any exist. Read Delete an Override for more information.
Duplicate a Schedule
Copying an existing schedule to create a new one with the same people and settings allows you to create new schedules at scale.
You can duplicate a schedule in two places in the web app:
- On the Schedule List page
- On the Schedule Details page
Team AssociationThe Team selection for copied schedules is initially blank. Roles with Team Manager permissions can associate the new schedule with any Teams they belong to.
Schedule List
- Navigate to People Schedules.
- Click the icon and select Duplicate. This action creates a new schedule that copies all people and settings from the previous schedule, excluding the team association.
- Enter a Schedule Name for the new on-call schedule and make any necessary edits.
- Click Save Schedule.
Schedule Details
- Navigate to People Schedules and select the name of your desired schedule.
- On the right side, click Copy this Schedule.
- Enter a Schedule Name for the new on-call schedule and make any necessary edits.
- Click Save Schedule.
Rename Schedule Layers
You can edit a schedule layer's name to provide a descriptive title. A schedule layer's name can be up to 100 characters long and supports emojis.
- Navigate to People Schedules. Click the icon to the right of your desired schedule and select Edit.
- Click the layer name you want to update and enter a new value.
- Click Save Schedule.
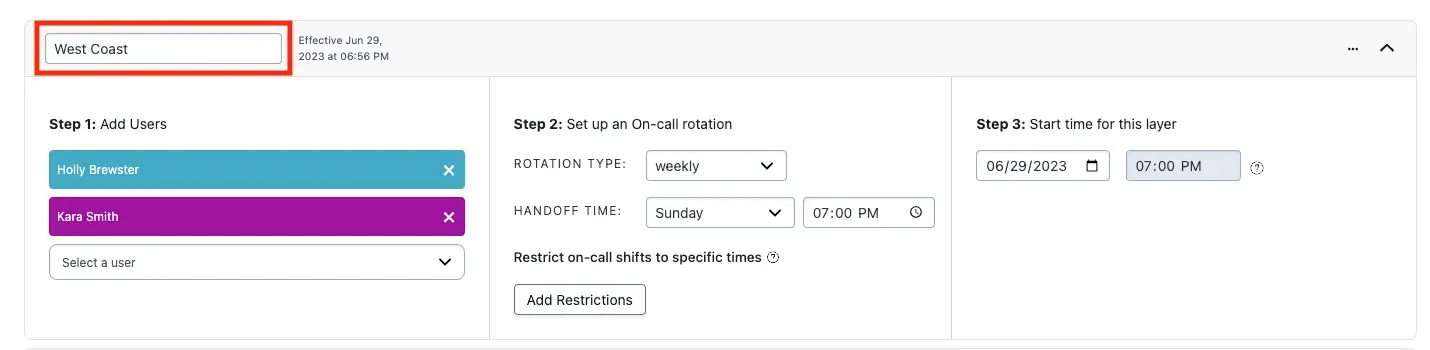
Edit schedule layer name
Reorder Schedule Layers
The order of schedule layers determines how the final schedule is computed. For example, if Layer 1 and Layer 2 have shifts that overlap and Layer 2 appears below Layer 1 in the UI, the final schedule includes only shift times from Layer 1 that shifts from Layer 2 do not cover.
You can change the order of a schedule's layers to adjust how the final schedule is computed.
- Navigate to People Schedules. Click the icon to the right of your desired schedule and select Edit.
- Click and hold the gray bar at the top of the layer you want to move, drag it to your preferred position, and release it.
- Click Save Schedule.
NoteChanging the order of schedule layers can cause the final schedule to appear incorrect when viewing past schedules. This occurs because the final schedule was computed using a layer order that is no longer in effect.
Duplicate a Layer
You can duplicate an entire layer’s configuration (including people, on-call rotation type, handoff time, and restrictions) into a new layer.
- Navigate to People Schedules. Click the icon to the right of your desired schedule and select Edit.
- Click More to the right of the layer you want to duplicate and select Duplicate Layer.
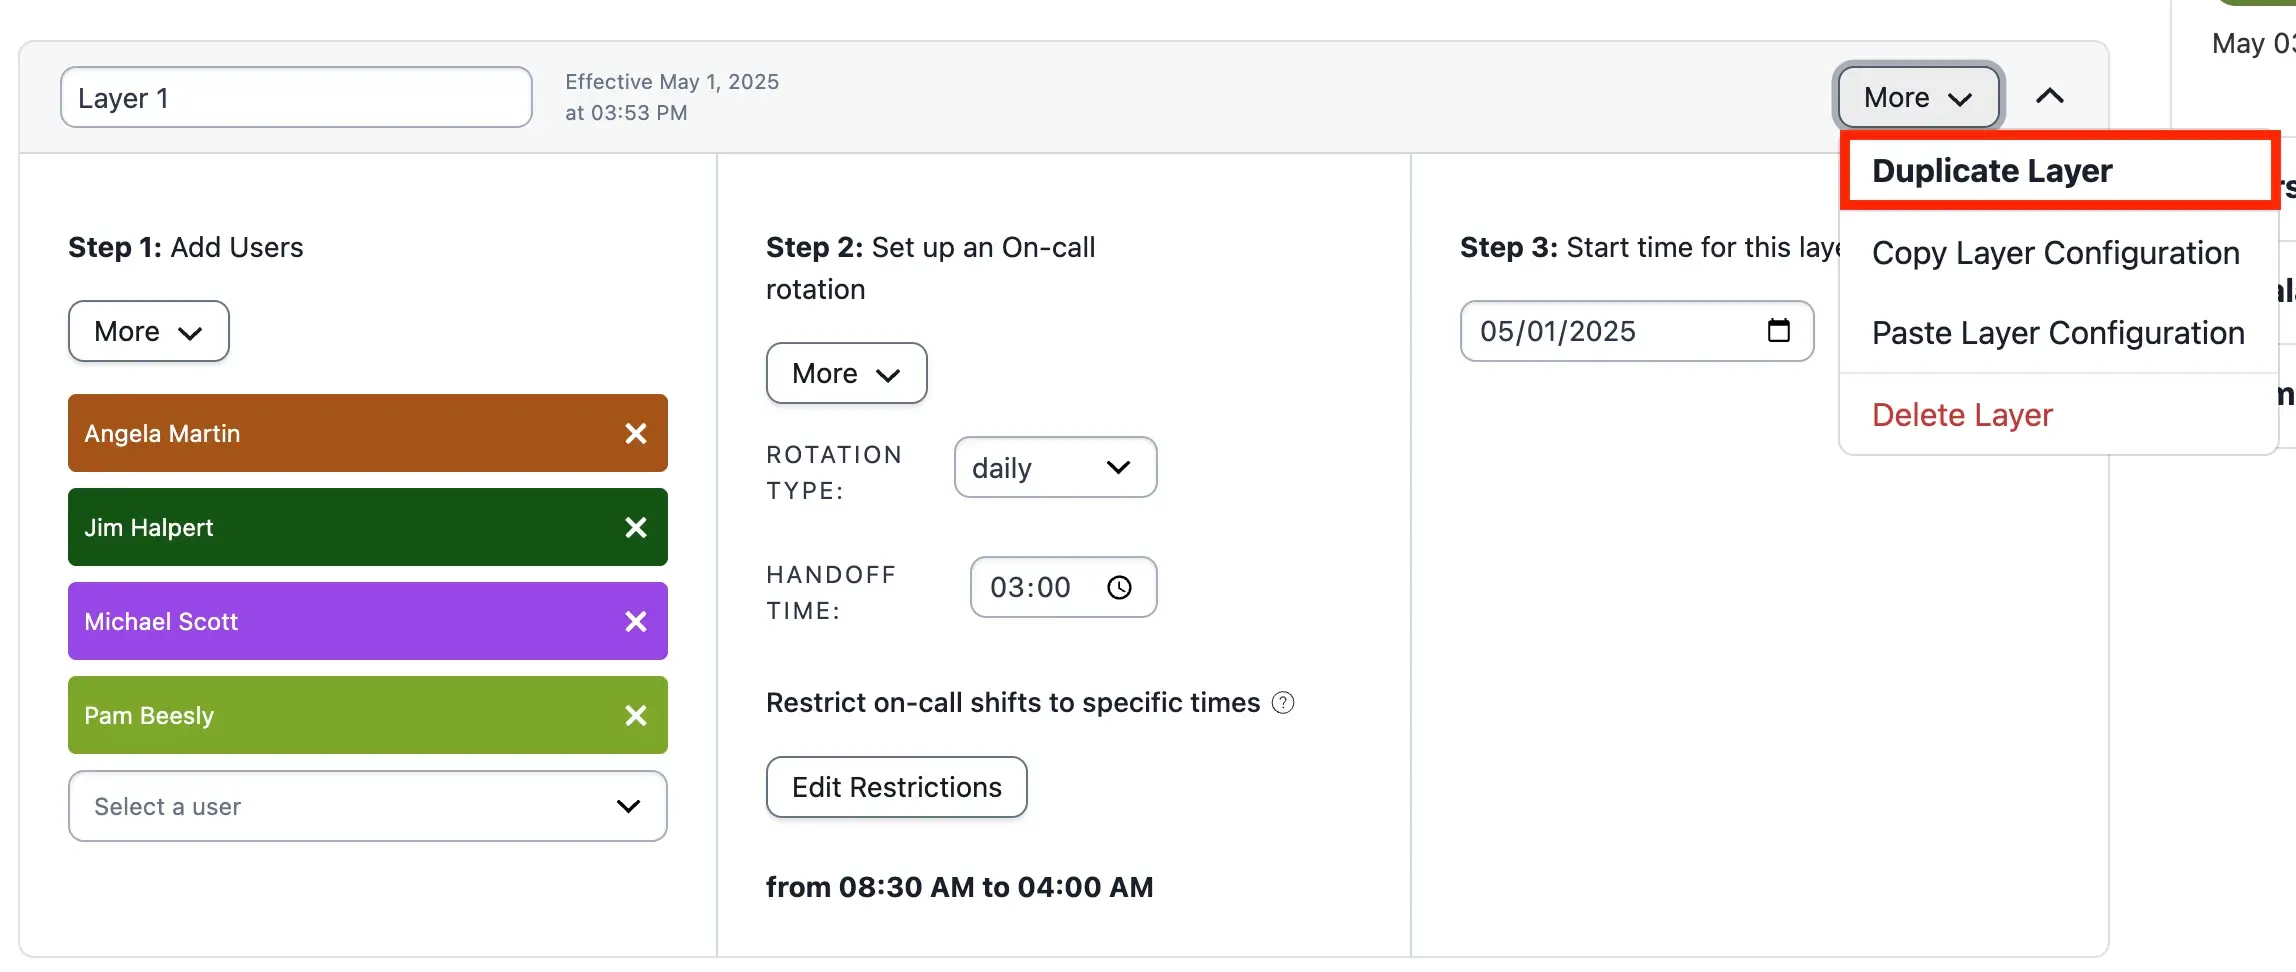
Duplicate a schedule layer
- A new layer is created with the same configuration after the last layer in your schedule. You can move this layer by dragging and dropping it to your preferred position.
Copy Layer Configuration
You can copy a layer’s Rotation Type and Handoff Time configuration and paste it into another layer. This action overwrites the configurations of the target layer.
- Navigate to People Schedules. Click the icon to the right of your desired schedule and select Edit.
- Click More to the right of the desired layer and select Copy Layer Configuration.
- Navigate to the target layer, click More and select Paste Layer Configuration.
Copy Layer Restrictions
You can copy a layer’s Restrict on-call shifts to specific times configuration into another layer. This action overwrites the configurations of the target layer.
- Navigate to People Schedules. Click the icon to the right of your desired schedule and select Edit.
- Under Step 2: Set up an On-call rotation, click More within the desired layer and select Copy Layer Restrictions.
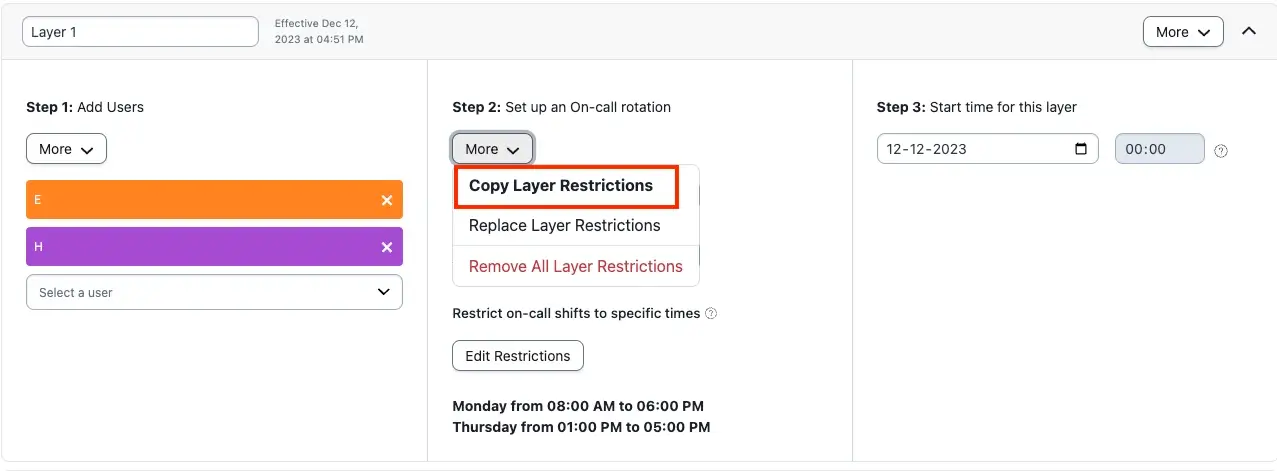
Copy layer restrictions
- Navigate to the target layer, click More and select Replace Layer Restrictions.
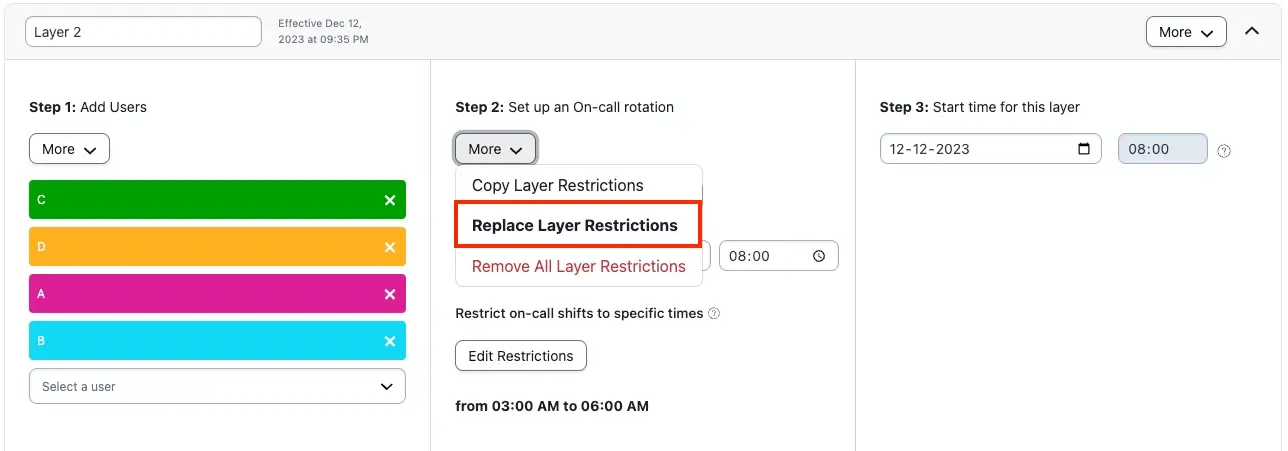
Replace layer restrictions
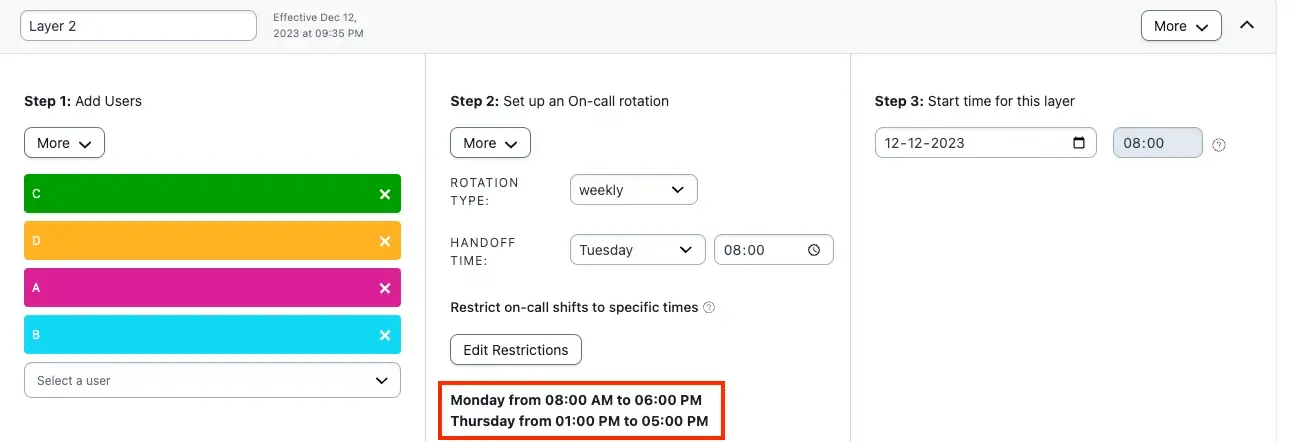
Layer restrictions
Create Overrides
Overrides allow you to make manual one-time adjustments to on-call schedules. Overrides are most commonly used when a person is sick, goes on vacation, or wants to swap on-call shifts.
Scheduling an override creates an override layer on a schedule. Scheduled overrides display beneath your schedule layers as the lowest layer before the Final Schedule.
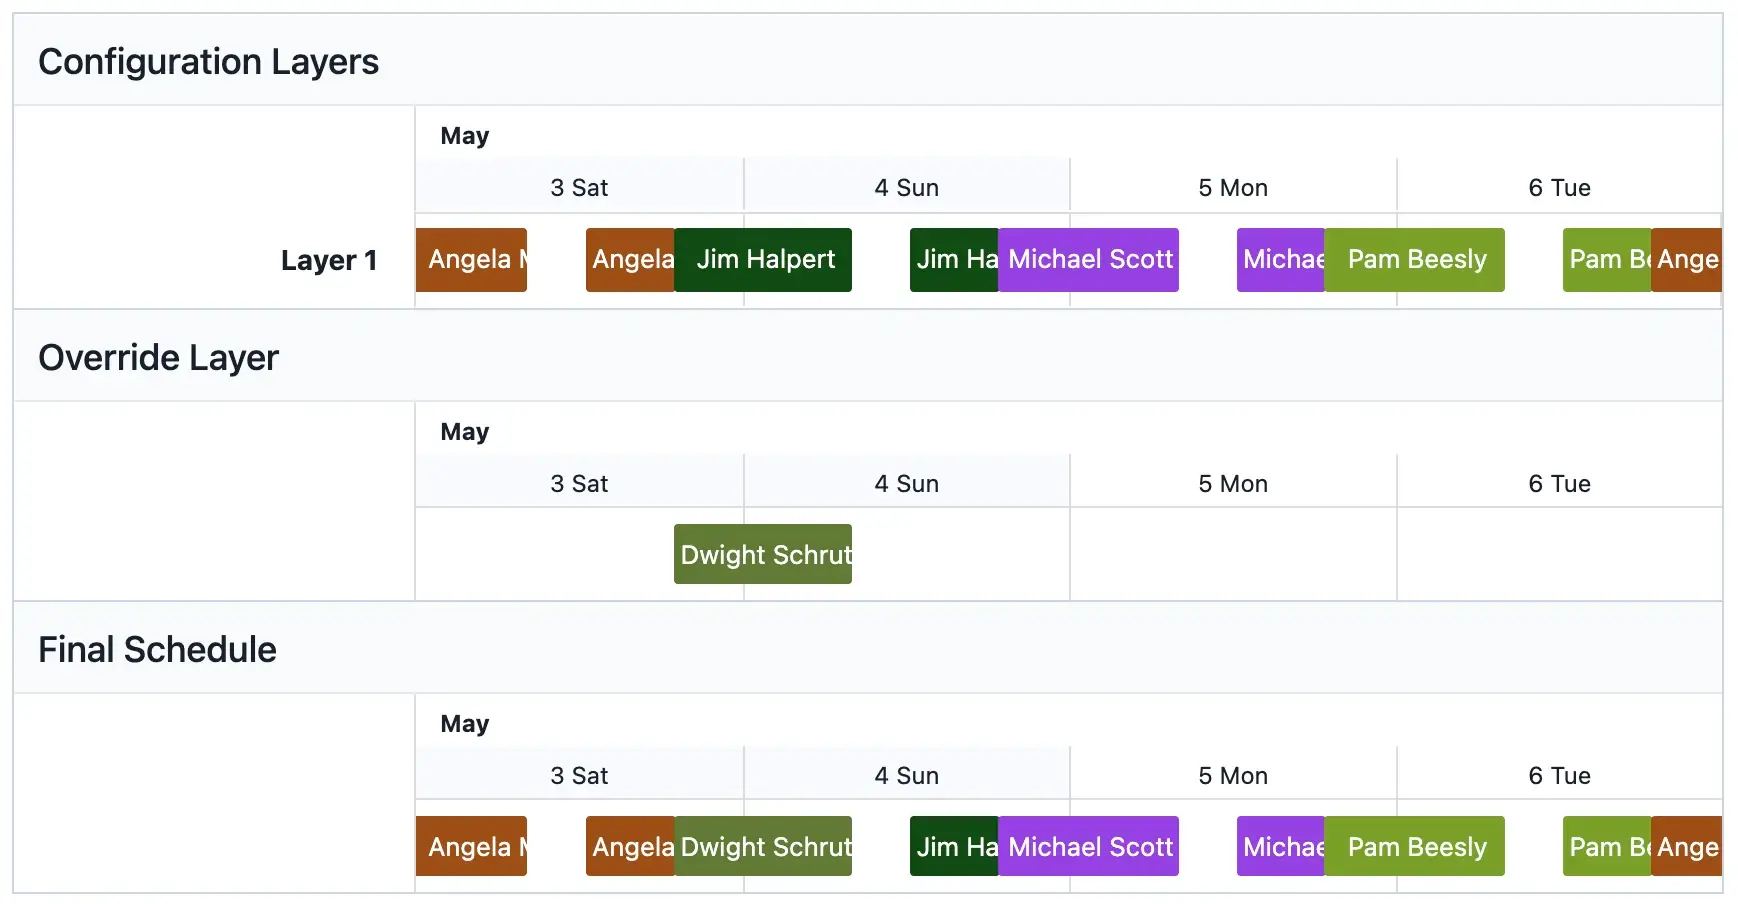
Override layer on the final schedule
You can create overrides in the web app or using the REST API.
Required User PermissionsAll roles, with the exception of Restricted Access, Observers, Limited Stakeholders, and Full Stakeholders, can create overrides.
Create Overrides in the Web App
You can schedule overrides on existing schedules in two places:
- On a specific schedule shift
- On any span of time on a schedule
Override a Specific Schedule Shift
Scheduling an override by selecting a specific shift pre-populates the relevant information.
- Navigate to People Schedules.
- From the Schedules page or from a schedule's edit page, click directly on the shift you want to override. You can tab forward by days, weeks, and months to locate the shift if necessary.
- In the Schedule an Override modal, fill out or confirm the following fields:
| Field | Action |
|---|---|
| Who should take this shift? | Select the person taking the shift. |
| Start Date | Confirm or edit the start date. |
| Start time | Confirm or edit the start time. |
| End Date | Confirm or edit the end date. |
| End time | Confirm or edit the end time. |
- Click Create Override.
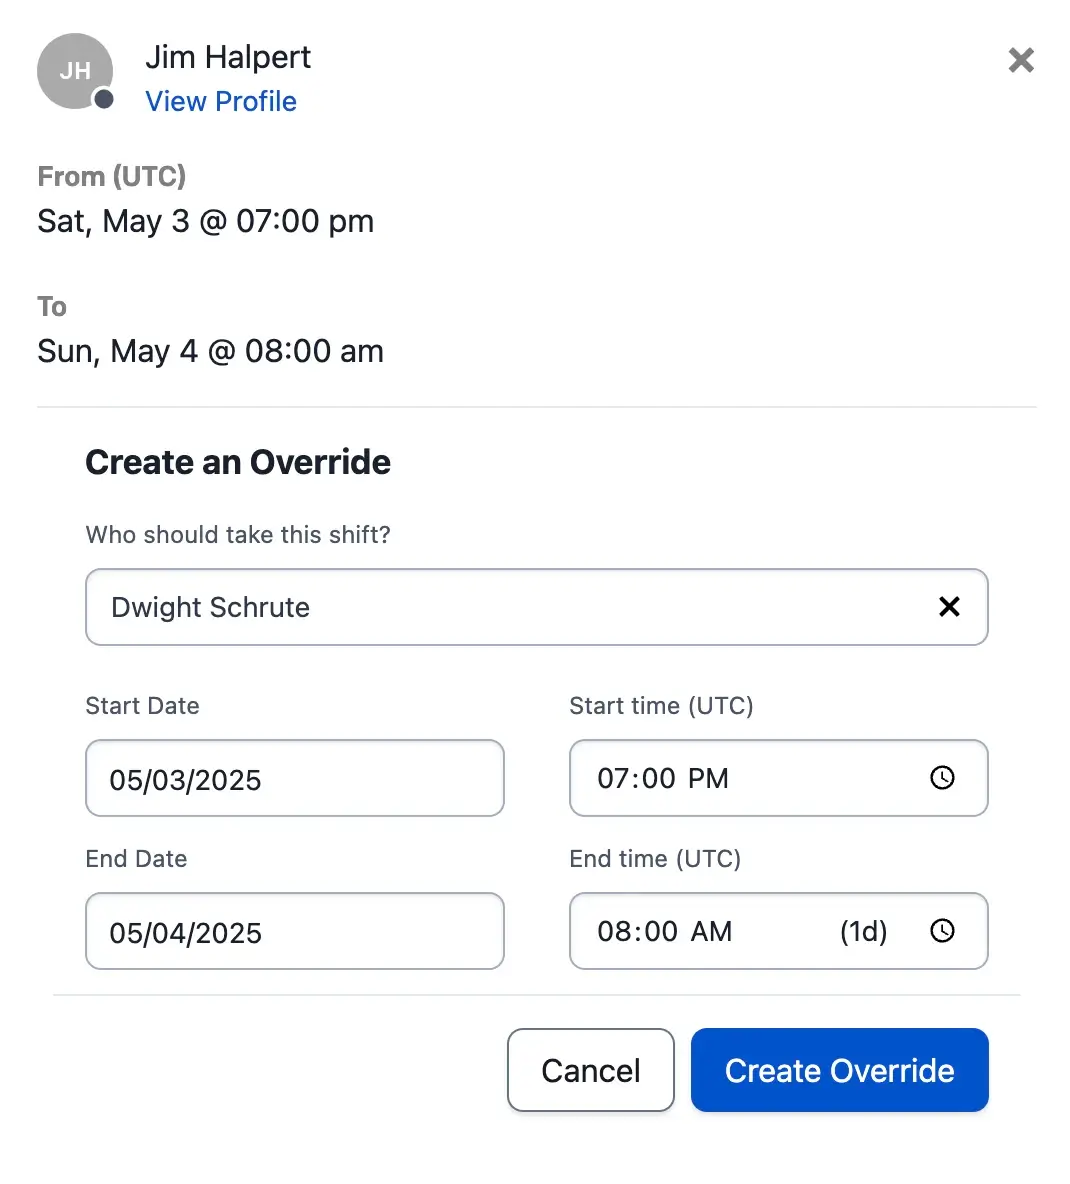
Override an on-call shift
Override Any Span of Time on a Schedule
- Navigate to People Schedules. Click the icon to the right of the desired schedule and select Schedule an override.
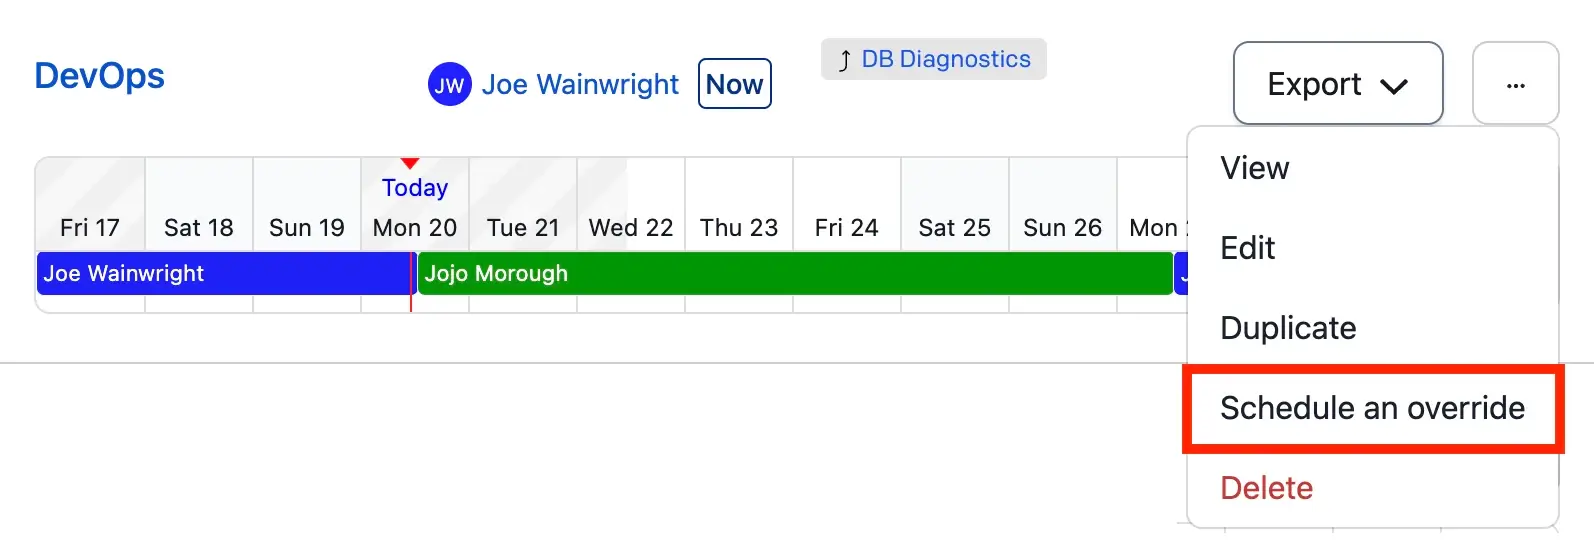
Schedule an override from the Schedules list
- Alternatively, click into a schedule and select Schedule an Override on the right side.
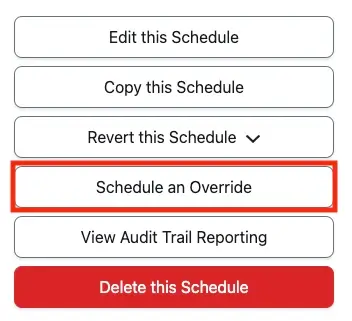
Schedule an override from a schedule
- In the Schedule an Override modal, select values for the fields:
| Field | Action |
|---|---|
| User | Select the person taking the override. |
| Starts on | Select the start date and time. |
| Ends on | Select the end date and time. |
- Click Create Override.
Create Overrides in My On-Call Shifts
Follow our documentation on My On-Call Shifts to create overrides from this page.
Create Overrides Using the REST API
An example Python script to schedule overrides for a person going on vacation is located here: vacation_overrides.py.
Our developer docs provide more information on creating and deleting overrides using the REST API.
Delete an Override
You can delete an upcoming override if it is no longer needed. If you delete an override during the middle of the scheduled shift, the regular schedule resumes immediately. You cannot delete past overrides; you can only delete present or future overrides.
- Navigate to People Schedules and select your desired schedule, or click the icon and select View.
- Navigate to the scheduled override time within the timeline or calendar view.
- In the Upcoming Overrides list on the right side, click the icon.
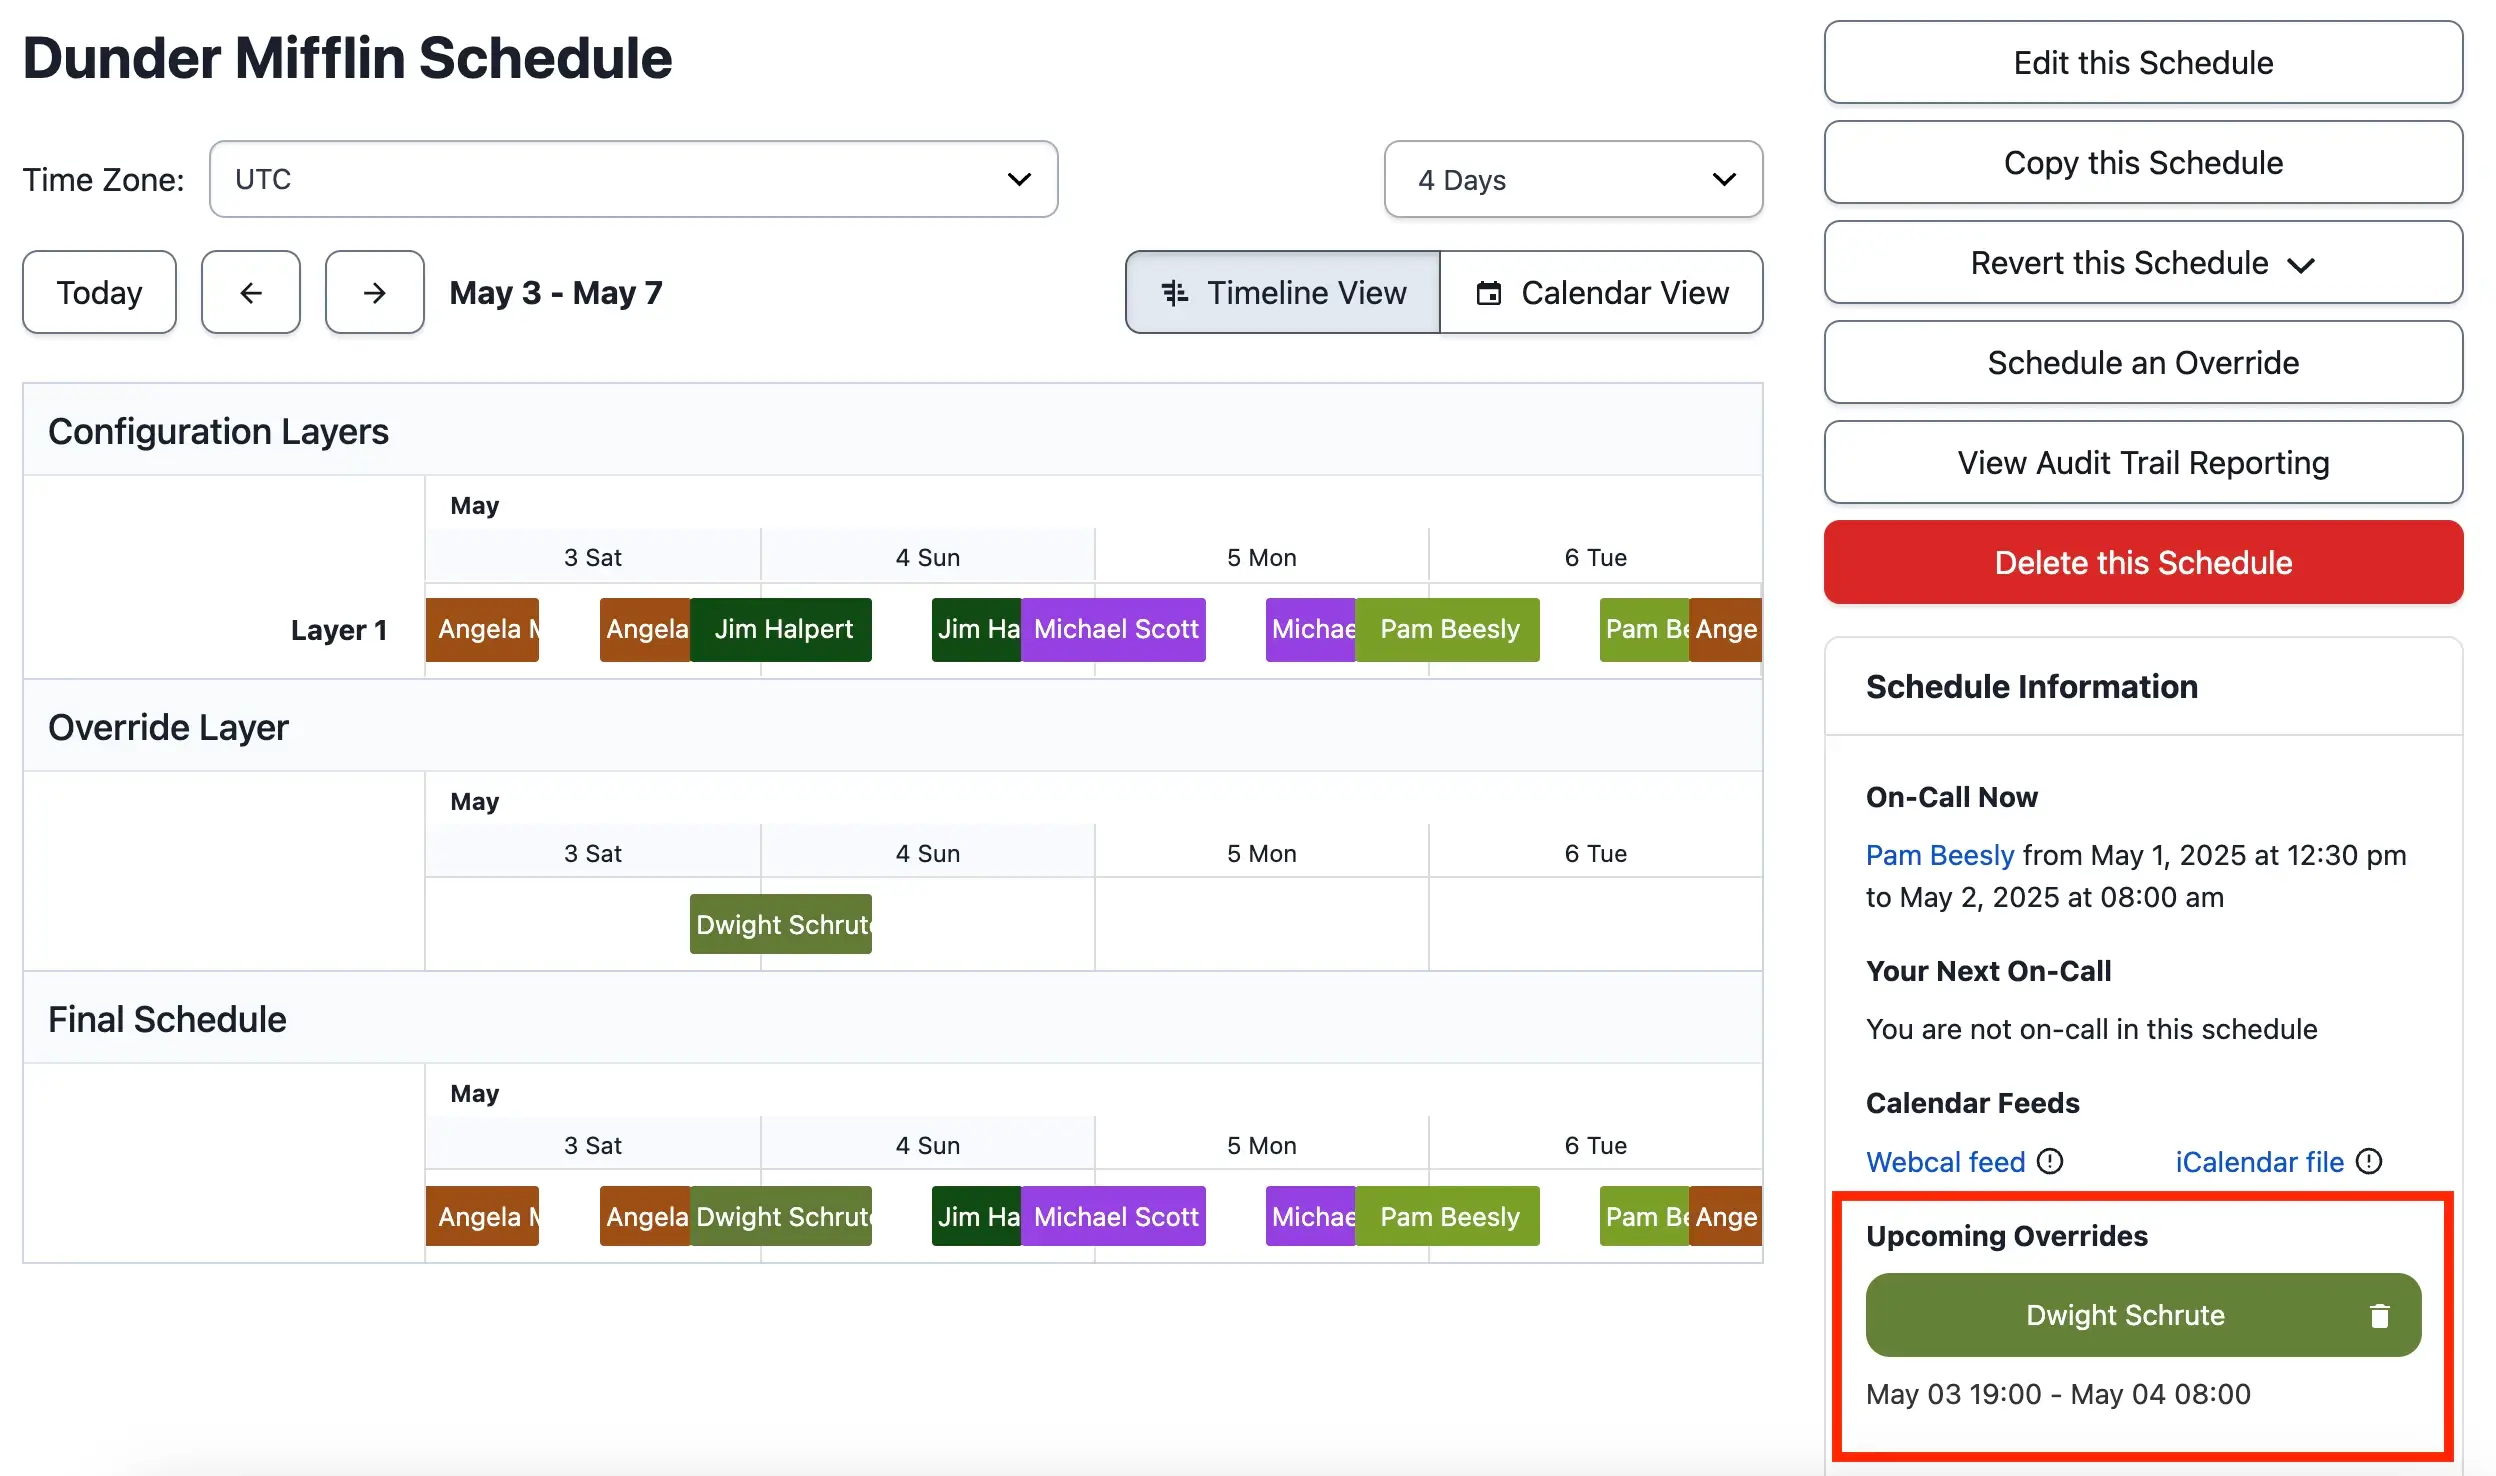
Delete an override
Edit Schedule Time Zone Settings
When you create a new schedule, it defaults to the account-level time zone. Follow the instructions in Change the Schedule-Level Time Zone to use a different time zone for your schedule than the account.
Pause or Deactivate an On-Call Schedule
Sometimes you might want to stop using a schedule without deleting it.
For example:
- The schedule is a draft which you are not ready to implement. (Note, however, that you can set an effective date for future changes without deactivating your current schedule.)
- The schedule is only used for particular occasions, such as on-call shadowing.
To take an on-call schedule out of use, remove the schedule from any escalation policies it is assigned to, or change the escalation policy your services use to another that does not include the schedule.
Option 1: Remove a Schedule from an Escalation Policy
The right sidebar displays any escalation policies where the schedule is in use.
Escalation policies that use this schedule
- Select the escalation policy you want to remove the schedule from. This action opens the escalation policy page.
- Click Edit in the top right corner of the page.
- Locate your schedule in the Notify the following users or schedules field and click the icon to remove it from the escalation rule.
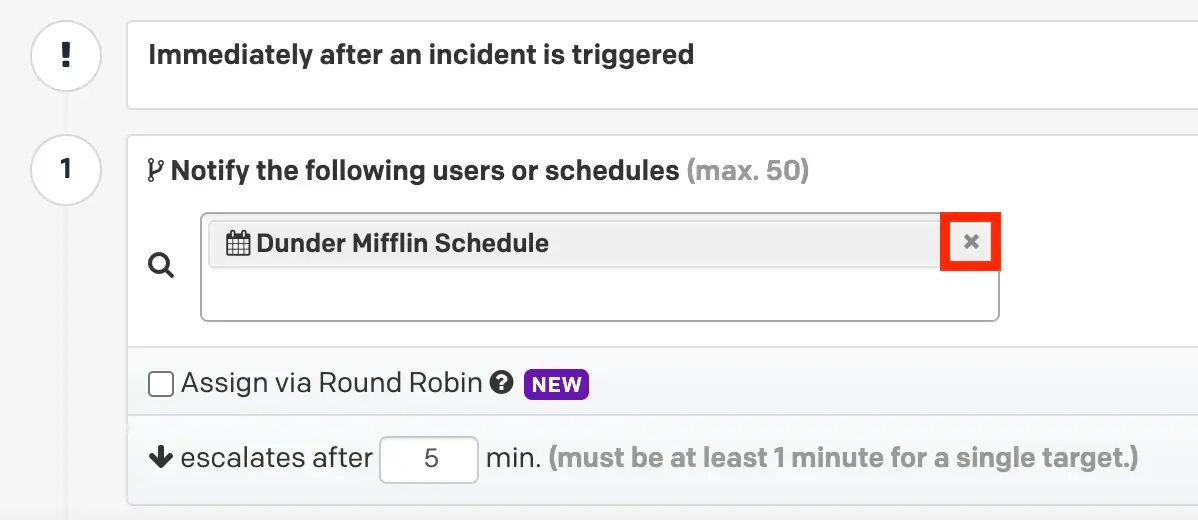
Remove schedule from an escalation policy
TipIf the schedule is the only target (person or schedule) in the escalation rule, click the icon for the entire rule, as each rule must contain at least one target.
- Click Save at the bottom of the escalation policy.
Option 2: Change the Escalation Policy for a Service
Visit Escalation Policies and Schedules for instructions to change a service’s escalation policy. This action ensures that incidents triggered for the service do not alert the schedule you want to take out of use.
Restore a Schedule to a Previous Version
If you or another person alters a schedule in an undesired way, you can quickly revert a schedule back to a previously saved version. This feature also allows you to see when a change occurred.
- Click People Schedules.
- Select the name of the schedule you want to revert.
- On the right side of the page, select Revert this Schedule to view recent versions.
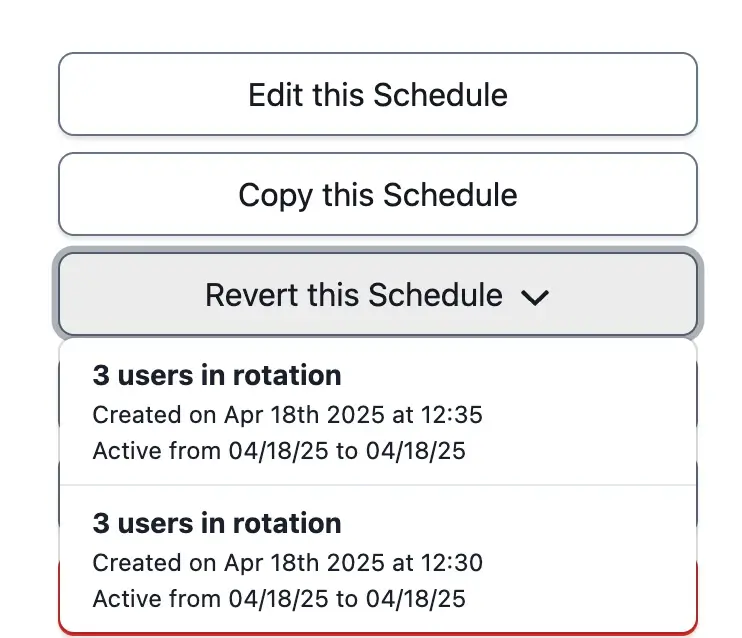
Restore a schedule to a previous version
- Select an option from the dropdown menu to open the schedule's edit page with that version populated.
- Confirm the schedule details, optionally make additional changes, and click Revert Schedule in the upper right corner.
Schedule Limitation with OverridesOnly changes made to the schedule layers can be reverted. Overrides are not affected if you revert a schedule. For more information about reviewing who made a change to a schedule, see View Schedule Audit Trail Reporting.
Schedules and Teams Behavior
For accounts with Teams, if you assign a schedule to a Team, all people on the schedule are added to the Team. Similarly, if a schedule is already assigned to a Team, adding people to the schedule adds them to the Team. You can view a schedule's Teams in the Schedule Information sidebar on the right side.
Add a Schedule to a Team
Required User PermissionsWhile editing an on-call schedule, only Global Admins and the Account Owner can add the schedule to a Team.
- Navigate to People Schedules and click the icon to the right of your desired schedule and select Edit.
- In the Teams section, select the Team(s) you want to associate the schedule with.
- Click Save Schedule.
Remove a Schedule from a Team
Before you can remove a schedule from a Team, keep the following items in mind:
- If you manually added a schedule to a Team, a person with a base role of Admin or higher can remove the schedule from the Team.
- If you manually added an escalation policy with a schedule to a Team, remove the escalation policy from the Team before removing the schedule.
- Navigate to People Schedules and click the icon to the right of your desired schedule and select Edit.
- In the Teams section, click the icon to the right of the Team(s) you want to remove the schedule from.
- Click Save Schedule in the bottom right corner.
Updated 4 months ago