Jira Integration | Jeli

Jeli Part of PagerDuty

Jira + Jeli Benefits

  • Connect Jira to your workflow for both incident response and analysis.
  • Create Jira tickets and link to them in the incident Slack channel.
  • Create new action item tickets in Jira or import existing tickets into an investigation.
  • Manage and track tickets in Jira without leaving Jeli.

Requirements

📘

Availability

Jeli is available with the Enterprise plan for Incident Management. Please contact our Sales Team to upgrade to an account plan with this feature.

To Configure the Integration

In Jeli

Admin permissions are required to manage your Jeli Integrations. To add someone as an admin, visit User Access Management Settings in the Jeli App.

In Jira

Users will need permission to create API Atlassian tokens.

How it Works

  • Users create a Jira issue when creating or during a Jeli incident, or link an incident to an existing Jira issue.
  • Jeli incident status updates are automatically added as comments to the incident's primary Jira issue.
  • Jeli incident stage changes are synced with the primary Jira issue's ticket status.

Version

This integration is for Jira Cloud products, as well as Jira Server (i.e., Jira Software and Jira Service Management).

Integration Walkthrough

👍

Internal Service Account

We recommend creating an internal service account to configure the Jira integration. If an individual user sets up the Jira integration and then leaves your company, the Jira integration will no longer work. If you’re not sure how to request or set up a service account, reach out to your internal IT team.

Jira Cloud

  1. In Jeli, navigate to Settings Integrations Jira.

  2. Select the tab Connect to Jira Cloud configuration.

  3. There are two methods that you can use to connect your Jira account:

    1. Connect with OAuth:

      1. Click Connect to Jira, which will take redirect you to Jira.

      2. In the Authorize for site dropdown, select which Jira site you are authorizing and click Accept.

        A screenshot of the prompt to accept Jeli's access request

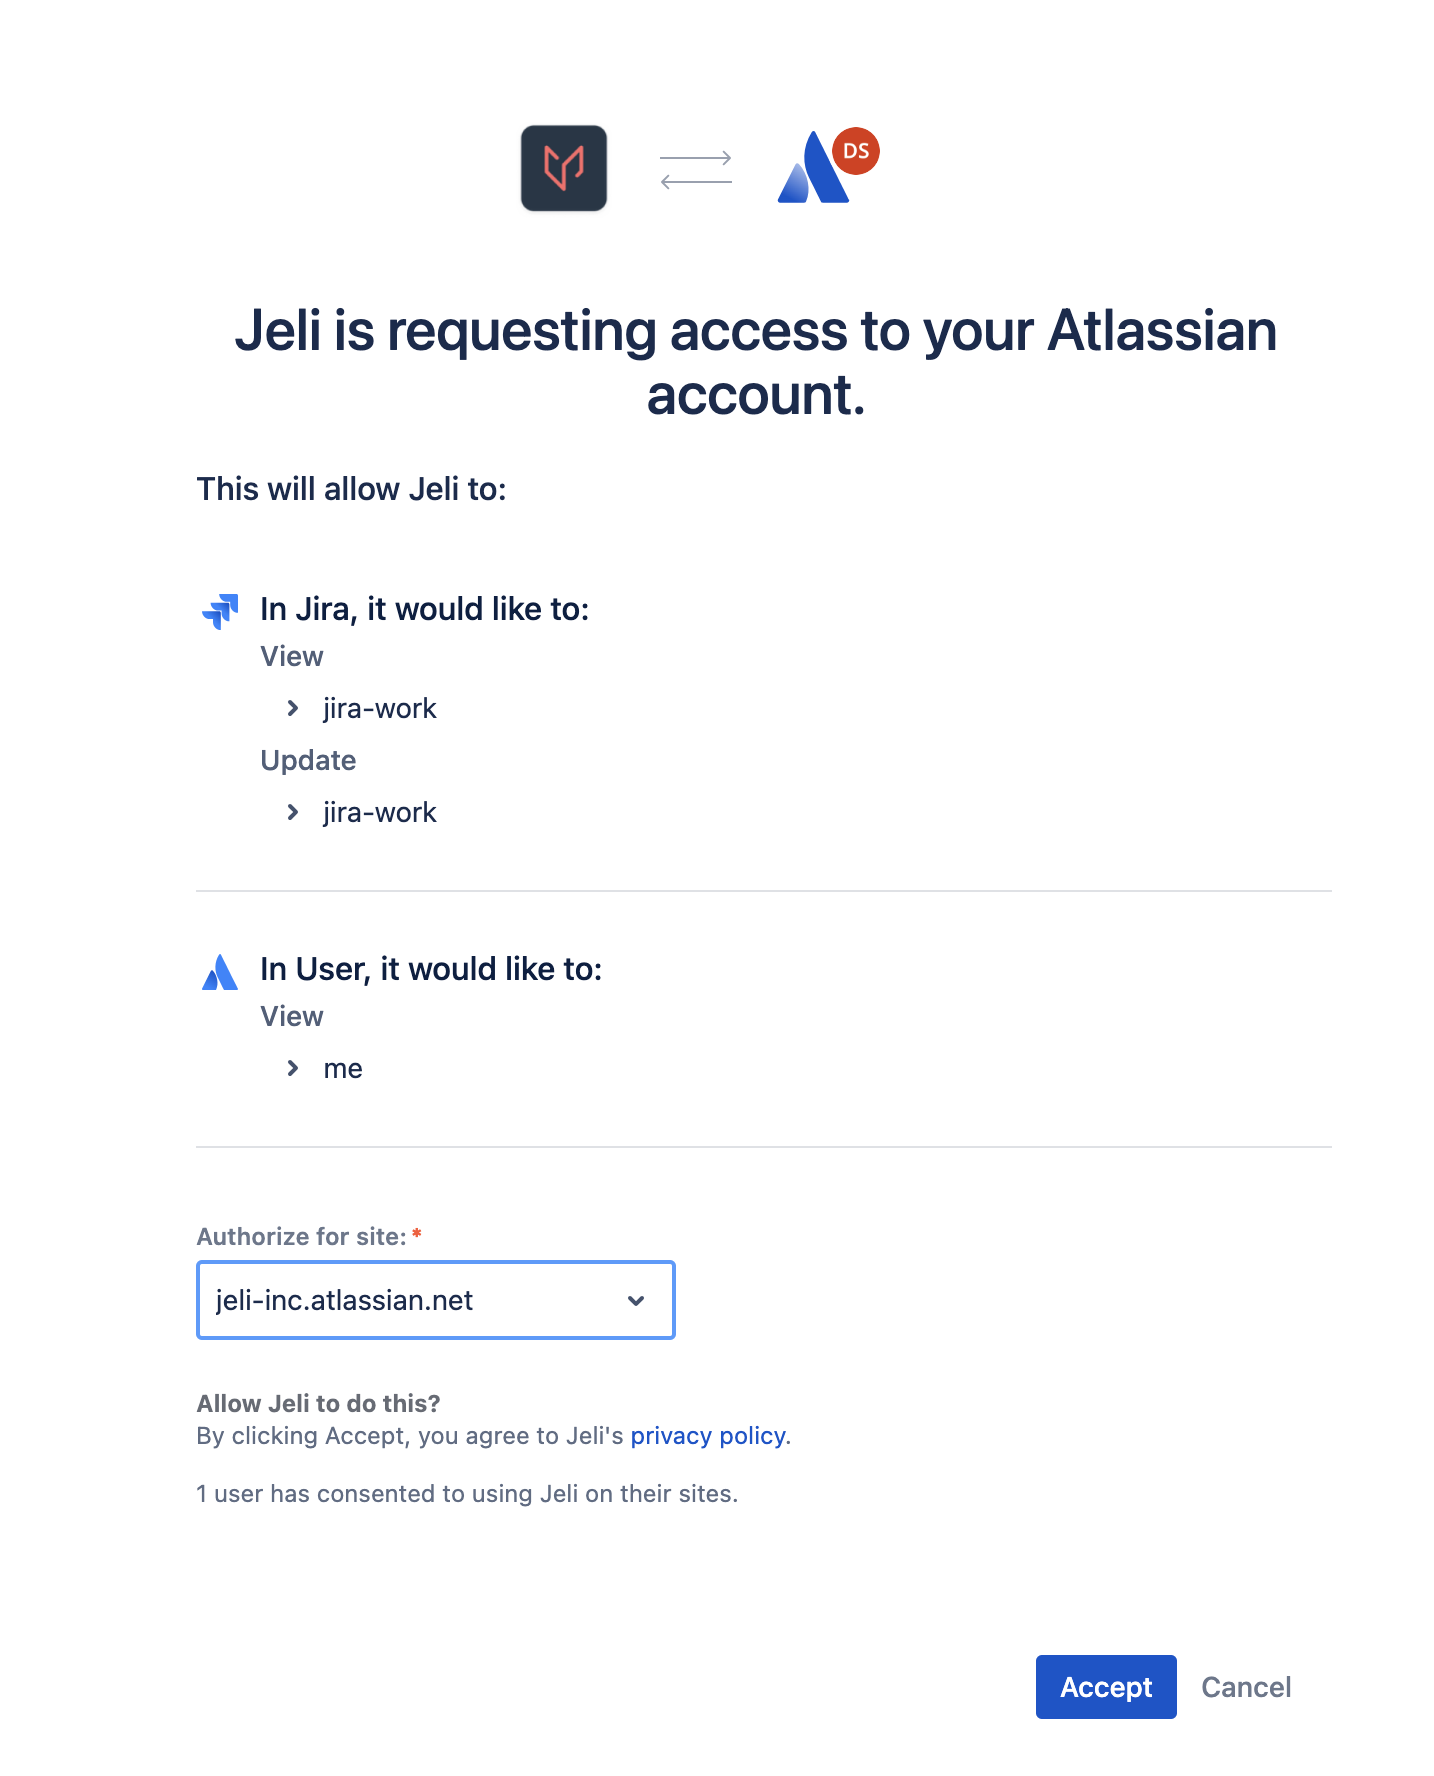
        Accept access request

    2. Connect with API Token:

      👍

      Use Service Account

      We suggest using a service account to generate this API token. When creating Jira issues in Jeli, the reporter of the Jira issue will be set to the user/account that generated the API key. See Manage API tokens for your Atlassian account in the Atlassian documentation for more information.

      1. In Jira, create an API Token and keep it in a safe place for later use.
      2. In Jeli, navigate to Settings Integrations Jira.
      3. Enter your configuration details:
        1. Jira Site Domain: The URL of your organization’s Jira instance, e.g, https://subdomain.atlassian.net.
        2. Email Address: The email address you use when logging into Jira.
        3. API Key: Paste the API key generated from Jira.
      4. Click Connect account.
        Once configured, the integrations page will display your active configuration and give you an option to disconnect the integration.

Jira Server

  1. In Jeli, navigate to Settings Integrations Jira.
  2. Select the tab Connect to Jira Server.
  3. Select Connect using user credentials.
  4. Enter your configuration details:
    1. Jira Site Domain: The URL of your organization’s Jira instance. For example, https://bean-co.atlassian.net.
    2. Username: The username Jeli will use to connect to Jira.
    3. Password: The password will use to connect to Jira.
  5. Click Connect account.

Once configured, the integration page will display your active configuration and give you an option to disconnect the integration.

Jira | Jeli Integration User Guide

Create a New Jira Issue When Opening a Jeli Incident

  1. While using the Jeli Slackbot, enter /jeli open to create a new Jeli incident and click Use Integrations. Jeli will use the default Jira project and issue type, if configured. The Jeli incident's name will be used as the Jira issue title.
  1. Click Modify Jira issue details to change the project, issue type, or populate additional fields, or click Disconnect Primary Issue to override the default and tell Jeli not to automatically create a Jira issue.
    1. Note: To modify specific Jira fields, click Modify Jira issue details or make configuration updates in Jira to set your preferred default values.
A screenshot of the Slack UI detailing fill in specifics for the primary Jira issue

Primary Jira issue

📘

Jeli Incident Name

If you configure the Jira integration to create an issue when a Jeli incident opens, it will automatically modify the Jeli incident's name to include the Jira ticket ID.

For example, if you open a Jeli incident with the name Consul is down and have a configured project Engineering, the resulting incident name will be ENG-123 Consul is down and the incident channel will be #eng-123-consul-is-down.

Create a New Jira Issue During a Jeli Incident

  1. While using the Jeli Slackbot, enter/jeli jira, select Create a new Jira issue and click Next
A screenshot of the Slack UI indicating how to create a new Jira issue

Create a new Jira issue

  1. Select a Jira project, issue type and provide a summary (Jira issue title) as well as any other required fields for your selected issue type. Optionally populate any additional, non-required fields. You may select the checkbox to Set issue as the primary Jira issue for this incident.
A screenshot of the Slack UI indicating how to create a Jira issue

Create Jira issue

  1. Click Create.

Enterprise Jira Configuration

All customers may create Jira issues from Jeli, specifying the following information:

  • Project
  • Issue Type
  • Issue Summary
  • Issue Description

Additionally, Jeli Enterprise customers may set or interact with additional fields, including custom fields on the Jira issue. Jeli supports the following Jira field types:

  • Checkboxes
  • Date Picker
  • Date Time Picker
  • Labels
  • Number Field
  • Paragraph
  • Radio Buttons
  • Select List (multiple choice and single choice)
  • Short text
  • URL
  • User Picker (single or multiple user)

You will see these fields presented within Jeli when creating a Jira issue from Slack. Jeli also supports looking up, assigning, or creating new labels directly from our integration.

For more information on our Enterprise plan, including a full list of additional features, please see our pricing page.

Link an Existing Jira Issue During a Jeli Incident

  1. While using the Jeli Slackbot, enter /jeli jira, select Link an existing Jira issue and click Next.
  2. Enter a Jira issue's URL and optionally select the checkbox to Set issue as the primary Jira issue for this incident.
A screenshot of the Slack UI indicating how to link a Jira issue

Link a Jira issue

  1. Click Link.

View Attached Jira Issues

Enter /jeli jira list to receive a list in Slack of all Jira tickets associated with the Jeli incident.

You can also enter /jeli overview to see a list of associated Jira issues in the incident overview.

Automatically Add Jeli Incident Status Updates as Jira Issue Comments

This feature automatically adds Jeli incident status updates as comments on the Jeli incident's primary Jira issue.

  1. In the Jeli web app, navigate to Settings Incident Response and select the tab Primary Jira Issue.
  2. Select the checkbox By default, create a Jira comment for every Jeli Slack bot status update.
A screenshot of the Jeli UI indicating how to create a Jira comment for every Jeli Slack bot status update

Create a Jira comment for every Jeli Slack bot status update

With this feature enabled, Jeli incident status updates will automatically be added as comments to the incident's primary Jira issue.

Automatically Sync Your Jeli Incident Stage With Jira Ticket Status

This feature automatically syncs Jeli incident stage changes with ticket status for the primary Jira issue on your incident.

  1. In the Jeli web app, navigate to Settings Incident Response and select the tab Primary Jira Issue.
  2. Click Configure Primary Jira Issue.
  3. Select a Default Jira project and Default Jira issue type.
  4. Map each Jeli incident stage to your desired Jira issue status.
  5. Click Save configuration.
A screenshot of the Jeli web app detailing how to configure the default primary Jira issue and sync Jeli incident stages with Jira issue statuses

Configure default primary Jira issue

Once configured, Jeli will automatically sync Jira tickets for all future incidents.

Incident Analysis with Jira

For more information on using our Jira Integration for Incident Analysis, please read Collect Action Items.

Uninstall the Jira | Jeli Integration

  1. In the Jeli web app, navigate to Settings Integrations.
  2. In the section Jira, click Edit configuration.
  3. Click Disconnect Jira Site.
  4. In the confirmation modal, click Disconnect.

FAQ

Why can't I select my issue type when creating a Jira issue?

This integration supports default Jira configurations. Any issue type with required fields other than Summary or Description are not supported.

A screenshot indicating how to select a Jira issue typ

Select a Jira issue typ

If you need to select another issue type, we recommend going to Jira, creating your action item, and then linking it to the existing issue in Jeli.