
ServiceNow v7 Integration Guide
Configuring the v7.9.1 Integration
ServiceNow and PagerDuty Integration Benefits
- Leverage ServiceNow workflow and ticketing capabilities with PagerDuty robust on-call scheduling, notifications, and escalation policies.
- Run Response Plays, post status updates, and set the impacted business service on a PagerDuty incident from the ServiceNow interface.
- Perform assignment group and priority mapping to PagerDuty escalation policies.
- Provision business and technical services from ServiceNow to PagerDuty along with their dependency relationships.
- Send ServiceNow change requests to PagerDuty as change events.
- Author custom code for outbound REST API calls.
- MID server support.
How It Works
Incident communication between ServiceNow and PagerDuty is bi-directional, allowing you to trigger, reassign, resolve, use response plays, post status updates, and set impacted business services in either system. The integration supports the following workflows:
- Third-party monitoring tool integrations detect an issue and trigger an incident in PagerDuty. You receive notifications from PagerDuty, and you can Acknowledge and resolve the incident via PagerDuty. A ServiceNow ticket opens when a PagerDuty incident triggers, and these actions remain in sync for the lifecycle of the incident.
- A ticket is filed in ServiceNow, which automatically triggers an incident in PagerDuty and notifies you. You take ownership via PagerDuty, and these actions from PagerDuty remain in sync with ServiceNow.
Requirements
In ServiceNow
- A ServiceNow Administrator role is required for configuration.
In PagerDuty
- The ServiceNow integration is only available to accounts on the following pricing plans: Business, Digital Operations (legacy), and Enterprise for Incident Management. Contact our Sales Team to upgrade to a plan featuring the ServiceNow integration.
- A Global Admin or Account Owner base role is required for configuration.
Quick Links
- How the Integration Works
- Advanced Configuration
- Troubleshooting the ServiceNow Integration
- Frequently Asked Questions
Version
This guide details configuration for the latest ServiceNow v7.9.1 integration.
Looking for Another Version?The ServiceNow v6 integration is also available.
Integration Walkthrough
Assignment Groups and Change GroupsServiceNow Quebec refers to assignment groups as change groups. These terms are interchangeable in this guide.
Complete ServiceNow Pre-Install Requirements
Configure ServiceNow Application Access Controls
To ensure the integration functions correctly, a ServiceNow administrator must allow configuration access in the specified ServiceNow tables.
- Navigate to System Definition Tables.
- Search for and open the records for
sys_user,sys_user_group, andsys_user_grmember. - Select the Application Access tab on each record and configure the following values:
| Field | Value |
|---|---|
| Can read | Checked |
| Can create | Checked |
| Can update | Checked |
| Allow configuration | Checked |
- Click Update in the upper-right corner of each record to save your changes.
Install the Integration
- Navigate to the PagerDuty integration in the ServiceNow Store and install the application.
Add PagerDuty Fields to Views
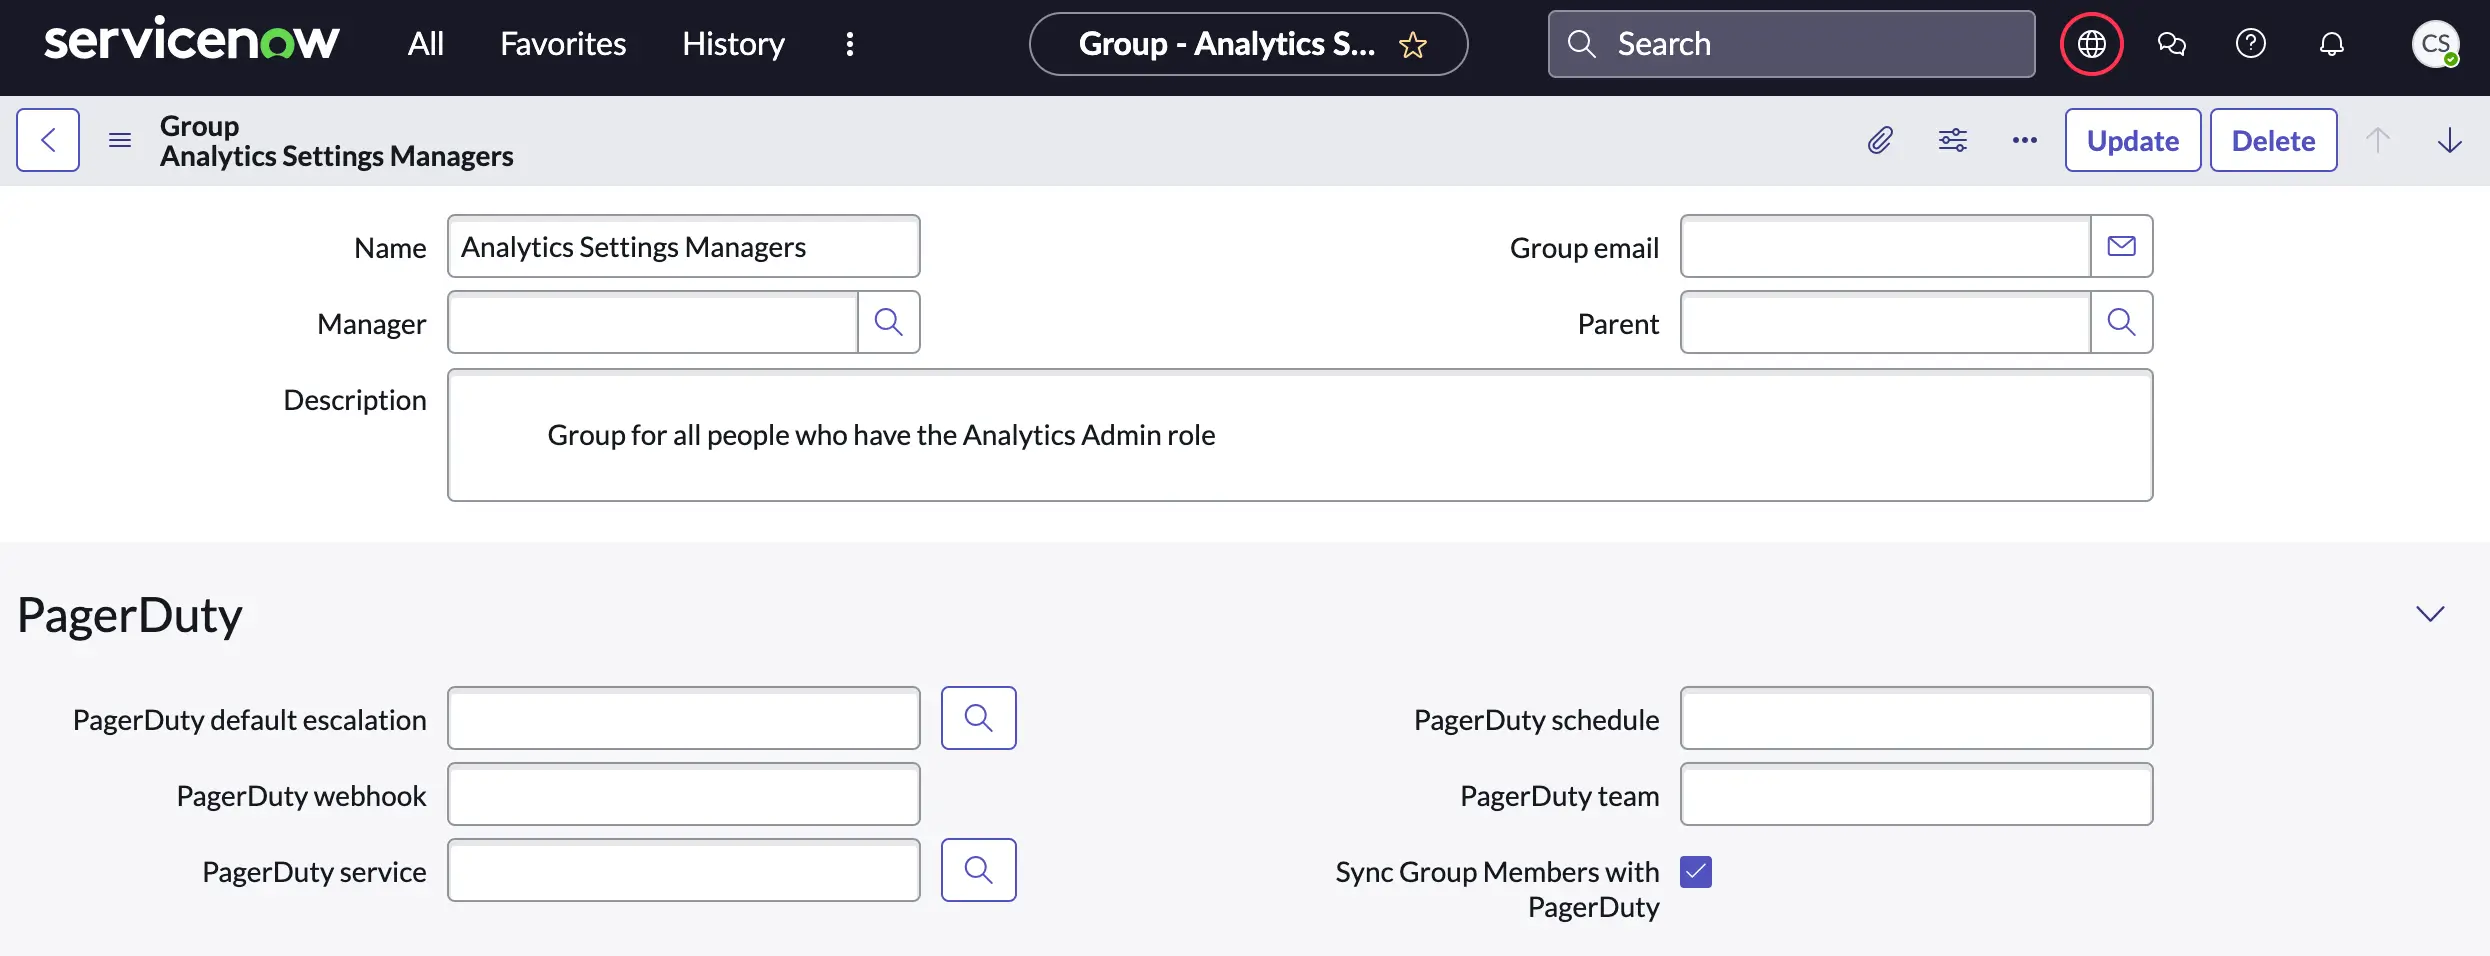
To view PagerDuty ID fields within ServiceNow, manually add them to the Group, User, and Incident views. This makes it easier to see which ServiceNow objects map to PagerDuty. Complete instructions are detailed in the Show or hide fields on a form documentation on the ServiceNow site.
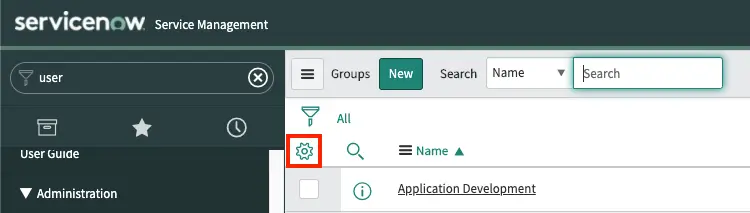
- Add the PagerDuty fields to the User and Group list views by clicking the gear icon in the upper-left corner of the grid to customize the display of columns. This makes them visible in your list views only.
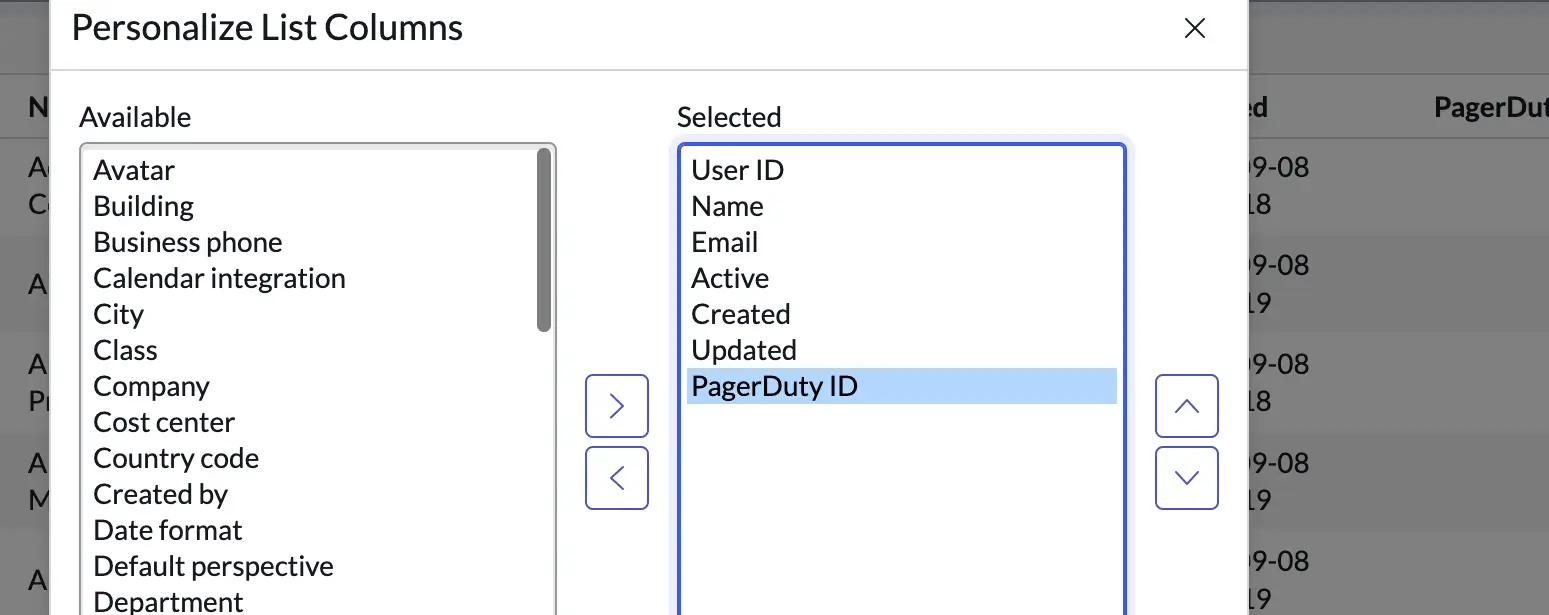
- Use the following table to identify the available PagerDuty fields you can add to the list views and forms:
| List Views and Forms | PagerDuty Fields |
|---|---|
| User list view and user form | - PagerDuty ID |
| Group list view and individual Group form | - PagerDuty default escalation - PagerDuty error message - PagerDuty schedule - PagerDuty service - PagerDuty team - PagerDuty webhook |
| Applications list view and individual CI form | - PagerDuty Change Event Token - PagerDuty service - PagerDuty webhook |
| Incident list view and Incident form | - PagerDuty incident - PagerDuty incident id - PagerDuty incident key |
Configure PagerDuty
Create a PagerDuty API Access Key
- Log in to your PagerDuty account in the web app. Navigate to Integrations API Access Keys.
- Click Create New API Key.

- In the dialog box, enter a Description for your key. Leave the Read-only box unchecked, as a full API key is required. Click Create key.
- Copy the generated API key and save it in a secure place. You do not have access to the key after this step. If you lose a key, remove the key and create a new one. Click Close.
Create a Default PagerDuty User Account for ServiceNow
This integration requires ServiceNow to have access to your PagerDuty account via both an API token and a PagerDuty user account. The PagerDuty user account ensures that non-PagerDuty users can take action in ServiceNow and have those actions reflect in PagerDuty.
Default User Provisioning StipulationsYou can provision a Default User from the ServiceNow UI, but consider the following stipulations:
- Provisioning the Default User creates a PagerDuty user based on the user who is logged in to ServiceNow and configuring this setting. If you agree to be provisioned as the Default ServiceNow user, follow the directions in this section and move to Configure Your ServiceNow Instance.
- If you do not want to be provisioned as the Default ServiceNow user in PagerDuty, proceed with the steps below.
- In your PagerDuty account, navigate to People Users and click Add Users.
- Configure the new user profile with the following values:
| Field | Value |
|---|---|
| Name | ServiceNow User |
| Enter any valid email address and save it in a secure place | |
| Base Role | Select Global Admin |
- Click Add, then click Send Invitations to save.
- Locate the new ServiceNow User in your PagerDuty Users list, click the user name, and note the seven-character alphanumeric user ID in the URL of the page (for example, if the URL is
https://your-subdomain.pagerduty.com/users/PXXXXXX, the user ID isPXXXXXX). Copy this user ID and store it in a secure place with the email address.
Configure Your ServiceNow Instance
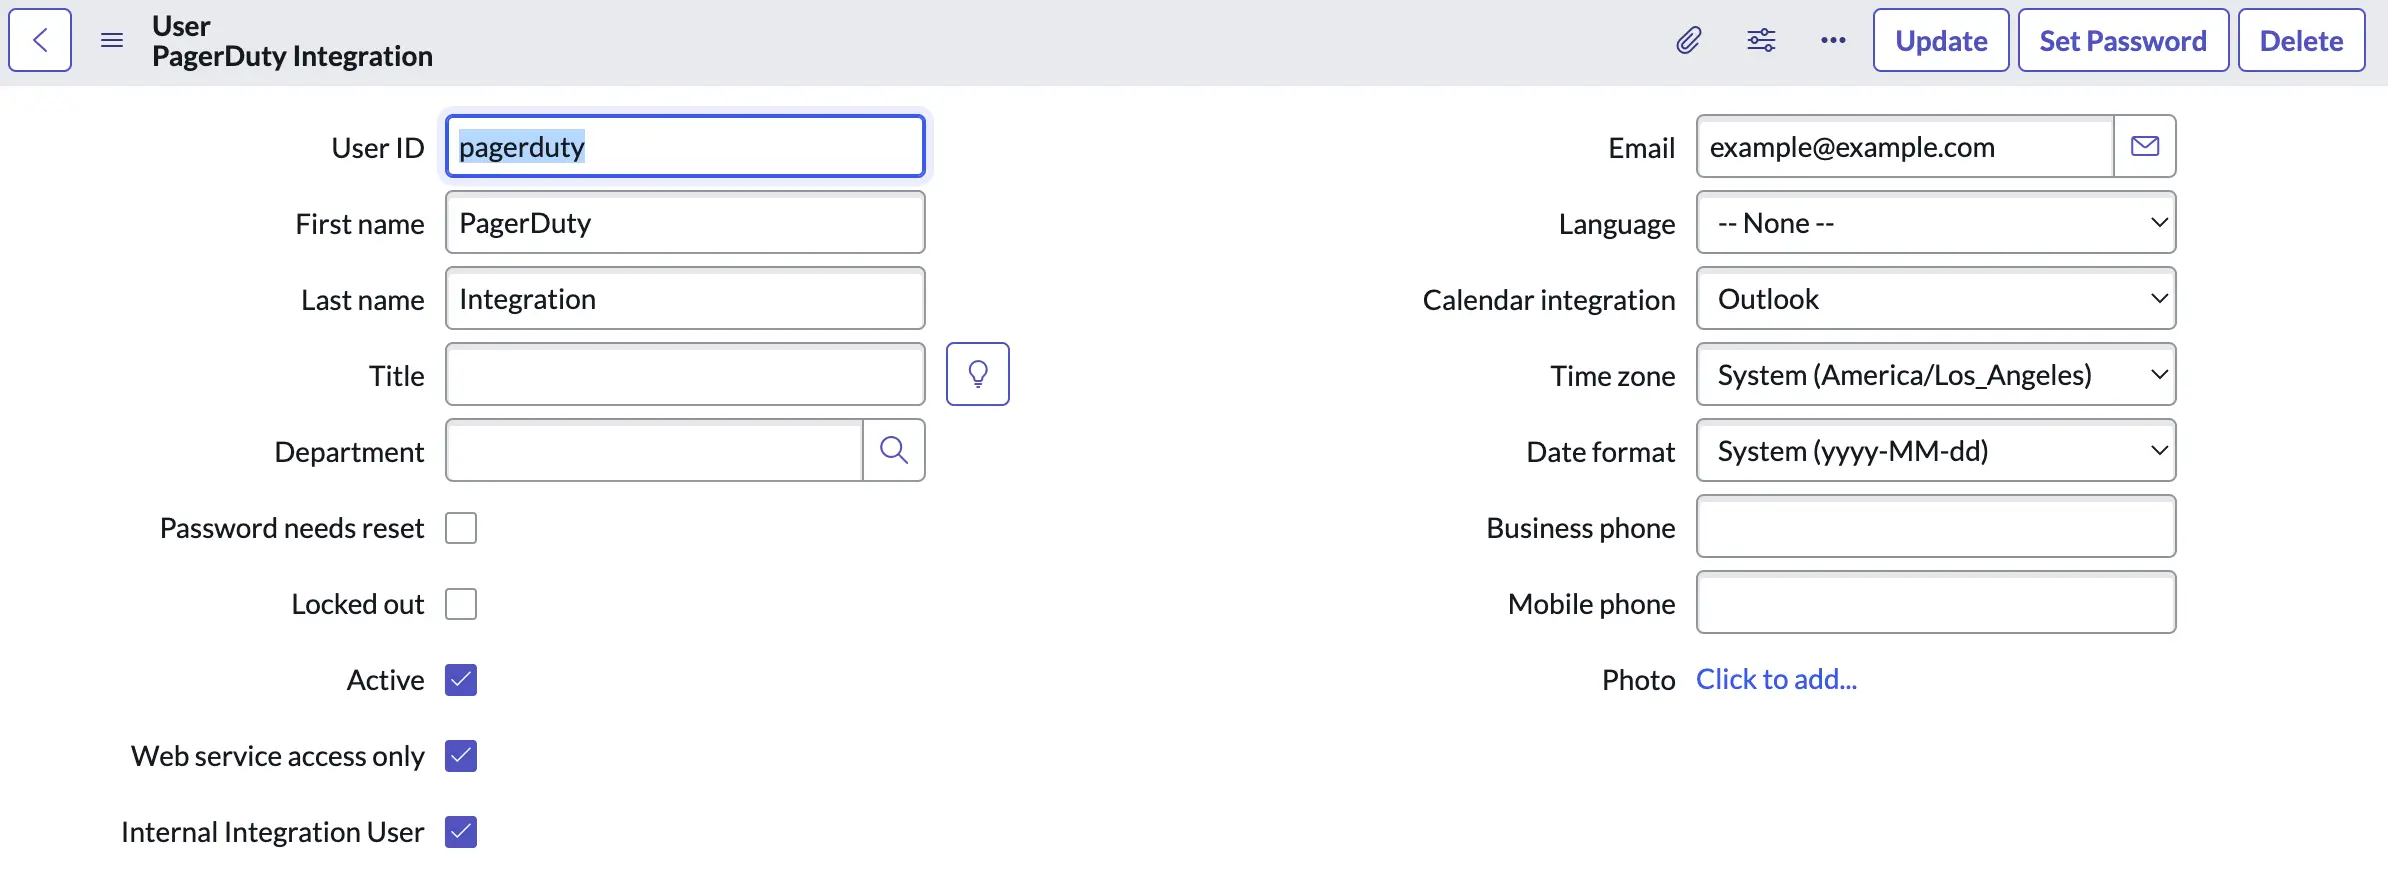
Create a ServiceNow User Account for Webhook Authentication
The PagerDuty integration requires a dedicated ServiceNow user account to allow PagerDuty to sync actions back to ServiceNow via webhooks. This security feature allows you to control integration permissions and roles within ServiceNow.
- Log in to your ServiceNow instance. Navigate to Organization Users and click New.
- Configure the new user account with the following values:
| Field | Value |
|---|---|
| User ID | Enter any desired username (save this value in a secure place) |
| First name | Enter a first name |
| Last name | Enter a last name |
| Password | Set a password (save this value in a secure place) |
| Web service access only | Checked (optional, if available) |
| Internal Integration User | Checked (optional, if available) |
| Enter the exact email address used for the PagerDuty default user account in the previous section | |
| PagerDuty ID | Enter the seven-character user ID generated for the default PagerDuty account in the previous section |
Click Submit.
- Search for and click into the newly created user profile.
- Under the Roles tab, click Edit and assign the following three roles to the user account:
itil,rest_service, andx_pd_integration.admin. Click Save.
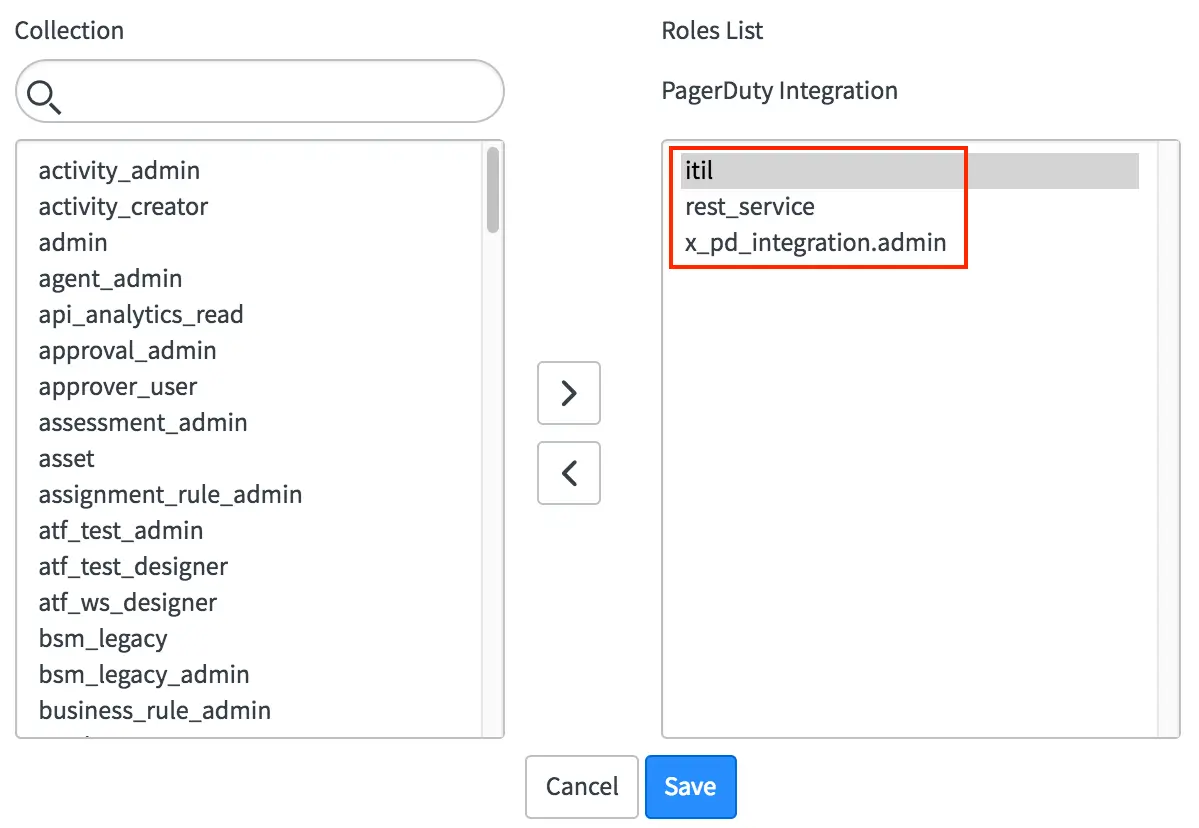
The user account requires permissions to make API requests so that PagerDuty can create incidents in ServiceNow and manage existing incidents. If your ServiceNow instance allows all users to perform REST API calls, the itil and x_pd_integration.admin roles are sufficient. If REST API access is restricted by role, assign the required role, such as snc_platform_rest_api_access or rest_service.
- Verify the following prerequisites are complete:
- A default PagerDuty user account exists for ServiceNow.
- An API key exists in PagerDuty.
- A ServiceNow user account exists for the PagerDuty integration.
- The accounts map to each other via their shared email address and PagerDuty User ID.
Click Update to save the user record in ServiceNow.
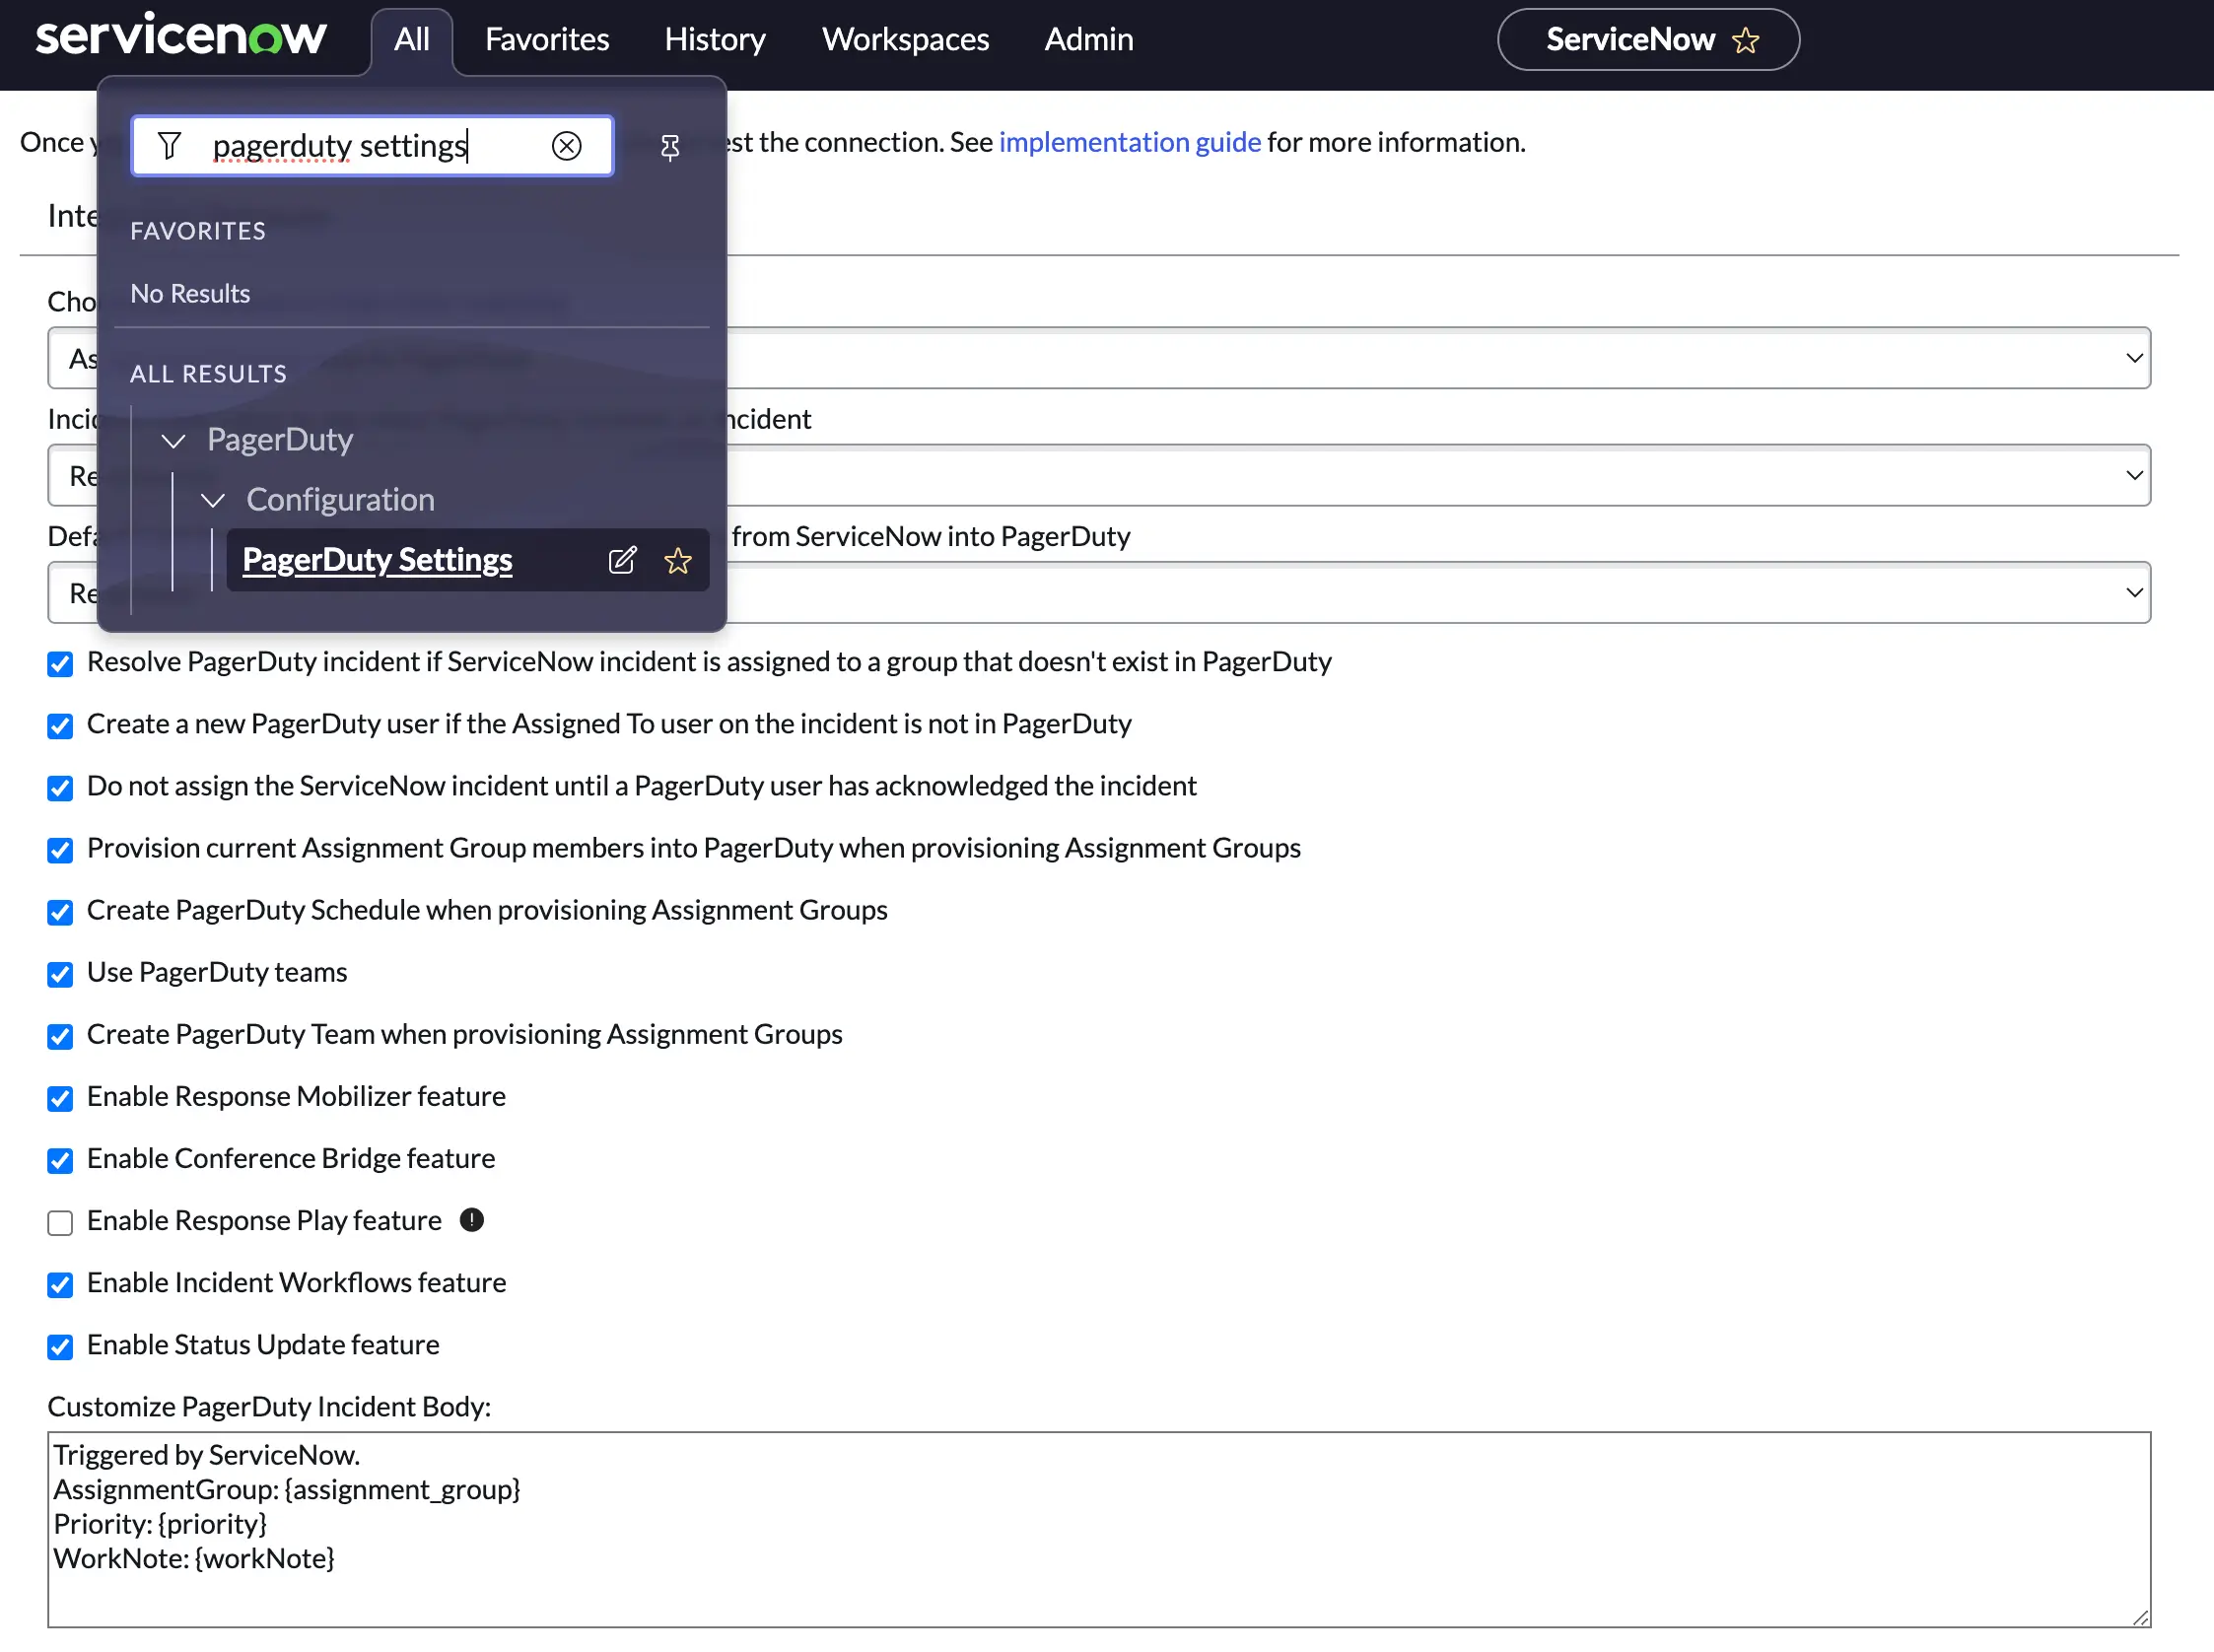
Configure PagerDuty Settings in ServiceNow
- Navigate to PagerDuty Configuration PagerDuty Settings. If prompted, switch to the PagerDuty application scope to make the page editable.
- Configure the following fields on the configuration page:
| Field | Value / Instruction |
|---|---|
| ServiceNow user for authentication | Enter the user ID of the new ServiceNow user (must be all lowercase) |
| ServiceNow user password for authentication | Enter the password of the new ServiceNow user |
PagerDuty account URL (https://subdomain.pagerduty.com) | Enter your PagerDuty subdomain URL (e.g., https://subdomain.pagerduty.com) |
| PagerDuty API access key | Enter the API key generated in the previous section |
| Default Service ID | Enter a seven-character PagerDuty service ID starting with P, or click Provision default service |
| Default User ID | Enter the seven-character alphanumeric PagerDuty user ID starting with P from the previous section, or click Provision default user |
| REST API Endpoint | Leave as the default value: https://api.pagerduty.com |
Click Save.
- Click Actions Test REST API Connection. A successful integration configuration returns a
Connection test successful (200)response. - Click Actions Test ServiceNow User Authentication. A successful account configuration returns a
ServiceNow user authentication test successful (200)response. - Click Test Default User Settings. A successful configuration returns a series of success messages. If the test fails, follow the on-screen instructions to make adjustments.
Add the ServiceNow Extension to an Existing PagerDuty Service
To create a new service, skip this section and proceed to Review PagerDuty Settings in ServiceNow.
Option 1: Manually Configure the Extension in PagerDuty
This option requires access to the username and password of the ServiceNow account used by PagerDuty.
- In your PagerDuty account, navigate to Services Service Directory. Click the service name, select the Integrations tab, and select Add or manage extensions New Extension.
- In the Extension Type field, search for and select ServiceNow (v7).
- Enter a Name using the format
servicenow-service-name(e.g.,servicenow-shopping-cart). - Configure the remaining fields using the following table:
| Field | Value / Instruction |
|---|---|
| ServiceNow URL | Enter the URL in this format: https://[INSTANCE-NAME].service-now.com/api/x_pd_integration/pagerduty2sn |
| ServiceNow User ID and ServiceNow Password | Enter the credentials created in the Create a ServiceNow User Account for Webhook Authentication section |
| Sync Options | Select Sync All Incidents to sync all new incidents, or select Manually Sync Incidents to manage sync preferences via the incident details page |
| Incident Type | Select Incident to create standard incidents, or select Security Incident to generate ServiceNow Security Incidents |
- Click Save.
Option 2: Use the ServiceNow Integration to Provision the PagerDuty Extension
This option requires the x_pd_integration.admin role in ServiceNow to provision the extension without providing account credentials directly to PagerDuty.
- Review the configuration on the PagerDuty Settings page to determine how ServiceNow maps to PagerDuty:
- If mapping assignment groups only, navigate to the specific assignment group you want to map.
- If mapping configuration items, navigate to the specific configuration item you want to map.
- Open the record in ServiceNow. Ensure the PagerDuty Service field is blank, which indicates the object does not yet map to PagerDuty.
- In your web browser, navigate to PagerDuty, select Services Service Directory, and click into your service. Copy the seven-character Service ID starting with
Pfrom the URL bar. - In ServiceNow, paste this value into the PagerDuty Service field and click Save. Reopen the record if you are redirected to a list view.
- Scroll to the Related Links section and click Provision Webhook. This creates the corresponding extension in PagerDuty and establishes the mapping.
Review PagerDuty Settings in ServiceNow
Review and configure global integration behaviors by navigating to PagerDuty Configuration PagerDuty Settings:
| Settings Category | Options and Descriptions |
|---|---|
| Integration Behavior | - Choose ServiceNow to PagerDuty mapping: Select whether assignment groups map to PagerDuty, or if configuration items and assignment groups map to PagerDuty. Learn more in the Choose How ServiceNow Objects Map to PagerDuty Objects section. - Incident state value to use when PagerDuty resolves an incident: Select the integer value associated with the Resolved state in ServiceNow. Update this field if you use a customized value. - Resolve PagerDuty incident if ServiceNow incident is assigned to a group that does not exist in PagerDuty: Choose whether a PagerDuty incident resolves if assigned to an unmapped group. This applies if some ServiceNow groups do not map to PagerDuty escalation policies. - Create a new PagerDuty user if one is not found with the ServiceNow user’s email: Auto-provision ServiceNow users to PagerDuty when they are assigned to or manage an incident. This action can affect billing. - Do not assign the ServiceNow incident until a PagerDuty user has acknowledged the incident. - Provision current Assignment Group members into PagerDuty when provisioning Assignment Groups: Auto-provisions group members when an assignment group provisions to PagerDuty. - Create PagerDuty Schedule when provisioning Assignment Groups: Automatically creates a schedule for provisioned groups, adding the group manager to the schedule. Additional users must be added in PagerDuty. - Use PagerDuty teams: Enables PagerDuty Teams functionality alongside assignment groups. - Create PagerDuty Team when provisioning Assignment Groups: Automatically creates a PagerDuty team and provisions the group manager, even if group member auto-provisioning is disabled. If no manager is assigned, the user executing the provisioning is set as manager. - Enable Response Mobilizer: Allows you to add responders from the ServiceNow interface. This requires the separately purchased Modern Incident Response add-on product. - Enable Conference Bridges: Allows you to add conference bridge information from the ServiceNow interface. This requires the separately purchased Modern Incident Response add-on product. - Enable Response Play feature (Deprecated): Allows response plays to run from ServiceNow. This feature is deprecated starting with version 7.9; use Incident Workflows instead. - Enable Incident Workflows feature: Allows incident workflows to run from ServiceNow. Learn more in the Incident Workflows documentation. - Enable Status Update Feature: Allows sending status updates to the PagerDuty Status Dashboard from ServiceNow. This requires a Business, Digital Operations (legacy), or Enterprise plan. - Customize PagerDuty Incident Body: Define the body text format for PagerDuty incidents created from ServiceNow using column variables from the incident table and {workNote}. |
| PagerDuty Settings | - Choose ServiceNow to PagerDuty mapping: Your PagerDuty subdomain URL (e.g., yoursubdomain.pagerduty.com).- PagerDuty API access key: The API key used to authenticate with the PagerDuty REST API. - Default Service ID: Paste a seven-character PagerDuty service ID starting with P here, or click Provision default service to generate one.- Default User ID: The account used for API requests when the active ServiceNow user does not exist in PagerDuty. You can input an existing ID or click to provision one. Omitting this field can cause incident creation failures for unprovisioned users. - REST API Endpoint: Leave as the default value: https://api.pagerduty.com. |
| ServiceNow Settings | - ServiceNow user for authentication: The username PagerDuty uses to deliver webhooks. - ServiceNow user password for authentication: The password for the webhook delivery user. - ServiceNow REST endpoint for webhook callback: Defines the path PagerDuty uses to send webhooks. The default value is recommended. |
| Legacy Settings | - Logging verbosity level: Adjust log details for the integration. The default is info. Change to debug for active troubleshooting. |
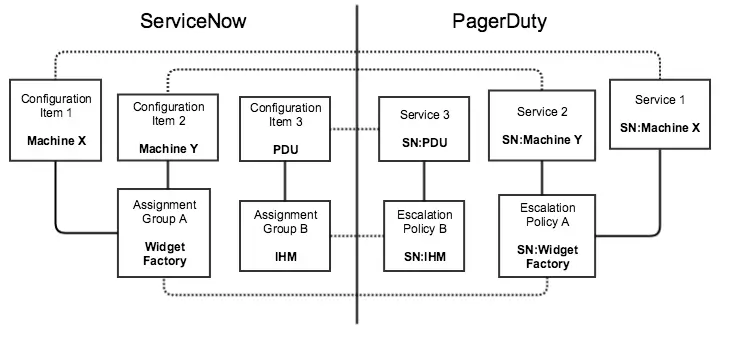
Choose How ServiceNow Objects Map to PagerDuty Objects
The Choose ServiceNow to PagerDuty mapping option supports two structural mappings:
- ServiceNow Assignment Groups map to PagerDuty
- Assignment groups map directly to both a PagerDuty service and a PagerDuty escalation policy.
- ServiceNow Configuration Items and Assignment Groups map to PagerDuty
- Configuration items map to PagerDuty services.
- Assignment groups map to PagerDuty escalation policies.
The following diagram illustrates object mappings when configuration items and assignment groups map to PagerDuty:
Provision From ServiceNow to PagerDuty
To establish a bi-directional sync, you must provision at least one assignment group into PagerDuty. Converted assignment groups create the PagerDuty services and escalation policies where ServiceNow incidents trigger. You can optionally provision configuration items, services, users, and priorities.
Provision Assignment Groups to PagerDuty
Each assignment group corresponds to a PagerDuty escalation policy to ensure correct routing. Provisioned groups receive a default escalation policy, and you can map additional escalation policies to specific ServiceNow incident priorities. Depending on your configuration, certain attributes do not map:
- If assignment groups map directly to PagerDuty, each group receives a PagerDuty escalation, service, and webhook ID. Schedule and team IDs are optional.
- If configuration items and assignment groups map to PagerDuty, each group receives only an escalation ID (and optional schedule or team IDs). The service and webhook IDs map to configuration items instead.
User RequirementThe user executing provisioning actions must have a valid PagerDuty user ID attached to their user record in ServiceNow.
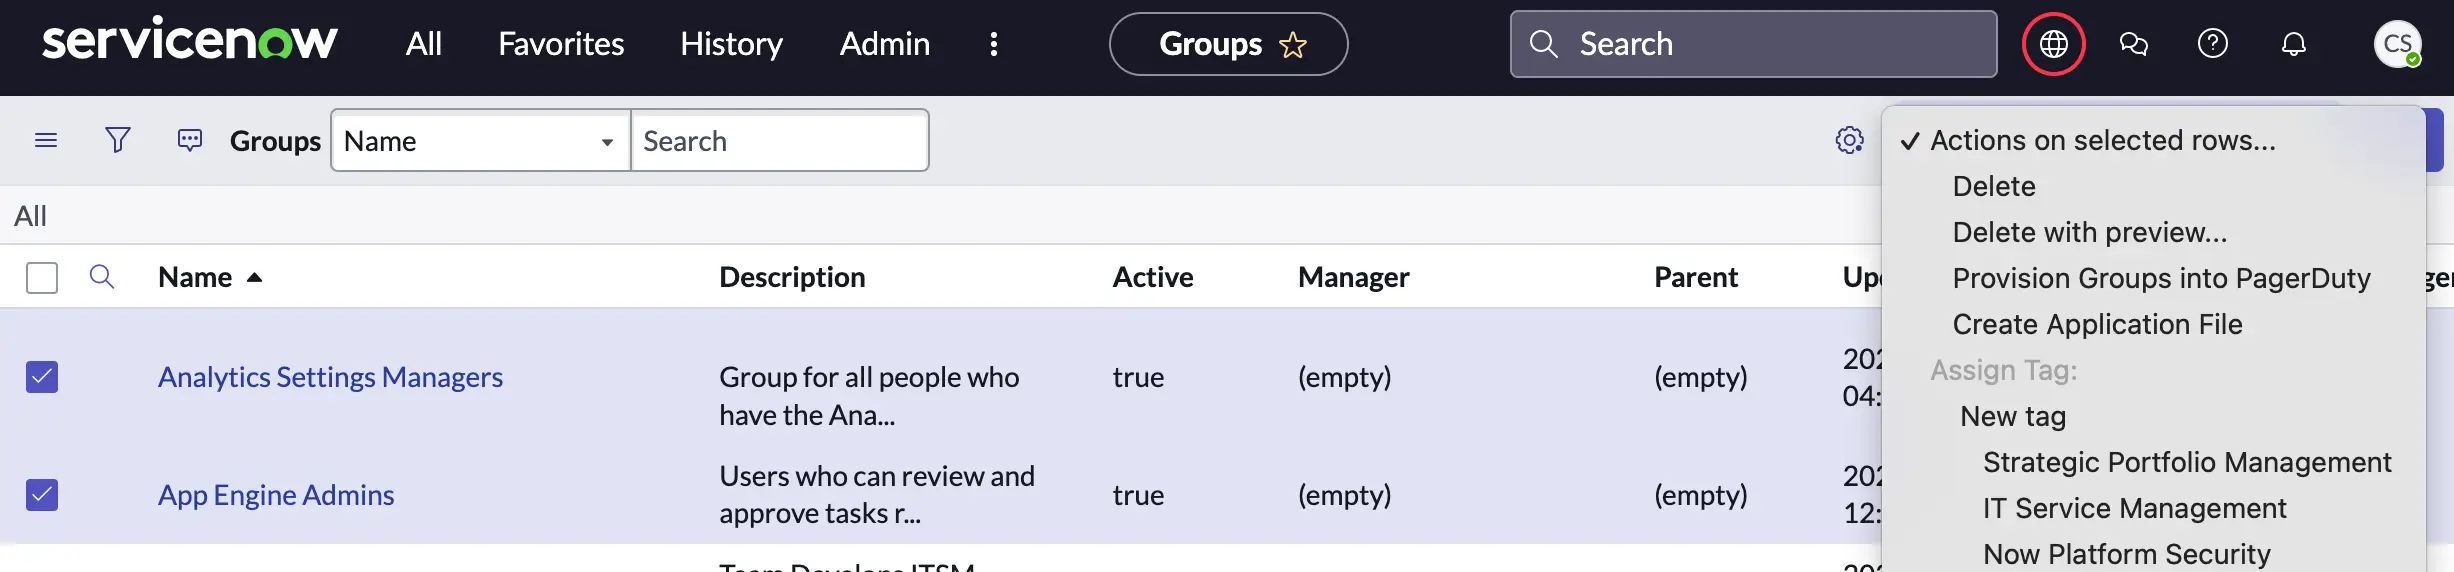
- Navigate to User Administration Groups and click the assignment group you want to provision.
- Click Provision Group into PagerDuty.
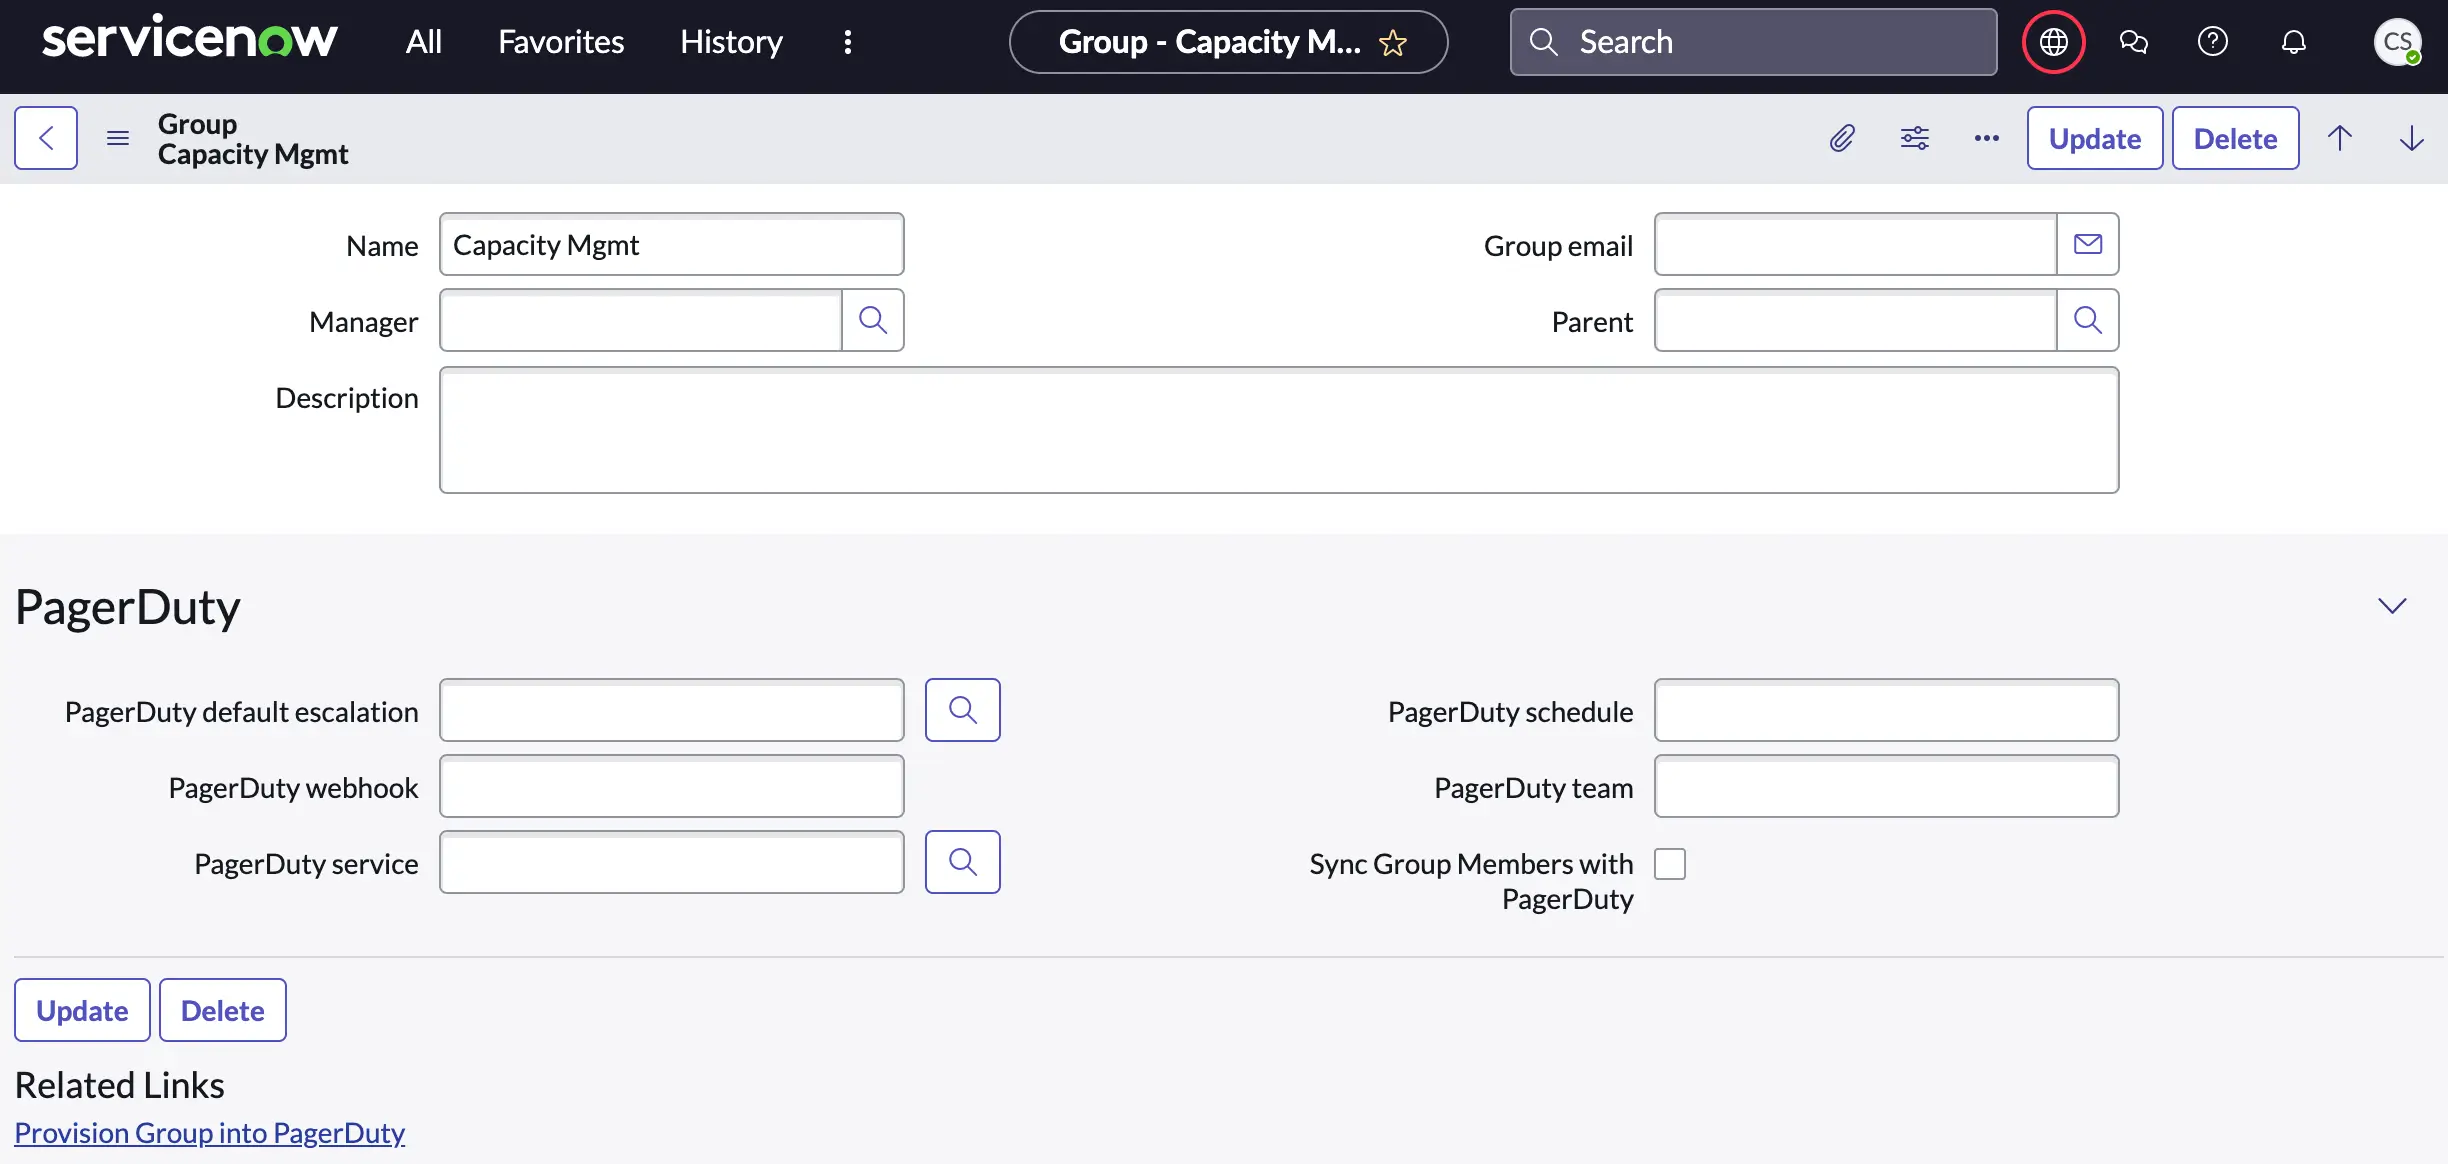
- A notification indicates group creation is underway. When complete, the PagerDuty service, PagerDuty escalation, and PagerDuty webhook fields populate within the record. Schedule and team IDs also populate if enabled in the settings.
- To provision multiple groups at once, navigate to the Groups list view, select the checkboxes next to the desired groups, click the dropdown menu at the bottom of the list, and select Provision Group into PagerDuty.
- Review the Sync Group Members with PagerDuty setting for the provisioned groups. When enabled, the integration checks if new group members have a PagerDuty account. If no account is found, the integration provisions them and adds them to the associated PagerDuty team.
Provision Configuration Items and Users to PagerDuty
Configuration NoteIf you selected Assignment Groups map to PagerDuty in the configuration settings, skip this step. You do not need to provision configuration items.
To provision configuration items and users, follow the instructions in the Advanced ServiceNow Configuration guide.
Step 5: Test the Integration
- Navigate to PagerDuty Incidents in the application navigator and click New.
- Configure the test incident with the following values:
| Field | Value |
|---|---|
| Caller | Select the ServiceNow user mapped to your PagerDuty account |
| Short description | Enter an incident title |
| Assignment Group | Select an assignment group that maps to PagerDuty |
Click Submit.
- Verify that the incident appears in your PagerDuty account under the service mapped to the assignment group. The activity log tracks updates, such as group reassignments.
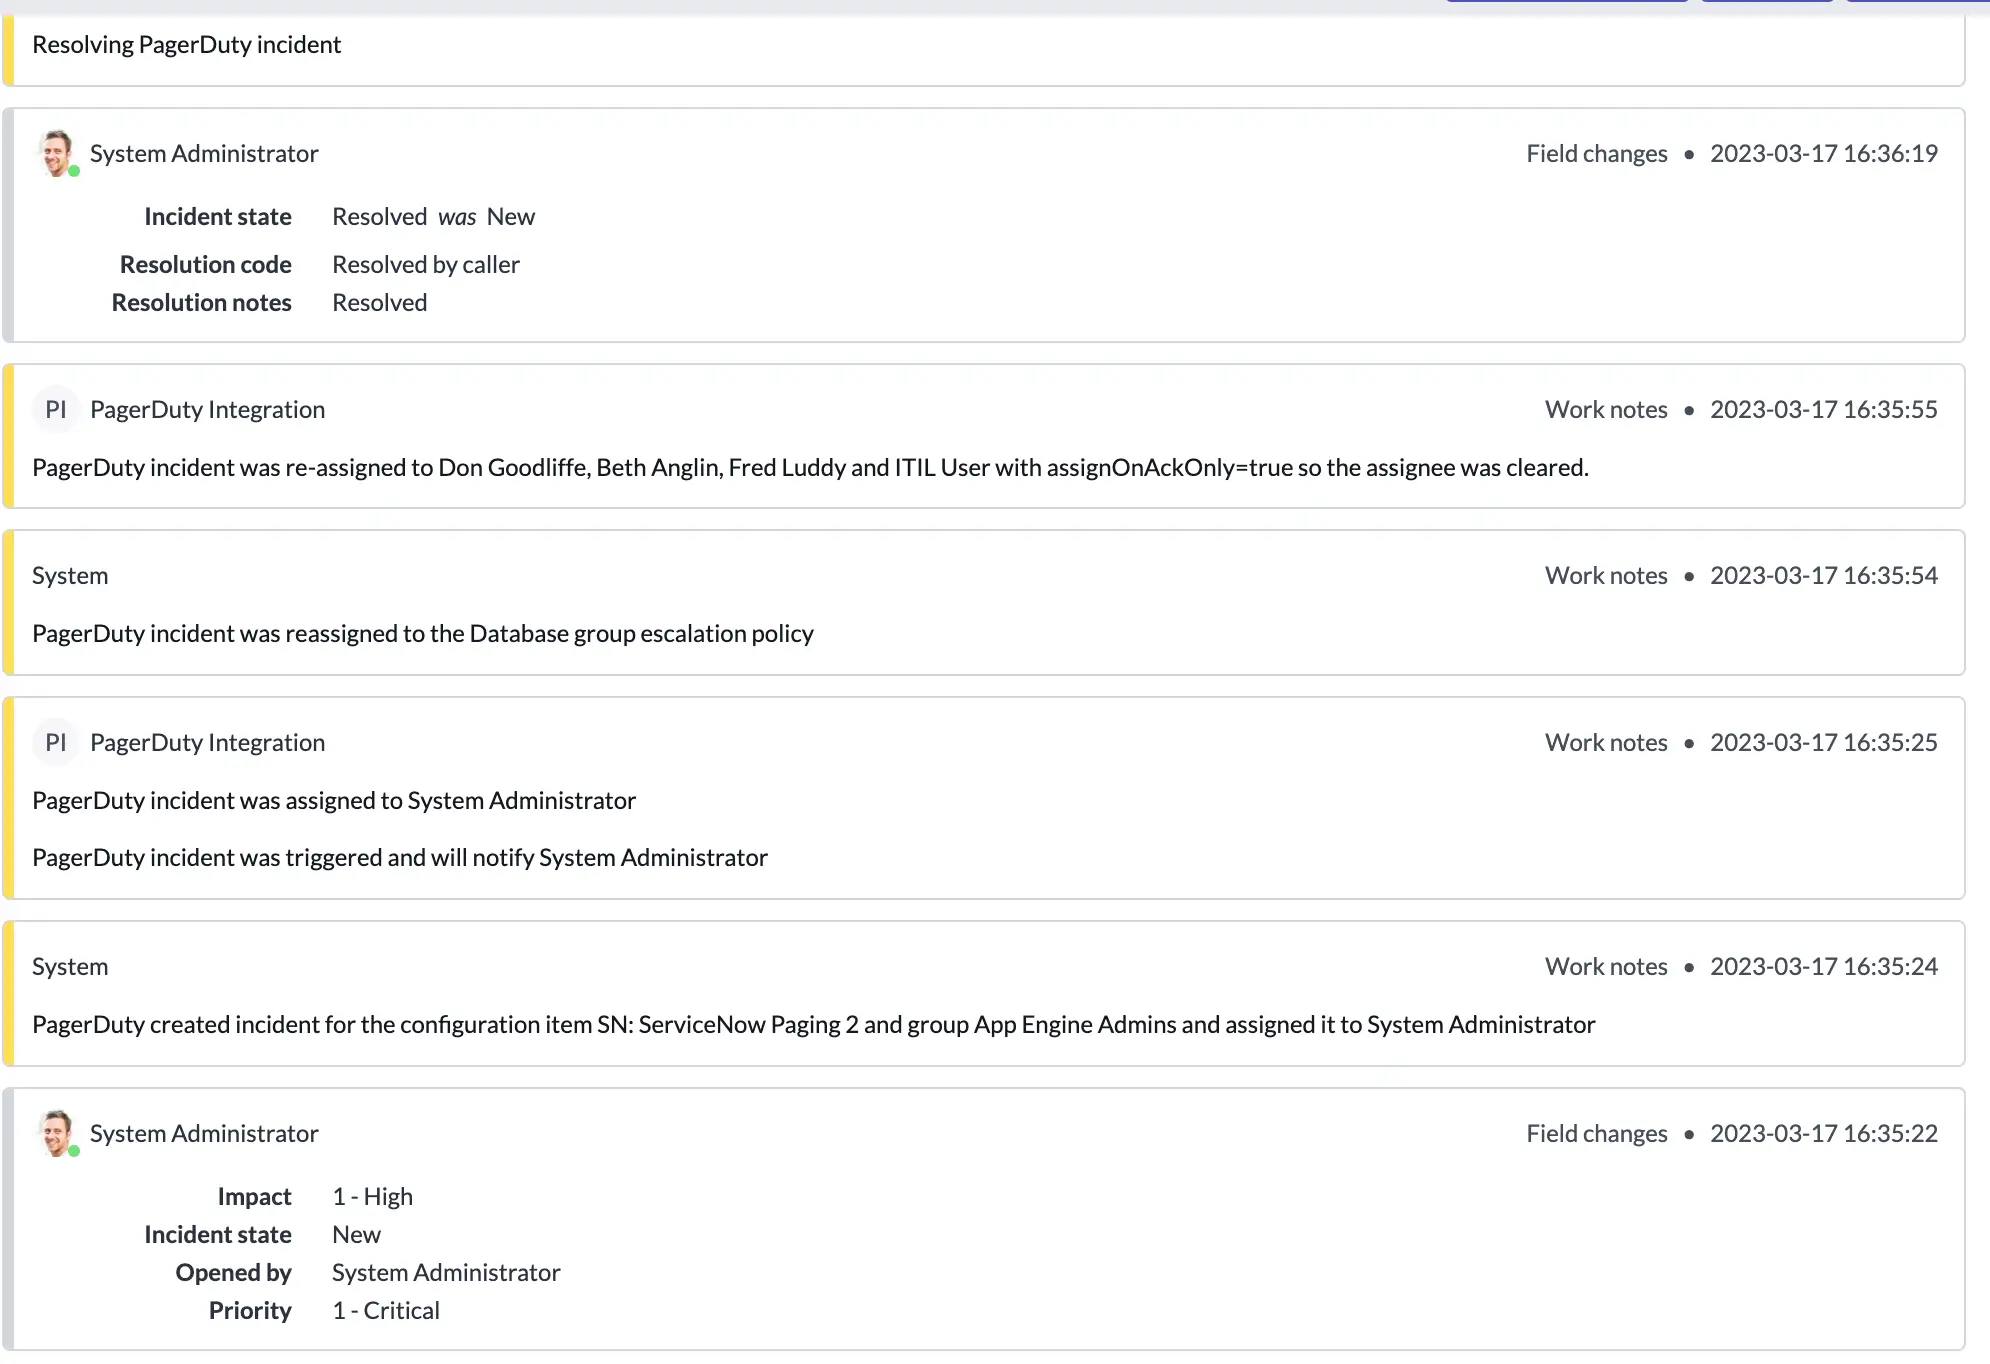
When you resolve the incident in PagerDuty, it resolves in ServiceNow, and vice versa.
To ensure optimal system performance when querying tables, database administrators should index the following columns in ServiceNow:
incident.x_pd_integration_incidentsys_user_group.x_pd_integration_pagerduty_escalationsys_user.x_pd_integration_pagerduty_idcmdb_ci.x_pd_integration_pagerduty_service
ServiceNow User GuideOnce initial configuration is complete, see our ServiceNow User Guide for active operational instructions.
Configure the ServiceNow Change Events Integration
To send ServiceNow change requests to PagerDuty as change events, follow the ServiceNow Change Requests Integration Guide.
Configure Escalation Policy Priority Mapping
You can assign multiple escalation policies to a single assignment group based on incident priority. You can configure this feature via the PagerDuty menu or on an individual assignment group record.
Configure Priority Mapping via the PagerDuty Menu
- Navigate to PagerDuty Map Priority to Escalation Policy and click New.
- Configure the mapping using the following table:
| Field | Value / Instruction |
|---|---|
| Assignment Group | Select the target assignment group |
| Escalation Policy | Select the PagerDuty escalation policy |
| Priority | Select the ServiceNow priority to map |
| Active | Check this box |
Click Submit.
- To deactivate a mapping, return to the Map Priority to Escalation Policy list view, click the status in the Active column, uncheck the Active box, and click Update.
Configure Priority Mapping on an Individual Assignment Group
- Open the preferred assignment group record.
- Select the PagerDuty Escalation Policies tab and click New.
- Configure the mapping using the following table:
| Field | Value / Instruction |
|---|---|
| Escalation Policy | Search for and select the PagerDuty escalation policy |
| Priority | Search for and select the target ServiceNow priority |
| Active | Check this box |
Click Submit.
Author Custom Code for Outbound API Calls
- Navigate to PagerDuty Settings and scroll to the PagerDuty API requests customization section.
- Enter your custom headers, inputting one header per line without quotes (e.g.,
name: value). - Click Save.
Configure a MID Server
MID server support is optional.
- Navigate to PagerDuty PagerDuty Settings.
- Under the PagerDuty API requests customization section, configure the following fields:
| Field | Value / Instruction |
|---|---|
| Use MID Server | Check this box |
| Set MID Server | The default MID server auto-populates |
| ECC parameters | Enter your parameter values |
- Click Save.
Upgrade Your PagerDuty Integration
- Revert app customizations prior to upgrading, as the upgrade path does not patch modified files. Capture customizations in an update set and store a copy for reference before reverting to out-of-the-box versions.
- Upgrade the PagerDuty application to the newest version in the ServiceNow Store.
- Navigate to System Diagnostics Upgrade History and select the PagerDuty upgrade log.
- Review the Skipped Changes to Review tab. For any Priority 1 or Priority 2 high-priority files, click the File name and select Revert to Base System on the details page. This overrides the local customizations that prevented the upgrade. Leave lower-priority skipped files as they are.
- Navigate to the PagerDuty Settings page and run both Test REST API Connection and Test ServiceNow User Authentication to confirm a
success (200)status code. - Run the Migrate Webhooks to v7 script.
- Run the MIGRATE Escalation Policies to… script to migrate mappings into the new table with empty priority values for default escalation policies.
- Review your captured update set and reapply required customizations.
Updated about 2 months ago