
Alerts
Learn how PagerDuty handles alerts from events, and how to manage alerts for effective responses and noise reduction
When PagerDuty receives a qualifying event (for example, from a monitoring tool), it triggers an alert, which then triggers an incident. You can aggregate multiple alerts into a single incident for triage, which streamlines incident handoff between teams, centralizes critical information, and reduces notification fatigue. Alerts can move from one incident to another either manually or automatically via Alert Grouping. You can also suppress or deduplicate alerts via Event Orchestration.
Create Alerts
Alert BehaviorSomeone must be on-call per the service's escalation policy to create a triggered alert. If an event with a trigger event action is received but the service does not have an on-call user at that time, the event is dropped and does not create an alert. You cannot audit or view dropped events.
Inbound events submitted via the Events API, or via Events API-based integrations, create alerts. You cannot manually create an alert in PagerDuty.
In the most basic terms, events create alerts, and alerts create incidents. The following diagram details this flow:
- Monitoring tools send events to PagerDuty.
- PagerDuty triggers an alert.
- PagerDuty associates the alert with an incident.
- Incident creation sends out notifications.
- Users receive notifications.

Alert and incident creation flow
Incidents That Do Not Create AlertsIncidents created via any of the following processes do not generate alerts:
Event Orchestration, suppression, and other alert-related features are not applicable to these incidents.
Alerts and Incident Titles
When PagerDuty creates an alert, it creates an accompanying incident with the same title as the alert. As additional alerts are added — either manually or automatically via Alert Grouping — the incident's title does not change. It keeps the title from the original alert. You can manually edit an incident's title at any time. You cannot edit alert titles.
View Alerts
You can review incident-associated alerts in the PagerDuty web app or mobile app. For an overview of all alerts, refer to the Alerts Table article.
View Alerts in the Web App
- Navigate to Incidents and select an incident's Title to go to its details page.
- Select the Alerts tab. Here you can review information about all alerts grouped under the incident and toggle Show/Hide Details for each alert.
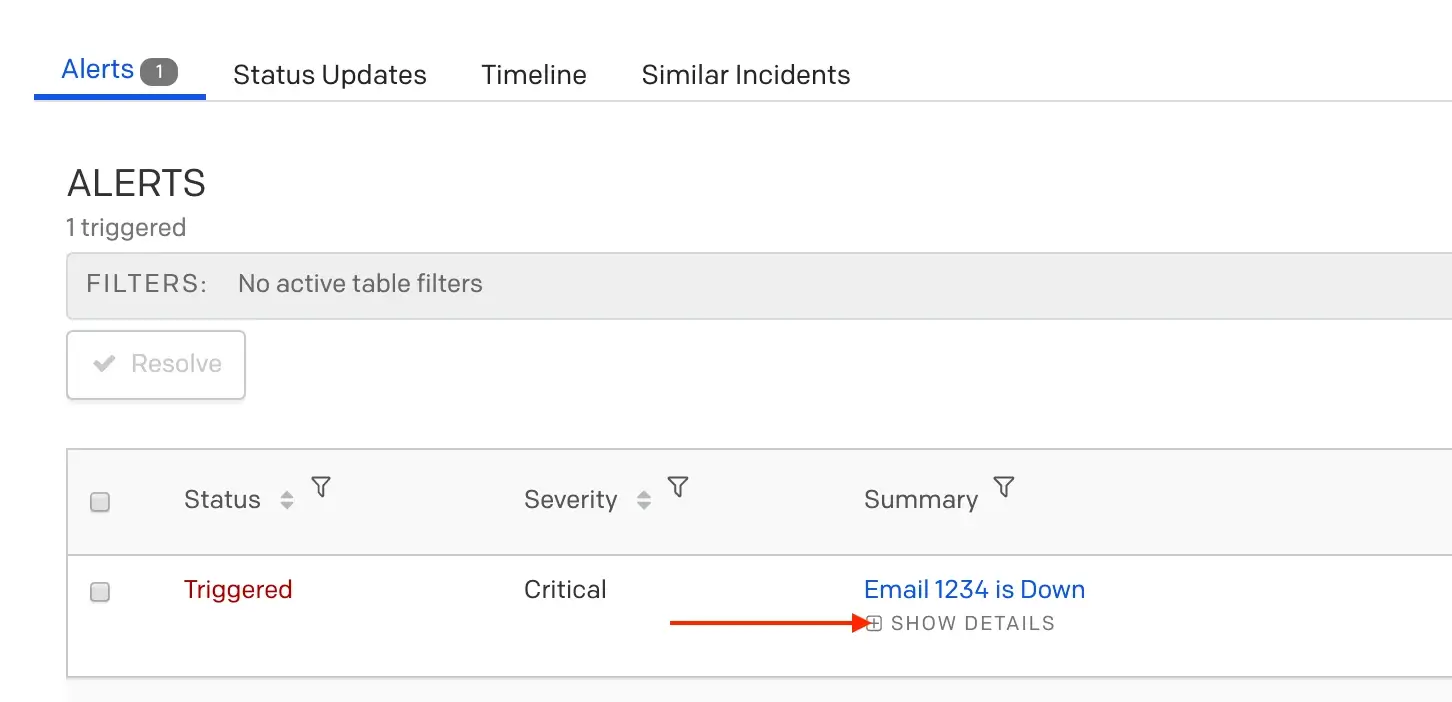
Show alert details
- Select an alert's Summary for a more detailed view. The Alert Log shows information about when the alert triggered, how it was processed, and any deduplicated alerts.
View Alerts in the Mobile App
- On the Incidents screen, select an incident.
- On the incident details screen, scroll down to the Alerts section and select an alert.
View Deduplicated Alerts
While an incident is unresolved, any subsequent alerts with a matching dedup_key deduplicate into the original alert.
The following is an example of the Alert Log showing a deduplicated alert:
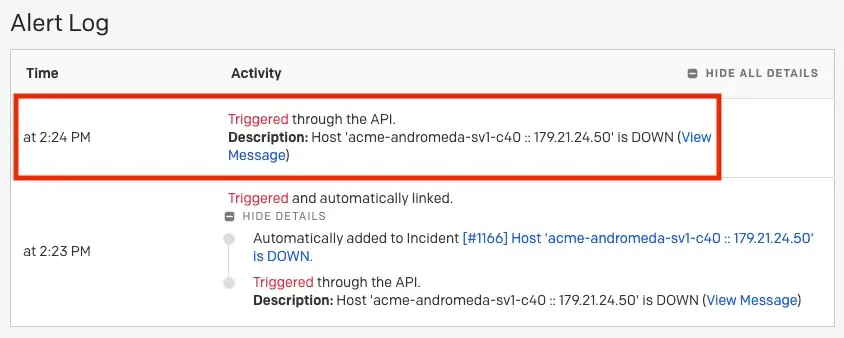
Deduplicated alert
Refer to the Alert Deduplication developer documentation for more information.
Move Alerts to Another Incident
You may want to move alerts to another incident to better organize related issues or correct misclassified alerts — for example, moving alerts that were grouped separately but represent the same underlying problem, or relocating alerts incorrectly associated with an unrelated incident during triage.
Manually Move Alerts to a New Incident
- Navigate to the incident's details page and scroll to the Alerts section.
- Select the checkbox next to the alert you want to move, then select Move Create new incident.
- In the modal, review the new incident details. Click Edit Incident to make changes, or click Create incident to proceed.
Manually Move Alerts to an Existing Incident
From the Incident Details Page:
- Navigate to the incident's details page and scroll to the Alerts section.
- Click an alert's Summary, then click Move to Another Incident.
- Enter the existing incident's number and click Find Incident.
- Click Move Alert.
From the Alerts Table:
- Navigate to Incidents Alerts.
- Click an alert's Summary, then click Move to Another Incident.
- Enter the existing incident's number and click Find Incident.
- Click Move Alert.
Alert Grouping
Refer to Alert Grouping for more information about how to aggregate alerts and reduce noise.
Alert Suppression and Deduplication
Refer to Event Orchestration for more information on alert suppression and deduplication.
Resolve Alerts
Alerts have two states only: triggered and resolved. You can resolve alerts manually or via the API. Resolving all alerts under an incident resolves the incident. Resolving an incident resolves all alerts under that parent incident.
Resolve via Events APIWhen sending an event with the resolve event action, the event must have the same
dedup_keyas the trigger alert to resolve the alert.If a matching
dedup_keyvalue is not found in an existing alert, the resolve event is dropped. You cannot audit or view dropped events.
Resolve Alerts in the Web App
- Navigate to Incidents and select the Title of an unresolved incident.
- On the incident details page with the Alerts tab selected, select the checkbox next to the alert you want to resolve. To select all alerts, select the checkbox in the header row.
- Click Resolve.
Resolve Alerts in the Mobile App
- On the Incidents screen, select an incident.
- On the incident details screen, scroll down to the Alerts section and select an alert.
- Tap Resolve.
Updated about 2 months ago