
Custom Fields on Incidents
Customize metadata fields for streamlined tracking and standardized information display.
The Custom Fields feature allows you to:
- Enrich PagerDuty incidents with critical and helpful metadata throughout the incident lifecycle.
- Flexibly define your preferred data.
- Standardize what information your incidents display.
- Aggregate data from several existing systems and populate that information during incident response.
AvailabilityThis feature is available with the Business, Enterprise for Incident Management, and Digital Operations (Legacy) pricing plans. Contact Sales to upgrade.

Custom Fields overview
Configure Custom Fields
Create a Custom Field
After creating an Incident Type, you can add custom fields to that type. Because Incident Types use inheritance, custom fields become available to that specific incident type and to its children.
Custom Fields AvailabilityCustom field limits are determined by your plan and the incident type. Please note that disabled custom fields do count toward these limits.
Plan Base Incident Type Limit Total Custom Fields Limit Business /
Ops Cloud Essentials15 Fields 45 Fields EIM /
Ops Cloud Plus/Ultimate100 Fields 130 Fields How Limits Work
Each plan has a set number of fields available for the Base Incident Type. You can then add additional custom fields to other Incident Types until you reach your account's total field limit. Each individual Incident Type has a maximum limit of 15 custom fields.Example: If your plan allows for 15 fields on the Base Incident Type and 45 fields total:
You have 30 fields remaining to use across other types.
- You can add up to 15 fields per type (e.g., 15 for "Major Incident" and 15 for "Security Incident") until you hit that 45-field account total.
Required User PermissionsAdmins and the Account Owner can create, edit, and delete fields.
- Navigate to Incidents Incident Types.
- Select an Incident Type, or create a new Incident Type.
- With the Fields tab selected, click New Field.
- Enter the following information:
| Field | Instructions |
|---|---|
| Display Name | Enter a logical name for the field that will display on incidents. |
| Field Name | Enter a name for use when referencing this field in the API. This field can only contain lowercase letters, numbers, and underscores. You cannot change this value after initial creation. |
| Description | Enter a description to help responders understand what this field is or how they should use it. |
| Field Type | Select a data type (for example, Text, Single Select, Multi Select). You cannot change this value after initial creation. |
| Set a Default Value (Optional) | Pre-populate the field for new incidents to show a default value. This value does not apply to past incidents. |
| Enable Field | Select Enable or Disable. |
- Click Create Field. Repeat these steps for each additional field needed.
Edit a Custom Field
- Navigate to Incidents Incident Types.
- Select the Incident Type for which you want to edit the custom field.
- To the right of the custom field, click Edit.
- Edit the details.
- Click Update Field.
Disable a Custom Field
When you disable a field, it is no longer editable on new or existing incidents. Existing values remain visible on the incident details page. Disable fields when you want to maintain existing data but no longer need to collect new values.
- Navigate to Incidents Incident Types.
- Select the Incident Type for which you want to disable a field.
- To the right of the custom field, click Disable.
- In the confirmation modal, click Disable.
Delete a Custom Field
Deletion WarningDeleting a field from an Incident Type permanently deletes the field for all Incident Types. It also removes the field and its values from existing incidents. This action cannot be undone.
- Navigate to Incidents Incident Types.
- Select an Incident Type.
- To the right of the field, click Delete.
- In the confirmation modal, click Delete.
Field Types
You can specify the field data type when you add a Custom Field. Data types help standardize and validate field data, preventing incorrect data from being entered. The following field types are available:
- Text
- Single Select
- Multiple Select
- Tag
- URL
- Checkbox
- Datetime
- Decimal
- Integer
- Paragraph
Custom Field Limits by TypeThe following table shows the maximum character and quantity limits for each custom field type:
Field Type Max Characters Max Quantity of Fields Text 255 100 Single Select 100 100 Multiple Select 100 5 (100 selectable values) Tag 255 5 (55 selectable values) URL 500 10 Checkbox 2 100 Datetime 10 100 Decimal 10 100 Integer 5 100 *Paragraph 2,000 5 *indicates new field type
Additional Requirements
- Single Select and Multiple Select: Can have a maximum of 100 options each. Multiple Select fields support up to 200 option selections.
- URL: Only absolute URLs are allowed, and they must use one of the following schemes: http, https, tel.
- Datetime: Values must conform to either full-date or date-time RFC3339, section 5.6. Examples of supported values:
2022-03-14,2019-08-28T10:43:05Z.
Child Incident Types & Field LimitsField limits apply per hierarchy branch, not per individual incident type.
Each top-level incident type (including children of the base incident) starts its own hierarchy with independent limits
Fields on a parent type consume the limit for that entire branch (the parent + all its descendants)
Sibling branches maintain separate limits and do not affect each other
Example: If a base incident has 5 paragraph fields, the limit is maxed for that branch. However, if the base incident has 0 fields, a child type like "Major Incident" can use all 5 fields across itself and its children, while a sibling "Security Incident" branch gets its own separate 5-field allowance.
View Custom Fields
Required User PermissionsUsers with permission to view and edit an incident can also view and edit that incident's Custom Fields.
View Custom Fields in the Web App
Navigate to an incident's details page and scroll to the Custom Fields section.
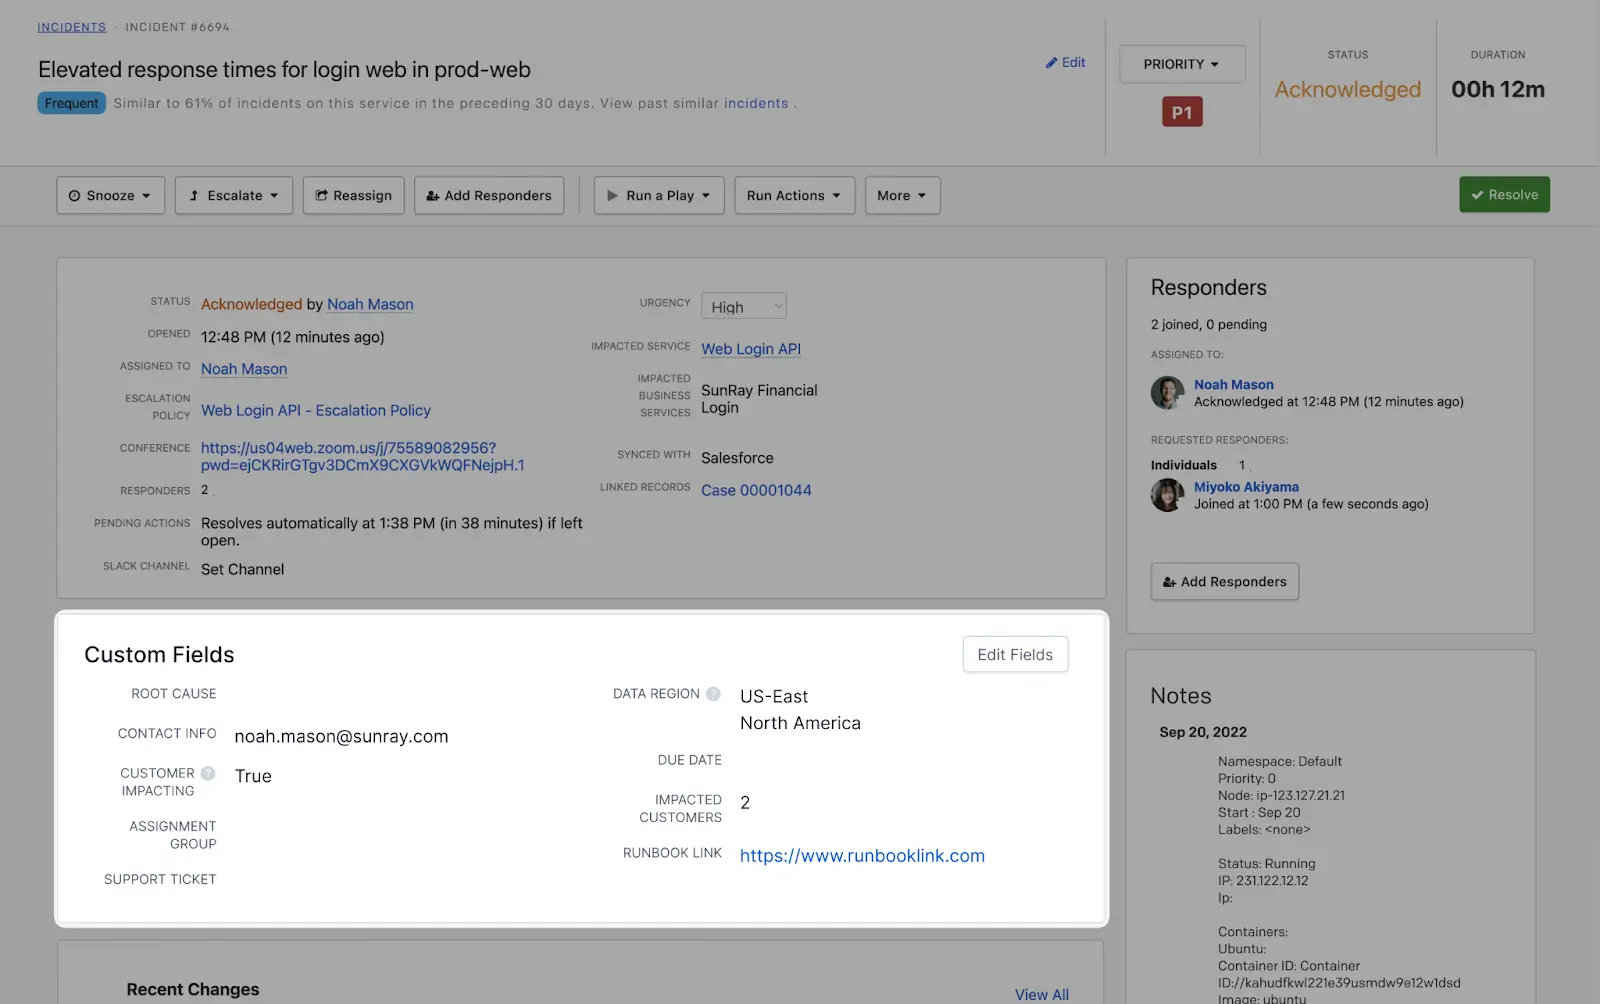
Custom fields in the web app
Edit Custom Field Values in the Web App
Custom Fields with default values are prefilled. Fields without default values may be left empty for the responder to fill in during incident response.
- Navigate to an incident's details page.
- Click Edit Fields in the Custom Fields section.
- In the right pane, enter your desired value(s) for each Custom Field.
- Click Save.
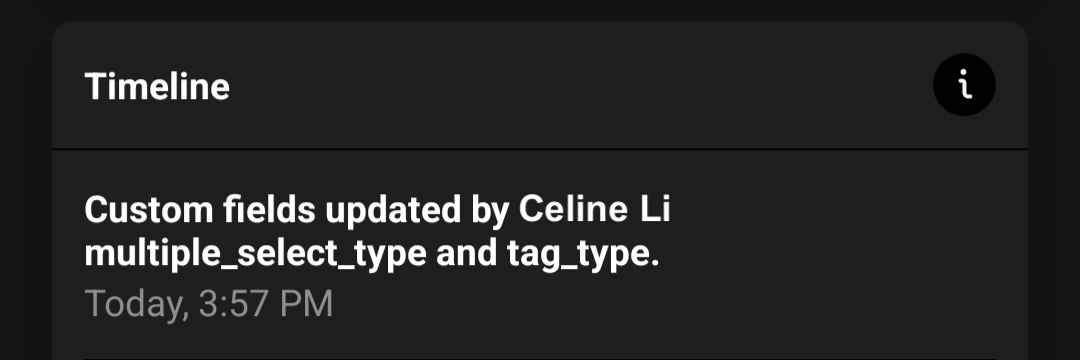
When a responder updates a Custom Field's value, a log entry is added to the incident's timeline.
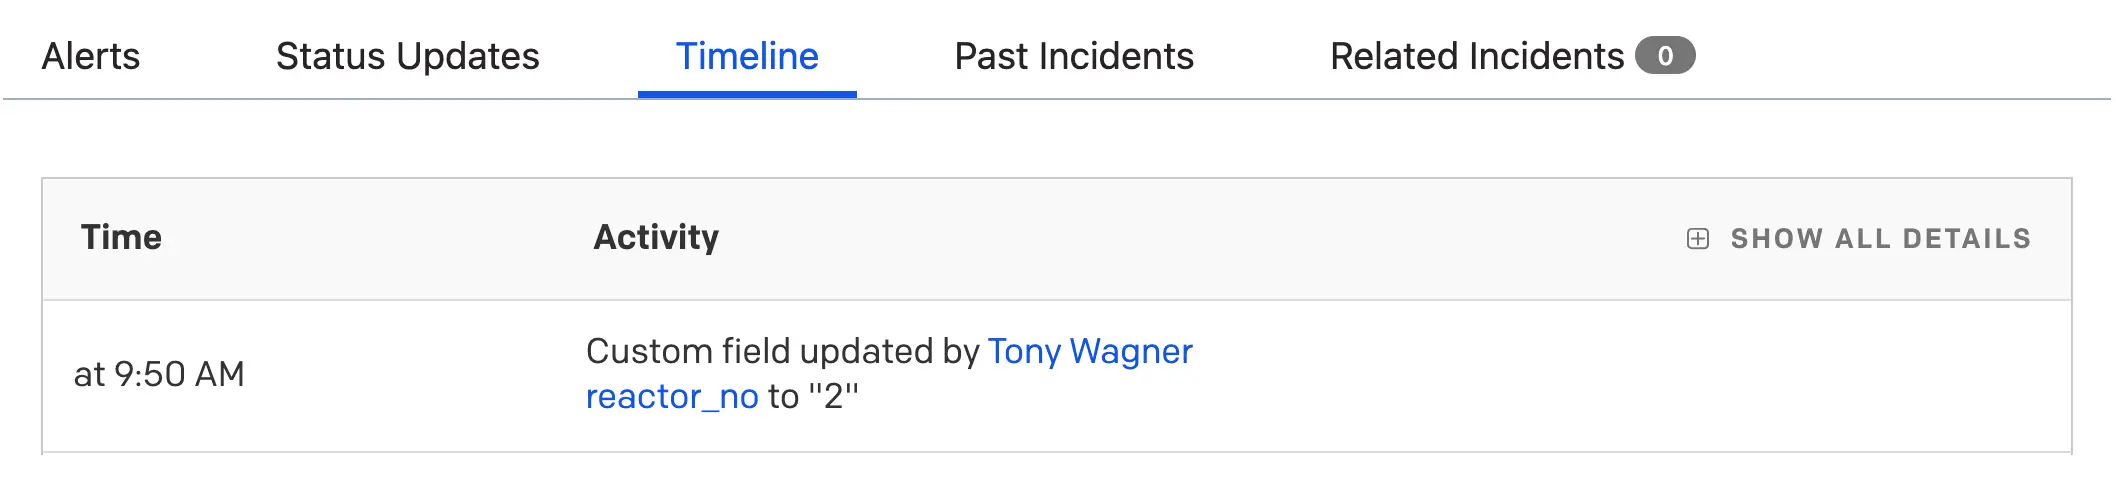
Custom field update in the incident timeline
View Custom Fields in the Mobile App
For incidents with Custom Fields defined, you can view them on the incident's details screen under the Triage tab:
- On iOS, scroll to the Custom Fields section.
- On Android, scroll to the Incident Type section (for example, Security Incident or Major Incident). An i icon indicates the custom fields.
If there are more than three Custom Fields defined, tap Show More to expand the section and view all fields.
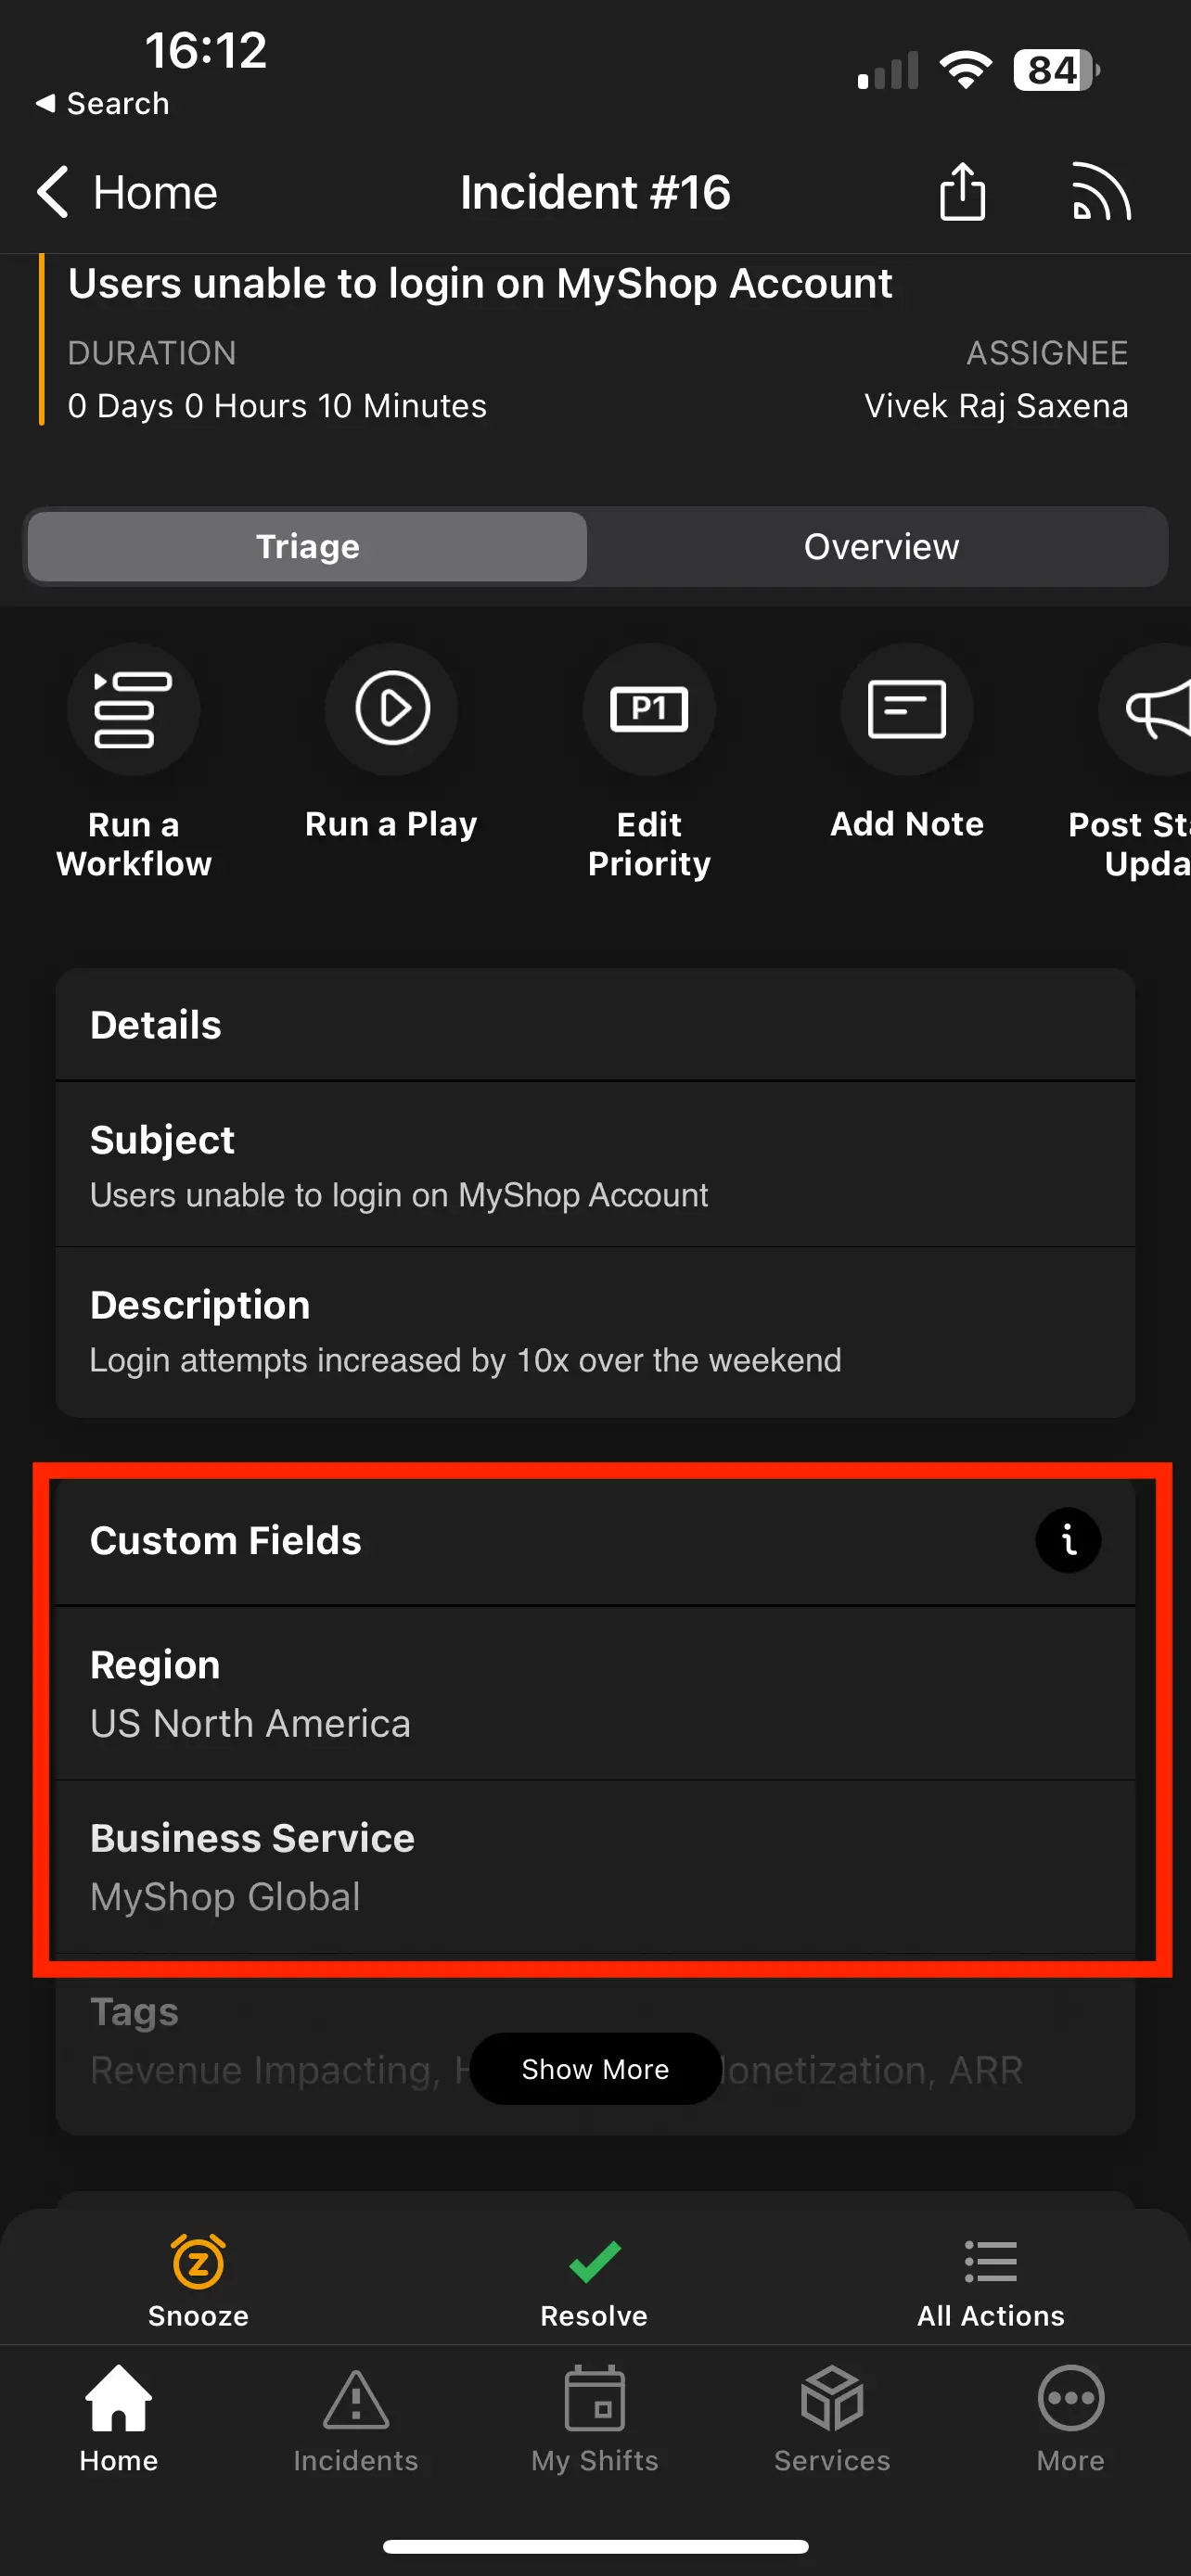
Custom fields in the mobile app
Edit Custom Field Values in the Mobile App
- Tap an incident to navigate to its details page.
- Under Custom Fields (iOS) or under the Incident Type section (Android), tap Edit Custom Fields.
- Enter your desired value(s) for each Custom Field.
- Tap Save.
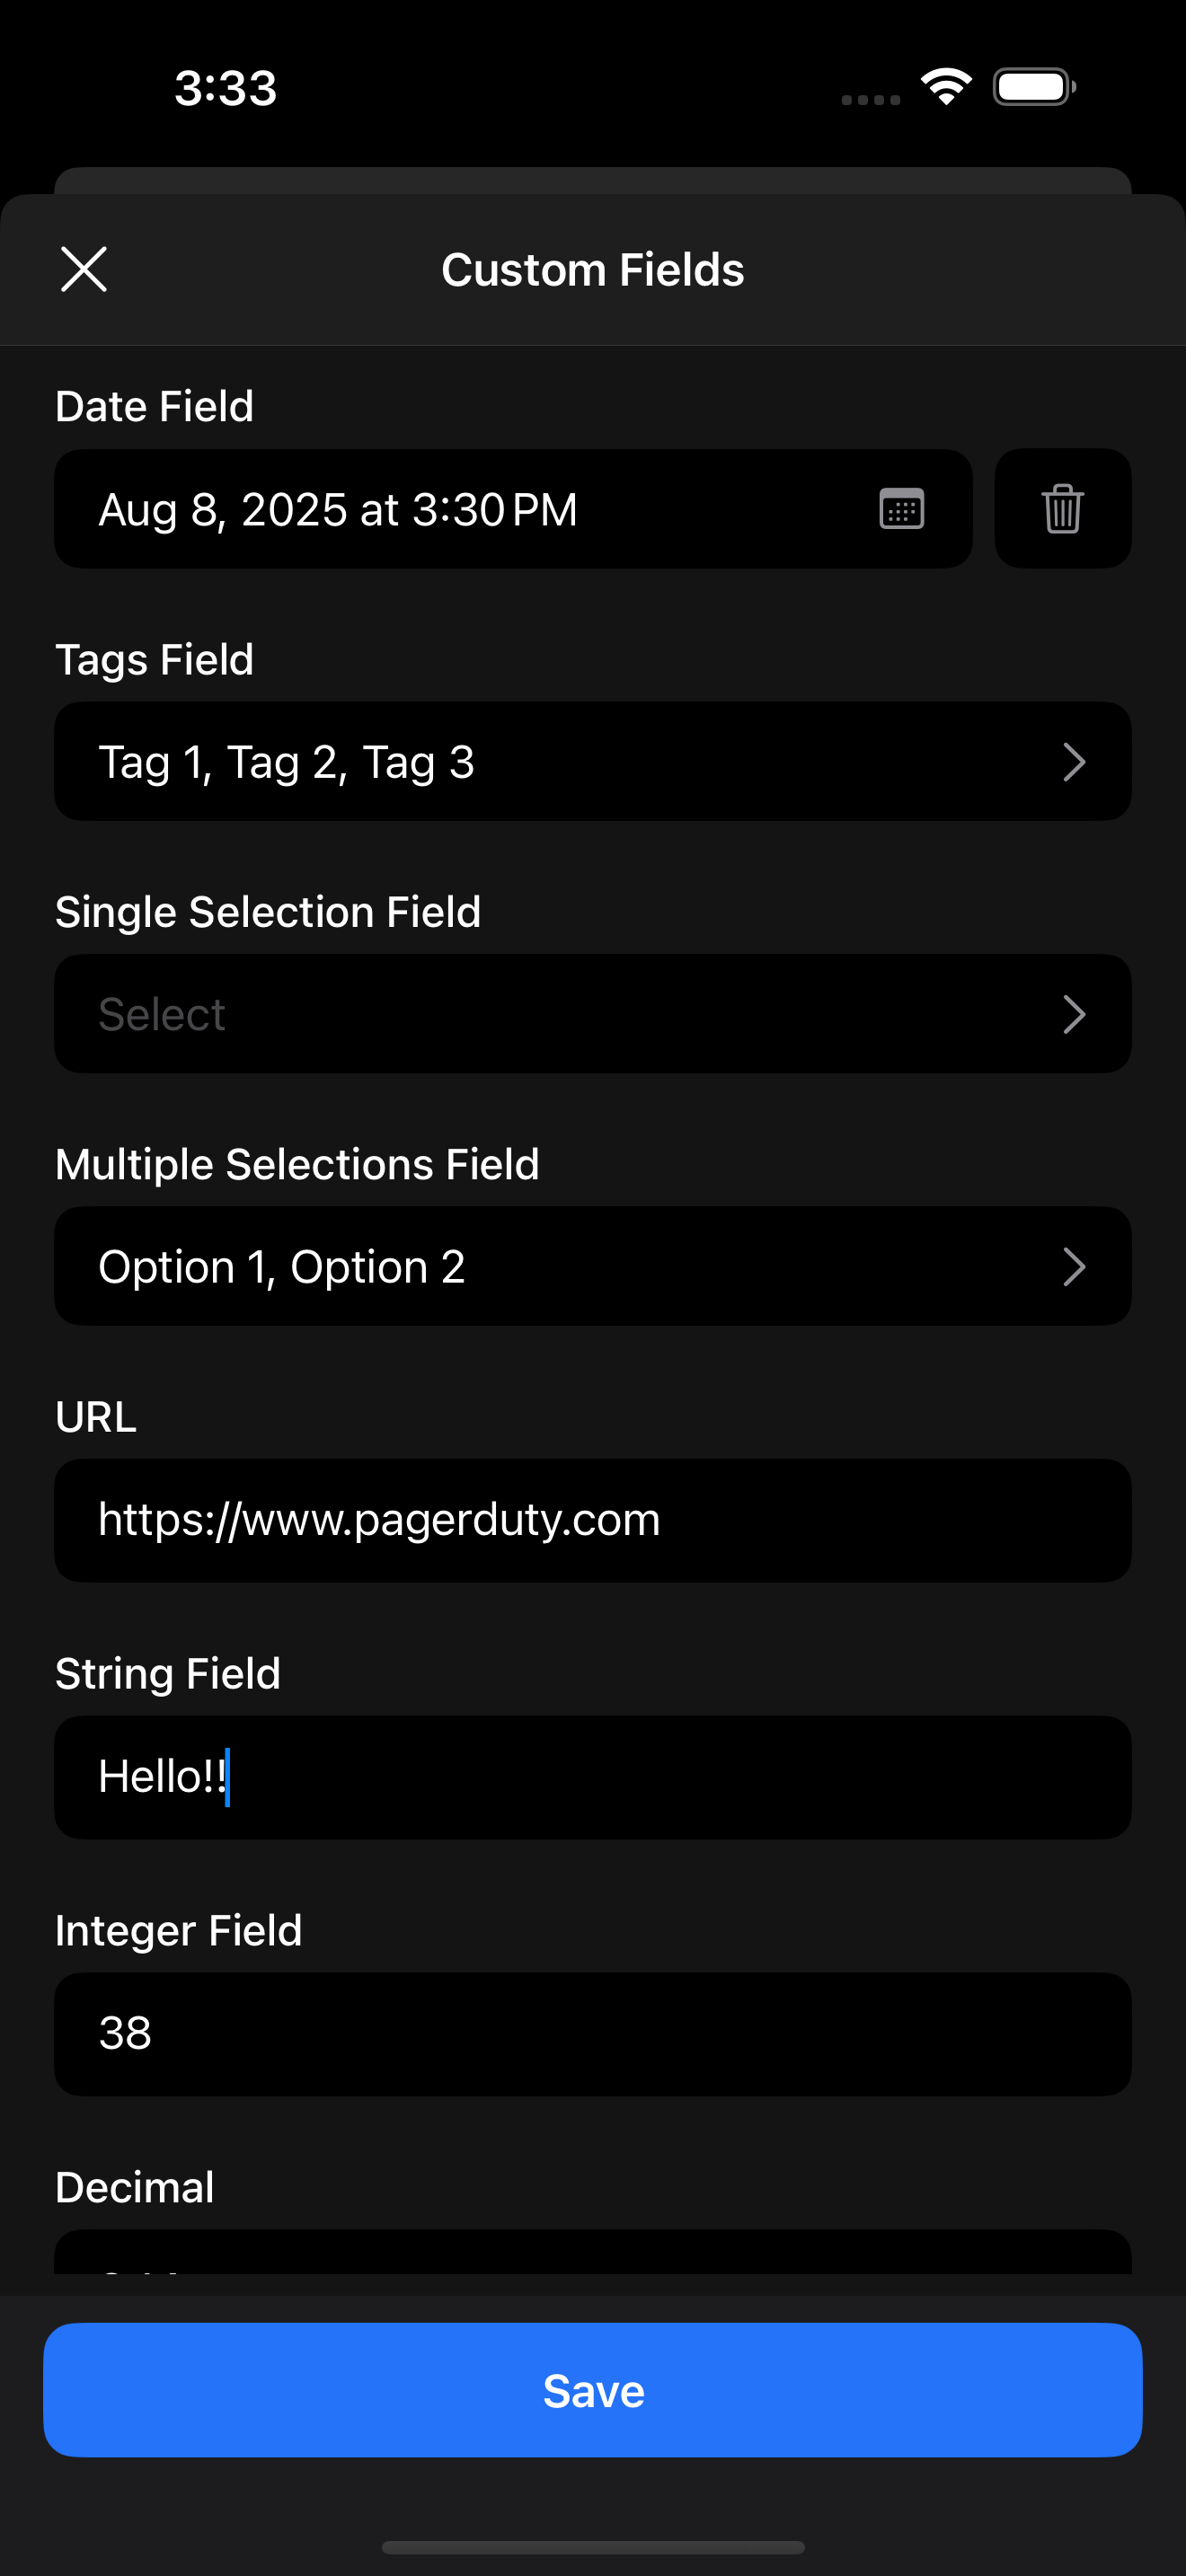
Edit Custom Field values in the mobile app
When a responder updates a Custom Field's value, a log entry is added to the incident's timeline.
Custom field update in the mobile app incident timeline
FAQ
What happens to active incidents if I add or remove a Custom Field?
Custom Fields apply across all incidents on an account. If you create a new Custom Field, it appears on all incidents previously created in your account. If you delete a Custom Field, it no longer appears on any incidents.
When adding a new field, default values do not apply to previously created incidents — those incidents will have null values.
How many Custom Fields can I create?
Customers on a Business pricing plan can create up to 15 active Custom Fields on incidents. Customers on an Enterprise for Incident Management plan can create an additional 15 Custom Fields, for a total of 30.
Contact the Sales team to upgrade to a plan with more Custom Fields.
How can I analyze or run a report on Custom Fields data?
Custom Fields are supported in the Incident Activity report and can be added as additional columns to the report.
How can I sync PagerDuty Custom Fields with ServiceNow incident record fields?
Refer to Custom Field Mappings for more information on bidirectionally syncing PagerDuty Custom Fields with ServiceNow incident record fields.
How can I set Custom Field values with Event Orchestration?
Refer to Event Orchestration for more information.
How can I update Custom Field values with Slack?
Refer to the Slack User Guide for more information.
How can I update Custom Field values with Microsoft Teams?
Refer to the Microsoft Teams User Guide for more information.
Updated about 1 month ago