
Incident Priority
Establish an incident classification scheme and assign incident priorities for effective triage
Incident priority allows you to classify incidents by priority levels. Just as alerts can have different severity levels and notifications can have different urgency levels, incidents can be classified into different priority levels. Priority labels are customized on a per-account basis, so you can configure the priority scheme in PagerDuty to match the scheme you may already use in other tools.
- Establish an Incident Classification Scheme
- Configure Incident Priority
- Prioritize an Incident
- Disable Incident Priority
Establish an Incident Classification Scheme
Before configuring incident priority, establish an incident classification scheme. Your scheme establishes a common language and criteria for communicating about incident levels and response elements. This information is ideally shared organization-wide — not just for technical responders and support staff, but for any part of your organization that may need to be aware of incidents and occasionally participate in response.
- List the incident classification levels: This is usually P1 through P5 (for priority) or SEV-1 through SEV-5 (for severity). Typically, the lower the number, the higher the impact (P1 is more important than P5).
- Define what each level means: Describe the impact and characteristics that apply to each level. These guidelines must be clear and objective enough that responders can accurately assess an open incident and assign it to a level. Incidents may be upgraded or downgraded as the situation evolves.
- Define the expected response: For each classification level, identify the expected scope and response urgency. Some organizations also maintain formal or informal service-level agreements at each level.
For more information and examples, refer to Severity Levels in the Incident Response Guide.
If your organization does not have an incident classification scheme, defining a limited number of levels is essential for effective triage and major incident response. If you have more than five classification levels, consider how many levels would benefit your organization in practice — the more levels you have, the more complex and time-consuming triage becomes.
TipThe Incident Priority feature does not allow any of the five levels to be blank. If your organization uses fewer than five classification levels, enter
---for any unused levels.
Configure Incident Priority
After establishing your incident classification scheme, configure the levels in PagerDuty.
Required User PermissionsThe Account Owner and Admins/Global Admins can configure and edit incident priority levels.
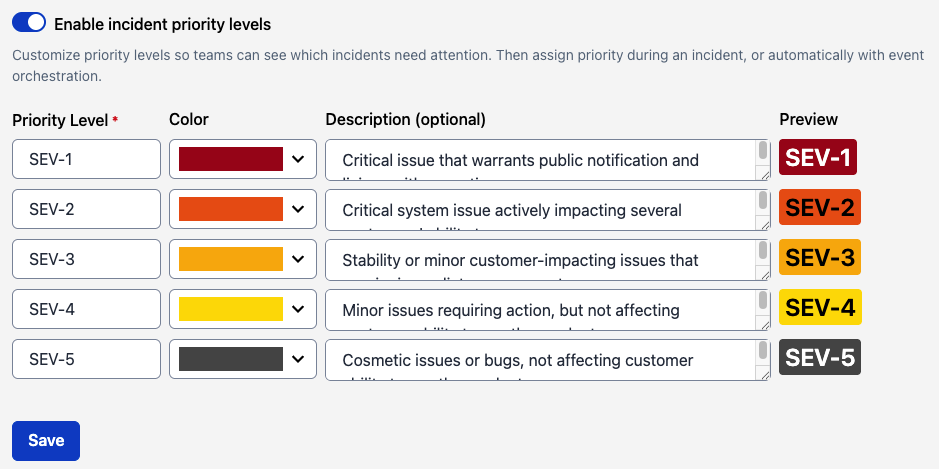
- Navigate to User Icon Account Settings Incident Settings tab.
- Toggle Enable incident priority levels to the on position.
- Under Incident Priority, customize your five priority levels using the following fields:
| Field | Description |
|---|---|
| Priority Level | Typically P1–P5 or SEV-1–SEV-5. |
| Color | Color labels draw attention to the most important incidents. Use distinctive colors for levels corresponding to major incidents. For example, red and orange for the two highest levels, and blue and gray for lower-priority levels. |
| Description (Optional) | Describe the incident impact and characteristics that apply to each level. Guidelines must be clear and objective enough that responders can accurately assess an open incident and assign it exactly one level. |
- Click Save.
Configure incident priority
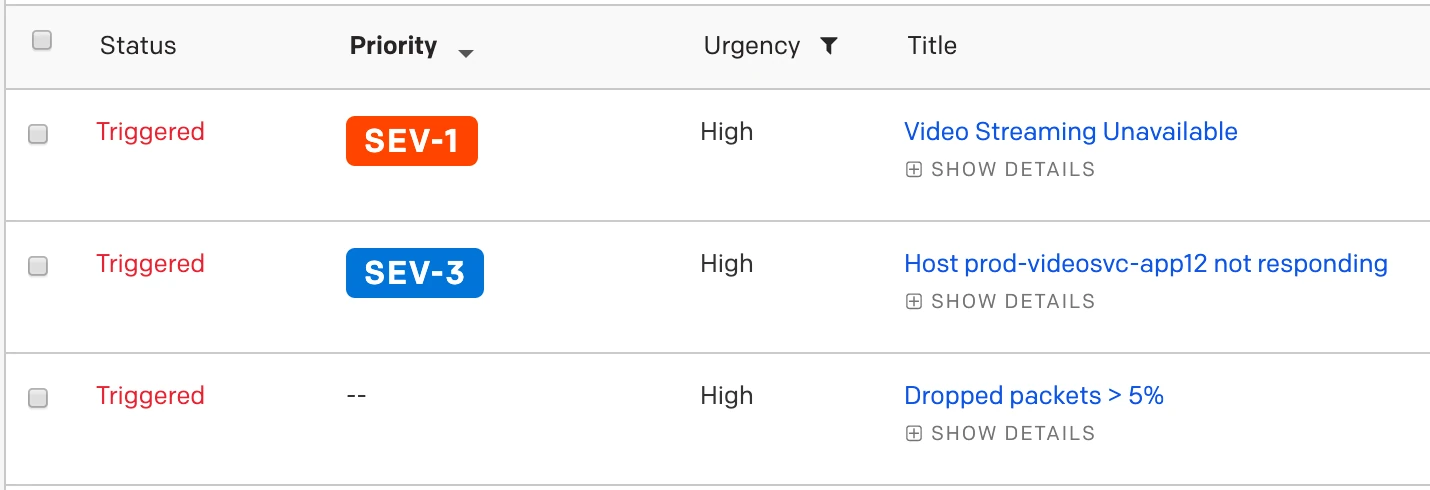
Priority is displayed on the Incidents page and on an incident's details page in both the web and mobile apps.
Prioritize an Incident
Setting incident priority drives decisions around the response process and provides valuable context for responders. You can set priority at incident creation or after the incident has been triggered.

Prioritize an incident during triage
Priority is also displayed on the incident dashboard. You can sort incidents by priority to see critical issues across a single team or your entire organization:
View incident priority
Set Incident Priority Using the Web App
At Incident Creation
- Navigate to the Incidents page.
- Click New Incident.
- Select your desired priority level from the dropdown.
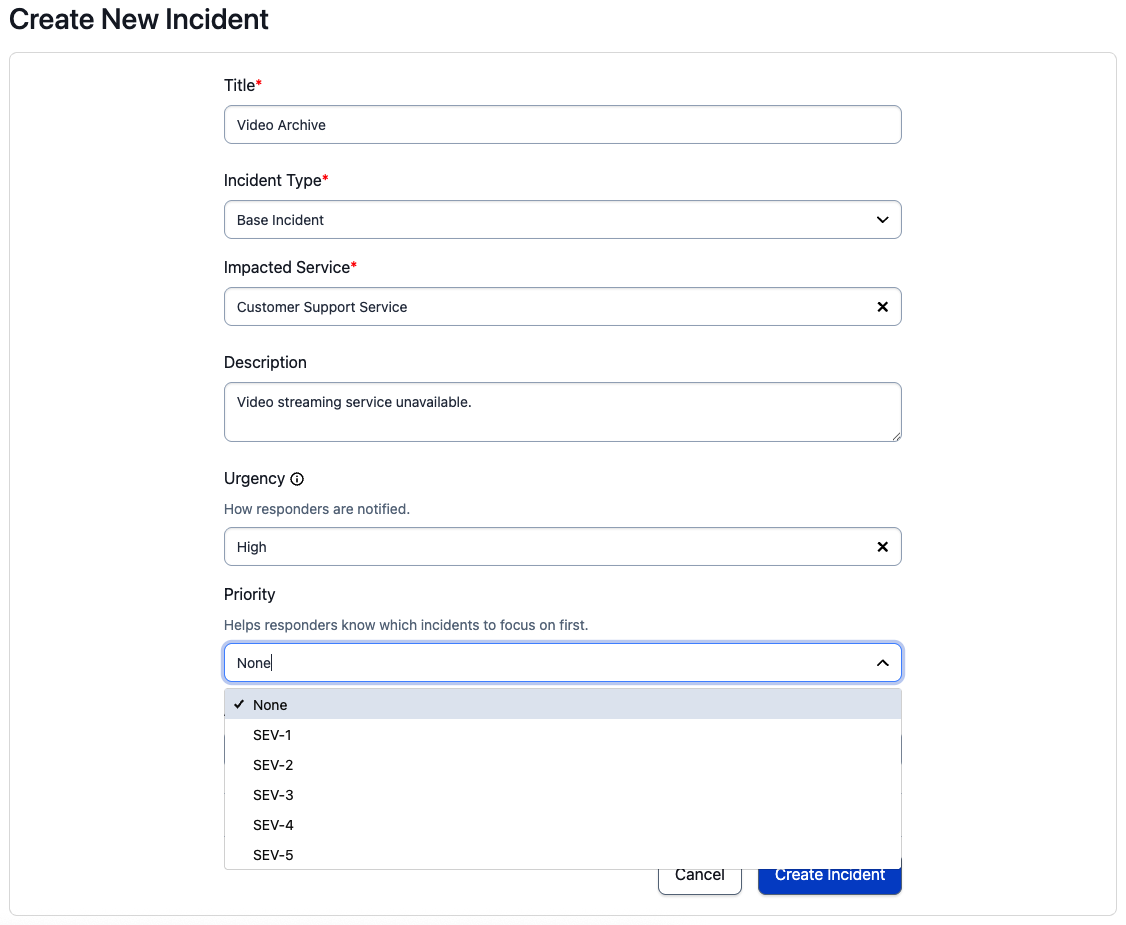
Set priority at incident creation
- Enter the remaining incident details.
- Click Create Incident.
To an Existing Incident
- Select an incident's Title to navigate to its details page.
- Click the Priority dropdown and select the desired priority level.
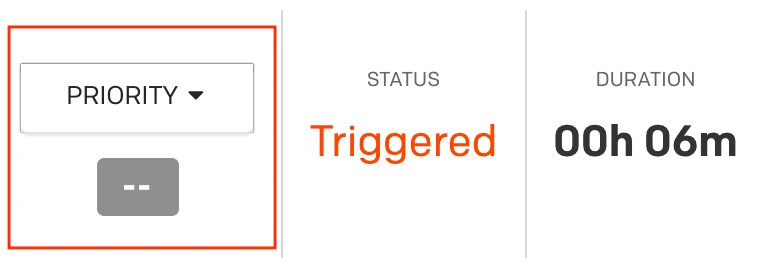
Edit an incident's priority
Set Incident Priority Using the Mobile App
At Incident Creation
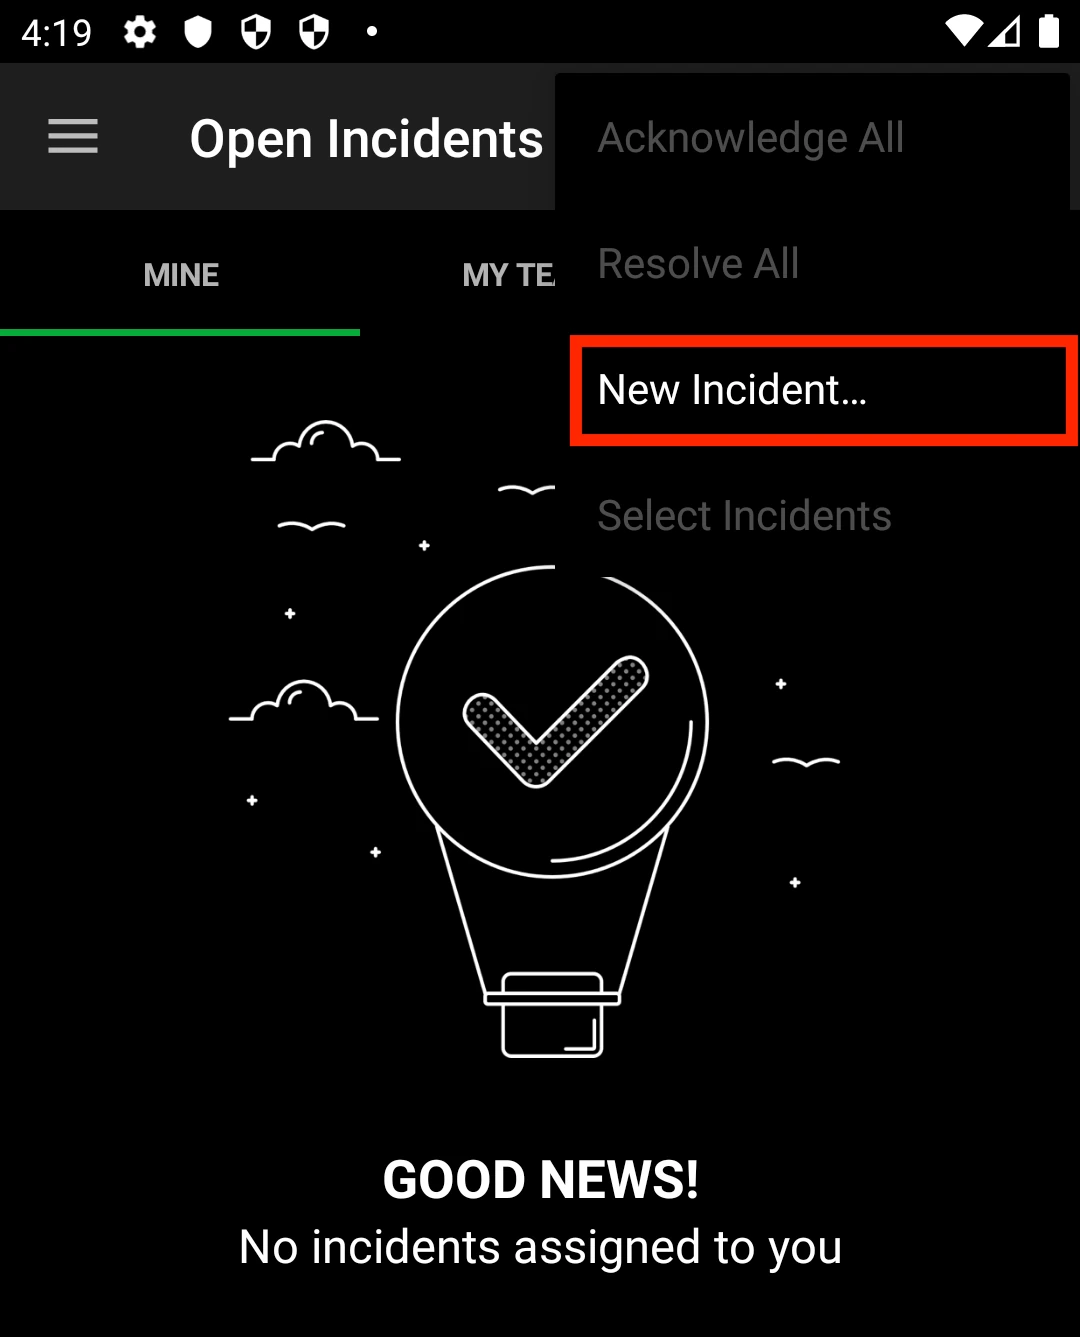
- Navigate to the Open Incidents screen.
- Tap in the top-right corner and select New Incident....
Priority in the mobile app
- Tap Priority and select the priority level from the list.
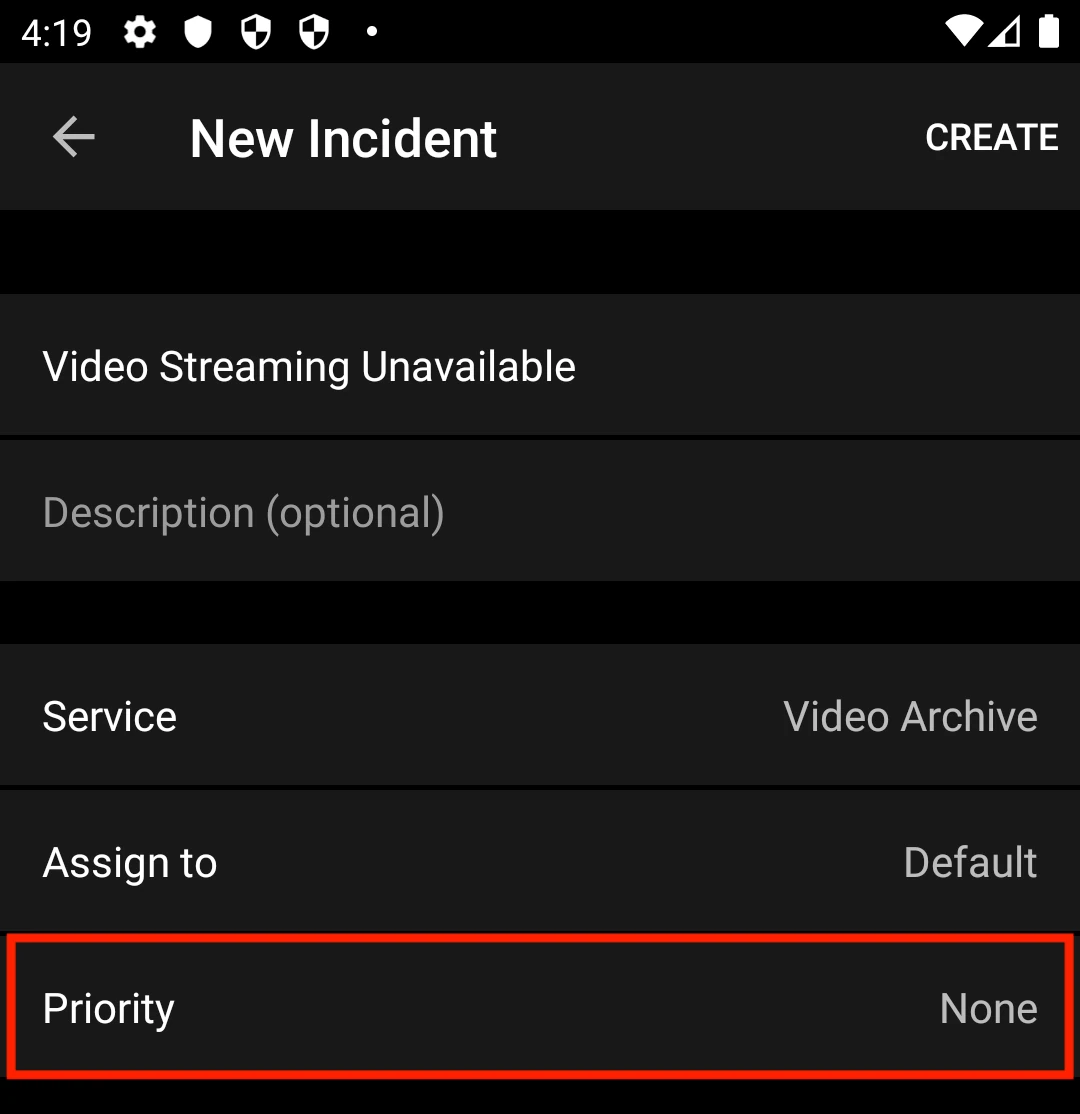
Select priority
- Enter any remaining incident details.
- Tap Create. The incident displays a label showing its priority level:
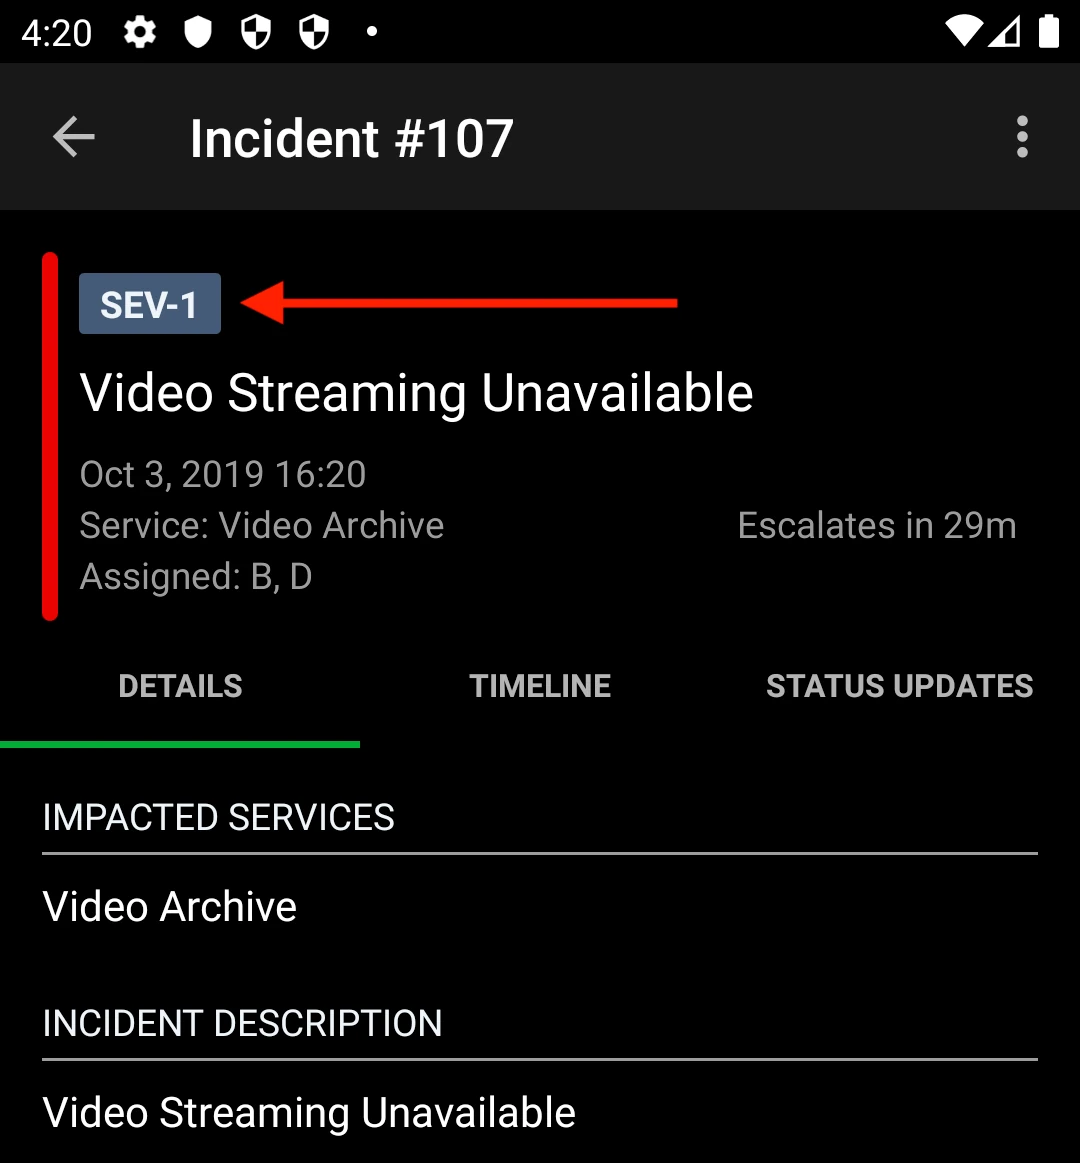
View priority
To an Existing Incident
- Tap an incident's name to navigate to its details screen.
- With the Triage tab selected, tap Add/Edit Priority.
- Select a priority level.
- Tap Confirm in the confirmation dialog.
Set Incident Priority via the REST API
Automated systems can interact with incident priority via the Incident REST API. You can specify an incident's priority at creation, and all relevant priority details are included when the API returns an incident object.
Refer to the following developer documentation for more information:
Incident webhooks also include information about an incident's priority. Refer to Webhooks Overview for more information.
Events APIYou cannot set priority via the Events API.
Set Incident Priority via Event Orchestration
Event Orchestration supports adding priority when an incident is created. Refer to Incident Actions for more information.
Disable Incident Priority
- Navigate to User Icon Account Settings Incident Settings tab.
- Toggle Enable Incident Priority Levels to the off position. The Priority column on your Incidents page no longer appears.
Retained Configuration SettingsAfter disabling incident priority, PagerDuty retains your configuration settings. To re-enable incident priority, toggle Enable Incident Priority Levels to the on position — your historical settings are preserved and do not need to be reconfigured.
Updated about 1 month ago