
Opportunity Events (Legacy)
Learn how to tag, filter and build timelines for Jeli incident events | Jeli Part of PagerDuty Legacy
When you import events from Slack or other Jeli Integrations, they will appear in the Events section of their associated Opportunity Report. The Events section allows you to add event tags, annotate events, search and filter data, and build a timeline.
You can access the Events section by navigating to Opportunities select your desired opportunity select Events in the left menu.
AvailabilityOpportunity Events are available on the Jeli Standalone (Legacy) pricing plan.
At this time, Jeli is not available for accounts in the EU service region (i.e., https://subdomain.eu.pagerduty.com).
Event Tags
Event tags simplify organizing and categorizing events, making it easier to find specific incident activities. Add event tags to relevant events to draw attention to interesting or important messages. Some common tags are:
- First Alert: The first signal that there was a problem.
- Experts Recruited: Each time the team brought in additional experts.
- Customer Impact Confirmed: Each time the team confirmed customer impact.
- Escalated as an Incident: When it was clear this was an incident.
- Mitigation Started: When the team started troubleshooting or fixing the issue.
- Status Update: Each important status update.
- Remediation Action: Each attempt to resolve the issue.
- Mitigation Ended: The end of troubleshooting/fixing.
Add Event Tags
- In the Jeli web app, select your desired opportunity and select Events in the left menu
- To the right of your desired event, click to open the tags menu.
- Select one or more tags.
Add an event tag
Tagged events will have a icon to the right:

Event tagged "Hypothesis - Proved"
Remove Event Tags
- In the Jeli web app, select your desired opportunity and select Events in the left menu
- To the right of your desired event, click to open the tags menu.
- In the bottom field, click to the right of the tag you would like to remove.
Create Event Notes
Please see our Notes article for more information on adding event notes.
Filter Event Data
Filter Data from a Channel
- Navigate to your desired opportunity and select Events in the left menu.
- In the Data from field, you can filter out which channels you want to see by checking and unchecking any data source.
Filter By Tags
Tags categorize or identify common themes across your data. Filtering by tags can help you narrow down the displayed data to the information you curated and annotated.
To filter by tags in your Event Data:
-
Navigate to your desired opportunity and select Events in the left menu.
-
Click into the Filtered By field. There are three ways to select tags from here:
- Enter the specific tag you’re looking for (e.g., "Alerts") and click the checkbox next to the tag name to filter to display only messages with that tag.
- Select the checkbox next to Tags in the dropdown that appears when clicking into the search field. This will automatically add all of the tags used in the investigation so far. You can deselect any tag that you do not want to filter by clicking to the right of the tag.
- In the dropdown that appears when clicking into the search field, there is an arrow to the left of Tags. Clicking this will expand to show the full selection of tags used in the investigation so far. Clicking the checkbox next to any specific tag will filter to display only messages with that tag.
TipWhen you select a tag, it will only display the messages with that tag. You can select multiple tags at a time, displaying all messages with any of the selected tags.
If you haven’t added any tags yet, the Tags option will be greyed out in the dropdown that appears when clicking into the search field.
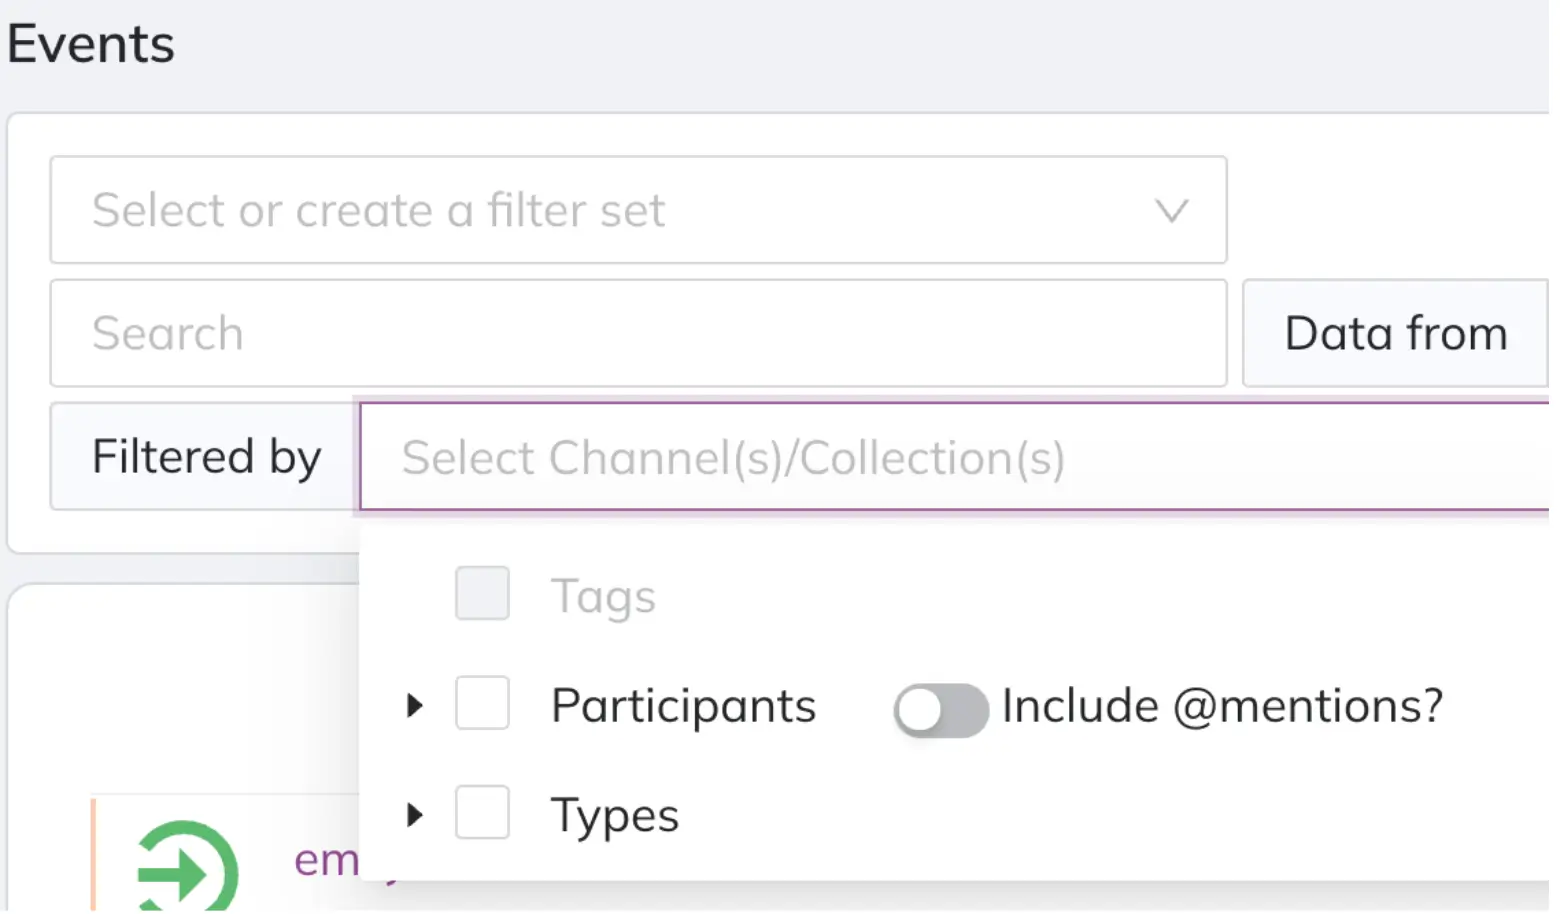
"Tags" unavailable
If you used the Jeli incident response bot, Responder Joins will automatically tag each time a new responder joined the Slack incident channel, even if no one manually added other tags.
Filter By Participants
Participants are the individuals who contributed to the imported Slack conversation. Filtering by participants is particularly useful when interviewing incident responders, allowing you to view all of the messages from a specific responder. See Create an Interview Filter below for more information.
To filter by participants in your Event Data:
- Navigate to your desired opportunity and select Events in the left menu.
- Click into the Filtered By field. There are three ways to select participants from there:
- Enter the name of the participant in the search field, and click the checkbox next to their name. This will filter to messages sent by that participant.
- Select the checkbox next to Participants in the dropdown. This will automatically add all of the participants identified in the conversation. You can deselect any participant you do not want to filter for by clicking to the right of their name.
- Click the arrow to the left of Participants, which will expand to show the full selection of participants identified in the conversation. Clicking the checkbox next to any specific name will filter to messages sent by that participant.
- In the dropdown, there is a Include @mentions? toggle to the right of Participants that is turned off by default. Enabling this option includes all messages where the selected participant was @mentioned by another participant. Sliding the toggle to the right enables the feature.
If you used the Jeli Slackbot, one of the participants you can filter by will be Jeli. This includes all of the updates and changes made during the incident using the Jeli Slackbot. Filtering by participant and selecting Jeli is a great shortcut to display all of the status updates sent throughout the incident.
Filter By Types
There are multiple data types available in Jeli:
- Chat Messages: The Slack messages imported into your Jeli investigation.
- Notes: The annotations you, or other investigators, contributed as you tagged and added context during your investigation.
- PagerDuty: The imported PagerDuty notifications that correspond to your Jeli investigation. This requires the PagerDuty Integration | Jeli.
To filter by data types:
-
Navigate to your desired opportunity and select Events in the left menu.
-
Click into the Filtered By field. There are three ways to select types from there:
- Enter the specific type (e.g. Notes) and click the checkbox next to the type to filter to the notes added to the investigation.
- Select the checkbox next to Types in the dropdown. This will automatically add all of the data types available. You can deselect any type you do not want to filter by clicking the to the right of the type.
- In the dropdown there is an arrow to the left of Types. Clicking this will expand to show the full selection of data types available. Clicking the checkbox next to any specific type will filter to the content matching that data type.
Create a Filter Set
Filter sets allow you to name and save your filters for later use. To create a filter set:
- Filter by the criteria you need (see instructions to filter event data above).
- In the Select or create a filter set field, enter a name for your filter set.
- In the dropdown that appears, click Create filter [FILTER-NAME].
Edit a Filter Set
To edit a filter set’s name:
- Click into the Select or create a filter set field.
- In the dropdown that appears, hover over your desired feature set and click the menu to the right.
- In the dropdown that appears, edit the filter set’s name.
- Hit enter to save the name.
To edit a filter set’s filters:
- Click into the Select or create a filter set field and select your preferred filter set.
- Add or remove your preferred filters.
a. If you make a mistake during editing and would like to revert the filter set to its previous saved setting, you can click Revert to the right. Note: You can only revert prior to updating the filter set. If you proceed to the next step and click Update, you will not be able to revert again. - Click Update to the right.
Select a Filter Set
To select a preconfigured filter set:
- Click into the Select or create a filter set field and select your preferred filter set.
- This will automatically select the filters saved to the set. If you would like to deselect the filter set, hover over the filter set name and click to the right.
Delete a Filter Set
- Click into the Select or create a filter set field.
- In the dropdown that appears, hover over your desired feature set and click the menu to the right.
- Select Delete in the dropdown that appears.
- A confirmation modal will appear. Click Delete again to delete the filter set.
Create an Interview Filter Set
You may use Jeli as you prepare for your interview and/or review meeting. To create an interview filter set:
- Tag and annotate questions: As you skim through the transcript, tag any message that you believe needs further explanation or discussion during your review meeting.
- When you want to pose a question to a specific individual: Use the Participant Follow-Up tag. Add a note to messages that you have questions about.
- When you want to flag a message for discussion with all the review meeting attendees: Use the Needs Further Investigation tag. Again, add a note with your questions or discussion topics.
- When you want to add broader questions that don’t relate to a specific message: Enter a note in the Notes section. You may find that you can organize your questions into themes or based on the relevant participants.
- Create an interview filter set: By creating a filter set, you can create a shortcut of the questions and themes you arrived at. You may use this filter set to share with folks ahead of a review meeting or interview or for your own personal notes.
- Navigate to Events in the left menu of the opportunity.
- In the Filtered By field, select your the desired tags (e.g., Participant Follow-Up and Needs Further Investigation) and the desired participants.
- In the Select or create a filter set field, enter the name of your filter (e.g., Interview XYZ) and click Create filter [FILTER-NAME] below to create and save your filter.
Create a Snake Timeline
By creating a single event filter set, you can tell the story of what happened during your incident:
- How it started
- Who helped
- Remediation steps
- Etc.
You can then create a timeline from the current event data by clicking Build a timeline.
- Create a filter set.
- After you’ve selected your filter set, click Build a Timeline on the right. The number on the button tells you the number of events displayed. You can change the data by searching or filtering.
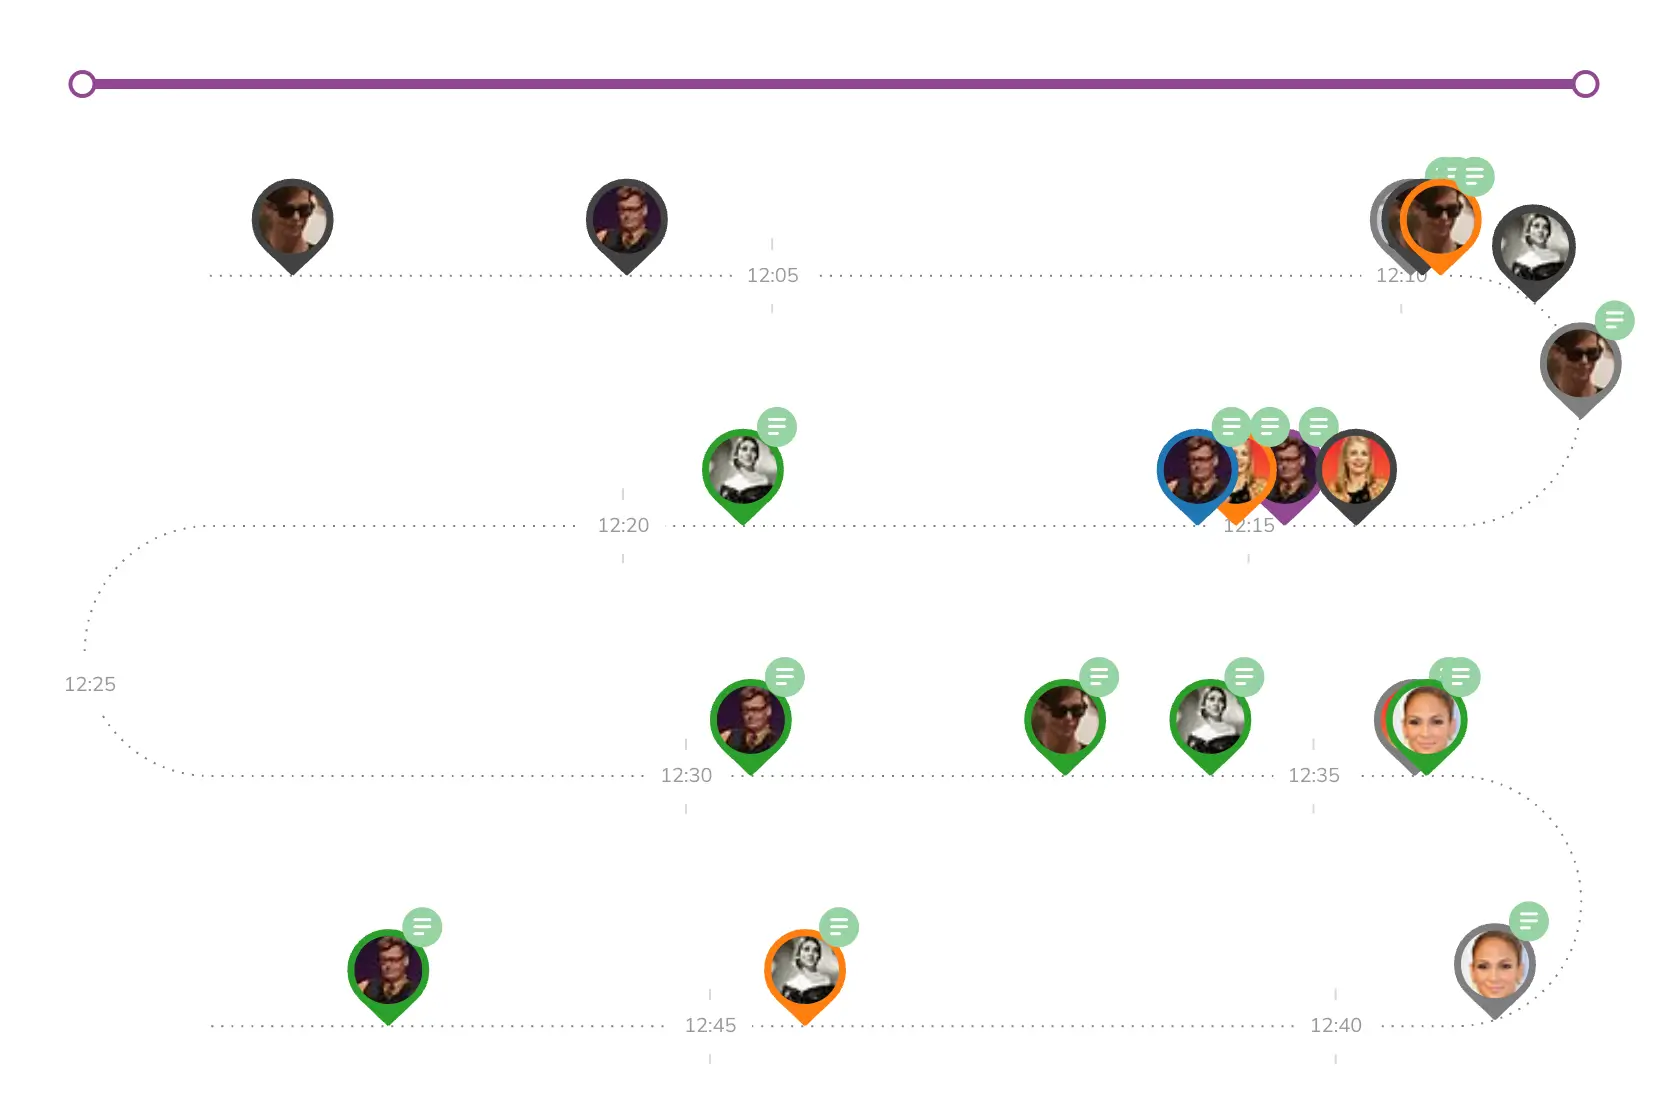
Example Snake Timeline
FAQ
What's the Difference Between Narrative Builder and the Snake Timeline?
You can use the snake timeline to get a sense of events and where each event falls related to others on a time scale perspective. The snake timeline view allows you to look at all events together, rather than picking and choosing in the Narrative Builder.
The snake timeline allows you to visualize key elements of the situation like "what time did each responder join?" or "gaps in communication."
Updated 22 days ago