
Account Settings
Administer account-wide settings
Manage account settings such as billing, single sign-on (SSO), user offboarding, incident priorities, and more.
To configure account settings, navigate to User Icon Account Settings and select from the tabs detailed below:
- Your Subscription
- Account Settings
- Single Sign-On
- Tagging
- User Offboarding
- Mobile Security Settings
- Incident Settings
- Status Updates
- Analytics Email Settings
- On-Call Readiness
- PagerDuty Advance
Your Subscription
Review information about your account's pricing plan and subscription details.
For more information, see Billing, Invoices and Payments.
Account Settings
Manage various global settings such as timezone, contact information privacy, and user licensing limits.
Dark Mode Not Available in Web AppThe PagerDuty web app does not currently offer a dark mode or theme setting. The PagerDuty mobile app supports a dark theme.
Account Details
Company Name
To set the company name:
- In the web app, navigate to User Icon Account Settings.
- In the Company Name field, enter the name of your organization.
- Click Save Changes.
Default Time Zone
New user accounts will use this time zone. If a user prefers a different time zone, they can change it on their user profile.
- In the web app, navigate to User Icon Account Settings.
- Select a time zone from the dropdown.
- Click Save Changes.
Contact Details
With the options below enabled, contact information is obscured for any user who is not the Account Owner or an Admin.
Hide Contact Details
- In the web app, navigate to User Icon Account Settings.
- Check one or both of the following checkboxes according to your preference:
- Hide Contact Phone and SMS Numbers
- Hide Contact Email Addresses
- Click Save Changes.
Language Settings
You can select a default language for phone notifications for all new and existing users in your account. Users can update their own personal setting if it differs from the default set at the Admin level.
To select an account-wide default language for phone notifications:
- In the web app, navigate to User Icon Account Settings.
- Under Default Voice Language Setting, select your preferred language from the dropdown.
- Click Save Changes to set the default language for all new and existing users.
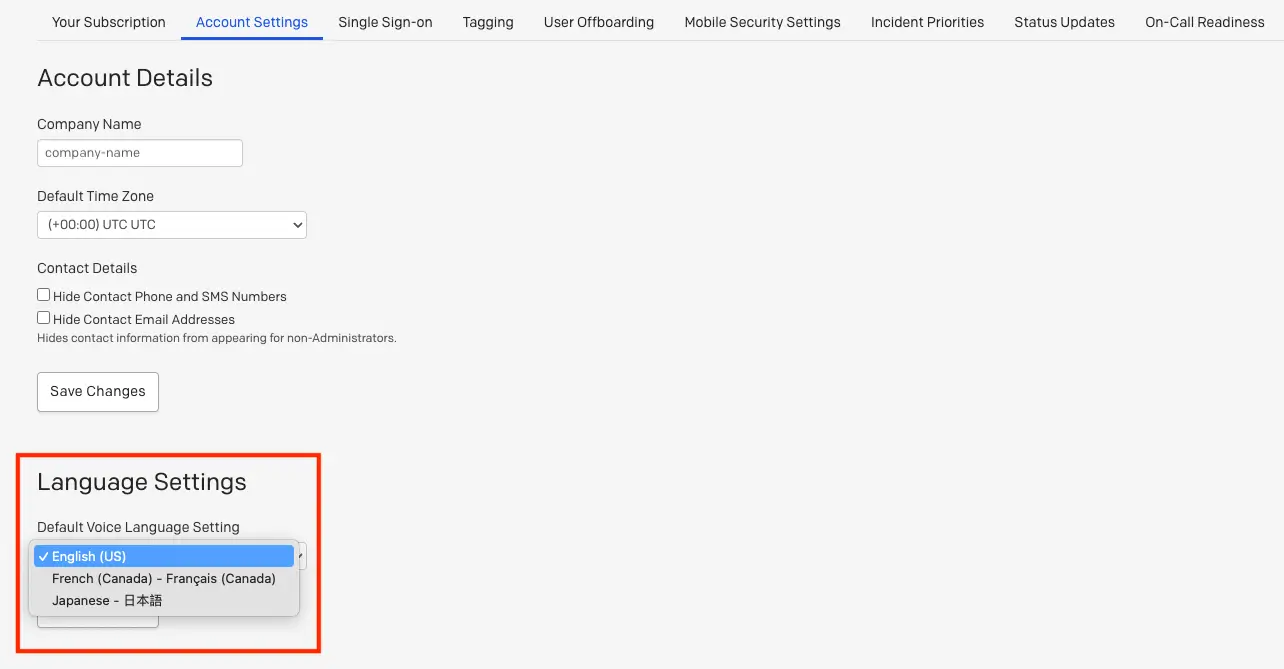
Select default voice language setting
Product Trials
View trials for new features or features available on other plans. The Account Owner can enable a trial here if one is available. Trial availability depends on your current plan. Contact the Sales team if you have any questions regarding trials.
Change Account Owner
User Role After Transferring Account OwnershipWhen you transfer account ownership to a different user, your user account role will be changed to Admin.
Requirement: Transfer Account Ownership to an Active UserEnsure that the user you are transferring account ownership to has accepted their invitation to your PagerDuty account. Once accepted, they are an active user.
- In the web app, navigate to User Icon Account Settings.
- In the Change Account Owner section, enter a search term or select the user you would like to transfer account ownership to.
- Click Change account owner.
- Accept the confirmation message to transfer ownership.
Account Owner Unavailable
If the current account owner has left your organization and their PagerDuty login information is not available, follow these steps:
- Contact your internal IT department to request access to the former Account Owner's email inbox.
- In your web browser, navigate to your organization's PagerDuty login page, for example
https://your-subdomain.pagerduty.com/sign_in, enter the former Account Owner's email address, and click Forgot your password? to send a password reset email. - Follow the instructions in the password reset email to log in to your PagerDuty account as the Account Owner, and follow the steps above to transfer account ownership to an appropriate user.
Email Domain Restriction
You can use an allow list to restrict the domains that users can enter. This setting applies to both login and contact email addresses. The restriction applies to future updates — if you are enabling the feature for the first time and users have entered email domains that are not on the allow list, their email addresses will continue to work.
- In the web app, navigate to User Icon Account Settings.
- Under Email Domain Restriction, check the boxes to restrict login email addresses and/or contact email addresses (an email address where a user receives notifications).
- Enter a comma-separated list of domains to allow.
- Click Update Email Domain Settings.
Users who enter email domains not specified in the Email Domain Allow List will see alert dialog boxes when entering their login email and/or contact information email.
Subdomains in Email Addresses
If your account uses subdomains in email addresses, check Allow Subdomains as a convenience feature. With this feature enabled, the allow list will permit all subdomains under any of the domains listed in the previous section. For example, entering domain.com will also allow subdomain.domain.com and subdomain2.subdomain1.domain.com.
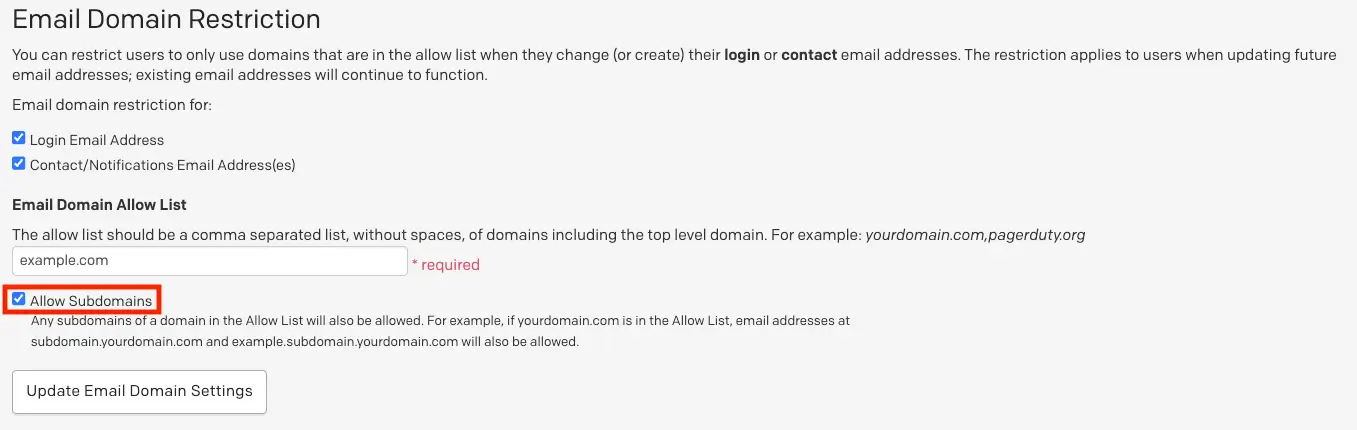
Allow subdomains
Update Payment Information
Update your billing information, including credit card details and purchasing contact information.
For more information, see Billing, Invoices and Payments.
Account Limits
Account Limits Not AvailableAccount Limits are only available for accounts with month-to-month pricing plans.
If the Account Limits section is not visible on your Account Settings page, your account may have a user limit built into its pricing plan. In this case, refer to the section on User Charges for information on adding more users.
The Account Owner can set a Full User Limit to restrict the maximum number of full users that can be invited. This helps manage the monthly user charge, which is determined based on the highest number of full users in your account at any time during the current month or in prior months.
Set Full User Limit
- In the input field, enter the maximum number of users desired.
- Click Save changes.
Remove Full User Limit
- Click next to the input field.
- Click Save changes.
Billing Notifications
Configure recipients for invoices and payment receipts.
For more information, see Billing, Invoices and Payments.
Single Sign-On
Configure which login method to use when users authenticate with PagerDuty.
For more information, see Single Sign-On (SSO).
Tagging
Use tags to enable faster searches for objects such as teams, escalation policies, and users. Large organizations can use tags to add metadata to indirectly related objects and identify their dotted-line relationships.
For more information, see Contextual Search - Tagging.
User Offboarding
Automatically address outstanding incident, team, schedule, and escalation policy associations when a user is removed from your PagerDuty account.
For more information, see Offboarding.
Mobile Security Settings
Optionally enable Mobile App Lock, a security setting for the PagerDuty mobile app that locks the app after a period of inactivity.
For more information, see Advanced Mobile Security.
Incident Settings
In the Incident Settings tab, you can manage Incident Priority and Reopen Incidents settings.
Incident Priority
Create a classification scheme to identify the most important incidents from the least important ones.
For more information, see Incident Priority.
Reopen Incidents
Manage account-wide access to the Reopen Incidents feature.
For more information, see Reopen Incidents.
Status Updates
Customize the look and feel of status update emails by uploading a company logo.
For more information, see Status Update Branding.
Analytics Email Settings
Availability
- All paid accounts will receive Analytics emails, regardless of their pricing plan. Admin and Account Owner emails are sent to customers on all plans. Team Manager emails are sent to customers on the Business pricing plan and above.
- Users with a base role of Manager who are also assigned a Team role of Manager on one or more Teams may receive Analytics emails. Account Owners and Global Admins are eligible to receive Analytics emails without any Team roles required. Users with base roles below Manager cannot receive Analytics emails at this time.
- Accounts on the Business and Enterprise Incident Management pricing plans can manage their Analytics email settings from the Analytics Dashboard. Customers on the Professional pricing plan will not have access to this option. Contact the Sales Team to upgrade to an account plan with this feature.
Administrators can determine who receives weekly Analytics emails using the Analytics Email Settings page, accessible in the PagerDuty web app under User Icon Account Settings Analytics Email Settings tab.
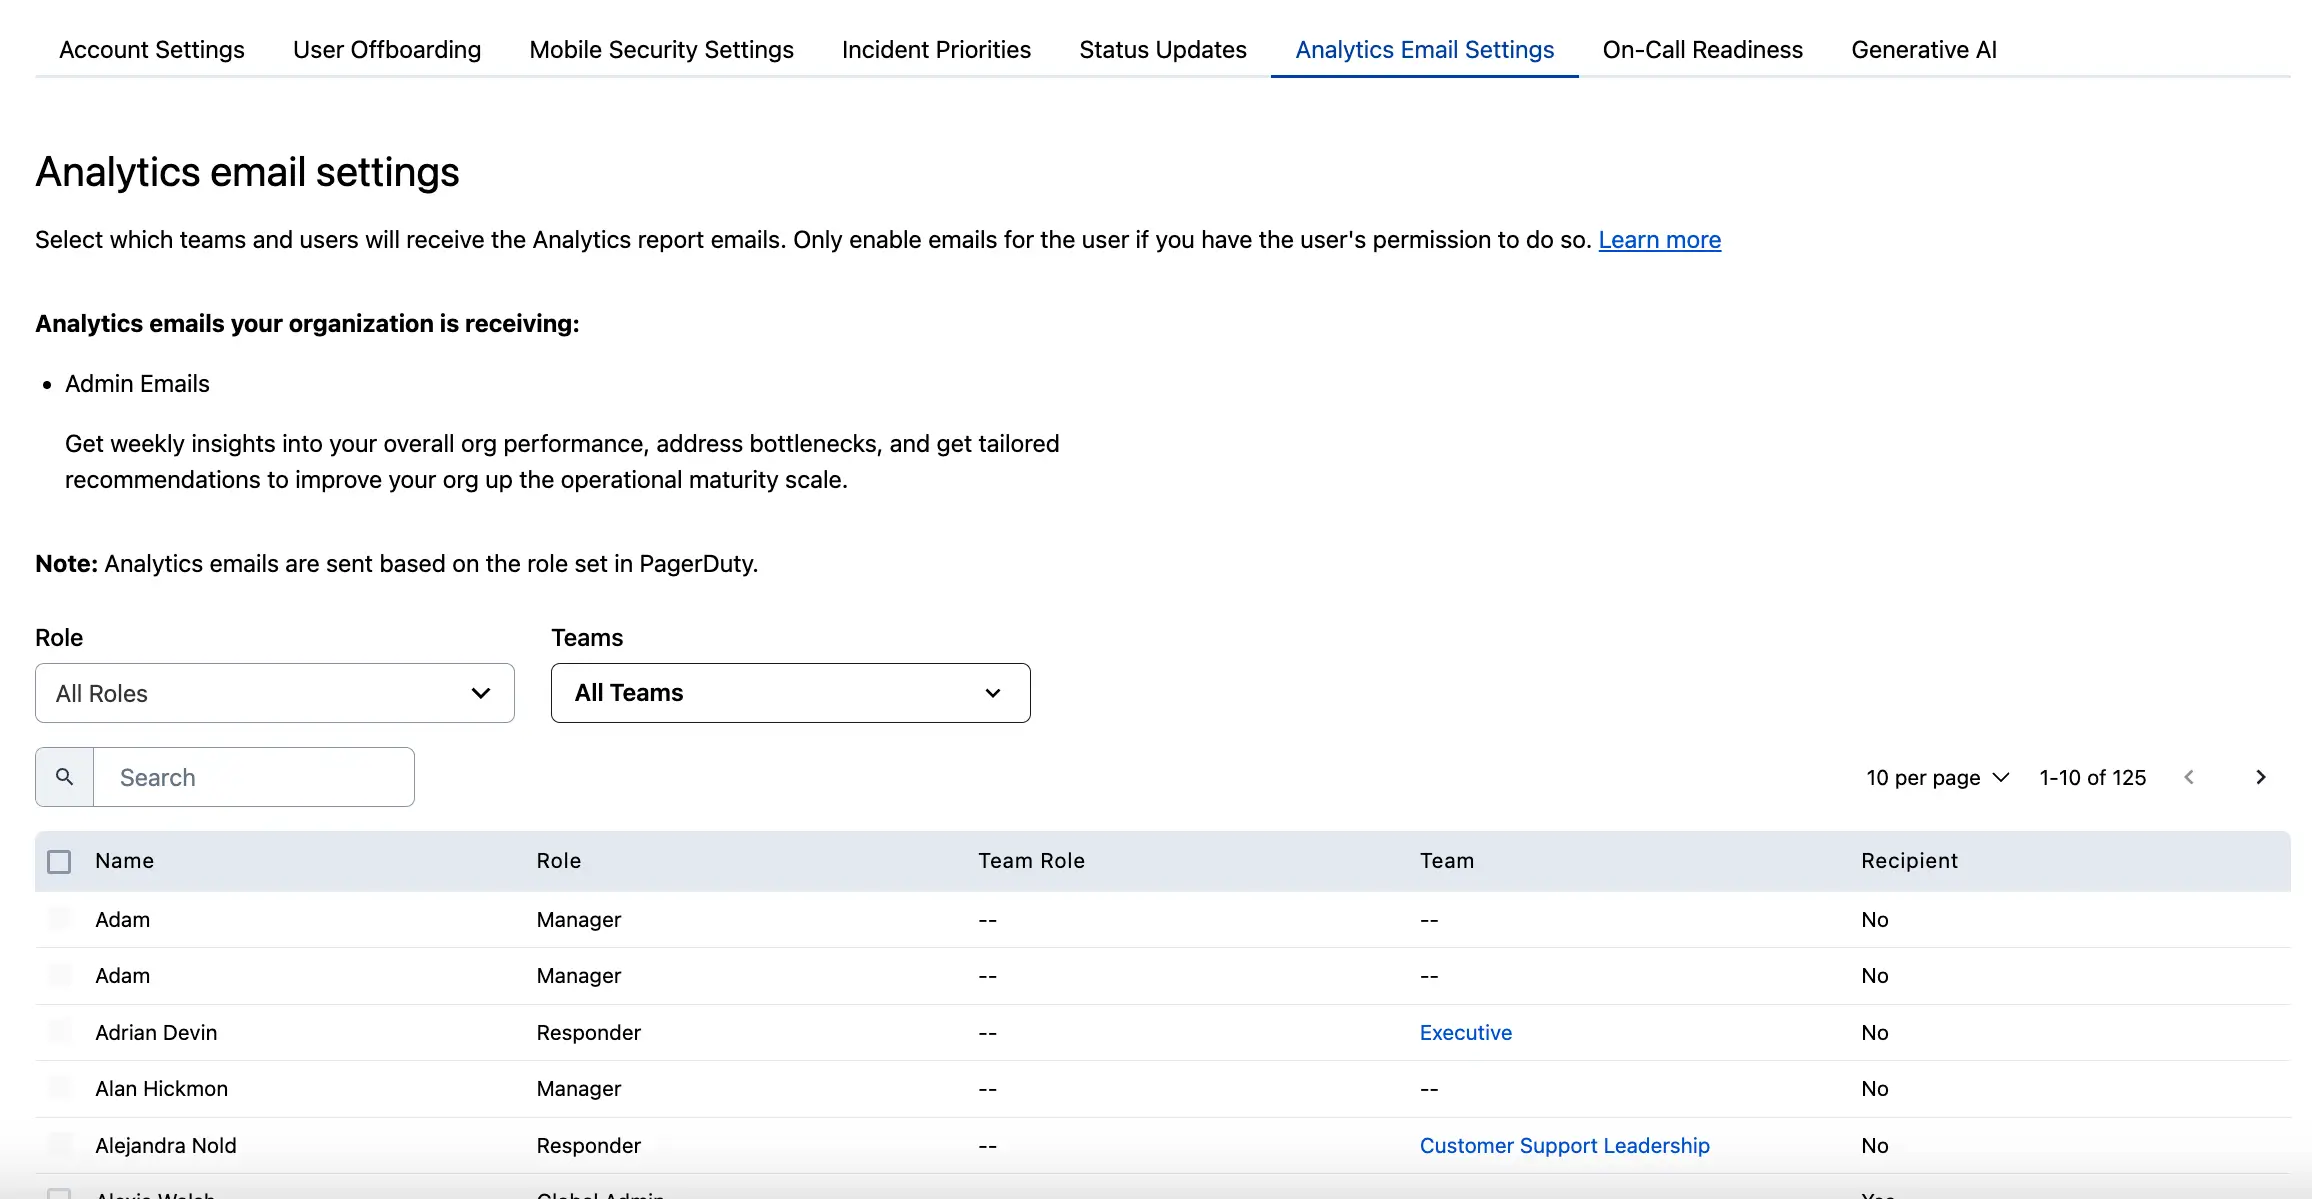
Analytics email settings
There are two types of weekly emails:
- Admin Emails: Get weekly insights into your organization's performance, address bottlenecks, and get tailored recommendations to improve your operational maturity.
- Team Manager Emails: Get weekly insights into the escalation policies you manage. View recommendations on how to improve your escalation policies' operational efficiencies.
Filter Users
Make a selection in the Roles dropdown and click Apply to display only users with a specific base role:
- Account Owner
- Global Admin
- Manager
- Responder
- Observer
- Limited Stakeholder
- Stakeholder
- Restricted Access
In the Teams dropdown, search and select one or more Teams and click Apply to display only associated users.
You can also enter a user's name in the search box to display matching users.
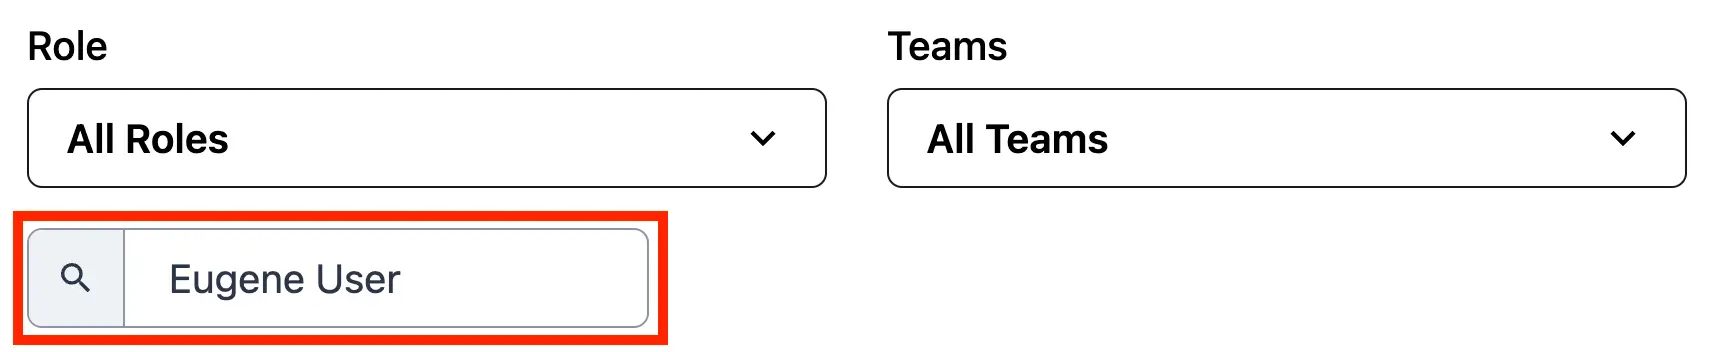
Search for a user
Configure Email Recipients
- Check the box next to the desired user's name.
- In the prompt at the bottom of the screen, click Include in emails or Exclude from emails.
A success banner will confirm your selection:

User successfully included
TipTo receive Analytics emails, users must be assigned a Team role.
Users with a Responder role cannot receive Analytics emails at this time.
On-Call Readiness
On-Call Readiness Reports help organizations improve incident response quality by ensuring responders have optimal notification rule configurations. You can set a Default Readiness Profile that best fits your organization's needs.
For more information, see On-Call Readiness Reports.
PagerDuty Advance
Configure options for PagerDuty Advance, PagerDuty's generative AI assistant.
Read PagerDuty Advance for more information.
Updated 18 days ago