Inform the public about your infrastructure's health
External Status Pages offer public audiences a unified source of truth about your infrastructure’s health. You can customize this feature to fit your brand’s look and feel, and define different views and sets of Business Services to display. Visitors can stay informed about ongoing incidents and read status updates, or subscribe to your status page to receive notifications via email, Slack, or webhook.
📘
Availability
External Status Pages are available on all plans and can be extended to include Private/Audience-specific pages or more subscribers with the add-on. Professional plans include one public page, and Business plans include one public and one private status page.
Please contact our Sales Team for pricing details, or if you would like to upgrade to the status page add-on.
PagerDuty offers two Status Page packaging add-on options, one which includes Public Status Pages, and a premium package that also features Private Status Pages and Audience-Specific Status Pages. Depending on the package you choose, features such as Page Subscribers, Premium Account Subscribers, and Total Account Subscribers may vary.
Pricing Plan
Subscribers
Professional
250
Business
500
Enterprise
1000
Please contact our Sales Team for more information.
📘
Product Limits
The number of status pages (public external page plus private external page) in an account cannot exceed the limit of 100. The number of business services associated to an external status page cannot exceed the limit of 500.
📘
Looking for our Company Status Page?
This article describes our External Status Page product, which you can use to build your own status pages. If you are looking for more information about the PagerDuty company status page at status.pagerduty.com, please read PagerDuty Outage Notifications.
Create an External Status Page
🚧
Required User Permissions
Users with the following base roles can configure an external status page:
Manager
Global Admin
Account Owner
Users who create an External Status Page become the Page Owner. Page Owners can edit their own status pages or delete their own drafts. Account Owners can edit any status page and delete any draft.
📘
Prerequisites and Product Limits
External Status Pages rely on Business Services to automatically notify users when there is a service degradation. After you have configured service dependencies, information about impacted business services will appear on the External Status Page.
By default, an incident with a priority of P1 or P2 will be considered an "impacting" incident. You can adjust this setting to restrict or include a wider set of incident priorities, depending on your organization's needs.
Incident priority is an account-wide setting, and will apply to both Internal Status Pages and External Status Pages. Incident priority can also be configured via the REST API.
You can create up to 100 status pages.
In the PagerDuty web app, navigate to StatusExternal Status Page.
Click New Status Page.
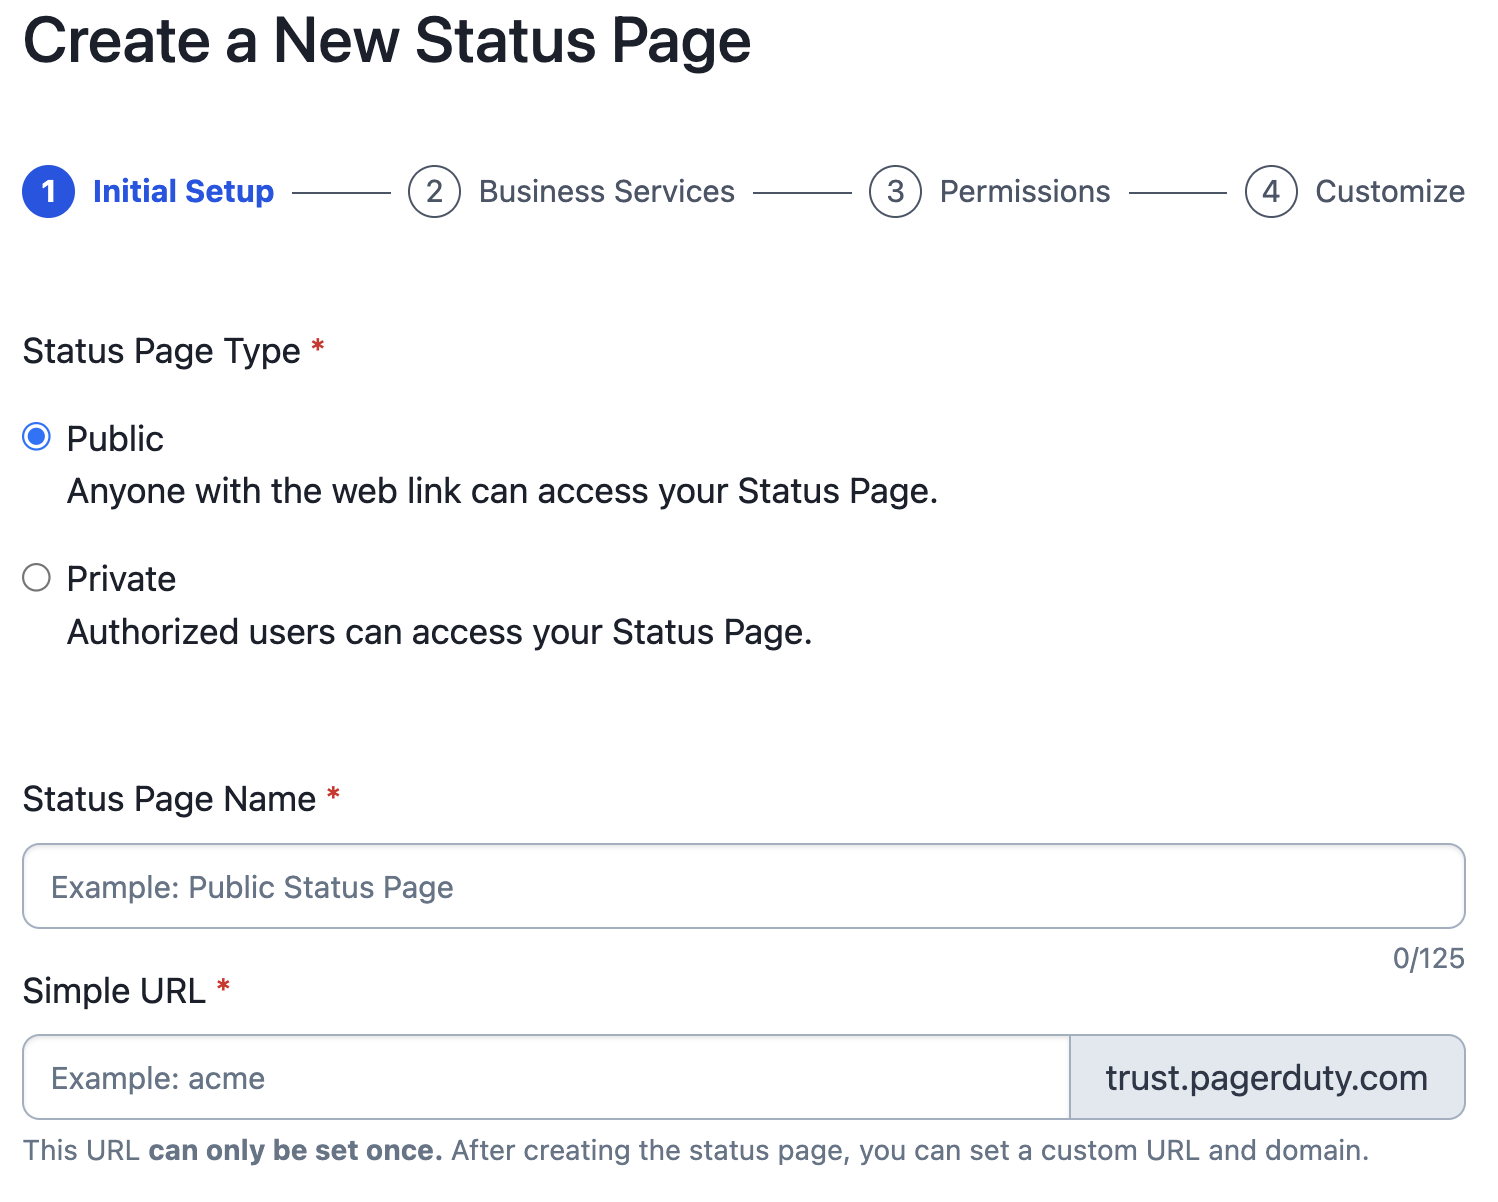
In the section Status Page Type, make a selection: Public or Private.
Note: Depending on the features in your account, this option may not be available.
Enter a descriptive Name for your status page. In the Simple URL field, create a unique public subdomain that your users can access.
Note: After you've published an external status page, you will have the option to set a Custom URL, which will determine the web address where your status page can be accessed, and will also be used for the sender address when email notifications are sent to status page subscribers. Please see the section Configure DNS Records for more information.
Create a new status page
❗️
Simple URL
The Simple URL cannot be changed after you have saved or published an external status page. Please take a moment to confirm that you've entered your Simple URL correctly.
Click Next.
In the Business Services section, select the Business Services that you’d like to display on your status page by clicking next to each. Selected business services will be shown in the right column. To deselect them, click . You can add up to 500 business services per status page. Once you’re ready, click Next.
Optional: You can organize business services into groups:
Click Add Group, enter a Group Name and click .
Click and hold next to a business service's name, drag it over the group's name, and release.
Click the expand arrow (e.g., /) to show/hide the business services in a group.
Optional: Click Edit Display Names to adjust your business services' public-facing names. This can be useful if you do not wish to disclose internal naming conventions, or to display a name that the public would better understand.
The Permissions section allows you to define which Teams and user roles can post incident status messages on the status page, which Teams can edit the status page, whether posts require approval, and whether you'd like to automate posts when an incident affects a business service. Make your selection in each of the following sections:
Section
Instructions
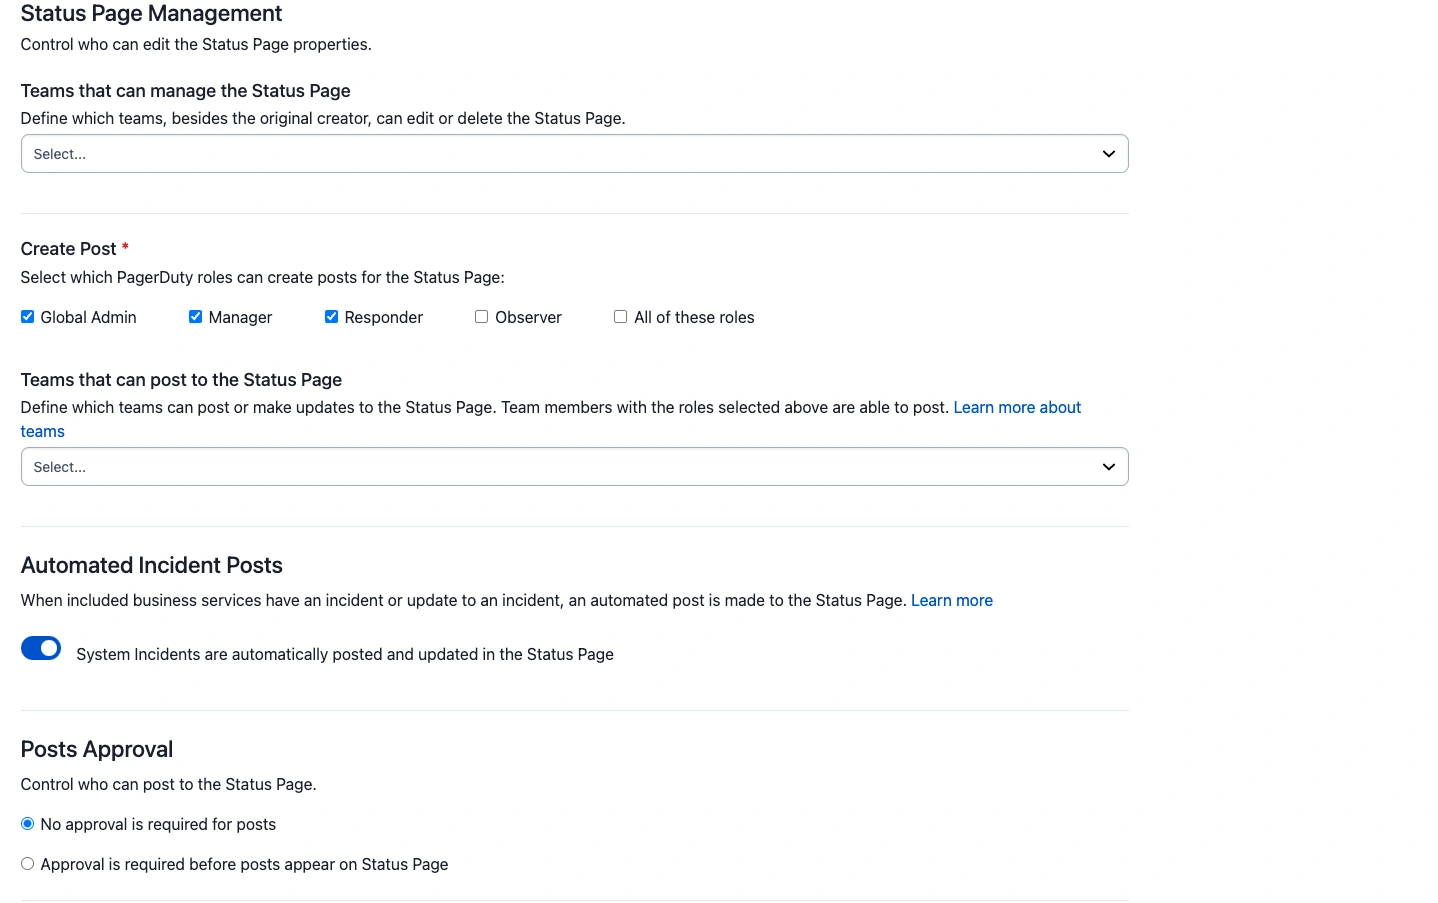
Teams that can manage the Status Page
From the dropdown, select which Team(s), besides the original creator, can edit or delete the Status Page.
Create Post
Select which PagerDuty base roles can create posts for the External Status Page: Global Admin, Manager, Responder, Observer and/or All of these roles.
Teams that can post to the Status Page
Select which Teams can post new incidents or updates to the status page.
Automated Incident Posts
This enables whether an automated status page post is published when the status of an incident changes (triggered, acknowledged, resolved) on an included business service. If approval is required to post messages, the incident will need to be approved before it is posted. Note: If enabled, this option will override the Post to External Status Page incident workflow action for that status page. In this case, the incident workflow action will not run.
Posts Approval
Select Approval is required to post messages or No approval is needed to post messages. If you select Approval is required to post messages, please select up to 15 users from the dropdown; these users will be able to review a draft of the message before it is posted on the status page.
Example status page permissions
Click Next.
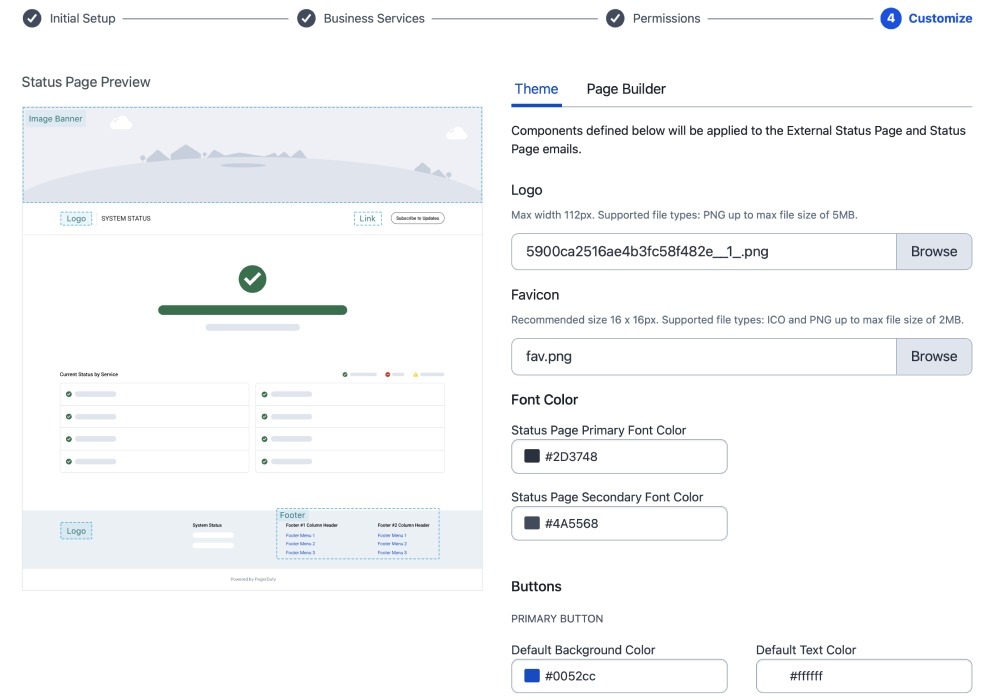
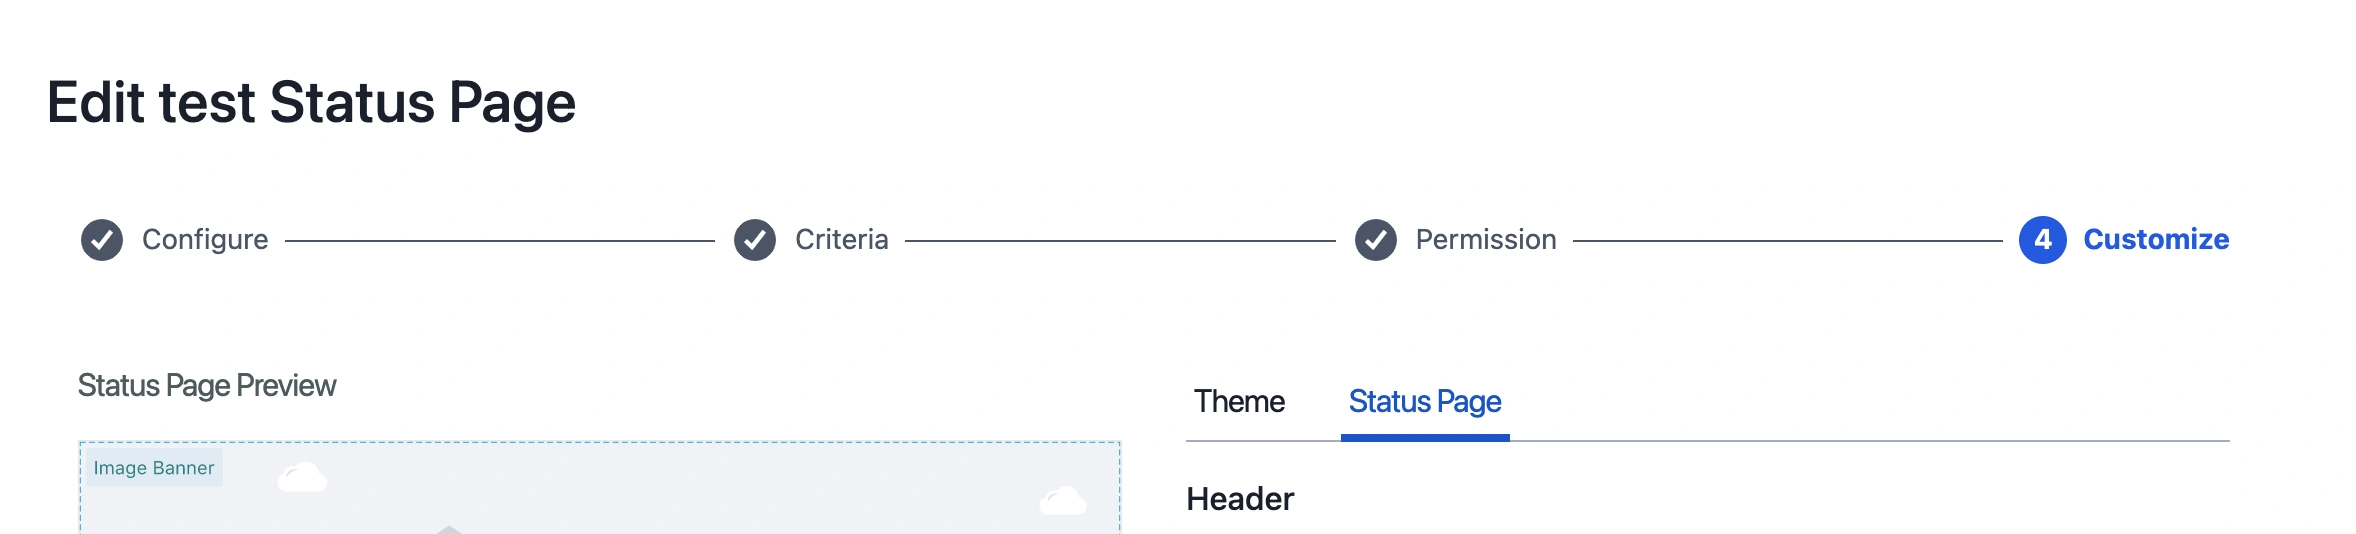
In the Theme tab of the Customize section, you can set the color palette, and upload your organization's logo and a favicon that will be displayed on the browser tab.
In the Status Page tab, you can optionally add an image to the header and footer, set up a navigation bar, and you can include relevant links to your status page.
If you'd like to hide the Subscribe button on the public-facing status page, in the section Navigation BarSubscribe Button, move the toggle to No.
Customize status page
Click Publish.
Optionally, if you’re not ready to publish your status page, click Save as Draft in the bottom-left corner.
Configure DNS Records
After you publish an external status page, you can configure a Custom URL, which will be used for the sender address when email notifications are sent to status page subscribers. PagerDuty will generate a set of DNS records, each of which must be verified with your DNS provider.
Navigate to StatusExternal Status Page.
Click next to the desired published status page and select Edit.
In the field Custom URL, enter your desired domain.
❗️
Custom URL
The Custom URL cannot be changed after you have saved or published an external status page. Please take a moment to confirm that you've entered your Custom URL correctly.
If you plan on migrating a custom URL that's currently in use with another status page solution, and you want to decrease downtime, please reach out to us at [email protected].
Click Submit Custom URL.
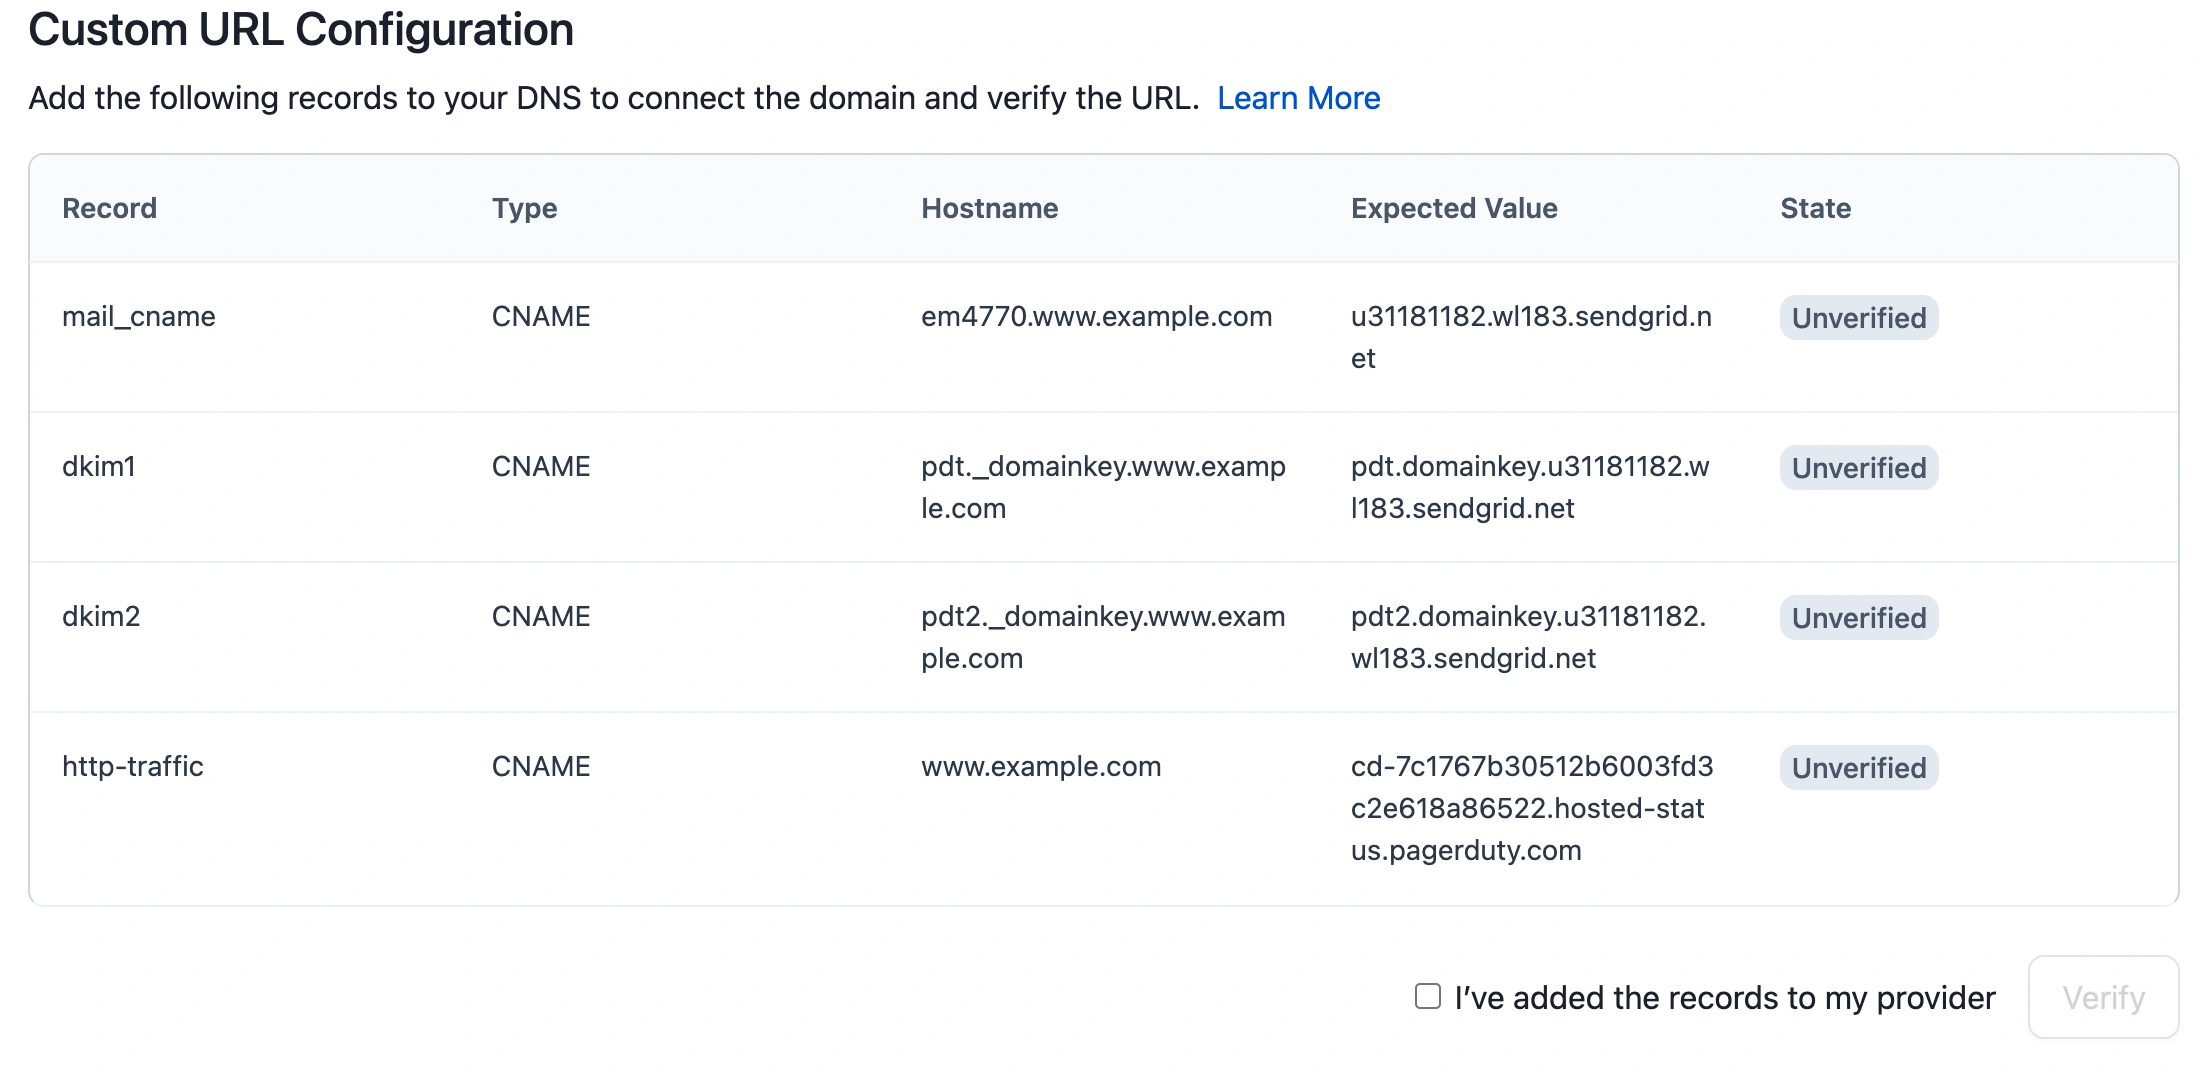
Using the information in the section DNS Records, add each record in your provider's administration console.
Example DNS records
Why We Require These Records
- mail_cname, dkim: Allows PagerDuty to authenticate emails on behalf of your domain.
tls-certificate: Allows PagerDuty to issue a TLS certificate for your domain to secure your Status Page with SSL/TLS.
http-traffic: Redirects users to the Status Page.
Check the box I’ve added the records to my provider and click Verify Records.
Verify records
After successful verification, the tag in the State column will change from Unverified to Verified. Depending on your DNS provider, record validation may take anywhere from a few minutes up to one or more days.
Please refer to your DNS provider's documentation for more information about adding DNS records and troubleshooting.
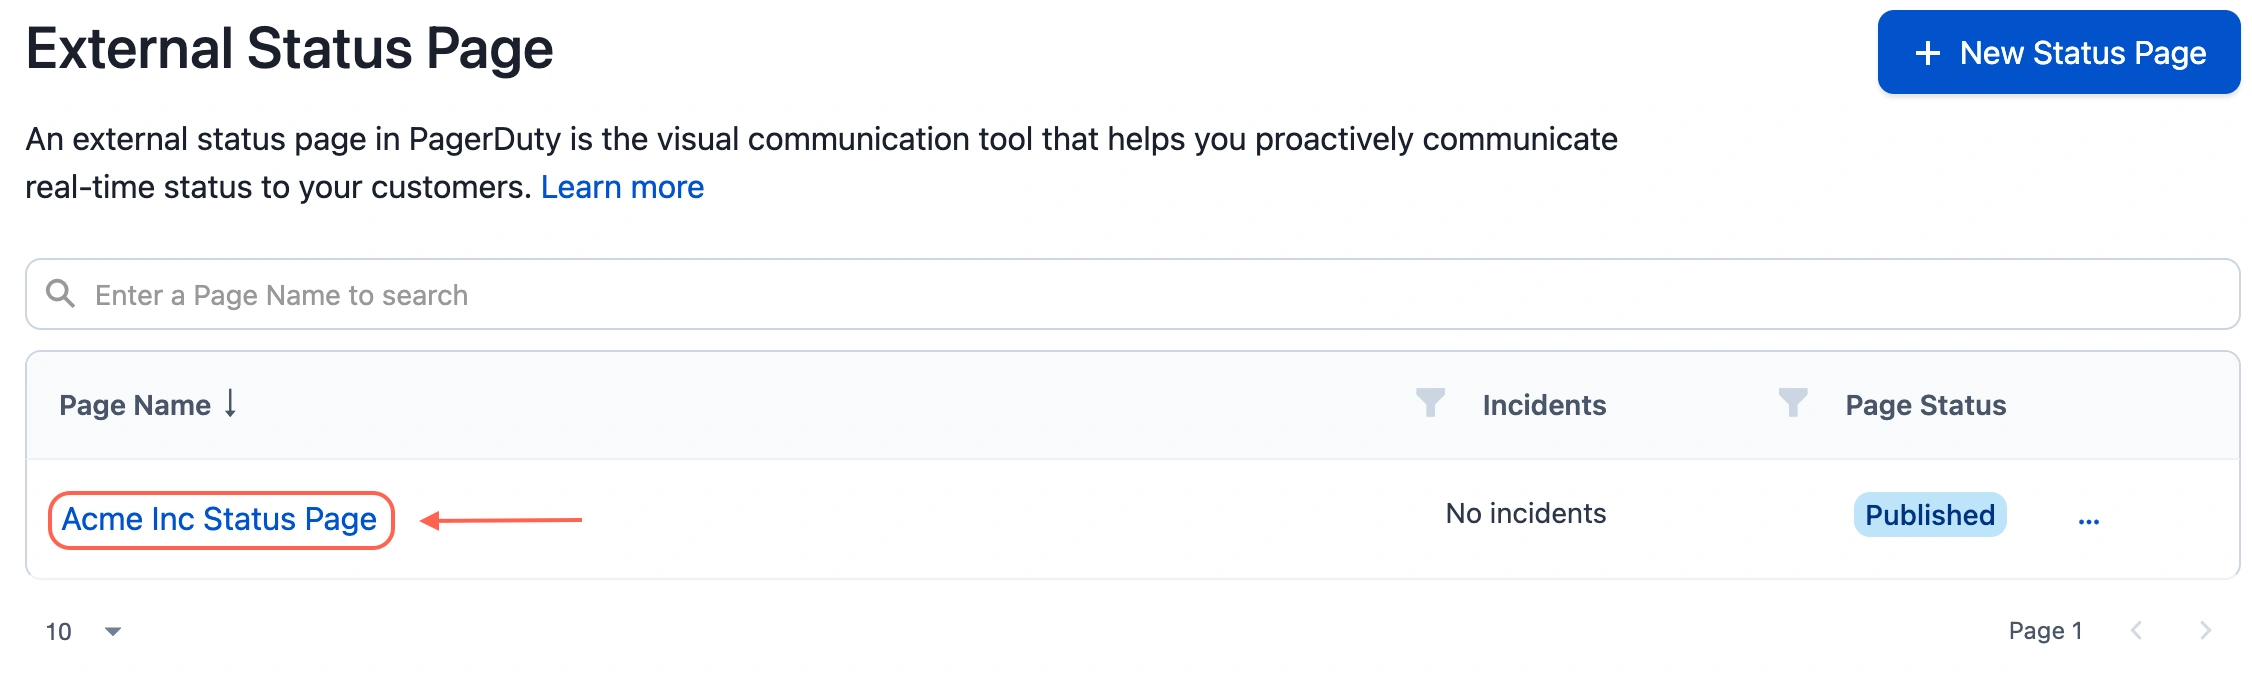
View an External Status Page
PagerDuty users can view an external status page by navigating to its unique public URL (e.g., https://subdomain.trust.pagerduty.com), or in the PagerDuty web app by navigating to StatusExternal Status Page and selecting a status page's title from the list.
Edit an External Status Page
🚧
Required User Permissions
Only the Page Owner (i.e., the user who created the status page draft), the Account Owner, and members of a Team with edit access can edit a status page.
Navigate to StatusExternal Status Page.
Click next to the desired status page and select Edit.
On the first page you can make changes to your Status Page Name. Click Next at bottom left to continue on to edit Business Services, Permissions and Customize settings.
When ready, click Publish.
Publish a Draft Status Page
Navigate to StatusExternal Status Page.
Click next to the desired status page and select Publish.
View Incidents
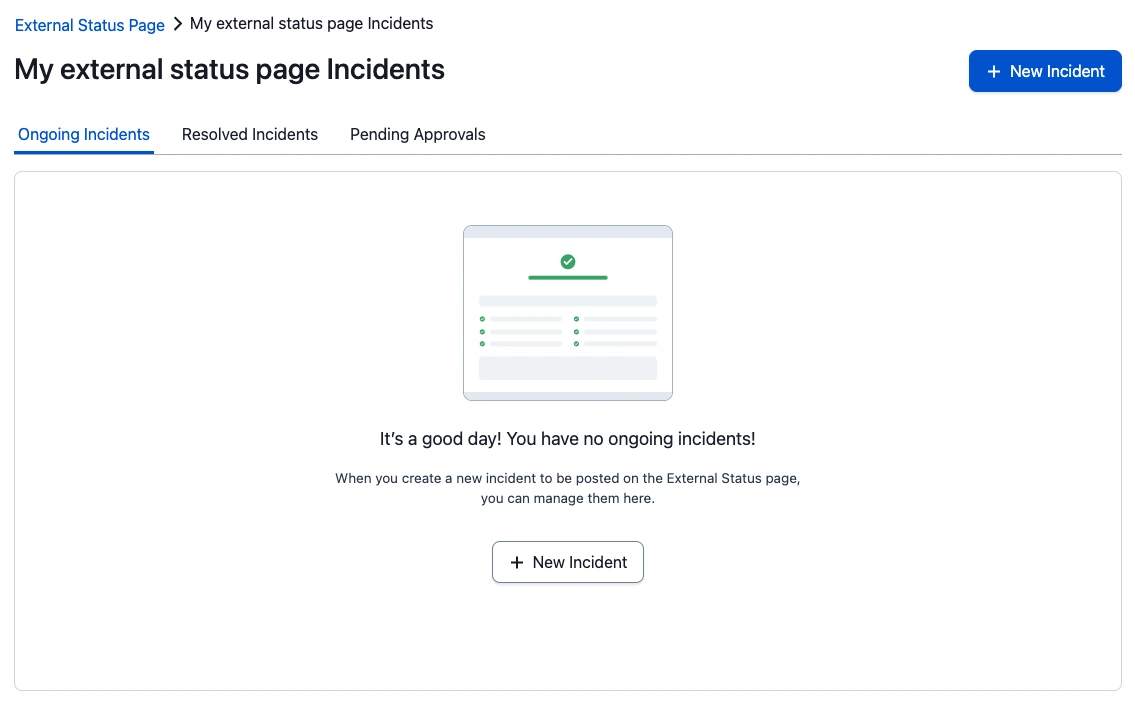
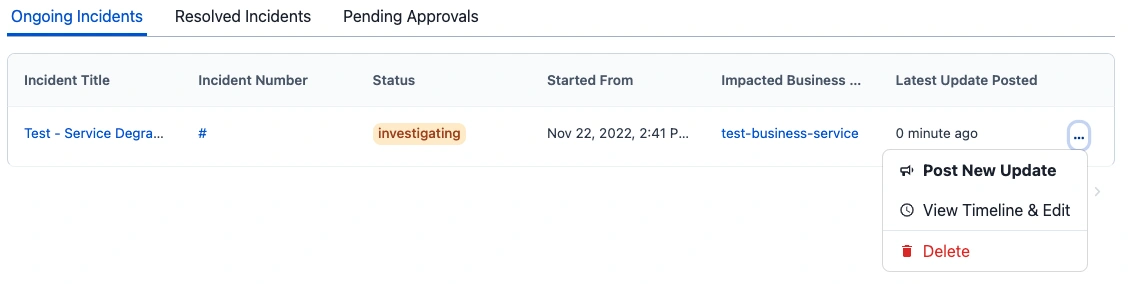
You can see ongoing and resolved incidents, as well as pending communication approvals related to each of your External Status Pages.
View incidents
Navigate to StatusExternal Status Page.
Click on the status page name. a. Use the Ongoing Incidents tab to gain awareness of the incidents that are currently impacting the Business Services related to this External Status Page. b. The Resolved Incidents tab will let you see the history of past incidents. c. The Pending Approvals tab will display ad-hoc communications that need to be approved in order to be published on your External Status Page. d. Click New Incident to manually trigger a new incident in order to notify your user base about an issue.
Configure an External Status Page
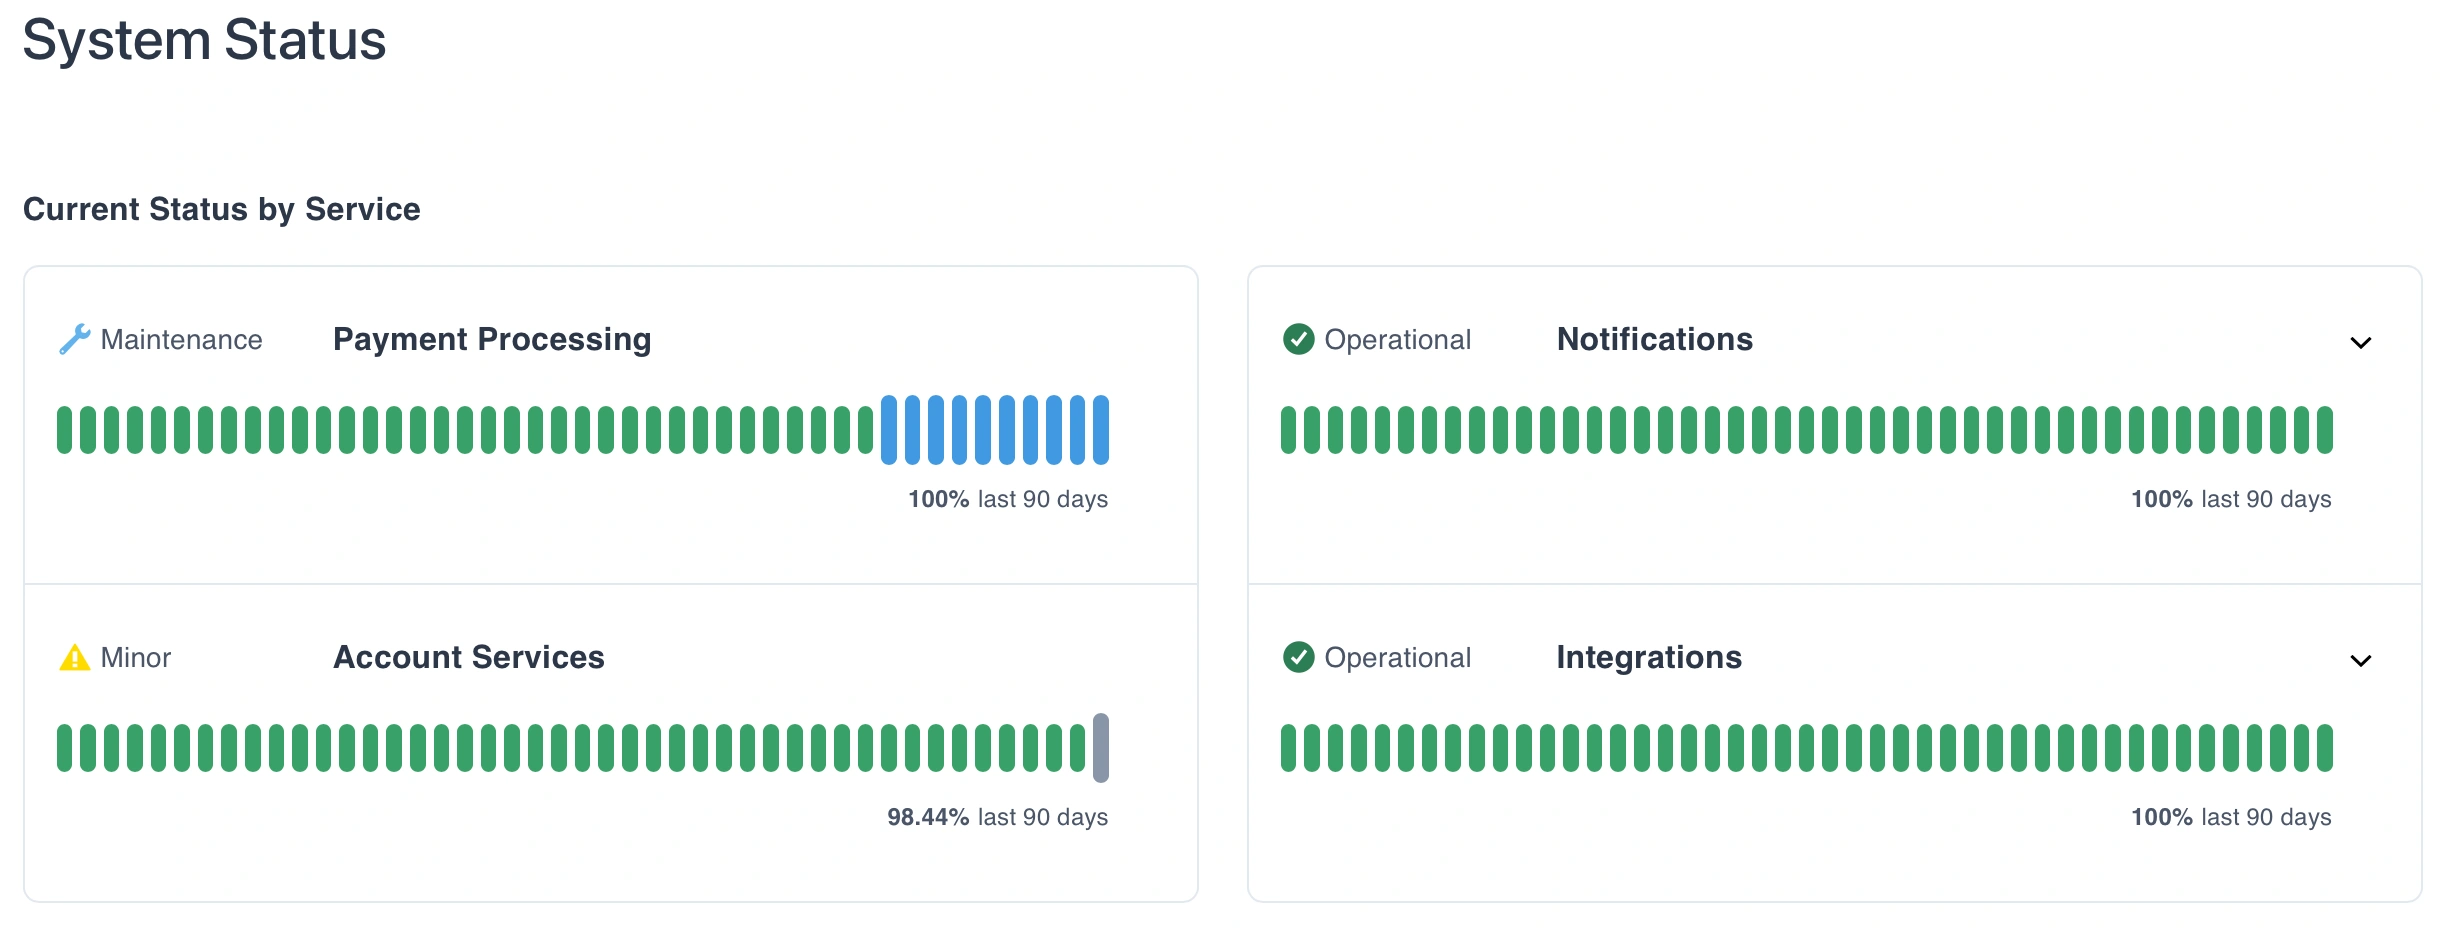
You can customize the metrics display on your status page. The status page uptime metrics calculation is based on major and minor outages, and their durations. Maintenance windows are reflected in the metrics but are not included in the uptime calculation.
Navigate to StatusExternal Status Page and select your preferred status page.
In the left pane, click next to Configuration and select Metrics.
From the dropdown, select your preferred time period to preview status page metrics.
Don't display (default)
Last 90 days
Last 30 days
Last 7 days
Click Save.
External status page metrics
The uptime percentage is calculated based on the duration of partial or significant outage incidents on the external status page. For example, using the last 90 days option, if an incident occurred and lasted 1 hour, we would have 2159 hours of uptime out of 2160 total hours. This would equal 99.9% of uptime. In other words:
Hours of uptime Total hours 100 = Uptime percentage
The number of bars will adapt to the screen size with each bar representing a specific timeframe. For example, a 13” screen display would show the following for the available time periods:
For 90 days, each bar represents 2 days.
For 30 days, each bar represents 1 day.
For 7 days, each bar represents roughly 4 hours and 20 minutes.
Delete an External Status Page
🚧
Required User Permissions
Only the Page Owner (i.e., the user who created the status page draft), the Account Owner, and members of a Team with edit access can delete a status page.
Navigate to StatusExternal Status Page.
Click on the name of the status page that you wish to delete.
Click the button in the sidebar at the left side of the page.
Select Delete Status Page.
Confirm the deletion by typing "delete" in the modal window and click Delete.
Status Page Incidents
Status Page Incidents are different from other Incidents you or your monitoring tools may trigger on technical services. Status Page Incidents are bound to the status page only and are meant to be used to publish status updates and inform your external audience of the current status of an internal incident.
🚧
Prerequisite
In order to post Status Page Incidents, incident Priority, an account-level setting, must be enabled.
Status Page Incidents
📘
Post Limits
Posts have a character limit of 5000 characters.
You can have a maximum of 50 ongoing posts per status page. This includes both incident and maintenance posts.
You can create up to 300 posts per status page per month.
Create a Status Page Incident
Navigate to StatusExternal Status Page.
Click on the name of the desired status page.
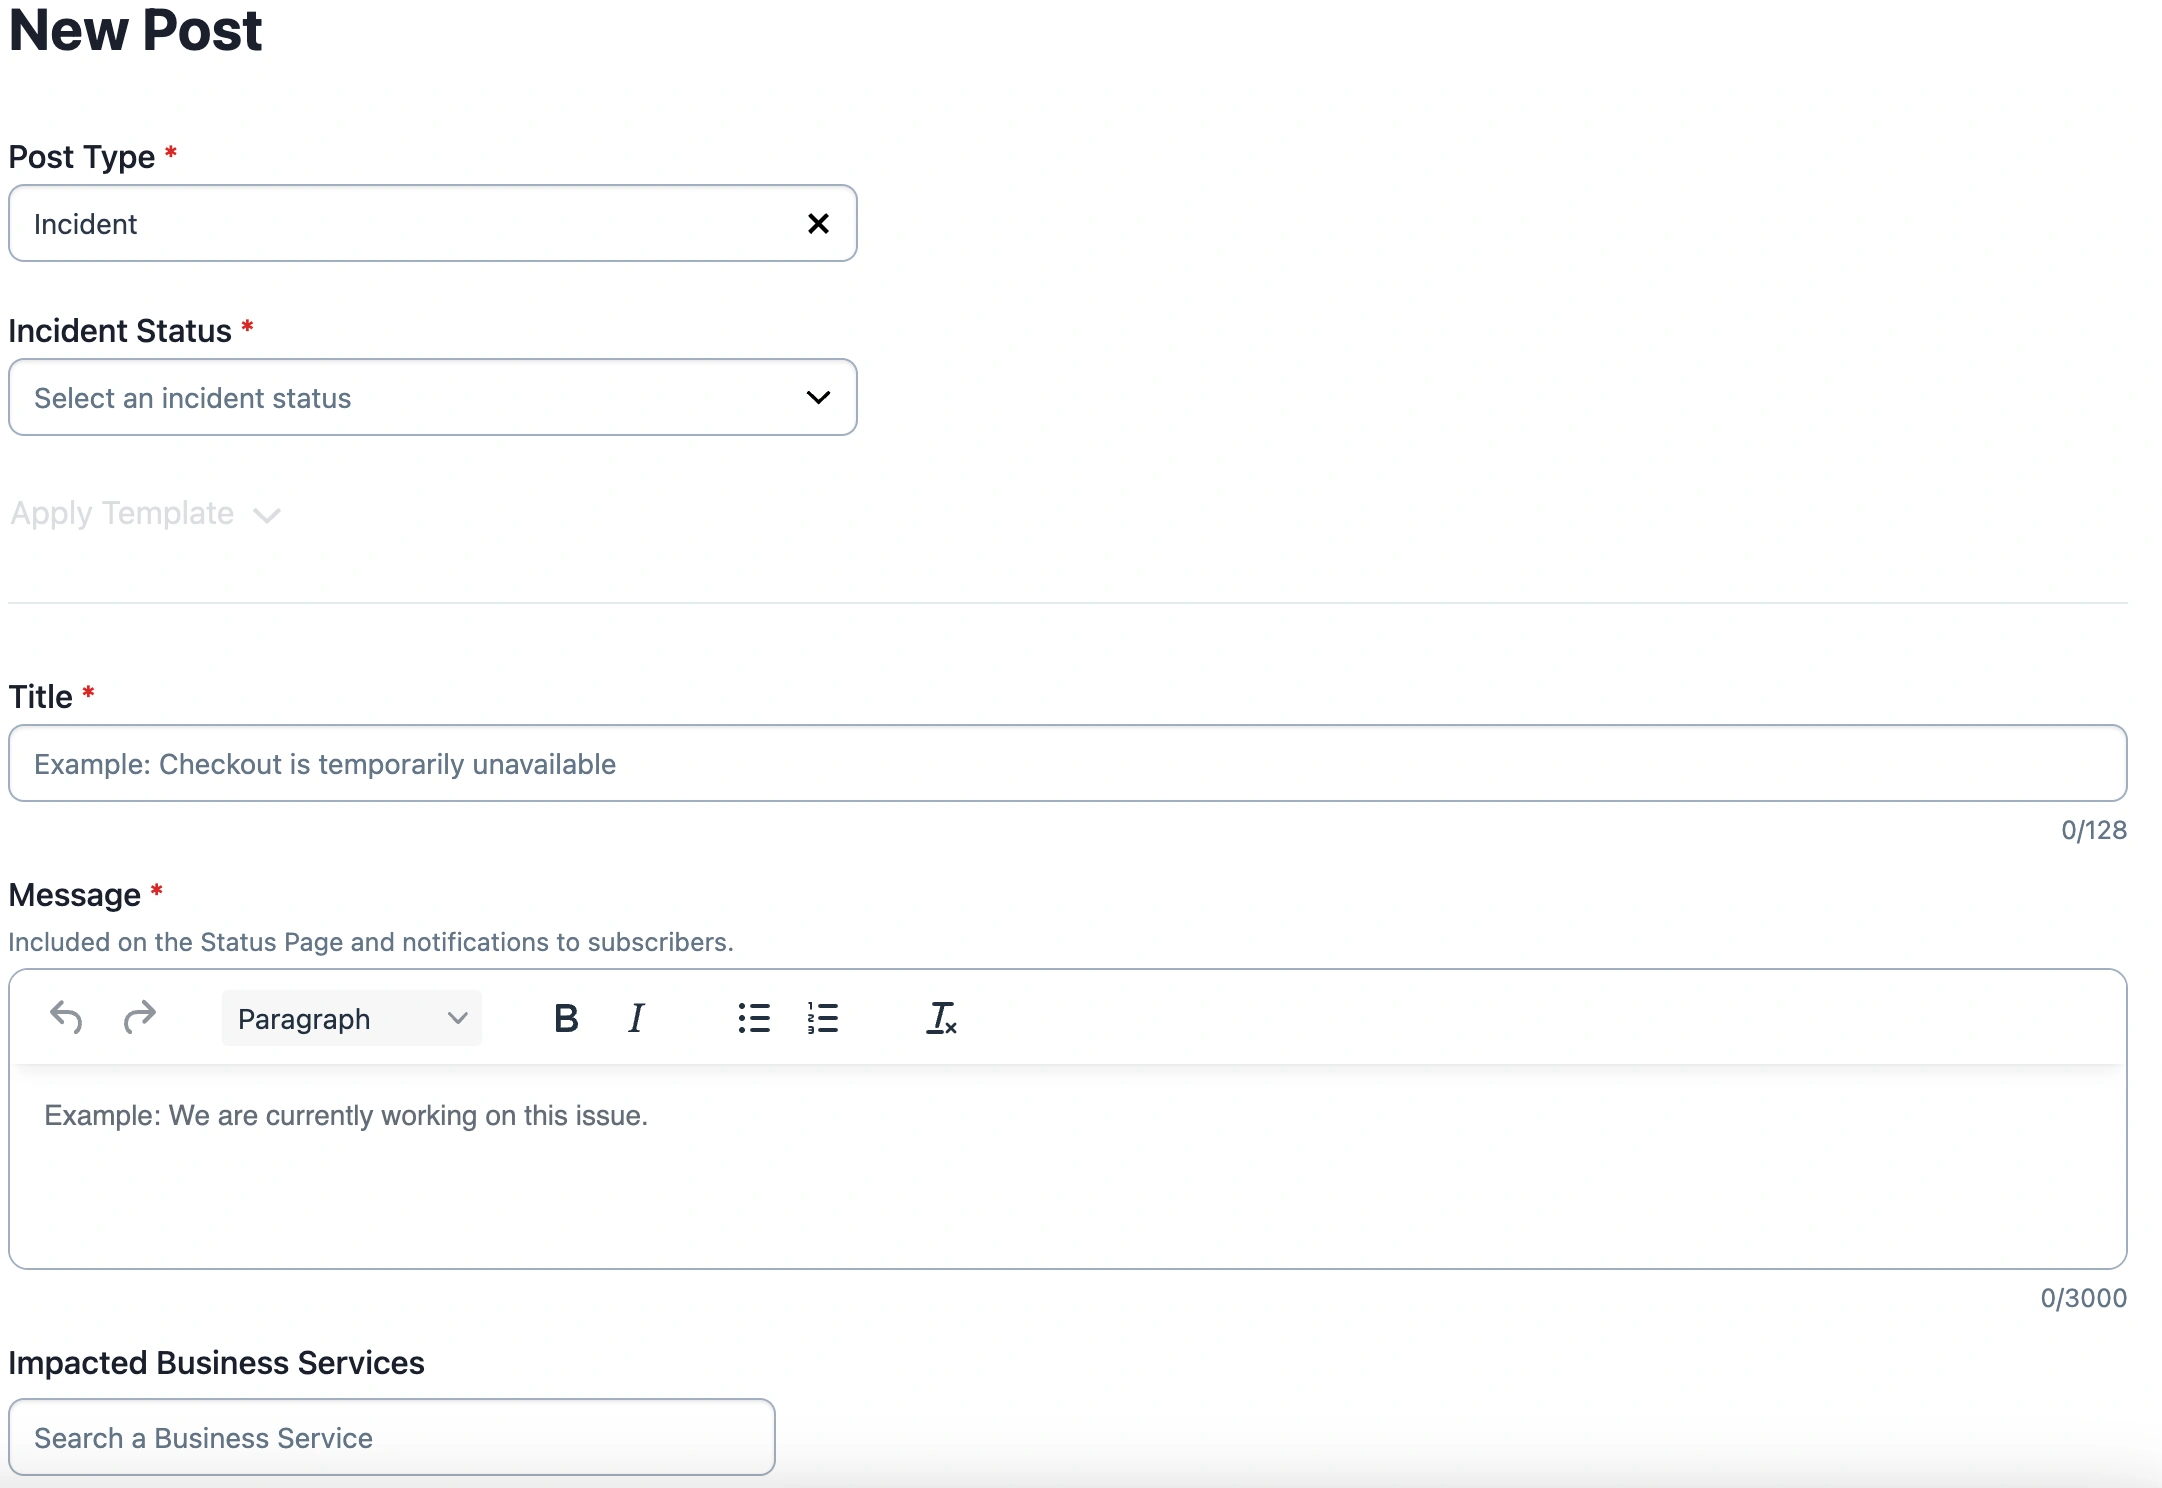
Click New Incident.
Select the incident status:
Detected: We've identified an issue and it's under investigation.
Investigating: The incident is still under investigation, and efforts to resolve it are underway.
Resolved: We've resolved the incident and resumed normal operations.
For Automated Incidents:
Detected: Maps to the Triggered status of the linked technical incident.
Investigating: Maps to the Acknowledged status of the linked technical incident.
Resolved: Maps to the Resolved status of the linked technical incident.
Give the Status Page Incident a descriptive Title and write an initial Message for External Status Page subscribers and visitors. The Message field supports rich text, including hyperlinks. To add a hyperlink to a message, highlight the text your preferred text, then right-click and click Link, to fill out the URL and other information. Optional: Set the Incident start time to reflect when impact began. You can backdate the start time so the public timeline matches the actual impact window with the Published Time field
Select the Impacted Business Services.
Select the level of impact: All Good, Major, or Minor.
Optional: Let users know the estimated Time till Next Update.
Optional: Check the Send update notifications to subscribers checkbox to send notifications.
Click Post to post the incident.
Create a Status Page Incident
Note: External Status Pages refresh automatically when new posts or updates are published. No manual reload is required.
In the open incidents list, click the to the right of the desired incident and select New Update.
Select the Post Status.
Write a Message for your External Status Page subscribers and visitors.
Select the Impacted Business Services.
Select the level of impact: All Good, Major, or Minor.
Optional: Let users know the estimated Time till Next Update.
Optional: Check the Send update notifications to subscribers checkbox to send notifications.
Click Update to publish the status update.
Publish a status update
Approve a Status Update
When a status update requires approval, named approvers will receive an email notification, a banner will appear on a status page's Incidents screen, and the Pending Approvals tab will also indicate that there are updates that need review.
Pending status updates banner
Users with appropriate permissions can approve pending status updates in the web app:
Navigate to StatusExternal Status Page.
Click on the name of the desired status page.
Select the Pending Approvals tab.
Click next to the status update and select Review Post.
Review the details of the status update and click Publish.
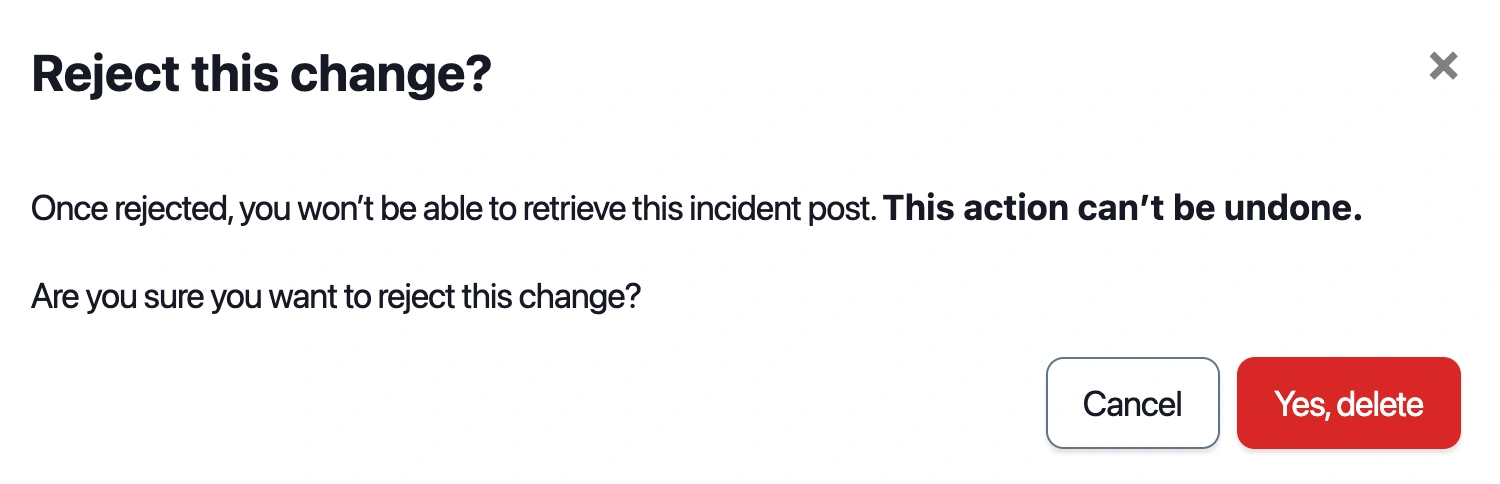
Reject a Status Update
While following the approval steps above, you also have the option to Reject a status update. Click Reject and confirm your decision in the modal by clicking Yes, delete.
🚧
Rejected Status Updates
Rejected status updates cannot be retrieved, and this action cannot be undone.
Reject a status update
Edit a Status Update
Your users can add information or make changes to existing status updates.
Navigate to StatusExternal Status Page.
Click on the name of the desired status page.
In the open incidents list, click next to the desired incident and select Edit Timeline.
Locate the status update that you need to update and click next to it. Make the necessary changes and click Update.
If you need to edit the impacted services, click icon under Business Services Impacted, select the desired business services, and then click Update.
Add a Postmortem to a Status Page
You can add public postmortems to any resolved External Status Page incident to share with your customers.
To add a postmortem to a resolved External Status Page incident:
Navigate to StatusExternal Status Page and then select your preferred status page.
You will be directed to the PostsIncidents page by default. Select the Resolved tab, click the menu to the right of the incident, and then select Add Postmortem.
Enter your postmortem in the Message field. You may use the text formatting options above to format your postmortem message.
Once you are finished entering your postmortem message, under Notifications you may optionally select the checkbox to Send update notifications to subscribers.
Please note that once posted, postmortems will be published immediately, independent of any configured approval flow you may have for your page. When you are sure that you would like to proceed, click Post.
Edit an External Status Page Postmortem
To edit an External Status Page postmortem that has already been posted:
Navigate to StatusExternal Status Page and then select your preferred status page.
You will be directed to the PostsIncidents page by default. Select the Resolved tab, click the menu to the right of the incident and then select Edit Postmortem.
Edit the postmortem in the Message field. You may use the text formatting options above to format your postmortem message.
Once you are finished editing your postmortem message, under Notifications you may optionally select the checkbox to Send update notifications to subscribers.
Please note that once posted, postmortems will be published immediately, independent of any configured approval flow you may have for your page. When you are sure that you would like to proceed, click Update.
Delete an External Status Page Postmortem
To delete an External Status Page postmortem that has already been posted:
Navigate to StatusExternal Status Page and then select your preferred status page.
You will be directed to the PostsIncidents page by default. Select the Resolved tab, click the menu to the right of the incident and then select Edit Postmortem.
At the bottom right, click Delete. A confirmation modal will appear, notifying you that this action cannot be undone and that subscribers are not notified of deleted posts. When you are ready to proceed, click Delete again.
Scheduled Maintenance Notices
You may let your users know about upcoming or ongoing maintenance windows for any components of your application or infrastructure. The external status page allows you to schedule maintenance notices, select the affected business services, and post updates.
📘
Post Limits
You can have a maximum of 50 ongoing posts per status page. This includes both incident and maintenance posts.
Post a Maintenance Notice
Navigate to StatusExternal Status Page.
Click on the name of the desired status page.
On the left sidebar, select Maintenance under Posts.
Click Post Maintenance.
Select the Post Status: Scheduled, In progress, or Completed.
Write a Title for your notice and a Message describing the maintenance. Visitors and subscribers will see this text.
In the section Scheduled Maintenance Time, use the date and time pickers to select start and end times.
Select the Impacted Business Service(s).
In the Notifications section, check or uncheck the box depending on whether you'd like to notify subscribers about the maintenance.
Click Post.
New maintenance notice submission form
Post a Maintenance Update
📘
Status Update Limit
You can add up to 50 status updates per post.
Navigate to StatusExternal Status Page.
Click on the name of the desired status page.
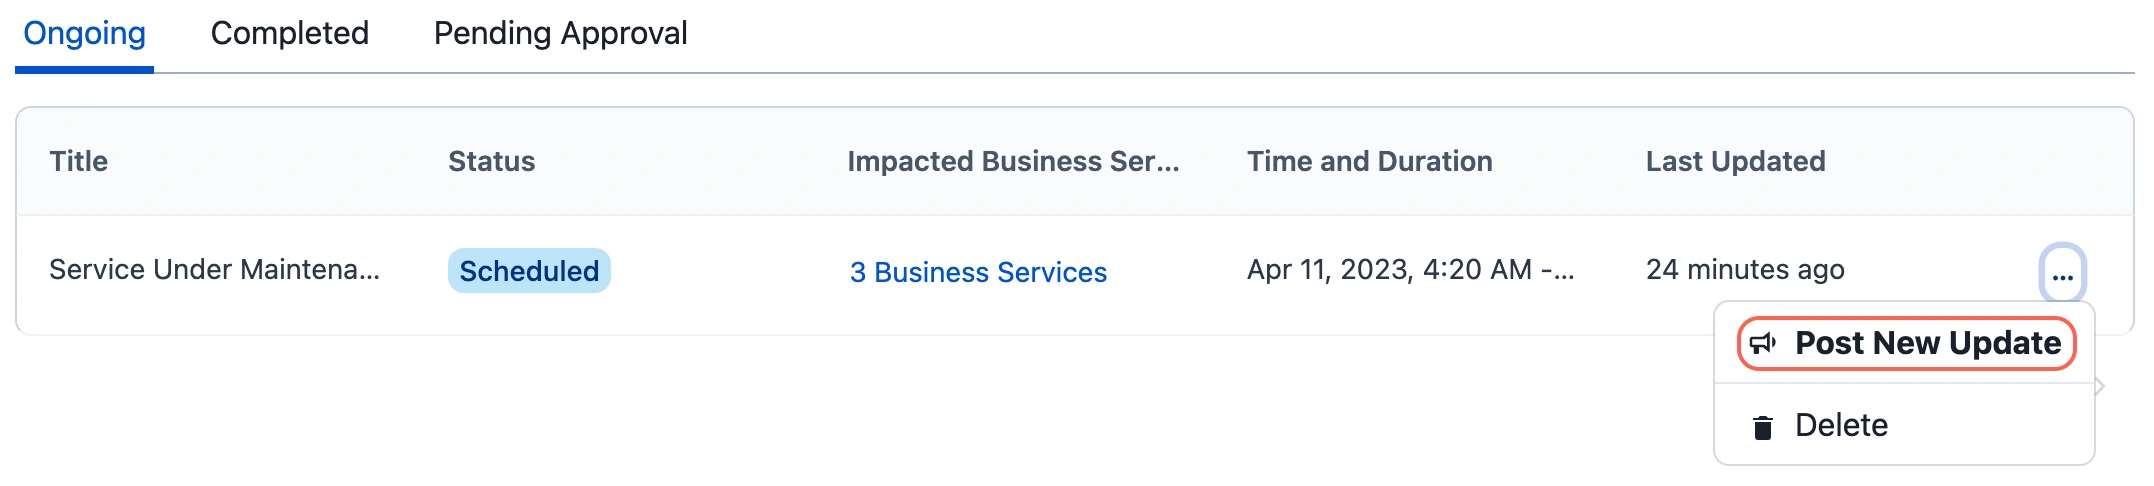
On the left sidebar, select Maintenance under Posts.
Click next to the desired maintenance notice and select Post New Update
Post new maintenance update
Select the Maintenance Status and write an update in the Message field.
Select the impacted Business Services.
Click Post.
End a Maintenance Window
Navigate to StatusExternal Status Page.
Click on the name of the desired status page.
Select Maintenance under Posts.
Click next to the desired maintenance notice and select Post New Update
Under Maintenance Status, select Completed.
Post the update. The maintenance moves to the Completed tab.
Completed maintenance windows
Delete a Maintenance Notice
Navigate to StatusExternal Status Page.
Click on the name of the desired status page.
On the left sidebar, select Maintenance under Posts.
Click next to the desired maintenance notice and select Delete
Confirm the action by clicking Delete button. Deleted maintenance notices cannot be restored.
Subscribe to Status Updates
There are multiple ways you or other users can subscribe to status updates:
You can subscribe yourself or another user to receive status updates via email.
In the web app, navigate to StatusExternal Status Page.
To the right of your desired status page, click Subscribers.
Click Add Subscriber.
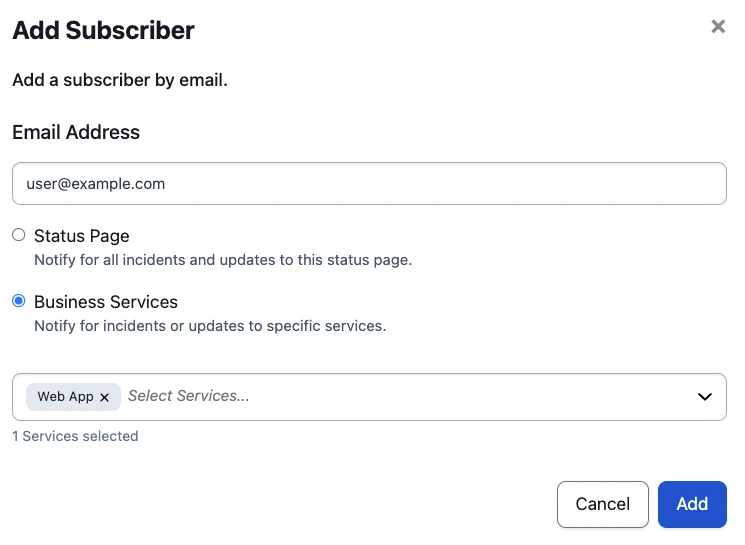
In the modal, enter a user's email address and select Status Page or Business Services.
If you select Status Page, the user will be notified for all incidents and updates to this status page.
If you select Business Services, please enter one or more Business Services. This option only notifies the user when there is a status page update related to their selected business service(s).
Subscribe a user to a business service
Click Add.
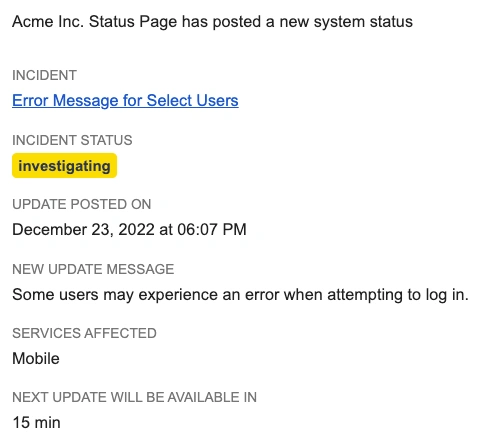
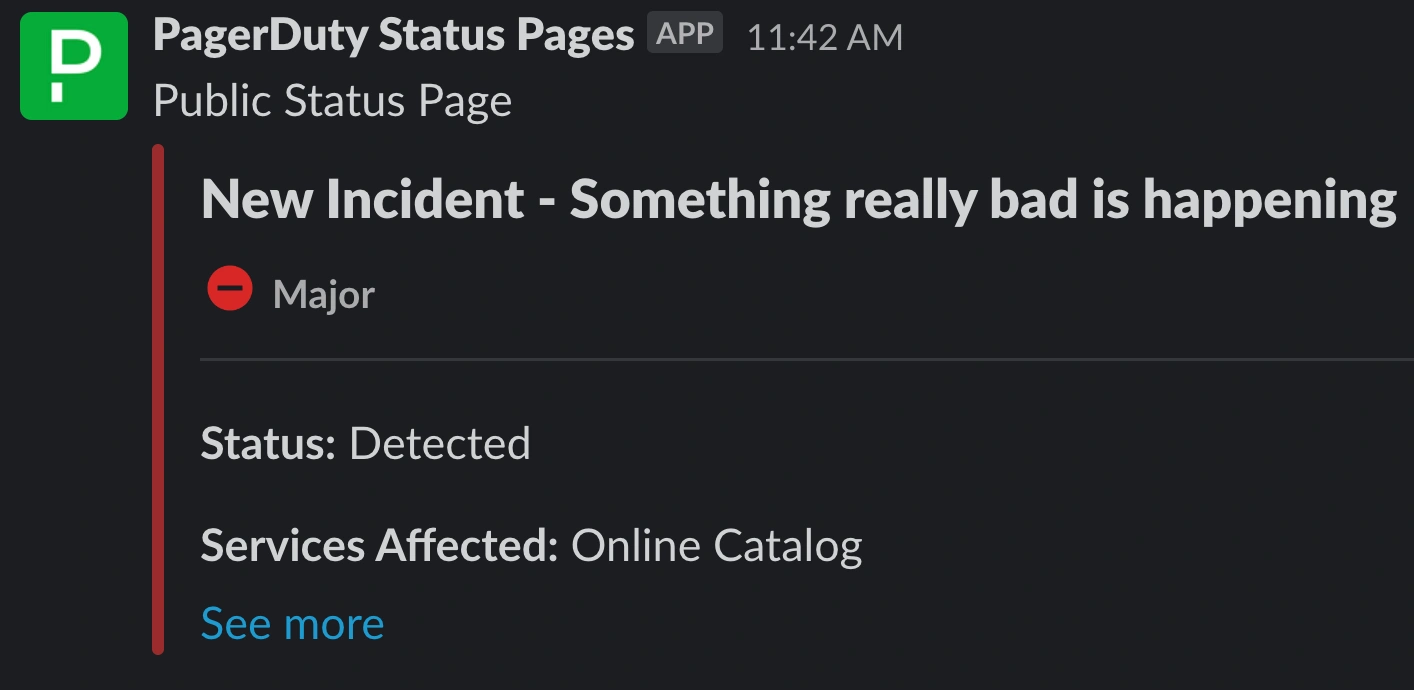
Subscribed users will receive an email notification whenever there is an incident on the status page or their selected business services.
Example email notification
📘
Subscriber Count
To view the number of subscribers, navigate to your preferred status page and select Subscribers in the left menu. Page Subscribers indicates how many users are subscribed to the currently selected status page, while Total Account Subscribers shows how many users are subscribed to all status pages.
Status page subscribers
If you reach the maximum number of subscribers, the option to add subscribers will be disabled. Please contact our Sales Team to purchase additional status page subscriber licenses.
You can have a maximum number of 150,000 subscriptions per status page. This includes all email, Slack and webhook subscription channels.
Import Subscribers from a CSV File
📘
Notification Method
The Import Subscribers feature only supports email subscriptions at this time.
In the web app, navigate to StatusExternal Status Page and select your preferred status page's name.
In the left pane, click Subscribers.
To the right of Add Subscriber, click Import Subscribers (CSV).
Select Import Subscribers
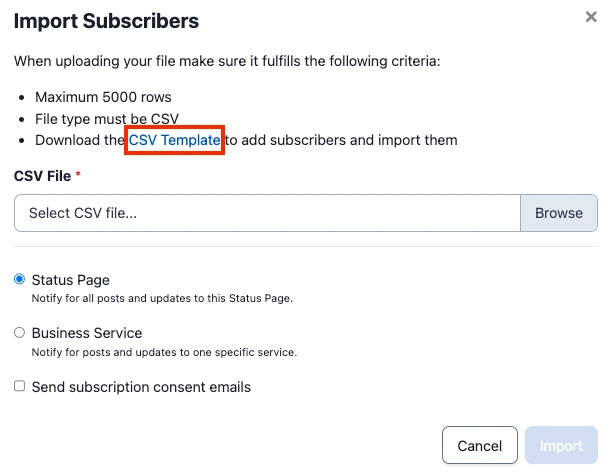
In the modal, download the CSV Template (PD-import-subscribers-template.csv), and then add your subscribers' email addresses to the file.
Note: The file type must be CSV, and a maximum of 5000 rows is allowed.
Downland CSV template
In the section CSV File, click Browse and select the file with your subscribers' email addresses.
Select Status Page to notify users whenever there is a post or update on the status page, orBusiness Service to only notify when a specific business service is affected.
If you select Business Service, a section Subscribe to a Service will appear. Select your preferred business service. Note: Only the business service(s) that you selected while configuring the status page will appear in this section.
Optional: Check the box Send subscription consent emails if you'd like users to receive a confirmation email. They will need to confirm their subscription before they begin receiving status updates.
Click Import.
On the Public-Facing Status Page
You can also subscribe to a status page from its public URL.
Visit a status page's public URL, e.g., https://status.pagerduty.com/.
In the top-right, click Subscribe to Updates.
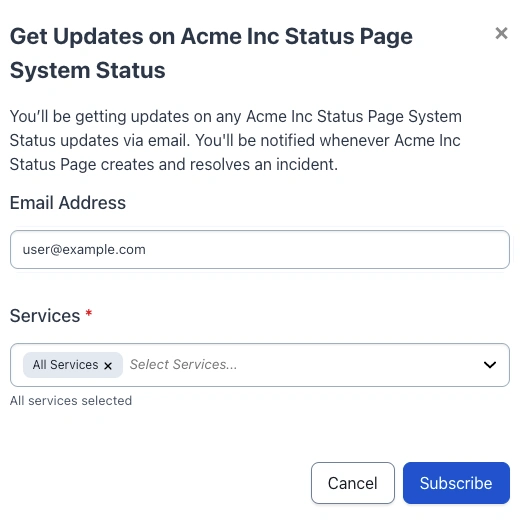
In the modal, enter your email address and select which business services you'd like to be notified for. To receive notifications for all incidents on this status page, leave the default selection, All Services.
Click Subscribe.
Subscribe on the public-facing status page
You should receive a confirmation email; open it and click Confirm your subscription.
In the web app, navigate to StatusExternal Status Page.
To the right of your desired status page, click Edit.
Under step 4 Customize, select the Status Page tab.
Edit External Status Page
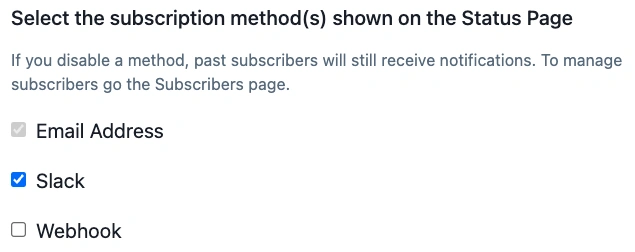
Under Select the subscription method(s) shown on the Status Page, select Slack .
Select "Slack"
Click Save.
Subscribe via Slack
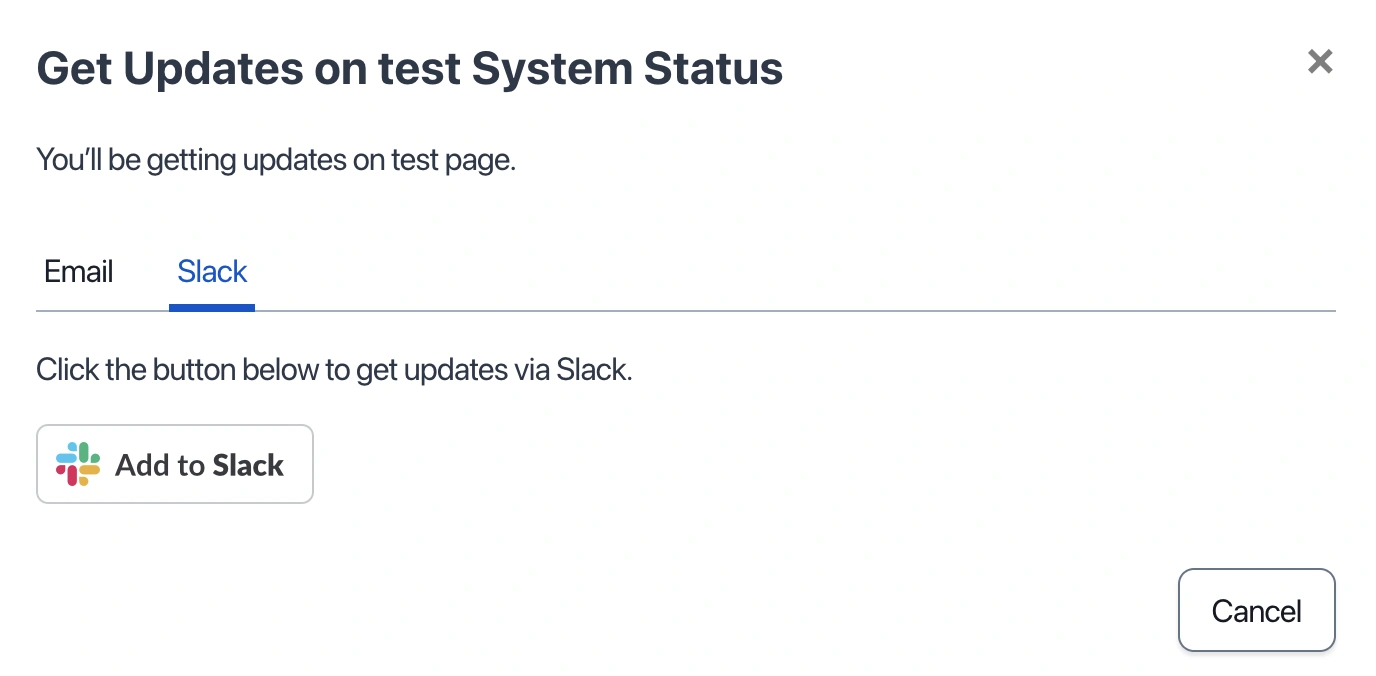
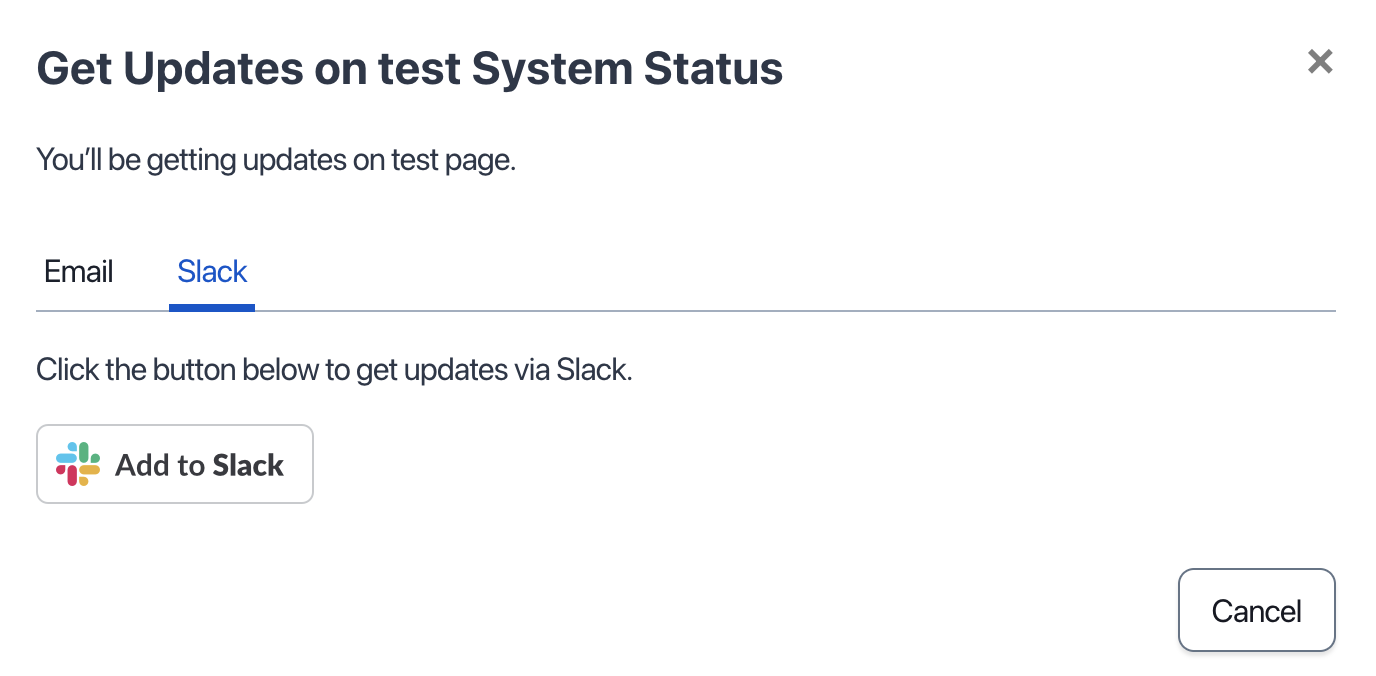
In your web browser, navigate to the status page's public URL and click Subscribe to Updates in the top-right.
Select the Slack tab and click Add to Slack.
Add to Slack
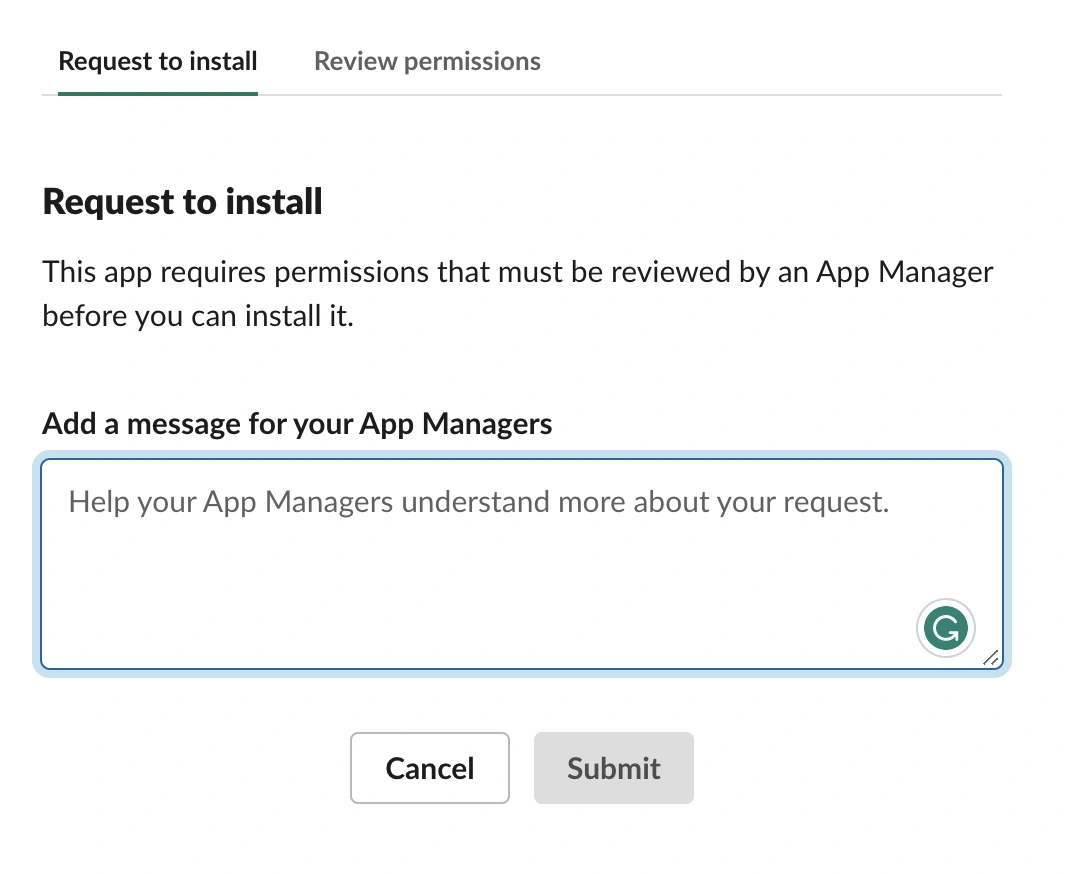
If you have administrative permissions to add apps to your Slack workspace, select a channel from the dropdown and click Allow to authorize your workspace. If you do not have administrative permissions, you can add a message for your App Managers and click Submit to send the installation request to your organization's Slack admins.
Note: If you are part of more than one Slack workspace, you can select the appropriate workspace from the dropdown in the top-right.
Connect Slack workspace
Request to install
After successful installation, you will receive a Slack message in the connected channel: added an integration to this channel: PagerDuty Status Pages.
Now, whenever there is a post on the status page, you'll receive an update in Slack, too.
In web app, navigate to StatusExternal Status Page.
To the right of your desired status page, click Edit.
Under step 4 Customize, select the Status Page tab.
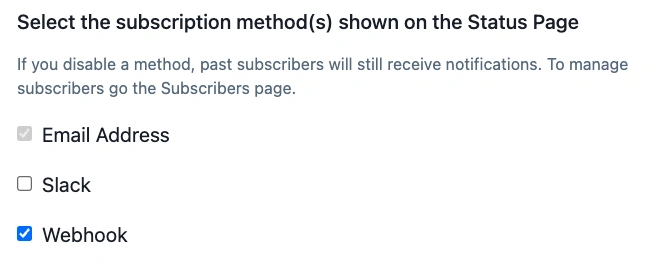
Under Select the subscription method(s) shown on the Status Page, select Webhook .
Select "Webhook"
Click Save.
Subscribe via Webhooks
Navigate to an external status page's public-facing site.
In the top-right, click Subscribe to Updates.
Select the tab Webhook and enter your webhook's URL in the field Webhook URL. Optionally enter an email address; we will send a notification to this email address if there are issues delivering the webhook.
Click Subscribe Webhook.
Example Payload
{
  "ends_at": null,
  "href": "https://subdomain.trust.pagerduty.com/incident_details/PXXXXXX",
  "message": "We are currently working on the issue.",
  "next_update_ms": 900000,
  "post_type": "incident",
  "reported_at": "2023-05-15T20:47:12Z",
  "services": [
    {
      "service_name": "Checkout",
      "severity": "minor"
    }
  ],
  "severity": "minor",
  "starts_at": null,
  "status": "investigating",
  "status_page": "Acme Corp",
  "title": "Checkout is temporarily unavailable"
}
As an admin, you can unsubscribe a webhook from a status page.
Navigate to StatusExternal Status Page.
To the right of your desired status page, select Subscribers.
Select the tab Webhook click to the right of the desired webhook URL Delete.
Read the warning modal and click Yes, delete.
Note: This action cannot be undone. Users will not receive a notice that the webhook was unsubscribed.
Status Page Templates
Use status page templates to create preset posts that can be selected during an incident or maintenance.
Create a Status Page Template
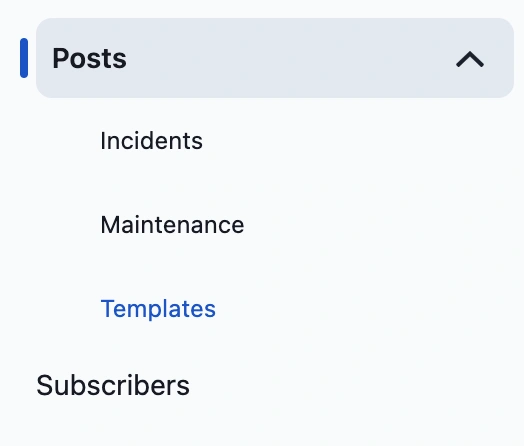
Navigate to StatusExternal Status Page select your preferred Status PagePostsTemplates and then click New Template.
Create a status page template
Perform the following:
Field
Instruction
Post Type
Select the type of post you would like to create a template for: Incident or Maintenance.
Template Name
Enter a template name.
Description
Enter an optionaltemplate description.
Incident or Maintenance Status
Depending on the post type selected above, you will see either Incident Status or Maintenance Status. Select your post's status from the dropdown.
Title
Enter an optionaltitle for the post.
Message
Enter the post message.
Impacted Business Services
Search and select impacted business services by checking the checkbox to the left of the business service. If you have selected an Incident post type, select the outage status in the dropdown to the right.
Impact
(Incident Post Type Only)
Select the incident impact level. This will determine the status level on your page.
Time till Next Update
(Incident Post Type Only)
Select the time duration until the next status update.
Notifications
Check this checkbox if you would like status update notifications to be sent to subscribers.
Once you have finished entering your preferred settings, click Create Template.
Edit or Delete a Status Page Template
Navigate to StatusExternal Status Page select your preferred Status PagePostsTemplates.
Click to the right of your template and select from the following:
Edit Template: Edit your preferred details and then click Save.
Delete: A modal will appear to let you know that this action cannot be undone once deleted. If you wish to proceed, click Yes, delete.
Apply a Status Page Template
Apply a status page template to populate a post with preset values. Templates can be used with new posts and post updates.
Navigate to StatusExternal Status Page select your preferred Status Page select Posts.
Perform the following depending on your use case:
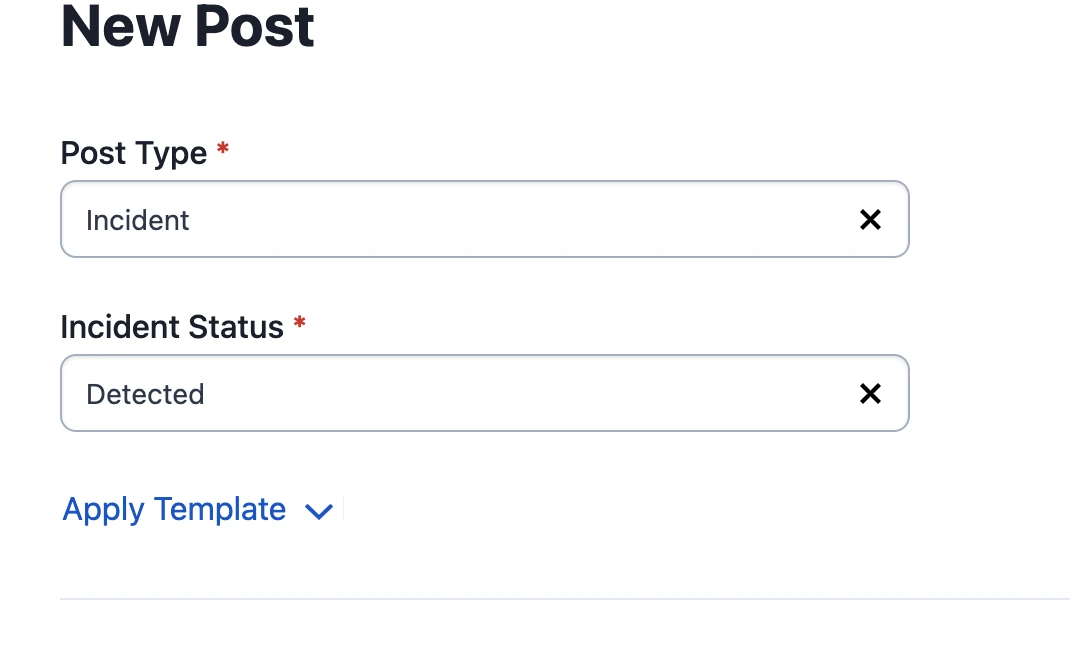
New Post: Click Post New Incident. On the next screen, click Apply Template and then select your preferred template from the dropdown. Your template will automatically apply to all of its preset fields. You may make edits after applying the template, or you can leave it as is. Click Post to post your incident.
Post Update: Select the menu to the right of your preferred incident and select Post Update. On the next screen, click Apply Template and then select your preferred template from the dropdown. Your template will automatically apply to all of its preset fields. You may make edits after applying the template, or you can leave it as is. Click Update to post your update.
New post
FAQ
Who will be able to access the status page externally?
Once you publish an External Status Page, any end-user will be able to access it at its public URL.
Can I customize my public URL?
Yes, you can customize the public URL while creating or editing a status page.
What is a subscriber?
A subscriber is any user on the internet that has opted in to receive communications about incidents in your External Status Page.
How can I customize my page layout?
You can customize the layout of your External Status Page during the Customize step while creating or editing a status page.
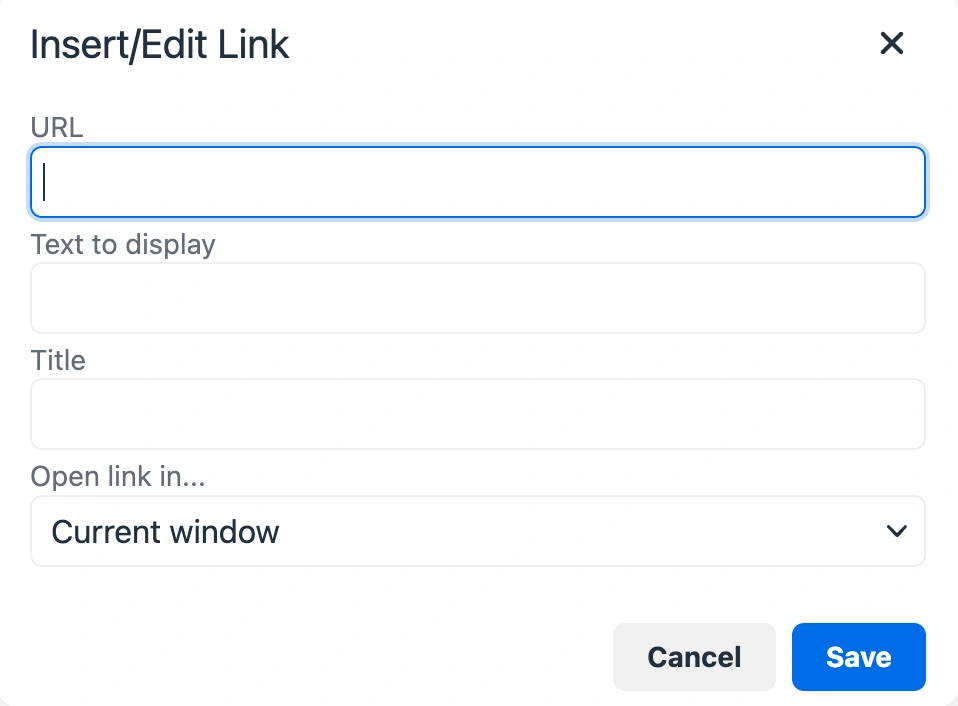
Does the external status page support rich text and hyperlinks?
Yes. The external status page supports rich text and hyperlinks for incidents, maintenance posts, templates, and postmortems. To add a hyperlink, right-click on the text and select Link... Enter the URL in the modal and click Save.
Add a link to a status page
What claim formats does the status page support?
The status page supports CSV and JSON claim formats. For example:
Single: e.g., PPAGE1 or "PPAGE1" (with quotes)
CSV: e.g., PPAGE1,PPAGE2 or "PPAGE1","PPAGE2" (with quotes)