Each user can have up to 10 different contact methods. However, users are limited to three phone numbers for phone notifications and three phone numbers for SMS.
Add a Phone or Email Contact Method
🚧
Toll-Free Numbers
Toll-free numbers are not supported as a contact method. Toll-free numbers are subject to additional regulations and restrictions that differ by region/country, and reliable delivery cannot be guaranteed.
To add phone or email contact methods:
Navigate to User IconMy ProfileContact Information tab.
Follow the instructions for your preferred notification method:
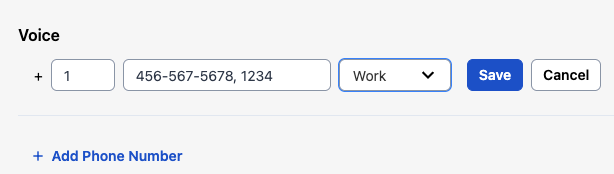
Voice:
Go to Voice.
Click Add Phone Number.
Enter the phone number.
Select the phone number type (for example, Work or Mobile) from the dropdown. If needed, you can configure a phone number with an extension.
Click Save.
Email:
Go to Email.
Select Add Email Address.
Enter the email address.
Select the email type (for example, Work or Home) from the dropdown.
(Optional) Select the Send Short Email checkbox to receive short email notifications designed for smaller devices like pagers or mobile phones.
(Optional) Select the Send HTML Email checkbox if you want to receive HTML emails.
If you leave both checkboxes unchecked, you receive plain-text emails. Refer to Notification Content and Behavior article for examples of HTML vs plain text emails.
Click Save.
Phone Contact Methods with an Extension or Delay
When configuring your phone notification methods, you may need to account for pauses, direct extensions, or key presses. You can achieve this by entering one or more commas (,), which each represent a one-second delay.
📘
Tip
Depending on your phone system, you may need to add commas for pauses before AND after your direct extension.
In the web app, go to User IconMy ProfileContact Information tab.
In the Voice section, click to the right of the phone number you want to edit, or click Add Phone Number.
Enter your phone number, followed by a comma (,), then your extension.
Click Save.
Contact method with an extension
Examples
Scenario
Contact method entry
Result
Phone notification method with a direct extension
415-555-5555,1234
PagerDuty dials 415-555-5555, waits one second, then dials 1234.
Phone notification method with a direct extension (alternate)
415-555-5555,,,1234
PagerDuty dials 415-555-5555, waits three seconds, then dials 1234.
Traverse a phone tree
415-555-5555,,1,,,2,987
PagerDuty dials 415-555-5555, waits two seconds, dials 1, waits three seconds, dials 2, waits one second, then dials 987.
Leave a delay for "Please leave a message after the tone..."
415-555-5555,,,,,,
PagerDuty dials 415-555-5555, waits six seconds, then leaves a message.
Phone Number Formatting
PagerDuty uses a third-party provider to validate phone numbers. Phone numbers may not exceed 40 characters, and may only include digits from 0–9 and the following symbols: comma (,), asterisk (*), and pound (#).
In some countries, providers require you to format numbers in a specific way. Due to limitations with local providers, Mexico-based SMS contact methods must be free of area code prefixes. For example, the PagerDuty system automatically removes the leading 1 in the phone number +52 15558889999 and reformats it as +52 5558889999. This improves SMS reply deliverability and processing.
Additionally, trunk prefixes from the following countries and regions are not supported:
France
Romania
UK
Denmark
Germany
Australia
Thailand
India
North America
You must remove trunk codes before adding a phone number as a contact method. For example, a UK-based number with local formatting 01332 412 251 must be formatted for international use without the leading 0, i.e., +44 1332 412251. Trunk codes or prefixes vary by region and may be different from the example provided.
Add a Slack Contact Method
PagerDuty relies on a variety of third parties for notifications. PagerDuty recommends configuring a secondary contact method as a backup to avoid delays caused by availability, traffic, or uptime issues. This ensures the timely delivery of notifications when seconds matter.
⚠️
Limitation
Slack's notification delivery is not rate-limited based on account type. However, free accounts have limited access to certain features like workflows and integrations that might affect how notifications are configured.
⚠️
Requirement
You must have a PagerDuty Slack integration configured with Workspace and user account mapping. View the Slack Integration Guide for more details.
To add a Slack contact method:
Navigate to User IconMy ProfileContact Information tab.
Go to Slack Extension, click Slack Workspace, and select your Workspace from the dropdown.
Click Save.
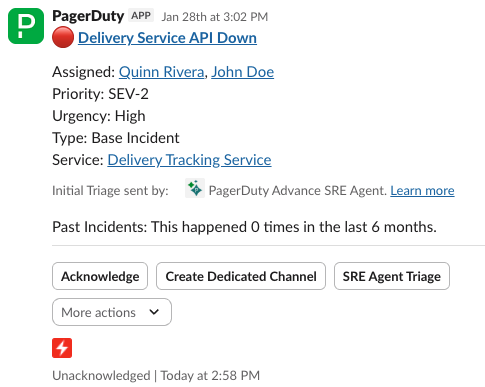
When you are assigned to an incident, you receive an incident notification as a direct message from the PagerDuty Slack App. Refer to the Slack User Guide for more information on responding to Slack incident notifications.
Incident notification in Slack
Add an SMS Contact Method
To receive PagerDuty notifications via SMS, you must first verify your phone number. Verification codes are sent directly to the new SMS number and cannot be sent to other numbers or users for the verification process. Unverified phone numbers cannot receive SMS notifications.
To add an SMS contact method:
Navigate to User IconMy Profile and select the Contact Information tab.
Go to Text Messaging/SMS and click Add Text Messaging/Add SMS Number.
Enter your phone number, select the phone number type (for example, Work or Mobile) from the dropdown, and click Send Verification.
👍
Supported Countries
Refer to Supported Countries for the list of countries where SMS notifications are supported. If you are in a country with partial support (i.e., marked with an asterisk, *), you may not receive the verification message due to local regulations and circumstances beyond PagerDuty's control. You can click Resend code to receive another code. However, PagerDuty recommends using the PagerDuty Mobile App as a primary notification method, as push notifications are delivered much more reliably.
When you receive a six-digit verification code on your device, enter it in the modal that appears and click Verify.
Verify SMS contact method
📘
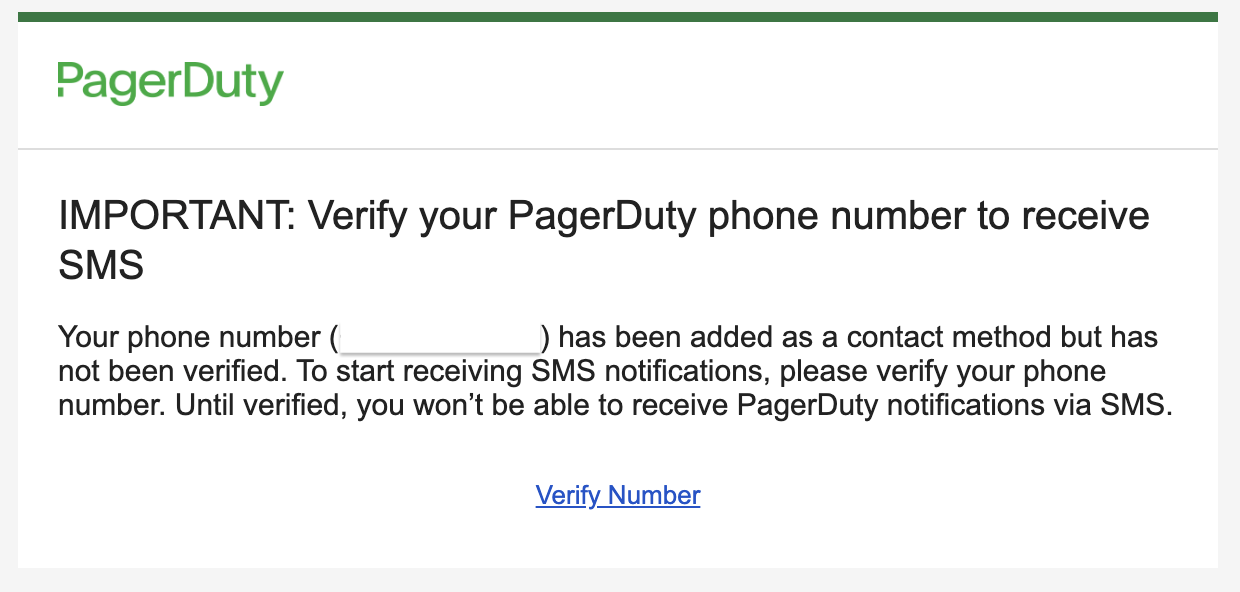
API Users
Users added via the REST API (for example, using Terraform) must manually verify their phone number in the PagerDuty web app. They see the following banner at the top of their view, instructing them to do so:
Phone number verification banner
📘
Reminder
You receive a reminder email in the event you leave a Contact Method unverified for an hour or longer. This reminder is sent once per Contact Method.
Contact Method reminder email
Add a WhatsApp Contact Method
For global organizations where SMS is not ideal, you can configure WhatsApp as a notification method. WhatsApp numbers must be verified prior to receiving notifications. Unverified numbers cannot receive WhatsApp notifications.
📘
Notes
You cannot use the same number for SMS and WhatsApp, and you must select one or the other. If you have multiple numbers, you can use one number for SMS and another for WhatsApp.
You can switch an existing SMS number to be used with WhatsApp. When switching between WhatsApp and SMS, notification rules are automatically replaced by the selected method.
In cases where messages cannot be delivered on WhatsApp, the fallback message is sent via SMS.
Admins: To block WhatsApp as a notification channel for your organization, contact [email protected].
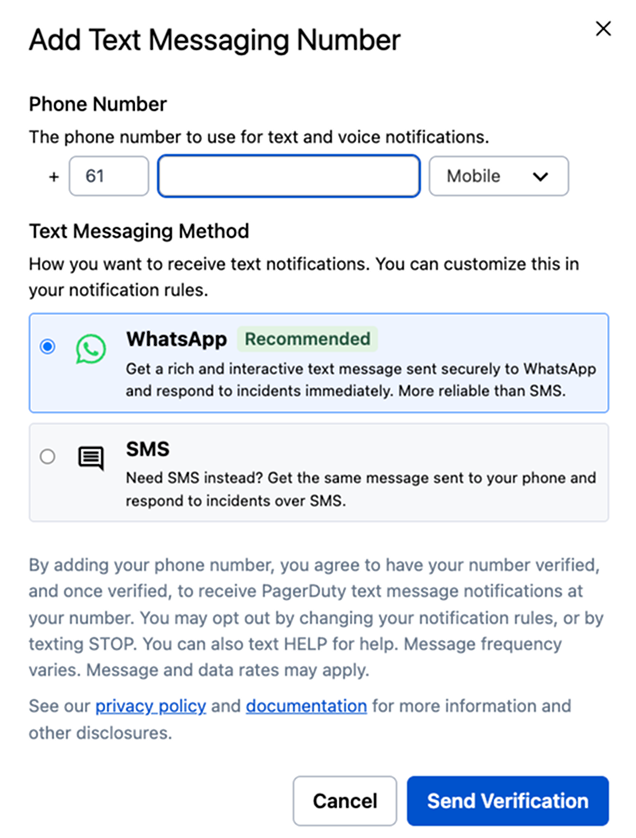
To add a WhatsApp contact method:
Navigate to User IconMy Profile, and Contact Information tab.
Go to Text Messaging and click Add Text Messaging.
Enter your phone number and select the phone number type (e.g., Mobile, Home, etc.) from the dropdown. If supported, the WhatsApp option will appear as an applicable notification method.
Click Send Verification.
Once you receive a notification from PagerDuty in WhatsApp, tap Verify to complete the Setup.
Find out more on the types of notifications you can receive with WhatsApp.
Add WhatsApp Contact Method
Test a Contact Method
You may want to send a test notification to confirm that your contact method was added correctly.
To test a contact method:
In the PagerDuty web app, navigate to User IconMy ProfileContact Information tab.
Click Test to the far right of the contact method you want to test.
📘
Test Notifications for Phone and SMS
Test notifications for phone and SMS contact methods are not available in all countries. Refer to Supported Countries for more information.
This method establishes a connection between PagerDuty and your contact method without creating a test incident. If you want to test a contact method using a test incident that mimics a production incident, you may also:
Navigate to User IconMy ProfileContact Information tab.
Click to the right of the contact method you want to edit.
Make the required changes.
Click Save.
📘
Too Many Edits
You can edit contact methods up to 10 times within a 24-hour period. If you receive the "Contact methods cannot be modified at this time" error, wait for 24 hours and try again.
Delete a Contact Method
Navigate to User IconMy ProfileContact Information tab.
Click to the right of the contact method you want to delete.
Click OK to accept the confirmation.
View Mobile App Devices
Under Mobile App on your user profile, you can view which devices are registered to receive push notifications. A device is registered to receive push notifications when you log in to the mobile app.
Expired Mobile Devices
An Expired flag next to a mobile device means that you have not logged into or accessed the mobile app in some time. For security reasons, the PagerDuty system expires the token. To re-enable the device, remove it as a contact method and then log in to your PagerDuty account on your preferred device.