How to record a .har file for troubleshooting
When troubleshooting advanced issues, it is a good practice to provide customer support team with the additional context about the network information that are generated in your web browser while the issue is actively occurring.
Customer Support Specialist or Technical Support Engineer may request that you record a HAR file whilst the issue is occurring and provide it to them via a support ticket for further analysis.
Note
Bear in mind that HAR files can contain sensitive data as well as the content of the pages you downloaded while recording and your cookies. This may allow anyone with the HAR file to impersonate your account and all the information that was provided during the recording (personal details, passwords, credit card numbers, and so on)
Google Chrome
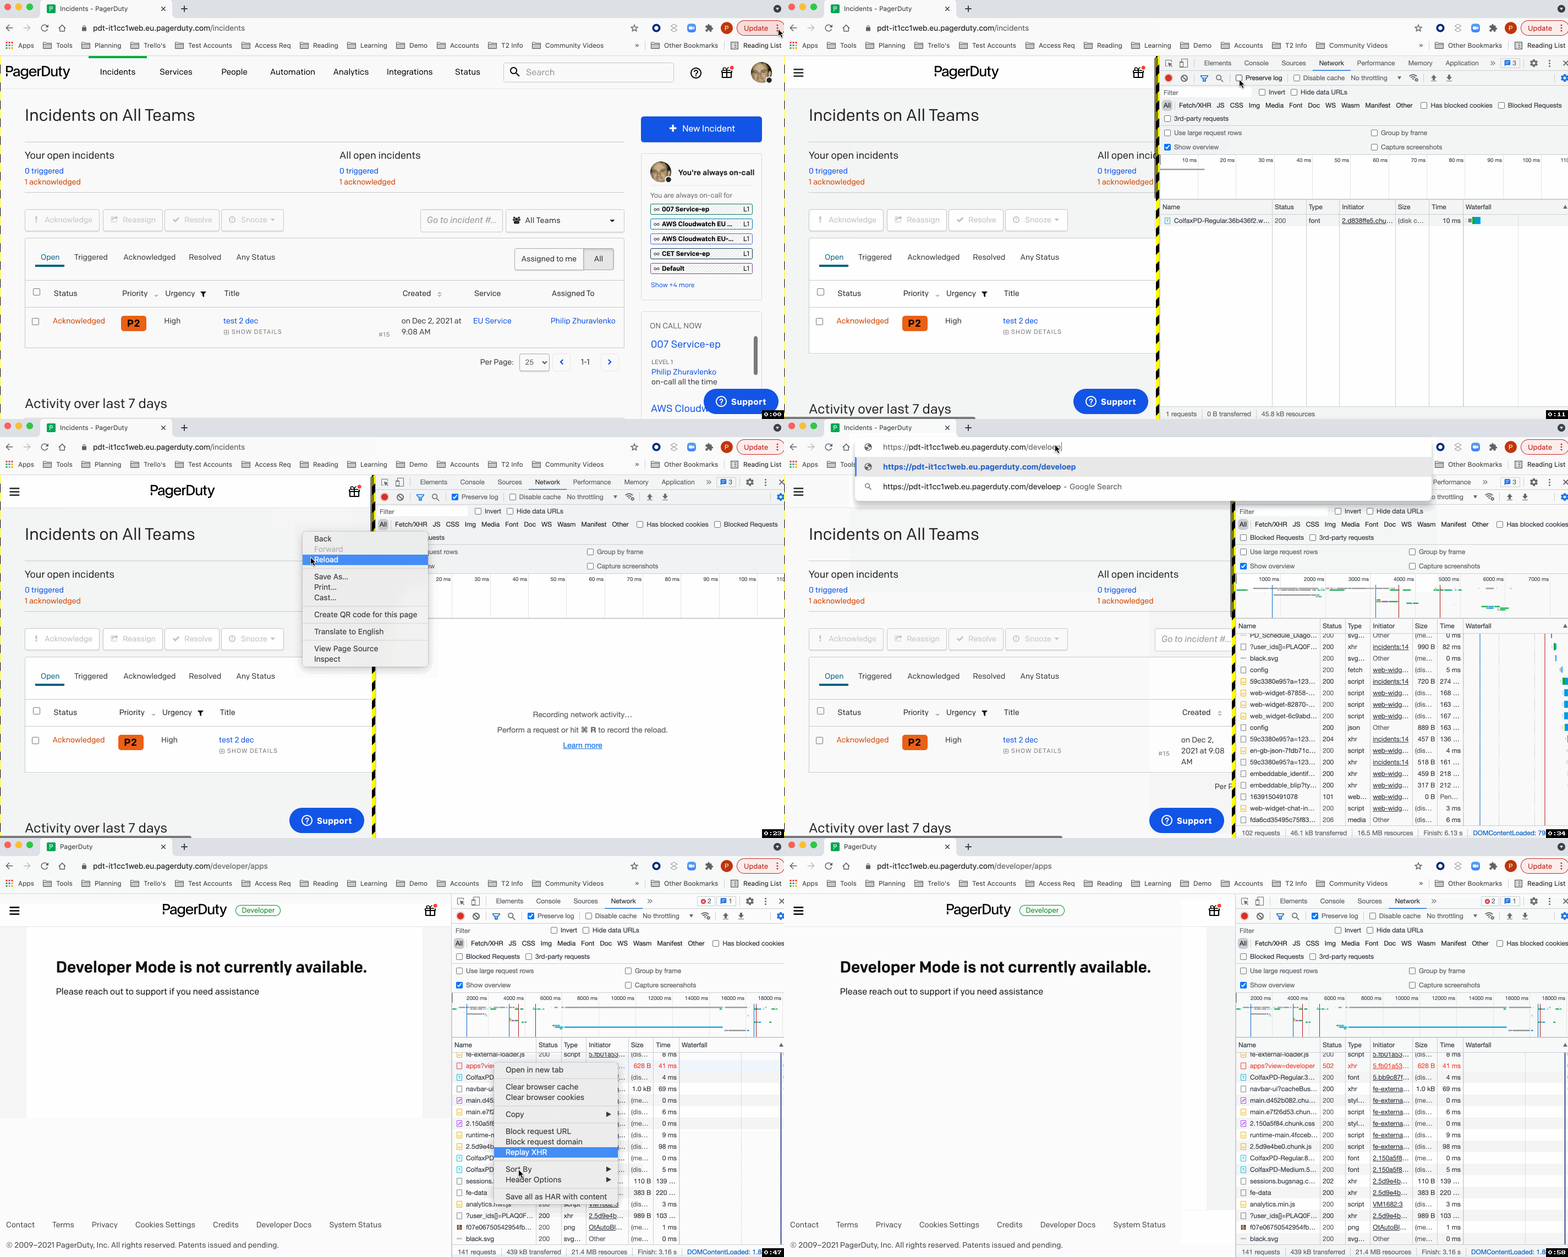
Listed below are the steps for recording HAR files in Google Chrome:
- Open Google Chrome and sign in to your PagerDuty account (if necessary) and navigate to the page where the issue is actively occurring.
- In the top right of the browser, look for the vertical ellipsis and select More Tools Developer Tools.
- From the panel that opens, select the Network tab.
- Make sure the round, red button in the upper left corner of the network tab is enabled so that network activity is recorded. If it is gray, click it once to start recording.
- Check the box Preserve log.
- Check the Clear button to clear out any existing logs from the Network tab.
- Reproduce the issue that one has experienced before, while the network requests are being recorded.
- Once the issue has been reproduced, right click on any of the network requests and click Save all as har with content.
- Upload your .har file recording to the support ticket or attach it to your email so that our support team can investigate it further.

Record a .har file
Updated about 2 years ago
