
Jeli Settings and Integrations
Jeli Part of PagerDuty
Jeli End-of-LifeAs of December 22, 2026, the Jeli UI will reach end-of-life. Post-incident review capabilities will be integrated directly into PagerDuty's Post-Incident Reviews in the PagerDuty web app.
Sign up for Early Access and select Post-Incident Reviews in PagerDuty UI to try the integrated experience before its general release.
Jeli administrators can manage Jeli settings, integrations, and user permissions within the platform, ensuring your team has the necessary tools and access to manage incidents effectively and maintain a streamlined, secure operational environment.
AvailabilityJeli is available to customers with a standalone Jeli plan, or the Enterprise plan for Incident Management.
Please contact our Sales Team to upgrade to an account plan with Jeli.
Required User PermissionsAdmin permissions are required to manage Jeli settings. To add someone as an admin, visit User Access Management Settings in the Jeli App.
View Jeli Settings
To access Jeli settings, click Settings in the left navigation.
Jeli settings
The following a settings are available:
Integrations
The Integrations menu is where you can manage and connect integrations. For more information, please visit our integration articles:
- Slack Integration | Jeli
- PagerDuty Integration | Jeli
- Opsgenie Integration | Jeli
- Zoom Integration | Jeli
- Jira Integration | Jeli
- Import HR Data
- Google Meet Integration | Jeli
- Statuspage Integration | Jeli
- Okta Integration | Jeli
- Vanta Integration | Jeli
- ServiceNow Integration | Jeli
- Nobl9 Integration | Jeli
Incident Response
The Incident Response menu allows you to configure settings related to your Jeli Slackbot. Here you can configure:
Incident Roles
Select the Incident Roles tab to define which roles can be assigned in the the Jeli Slackbot. These roles can be assigned when an incident is started using /jeli open or updated during an active incident using /jeli set-<role_name>.
The default Incident Roles in Jeli are Incident Commander and Communications Lead. These roles can be edited to customize the name or Slack command alias, but cannot be deleted.
Add Roles
- Click Add Role in the upper right of the configuration page.
- Enter the following:
- Incident role name: The name that will be displayed in the list of role options.
- Slack command alias: The alias responders can use in the incident channel to assign the role.
- Role help message: The help message that will be sent to the user when they are assigned to the role.
- Click Add and you will see the new role displayed in your list of Incident Roles
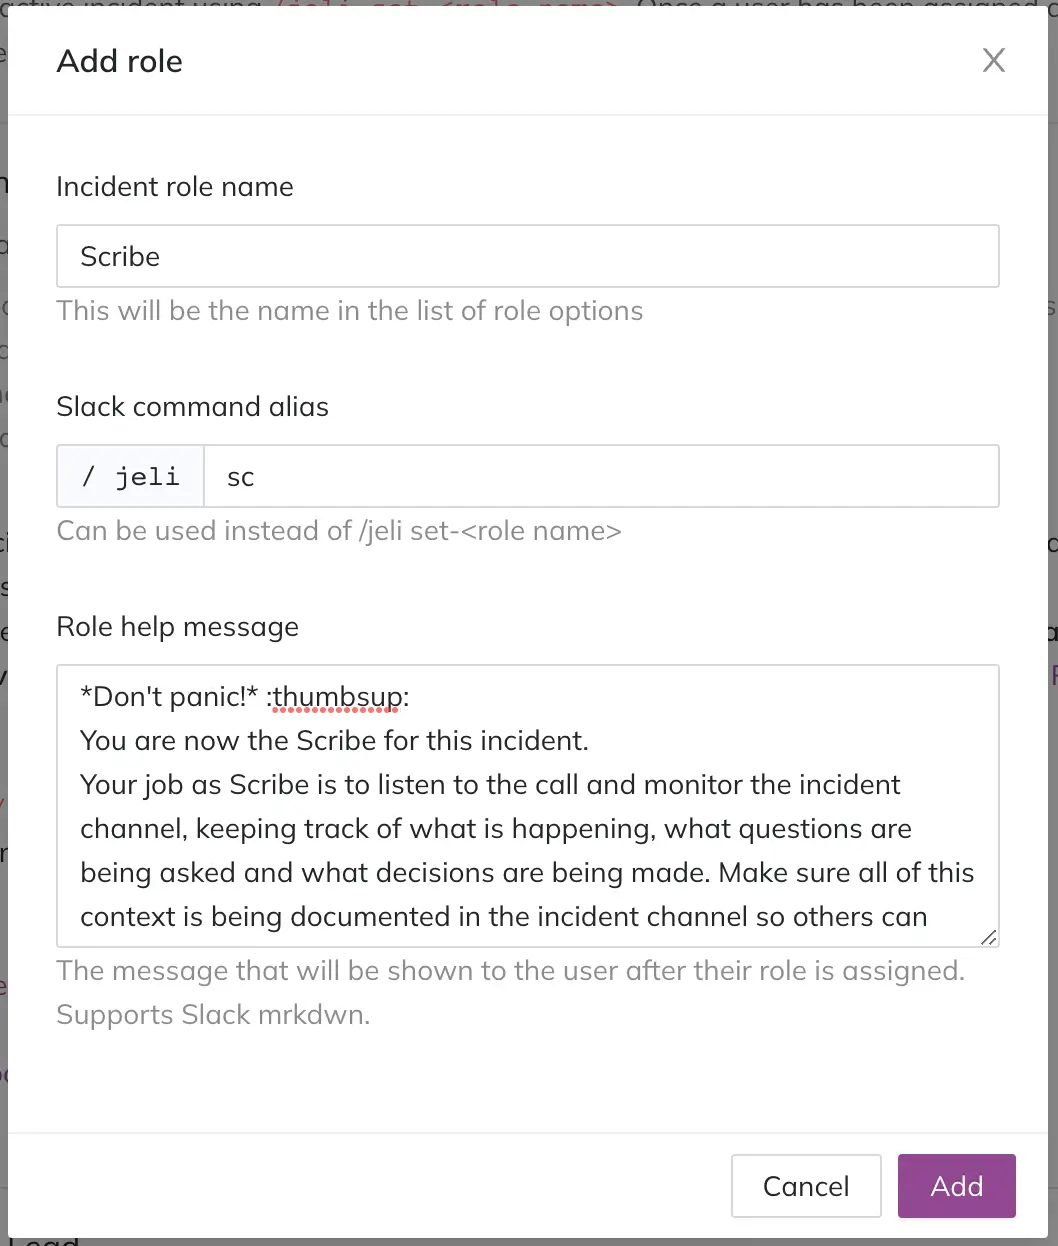
Add Role Example: Scribe role
This new role will now show up in the Jeli Slackbot when an incident opens, and the new role commands will be available during the incident. Based on the example from the image above, the commands would be/jeli sc, /jeli set-scribe.
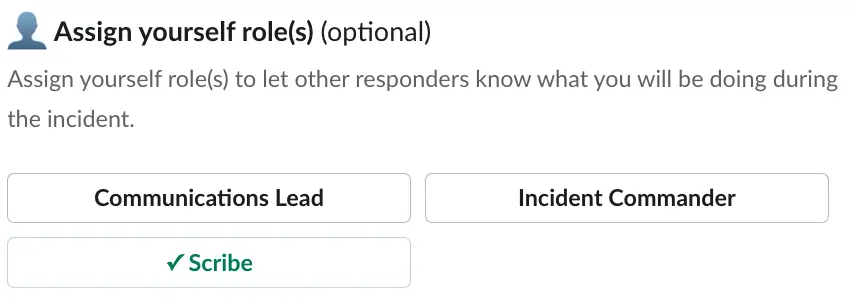
Assign Role Example: Assign a Scribe Role in Slack
Edit Roles
- Select the menu to the right of the role you would like to edit, and select Edit.
- You may edit the following:
- Incident role name: The name that will be displayed in the list of role options.
- Slack command alias: The alias responders can use in the incident channel to assign the role.
- Role help message: The help message that will be sent to the user when they are assigned to the role.
- Click Update to save your changes.
Delete Roles
- Select the menu to the right of the role you would like to edit, and select Delete.
- A confirmation dialog will appear. Click OK to confirm deletion.
Deletion WarningThis action is not reversible.
Broadcast Channels
Select the Broadcast Channels tab to configure how stakeholders will stay informed during incident response. Each broadcast channel will receive a persistent message and subsequent updates as the incident state changes.
Add Broadcast Channels
To add default broadcast channels for your incidents, search and select your preferred channel(s) under Default broadcast channels.
Remove Broadcast Channels
To remove broadcast channels for your incidents, click to the right of the channel name.
Severity
Select the Severity tab to define the severities that can be assigned in the the Jeli Slackbot. These severities can be assigned when an incident is started using /jeli open or updated during an active incident using /jeli sev.
Add Severity
- Click Add Severity in the upper right of the configuration page.
- Enter the following:
- Severity name: The name that will be displayed in the list of severity level options.
- Slack command: The Slack command shortcut that will come after
/jeli sev. Example:/jeli sev critical. - Description: The description that will appear in the severity dropdown.
- Click OK to save the severity level.
In the below example we are adding Severity 3, which can be set in the channel either by the severity modal /jeli sev or the shortcut /jeli sev minor.
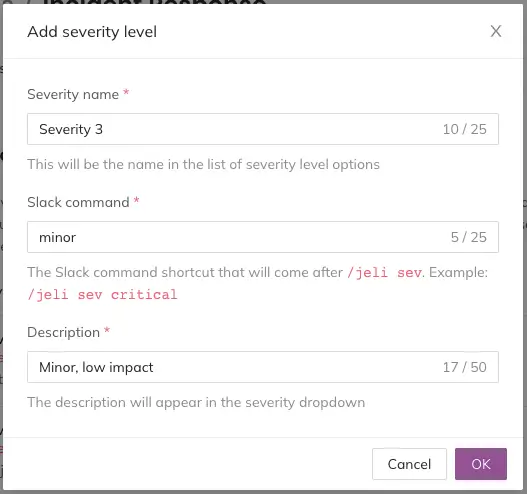
Add Severity Level Example: Severity 3 or Minor level
Edit Severity
- Select the menu to the right of the severity you would like to edit, and select Edit.
- Edit the following:
- Severity name: The name that will be displayed in the list of severity level options.
- Slack command: The Slack command shortcut that will come after
/jeli sev. Example:/jeli sev critical. - Description: The description that will appear in the severity dropdown.
- Click Update to save your changes.
- The order of your severity levels can also be changed by dragging and dropping a severity level to a new position in the list.
Status Reminders
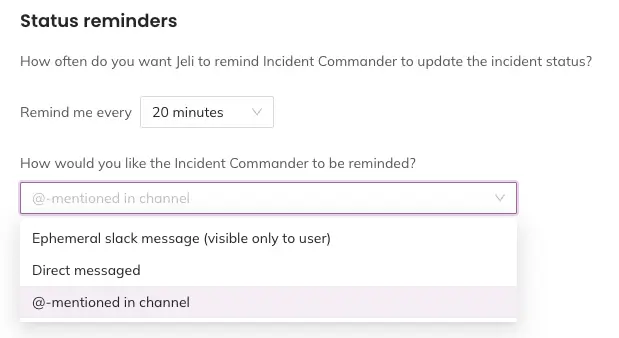
Select the Status Reminders tab to configure the frequency and methods used to remind the Incident Commander/Lead/Facilitator to update the incident status.
- Under Status reminders, select the following:
- Remind me every: Select the time frequency from the dropdown.
- How would you like the Incident Commander to be reminded?: Select the contact method from the dropdown.
Configure Status Reminder Frequency and Methods
Types
Select the Types tab to configure incident types, which allow you to activate specific actions using workflows during your response. Incident types also assist with sorting and filtering incidents, and trend analysis when looking at a specific incident.
Add Incident Types
Configure any incident type your team needs.
- Click Add type.
- Enter a Name and short Description of the incident type to help users know when it applies.
- Click OK to add the incident type.
Default Incident TypeThe default Incident Type is called
Default. This type can be modified, but not deleted.
Edit Incident Types
- Select the context menu for the type you would like to edit, and select Edit.
- Make your required changes to the Name and/or Description, and click OK.
Delete Incident Types
Deletion Warning
- Deleting incident types does not remove the type from existing incidents. Because of this, you are not able to reuse incident type names. Keep this in mind when deleting types.
- Types that are actively being used by a workflow cannot be deleted.
- Select the context menu for the type you would like to edit, and select Delete.
- In the confirmation modal, click Delete.
Primary Jira Issue
Select the Primary Jira Issue tab to configure the Jira issue that will be created when you open an incident using /jeli open. The incident name will become the issue title, and the issue key will be part of the incident channel name.
Please read Jira Integration | Jeli for more information about setting up the initial integration.
All Primary Jira Issues
In the section All Primary Jira Issues, select the checkbox if you'd like to create a Jira comment for every Jeli Slackbot status update.

All primary Jira issues
Set a Default Configuration
- Click Configure Primary Jira Issue.
- In the modal, select a Default Jira project and Default Jira issue type.
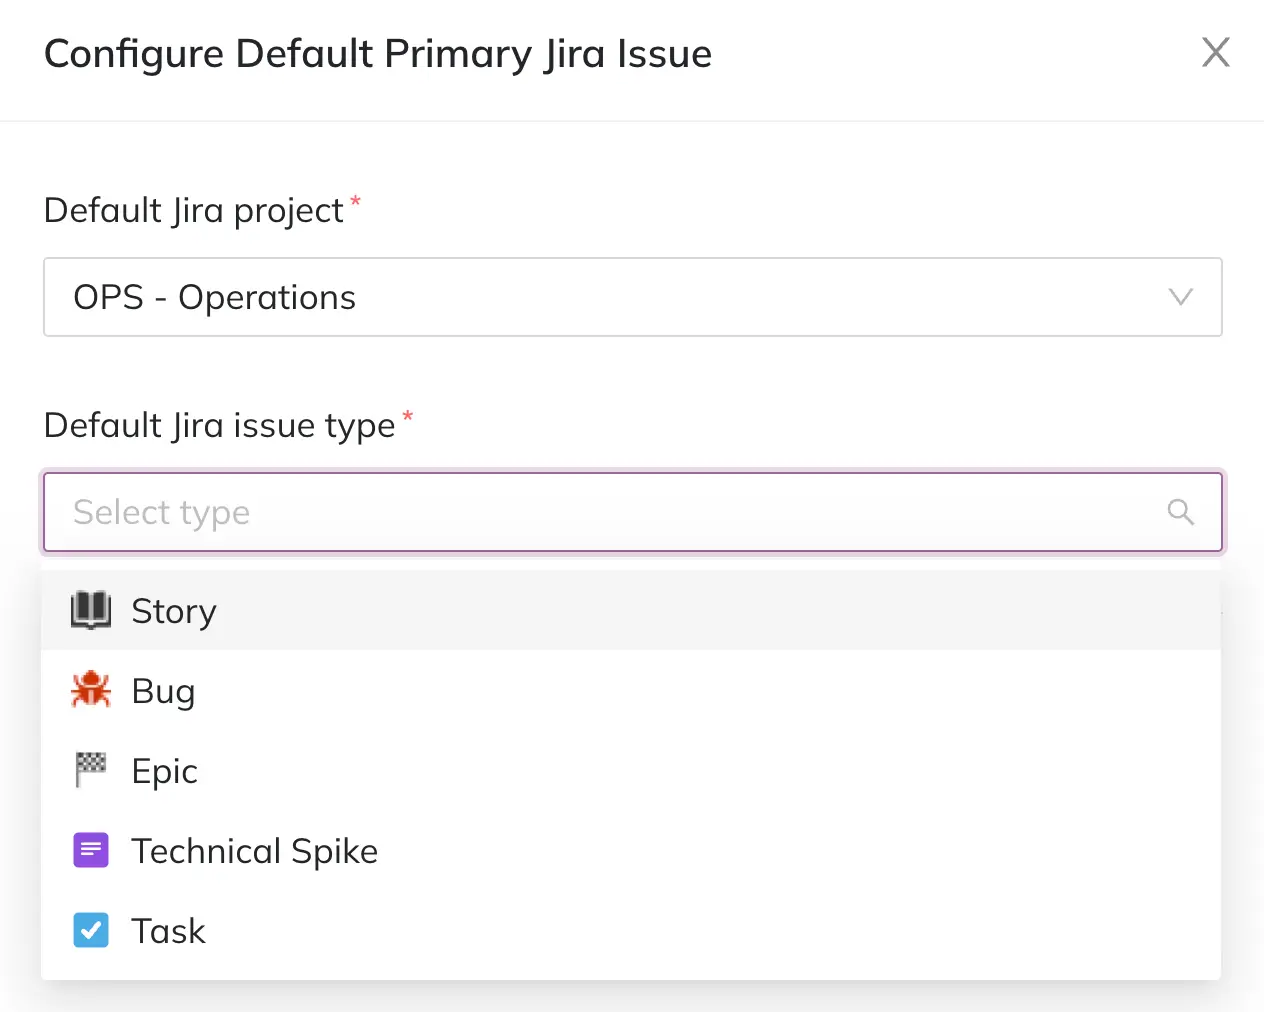
Select default Jira project and issue type
- Optional: Map Jeli incident stages to Jira issue statuses. Make selections in the dropdown to associate Jeli incident stages with Jira issue statuses.
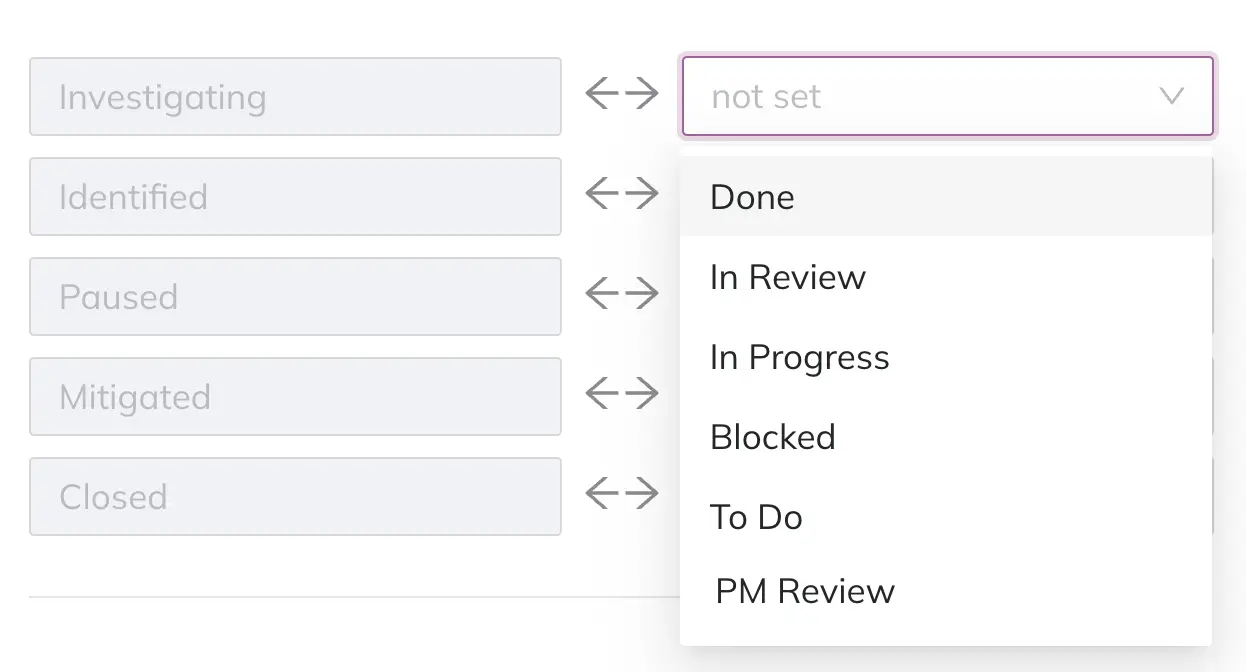
Map Jeli incident stages to Jira issue statuses
- Click Save configuration.
Remove Default Configuration
If you would like to disable the automatic creation of Jira tickets for incident response, you may clear the configuration on this page by selecting Remove.
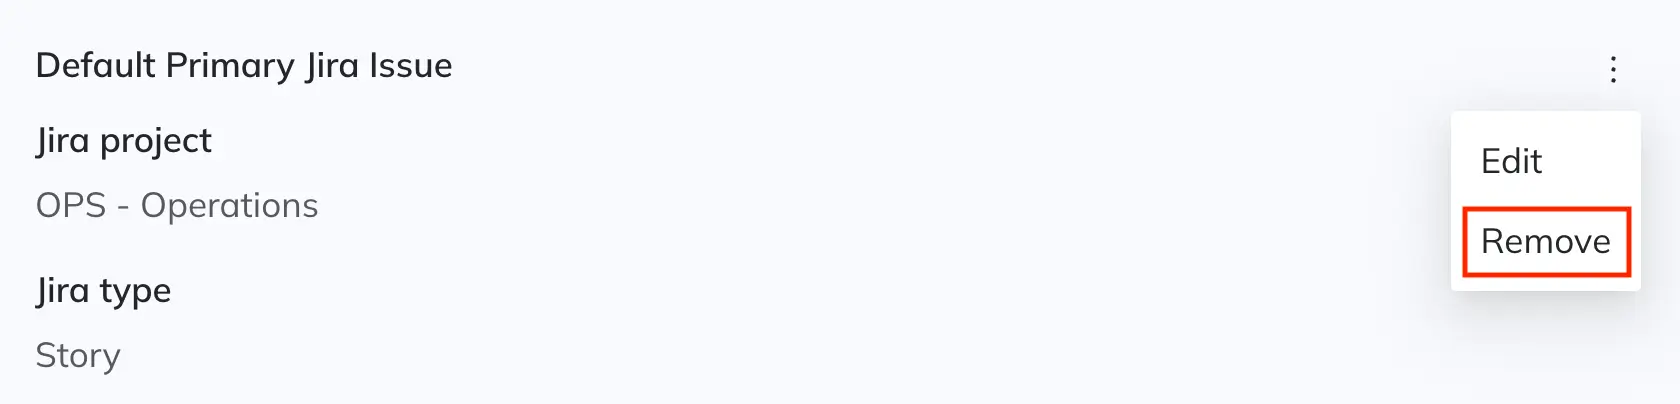
Remove configuration
Post-Incident Reviews
The Post-Incident Reviews menu allows you to configure Tag Types and Templates.
Tag Types
Select the Tag Type tab to see an overview of the Post-Incident Review Tags in your account. Here you can create a new tag type and configure auto-tagging.
Templates
Select the Templates tab to manage templates in your Jeli account. This is where you can view all templates currently used in your Jeli instance, who created the template, and if the template is used as a default template.
Use Jeli TemplatesTo learn more, see Use Templates for Incident Reviews in Jeli.
Create a Template
- With the Templates tab selected, click Create Template.
- Enter the following:
- A Name for the template.
- Template: The template's content. Github-flavored Markdown is supported.
- Type: Select Summary, Takeaways or Both Summary and Takeaways (default)
- Set as default for Summary: Toggle on or off.
- Set as default for Takeaways: Toggle on or off.
- Click OK.
Edit a Template
- With the Templates tab selected, select Edit to the right of the template you'd like to edit.
- Make your required changes and click OK.
Delete a Template
- With the Templates tab selected, select Delete to the right of the template you'd like to delete.
- In the confirmation modal, click Remove.
User Management
Required User PermissionsJeli Admins cannot update their own roles. Please contact another Admin user if you wish to do so.
The User Management menu is where you can edit the roles of Jeli users within your organization.
- To update a user's role, scroll the users table or search their name in search bar.
- Click the Access level dropdown to the right of your desired user's name and select the role you want to assign.
To narrow results by role, you can click the icon in the Access level table heading.
API Tokens
Select Settings API Tokens in the Jeli web app to manage API access keys. You can see when each token was generated and by whom.
Tokens should be used as Bearer tokens in the header of your API requests. To generate and run authenticated API requests, please visit our API documentation.
AvailabilityNot all Jeli pricing plans offer API access. Please see our Pricing Page for details.
Generate an API Access Token
- On the API Tokens page, click Generate token in the top right.
- Enter a Name for the token.
- Optional: Click to copy the access token to your clipboard for storage in a safe place, since the token's value is only visible once.
- Click Copy and close. This will also copy the access token to your clipboard if you did not do so in the previous step.
Edit an API Access Token
You can edit an API access token's name after creation. It is not possible to edit the token's value.
- Click Edit to the right of the token.
- Edit the token's Name.
- Click Save.
Revoke an API Access Token
You may revoke a token at any time. Once revoked, API requests using this token will fail.
- Click Revoke to the right of the token.
- A confirmation dialog will appear. Click Revoke token to confirm.
Irreversible ActionThis action is not reversible, and a deleted API access token cannot be recovered.
Webhooks
Webhooks allow you to receive notifications with event-specific data when actions occur in Jeli. For example, if you want to be updated when a new Post-Incident Review is created or when an incident updates, you can use webhooks to send notifications.
Create a Webhook
- In the Jeli web app, navigate to Settings Webhooks and click Add webhook.
- In the modal window, enter the following:
- Webhook URL: Enter the URL of the destination that events are sent to.
- Description: A short summary describing the webhook.
- Enabled upon creation?: Check or uncheck this option to toggle the webhook on/off.
- Event Type Filtering: Select which events you wish to receive from Jeli. If no event types are checked, this webhook will receive every event.
- Click Add to create the webhook.
Once created, your webhook will be displayed in a paginated list, along with where the endpoint events are directed to, the description, whether it’s enabled or not, and an auto-incrementing number to keep track of which version you’re currently on.
Unable to Roll BackIt is not currently possible to roll back to previous versions.
Test a Webhook
- To test a webhook without opening an incident, click the menu to the right of your preferred webhook and select Test.
- Note: If the Test option is grayed out, please make sure the webhook is enabled.
- Select an event type and click Test.
The following example is from a test incident.created webhook event:
{
  "incidentId": 1780,
  "name": "sparkling-base",
  "severity": "sev3",
  "slackChannelId": "C123ABC",
  "slackTeamId": "T123ABC",
  "stage": "Investigating",
  "status": "We're looking into the errors",
  "summary": "No summary set"
}
Edit a Webhook
- To edit a webhook, next to your preferred webhook select Edit.
- Make your required changes and click Update.
After saving, the webhook's version will increment (i.e., go up by one).
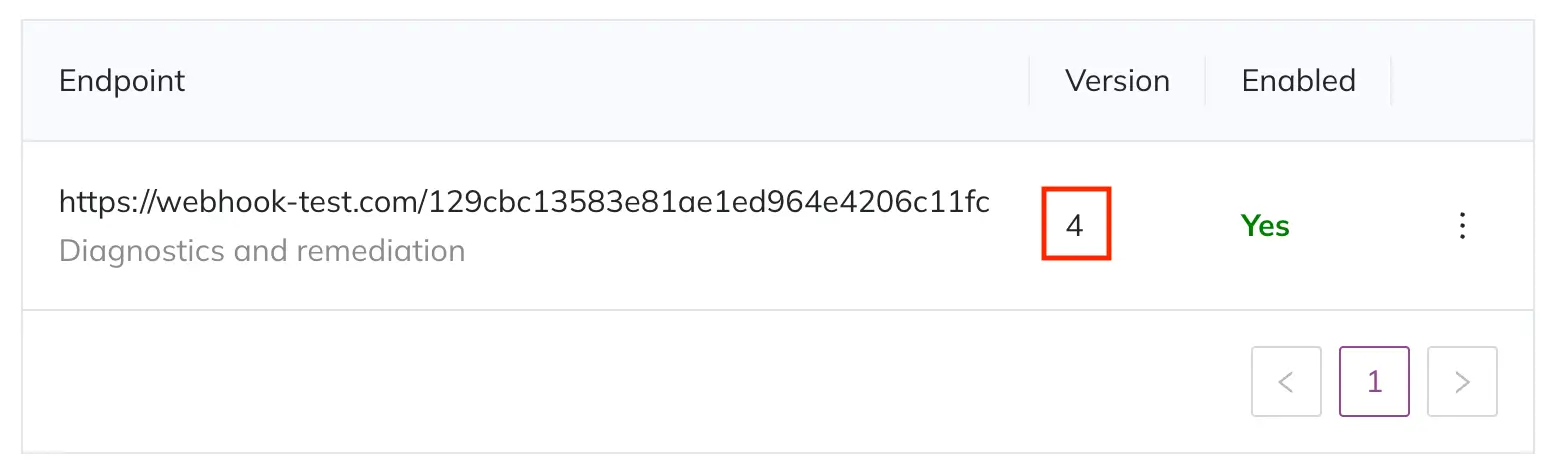
Webhook version
Delete a Webhook
- To delete a webhook, to the right of your desired webhook select Delete.
- In the confirmation dialog, click Delete endpoint.
Deletion WarningThis action is not reversible, and a deleted webhooks cannot be recovered.
Import Log
The Import Log provides an audit log of Slack and other integration data imports.
AvailabilityImport Logs are available with the Professional, Business, and Enterprise for Incident Management pricing plans.
Please contact our Sales Team if you would like to upgrade to a plan featuring Jeli.
The information provided includes:
| Column | Definition |
|---|---|
| Imported By | The user who initiated the import |
| Source | The source of the import |
| Import Range | The time frame of the import's data |
| Post-Incident Reviews | The Post-Incident Review the data was imported into |
To download a CSV of the Import Log's data, click Download CSV in the upper right.
Updated 16 days ago