Zendesk Integration Guide | PagerDuty
Configure the Zendesk integration
Zendesk + PagerDuty Integration Benefits
- PagerDuty for Zendesk facilitates cross-team communication between ITOps, DevOps, and your customer service teams. Communication silos are broken down, allowing you to mobilize the right resources across teams, in real-time, every time.
- Installing the PagerDuty app for Zendesk will add an Incident Command Console to your Zendesk account. This console allows PagerDuty to create Zendesk tickets, sync priority, and update tickets in real-time.
How it Works
- Ticket events are sent from Zendesk in JSON format to PagerDuty. These events will trigger new or update existing incidents based on the integration configuration. This will notify the configured services' on-call responders.
- Agents can manually trigger PagerDuty incidents from a Zendesk ticket, as well as associate Zendesk tickets with PagerDuty incidents.
- In PagerDuty, you can configure the Zendesk extension to sync updates bidirectionally.
Requirements
Availability
The Zendesk integration is available to accounts on the following pricing plans: Customer Service Professional, Customer Service Business, Customer Service Digital Operations (legacy) and Enterprise for Customer Service. Please contact our Sales Team if you would like to upgrade to a plan featuring the Zendesk integration.
- In PagerDuty: An Admin base role is required to connect PagerDuty to Zendesk and create a PagerDuty API key. If you do not have this role, please reach out to an Admin or Account Owner within your organization to configure the integration.
- In Zendesk: A Zendesk administrator will need to generate a Zendesk API key to configure the integration, install the marketplace app, and add any Webhooks or Triggers you choose to set up.
Version
This guide is for Zendesk v3, our most current integration version.
Looking For a Different Version?
Our legacy, email-based Zendesk v1 integration guide is also available.
Support for Zendesk v2 ended in March 2023 and is no longer available.
Integration Walkthrough
Add the Incident Command Console to Zendesk
In PagerDuty
- In the PagerDuty web app, navigate to Integrations Extensions.
- Under the Service Extensions menu, click New Extension, then search and select Zendesk.
- Confirm that you want to add the app by clicking Open in the popup window.
- Click install the PagerDuty app to open a new window where you can install the Incident Command Console for your users to manage incidents.
In Zendesk
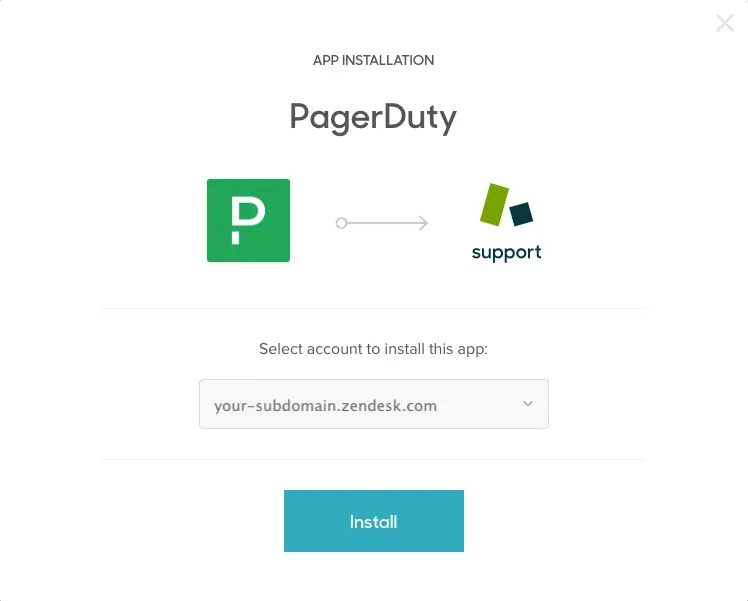
- You will be directed to a new tab for the PagerDuty app in the Zendesk marketplace, click Install.
- Select your preferred account from the dropdown and then click Install.

Install integration
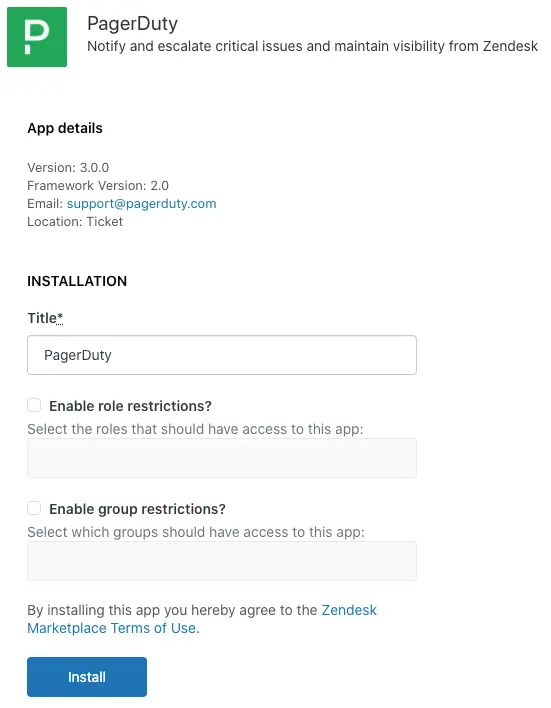
- You will be directed to your Zendesk account. Click Install again to complete the installation of the app in the Zendesk marketplace.

Installation details
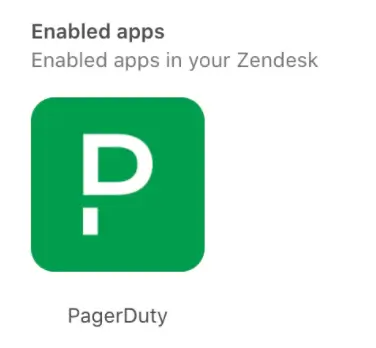
- You will then see PagerDuty listed under Enabled Apps ( Apps and Integrations Enabled Apps).

- In Zendesk's admin settings, navigate to Apps and integrations APIs Zendesk API to generate a Zendesk API token. Copy the API token and paste it in a safe place for future use.
- Note: You will not have access to this key after this screen.
- Click Save to continue.
Previous Versions
If you have a previous version of the Zendesk app, log in to Zendesk and navigate to Admin Go to Admin Center Apps and Integrations. Select the PagerDuty application, then click Update at the bottom of the page.
Configure Bi-Directional Workflows
Authorize the Integration
- In PagerDuty, return to the Zendesk Extension page (i.e., Integrations Extensions Zendesk) and click Authorize Account to continue configuring the integration.
- Enter your Zendesk subdomain, Zendesk user email, and paste the Zendesk API token you just created in Zendesk. Click Authorize.
- Click Get PagerDuty API Key to generate a PagerDuty API key.
- On the API Access Keys page, click Create New API Key.
- Enter a Description (e.g.,
Zendesk API Key) and click Create Key. - On the next screen, copy the API Key and paste it in a safe place for future use.
- Note: You will not have access to this key after this screen.
- Return to the Zendesk Extension page and enter your PagerDuty user email and the PagerDuty REST API key you just created. Click Save Changes.
Add Services
In order to configure workflow rules, or manually create a Zendesk ticket from a PagerDuty incident, you must first map your PagerDuty services to Zendesk.
- Select the Connections tab to connect PagerDuty services to Zendesk and build automation rules.
- Click Add Service, select a service from the dropdown, and then click Add Service again.
- A pop-up will confirm that the service webhooks are correctly configured. If there are any errors, you can click the Check webhooks button to recreate broken webhooks. Repeat steps 18-19 if you would like to add more services.
Upgrading from V2 to V3
If you are upgrading from Zendesk v2 to Zendesk v3, clicking the Check webhooks button will list your existing Zendesk v2 triggers that will be deactivated and replaced with Zendesk v3 triggers. Please take note of any conditions that have been manually added to these Zendesk v2 triggers. You will need to manually copy these from the Inactive section in the Triggers settings to update the new PagerDuty v3 triggers in the Active section.
- After you add a service, we predefine some of the automation rules for you. If you would like to change how the integration's rules are configured, you can click the service's name to update these rules and follow instructions in the Synced Attributes and PagerDuty to Zendesk Automation sections. Otherwise, the integration configuration is now complete. If you would like to add more services: Repeat steps 18-21.

Connected service
Configure Access Levels
In the Permissions tab, you can configure if different groups should have access to all or some actions for the Incident Command Console in the Zendesk platform.
-
Navigate to the Permissions tab, and choose the abilities that your users should be allowed to perform in the Incident Command Console.
-
If you’d like to add a new Group Ability, click Add Group Ability, choose the group from the dropdown you’d like to configure, and then select the actions they can take.
-
Once finished, click Save Changes to save the permissions. Note: These permissions only apply to actions users can take in Zendesk. If you’d like to restrict permissions in the PagerDuty platform, please refer to our Advanced Permissions article.
Edit Access Levels
You can edit access levels after initial configuration.
- In PagerDuty, go to Integrations Extensions.
- Find the Zendesk extension under Extension Type and click Edit on the Zendesk Extension page.
- Under Authorized accounts, select your desired Zendesk account, then select the Permissions tab.
- Make your desired changes and click Save Changes.
Synced Attributes (Optional)
Synced attributes allow you to keep PagerDuty incidents and Zendesk tickets in sync. There are two attributes that sync: Incident Priority and Notes.
To manage synced attributes:
- In PagerDuty, go to Integrations Extensions find the Zendesk extension under Extension Type and click Edit on the Zendesk Extension page.
- Under Authorized accounts, select your desired Zendesk account, then select the Connections tab and click the name of the service.
- To edit priority syncing: Click the dropdown under PagerDuty priority and select your preferred priority or delete syncing by clicking next to each priority level and click Save Changes.
- To sync notes: Check the Sync notes checkbox and click Save Changes.
PagerDuty to Zendesk Automation (Optional)
To manage what changes are made to a Zendesk ticket when there is a change to a PagerDuty incident:
-
In the PagerDuty web app, go to Integrations Extensions find the Zendesk extension under Extension Type and click Edit on the Zendesk Extension page.
-
Under Authorized accounts, select your desired Zendesk account, then select the Connections tab, click the name of the service, and scroll to the section PagerDuty → Zendesk.
-
From each Zendesk status dropdown, select what status the Zendesk ticket should change to when a PagerDuty incident changes status.
-
Check the checkbox to Automatically create Zendesk tickets if you would like Zendesk tickets to be automatically created when there are incidents triggered for this service. If you do not select this option, you can still create a Zendesk ticket manually from an incident.
-
Optionally select the following checkboxes to enable your preferred settings:
- Sync description on ticket creation: Sync the PagerDuty incident with the Zendesk ticket comment upon Zendesk ticket creation.
- Set incident priority threshold: Zendesk tickets will be created for incidents with a specific Incident Priority. Enable this setting and select your preferred threshold from the dropdown.
-
From the Zendesk ticket type dropdown, select which type of ticket you would like to PagerDuty incidents to create.
-
Click Save Changes.
Zendesk to PagerDuty Automation (Optional)
To manage what changes are made to a PagerDuty incident when there is a change to a Zendesk ticket:
- In PagerDuty, go to Integrations Extensions, find the Zendesk extension under Extension Type and click Edit on the Zendesk Extension page.
- Under Authorized accounts, select your desired Zendesk account, select the Connections tab, click the service name and scroll to the Zendesk → PagerDuty section.
- From each PagerDuty status dropdown, select what status the PagerDuty incident should change to when a Zendesk ticket status changes.
- Check the checkbox to Automatically create PagerDuty incidents if you would like Zendesk to automatically create PagerDuty incidents when Zendesk tickets are created. If you do not select this option, you can manually create a PagerDuty incident from a Zendesk ticket.
- Note: This will add a new trigger marked PagerDuty and the Service ID in the connected Zendesk account. The default condition for this trigger is to create a PagerDuty incident when a Zendesk ticket is created. You can adjust this setting as required with the available Zendesk trigger conditions.
- Optionally select the following checkboxes to enable your preferred settings:
- Set PagerDuty Urgency on incident creation: PagerDuty Incidents will be created with the urgency setting selected; select the incident priority to map as low urgency.
- Sync description on incident creation: Sync the comment of the Zendesk ticket with the PagerDuty incident description upon PagerDuty incident creation.
- Click Save Changes.
Zendesk User Guide
Once initial configuration is complete, please read our Zendesk User Guide for instructions on how to use the integration.
Upgrade to Zendesk v3
Requirements
- Support for Zendesk v2 ended on March 31, 2023. All PagerDuty customers using Zendesk v2 must upgrade to Zendesk v3 before it sunsets. There will be no new development on this version of the feature, and bug fixes will be handled case-by-case.
- The upgrade needs to be completed by a PagerDuty Admin and Zendesk Admin.
Upgrade from Zendesk v2 to v3
- Complete the Zendesk v3 Integration Walkthrough steps and test the integration.
- After completing the walkthrough, confirm that your new PagerDuty triggers are set to notify active webhooks per Zendesk’s announcement.
Upgrade from Zendesk v1 to v3
- Complete the Zendesk v3 Integration Walkthrough steps and test the integration.
- In the Automatically Trigger PagerDuty Incidents From Zendesk section, in steps 8-10, create new or update your existing PagerDuty Triggers to Notify active webhooks instead of an email target.
- In PagerDuty, on the service(s) that have the Zendesk v1 email integration, navigate to the service's Integrations, click next to to the Zendesk v1 email integration, and click Delete Integration to remove the integration from PagerDuty.
- In Zendesk, navigate to Go to Admin Center Apps and Integrations Targets. On the target for the PagerDuty email integration, select Edit Delete to remove the email target.
- Then navigate to Go to Admin Center Objects and rules Business Rules Triggers to confirm that your existing PagerDuty triggers have been updated to Notify active webhooks. If new triggers were created, delete the older triggers here.
Zendesk User Guide
Please read our User Guide for more information about using the integration after it has been configured.
FAQ
Can I set the incident priority when automatically creating an incident from Zendesk?
At this time, we aren’t able to set the priority of an incident when creating it through the webhook/Trigger method. You can submit this as a feature request with our Support team.
Updated 8 months ago
