Communicate with Stakeholders
Provide stakeholders with proactive information about an incident's scope of impact and progress towards resolution
Proactive stakeholder communications advise others on an incident’s status and scope of impact. When stakeholders receive proactive status updates, the primary response team can focus on resolution, rather than answering status inquiries, leading to more efficient incident response and improved MTTR.
Availability
This feature is available on current Business, Enterprise for Incident Management, and Digital Operations (Legacy) plans. Contact the Sales Team if you want to upgrade to a plan that includes this feature.
Add Subscribers to an Incident
PagerDuty offers multiple ways to add subscribers to incidents:
Add Subscribers to an Ongoing Incident
Users and Teams can subscribe to an active incident from the PagerDuty web app or the mobile app.
Unsubscribed Users
If an individual user has already subscribed to an incident, either individually or through a Team, and then unsubscribes from it, you cannot resubscribe them as part of a Team or as a group via Incident Workflow. You must either resubscribe them as an individual user using the following instructions, or the user must resubscribe themselves.
Add Subscribers to an Ongoing Incident in the Web App
- Navigate to the Incidents page and select an incident's title to view its detail page.
- Select the Status Updates tab.
- Click the Manage Subscribers button.
- On the Manage Subscribers screen.
- In the Add a User or Team dropdown, search for and select users and teams to subscribe to the incident.
- Click Add Subscribers.
Add Subscribers to an Ongoing Incident in the Mobile App
- Under My Open Incidents, select an incident's title to view its detail page.
- Select the Overview tab.
- Scroll to the Latest Status Update section and tap Manage.
- On the Add Subscribers screen, tap in the top-right and search or select users or Teams to subscribe to the incident. Users and Teams are automatically subscribed as soon as you tap them.
Add Subscribers at Incident Creation
You can configure PagerDuty to automatically subscribe stakeholders whenever an incident triggers. You can subscribe up to 25,000 users to an incident.
To automatically subscribe users:
-
Create an Incident Workflow that subscribes users and/or Teams. If you frequently subscribe the same sets of stakeholders to incidents, you can simplify this task by adding those groups to the Incident Workflow.
-
Associate the Incident Workflow with a PagerDuty service under the Services that this rule applies to section in the Workflow.
Note
Stakeholders do not receive a notification when they are subscribed to an incident. This “silent subscription” allows you to subscribe stakeholders to an incident at any time (for example, at incident creation) and then explicitly choose to publish a status update if there is something noteworthy to report. Thus, stakeholders only receive curated updates, which helps avoid notification fatigue.
Subscribe to a Business Service
Users subscribed to a business service are added as subscribers whenever an incident impacts the business service. To learn more about subscribing to a business service, refer to Business Service Subscription.
Stakeholder Users
You can add any kind of PagerDuty user as an incident subscriber: Account Owner, managers, responders, and more.
There are also special Full Stakeholder and Limited Stakeholder user licenses available; these user roles are specifically designed to subscribe to incidents and receive incident status updates.
Full Stakeholders have read-only access to other data in your PagerDuty account.
Limited Stakeholders only have access to view and subscribe to Internal Status Pages, and do not see any other parts of PagerDuty.
Full Stakeholders and Limited Stakeholders cannot add, edit, or delete any objects in the account.
Both Stakeholder user licenses are available at a reduced price and are ideal for employees who need to be involved in internal incident communications but do not actively participate in the resolution effort.
Contact the Sales Team for more information about both types of Stakeholder users.
Remove Subscribers from an Incident
Either users assigned to an incident can remove incident subscribers, or subscribers can unsubscribe themselves.
Remove a Subscriber in the Web App
- Navigate to Incidents and select an incident’s title to view its detail page.
- Select the Status Updates tab.
- Click the Manage Subscribers button.
- In the list of Subscribers, find the user or Team you want to unsubscribe and click Unsubscribe.

Unsubscribe a user from an incident
Remove a Subscriber in the Mobile App
- On the Incidents screen, select an incident to view its Incident Details screen.
- Select the Overview tab and scroll to the Latest Status Update section.
- Tap Manage.
- Next to the subscriber's name, tap Unsubscribe.
Status Updates
Once subscribed to an incident, stakeholders will start receiving all subsequent status updates for that incident. A responder can perform the following:
- Compose and publish an ad-hoc status update via the web or mobile app.
- Send status updates as part of an Incident Workflow.
- Send incident resolution notes as a status update
- Send a status update or start an Incident Workflow Instance that sends a predefined message via the API.
- Send status updates with rich text email notifications
Required User Permissions
- All users, with the exception of Limited and Full Stakeholders, can send status updates for incidents assigned to them.
- Only Responders, Managers, Global Admins, and Account Owners can send status updates for incidents that are not assigned to them.
You can send status updates in different ways:
Send Status Updates via Web or Mobile App
Publishing an ad hoc status update on the web or mobile app is beneficial when the update is context-dependent. For example, if a status update needs to provide details about the nature of the incident, the current impact, or the estimated resolution time, for example:
P1 incident in progress. Customers cannot watch any archived video streams. Diagnosed as networking-related, but the underlying cause is still being determined. Estimated time to remediation is at least 60m. Next status update in 30m.
Send Status Updates via the Web App
- Navigate to the Incidents page and click an incident’s title to view the detail page.
- In the Status Updates tab, enter or confirm the Impacted Business Service and/or desired Subscribers.
- On the incident detail page, there are two ways to create a new status update:
- In the actions menu, click Send Status Update or
- Select the Status Updates tab and click New Update
- Select your desired template and click Preview.
- Enter your Message for the status update and make any necessary changes to the template.
Note: If you have PagerDuty Advance, select Generate to automatically create a status update. You can also click Settings to enable or disable Chat data as a source for message creation. - Click Send Update when you are finished.
Select a Business Service
If you see a message that “This update will not be published to your status dashboard,” ensure you have selected a business service in step 3, above.
Send Status Updates via the Mobile App
- In the My Incidents section, select an incident to view its detail screen.
- Select the Overview tab, scroll to the Latest Status Update section, and tap Post Status Update.
- On the Add Status Update screen, enter your status update message.
- Tap to send the status update.
Select a Business Service
If you see a message “Update will not be shown on the status dashboard,” it is most likely because a business service is not selected or the incident does not have a priority.
Select a Business Service in the Mobile App
- In the My Incidents section, select an incident to view its detail screen.
- Select the Overview tab, scroll to the section Latest Status Update, and tap Post Status Update.
- On the Add Status Update screen, tap Change.
- In the Impacted Business Services section, tap .
- On the Add Business Service screen, select a business service.
- Tap Done (iOS) or Confirm (Android).
Edit Incident Priority in the Mobile App
- In the My Incidents section, select an incident to view its detail screen.
- Select the Overview scroll to the section Latest Status Update, and tap Post Status Update.
- On the Add Status Update screen, tap Change.
- In the Priority section, tap .
- On the Edit Priority screen, select a priority business service and tap Done (iOS) or Confirm (Android) in the confirmation modal.
Send Status Update via Incident Workflows
You can send Status Updates as part of an Incident Workflow. Refer to Send Status Update in the Workflow Actions library for more information.
Send Resolution Notes as a Status Update
When resolving an incident, responders can add a resolution note. They can also send this note to subscribers as a status update if:
- The incident has subscribers, or it is visible on the Internal Status Page.
- AND the incident is resolved from the PagerDuty web app as a single resolve (i.e., it was not resolved as part of a bulk action from the incident dashboard).
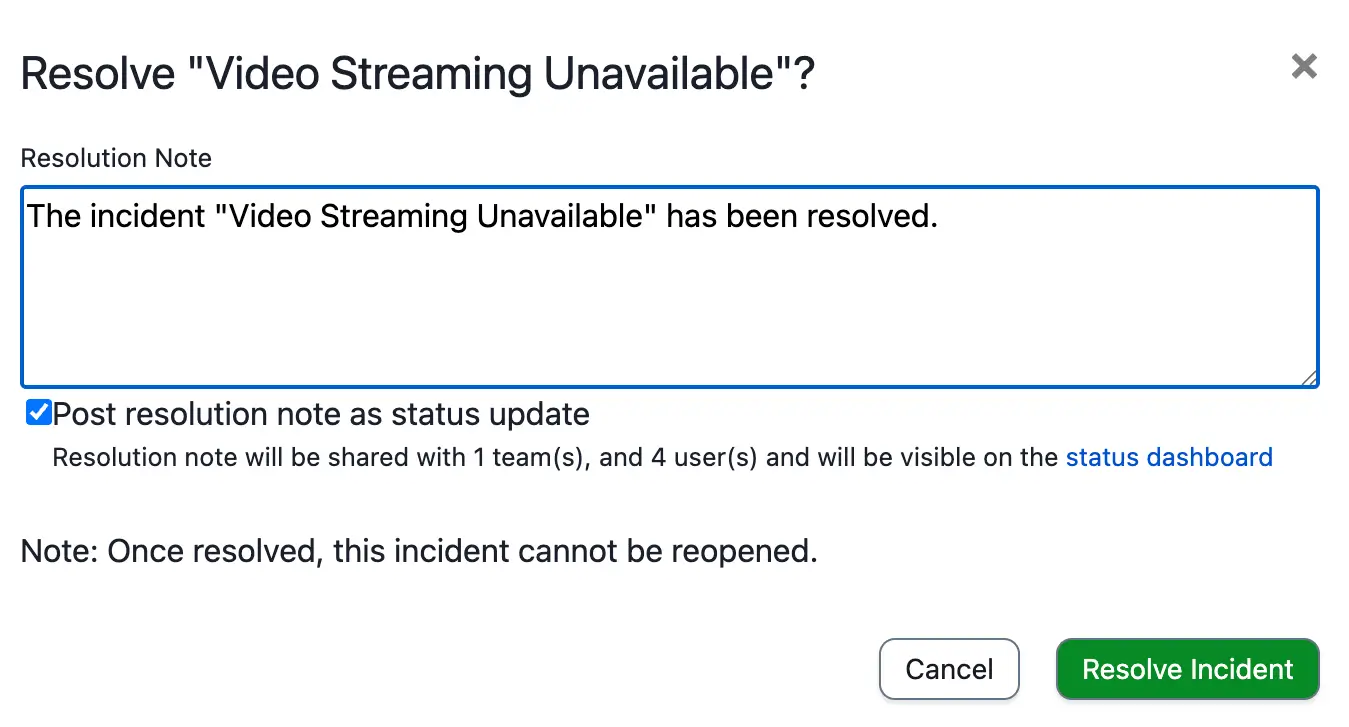
Incident resolution note
If you enable Post resolution note as status update, the note is sent to all incident subscribers, regardless of whether they were added via Incident Workflow or on demand through the UI.
Send Status Updates via API
Follow the API documentation to publish a status update or start an Incident Workflow Instance that publishes a predefined message via the API.
Send Status Updates Using Status Update Templates
Refer to the Status Update Templates article for more information on customizing and standardizing your status updates.
Status Update Notification Methods
Note
Status updates are sent to subscribed users depending on their status update notification rules. Currently, you cannot configure a time delay for status update notifications. For information on configuring status update notifications, refer to Status Update Notifications. You can see some examples for each notification method in the following.
Push Status Update
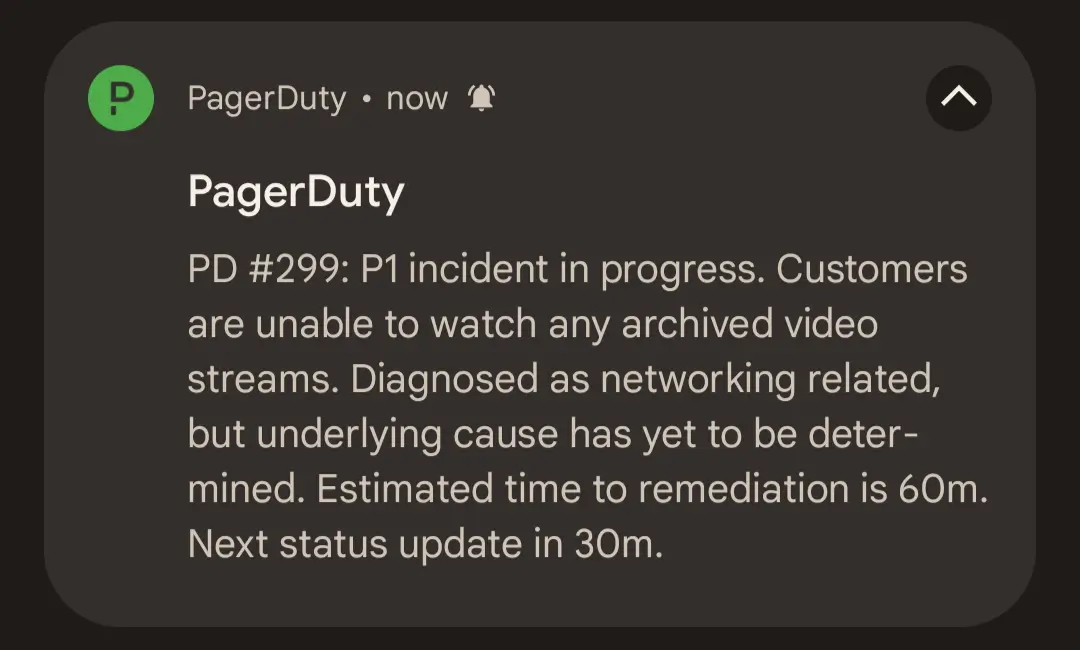
Push Notification Status Update
Email Status Update
Status update emails contain the most information about an incident:
- Who sent the status update
- Incident number and description
- When the incident was opened
- The affected service
- Incident status
- A link to the incident status page
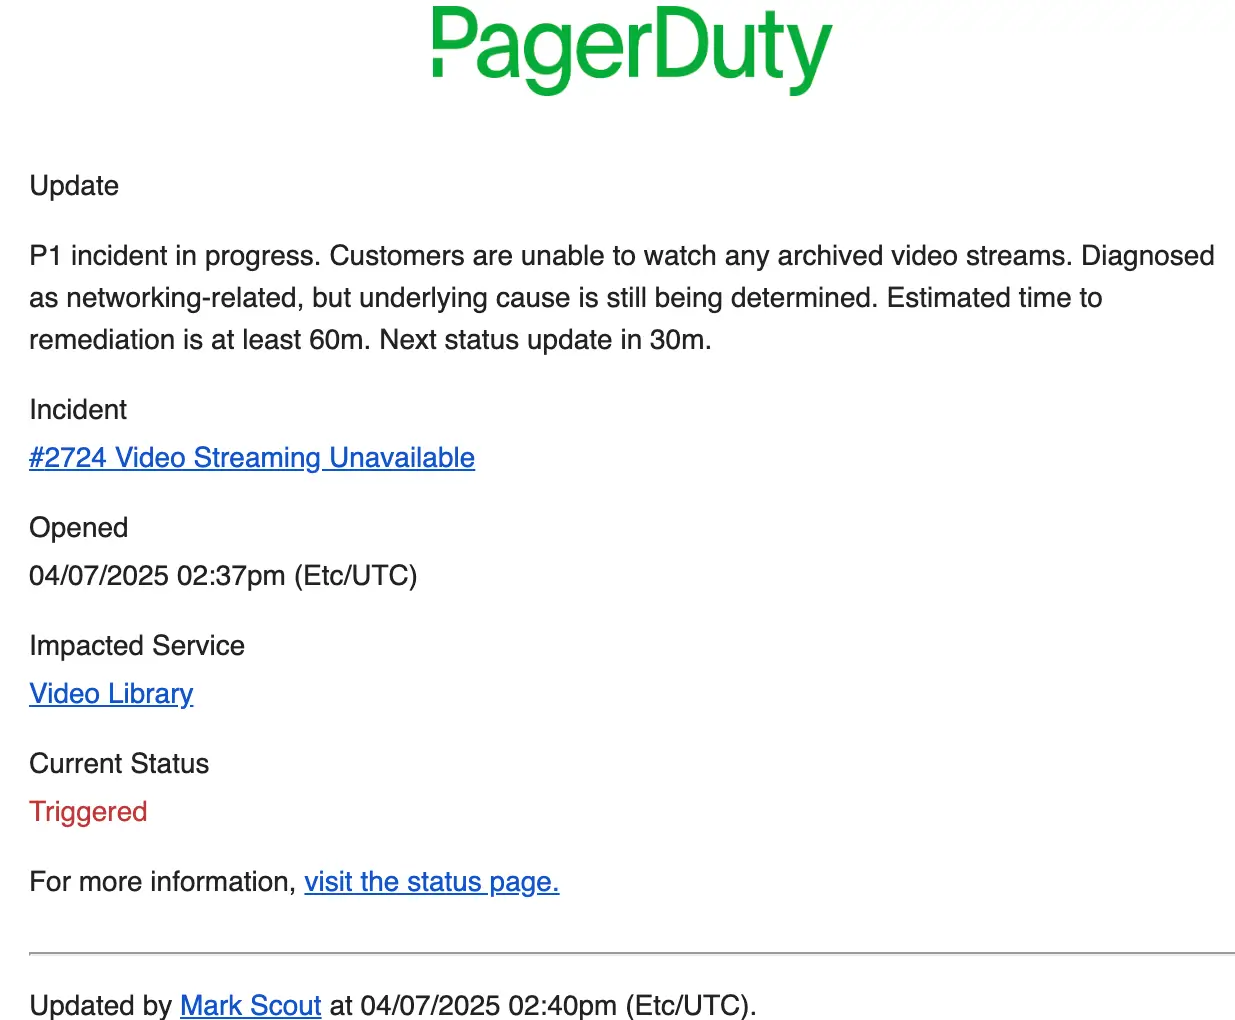
Email Status Update
SMS Status Update
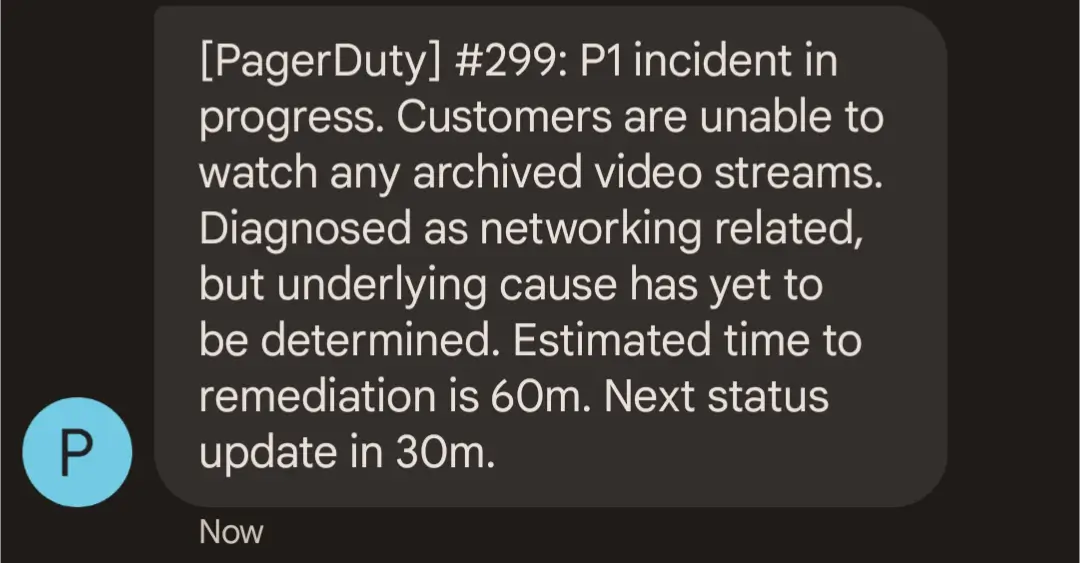
SMS Status Update
Internal Status Page Update
In addition to the notification methods above, all status updates are posted to the Internal Status Page. For more information on how to view an incident on the status dashboard, visit Status Updates.
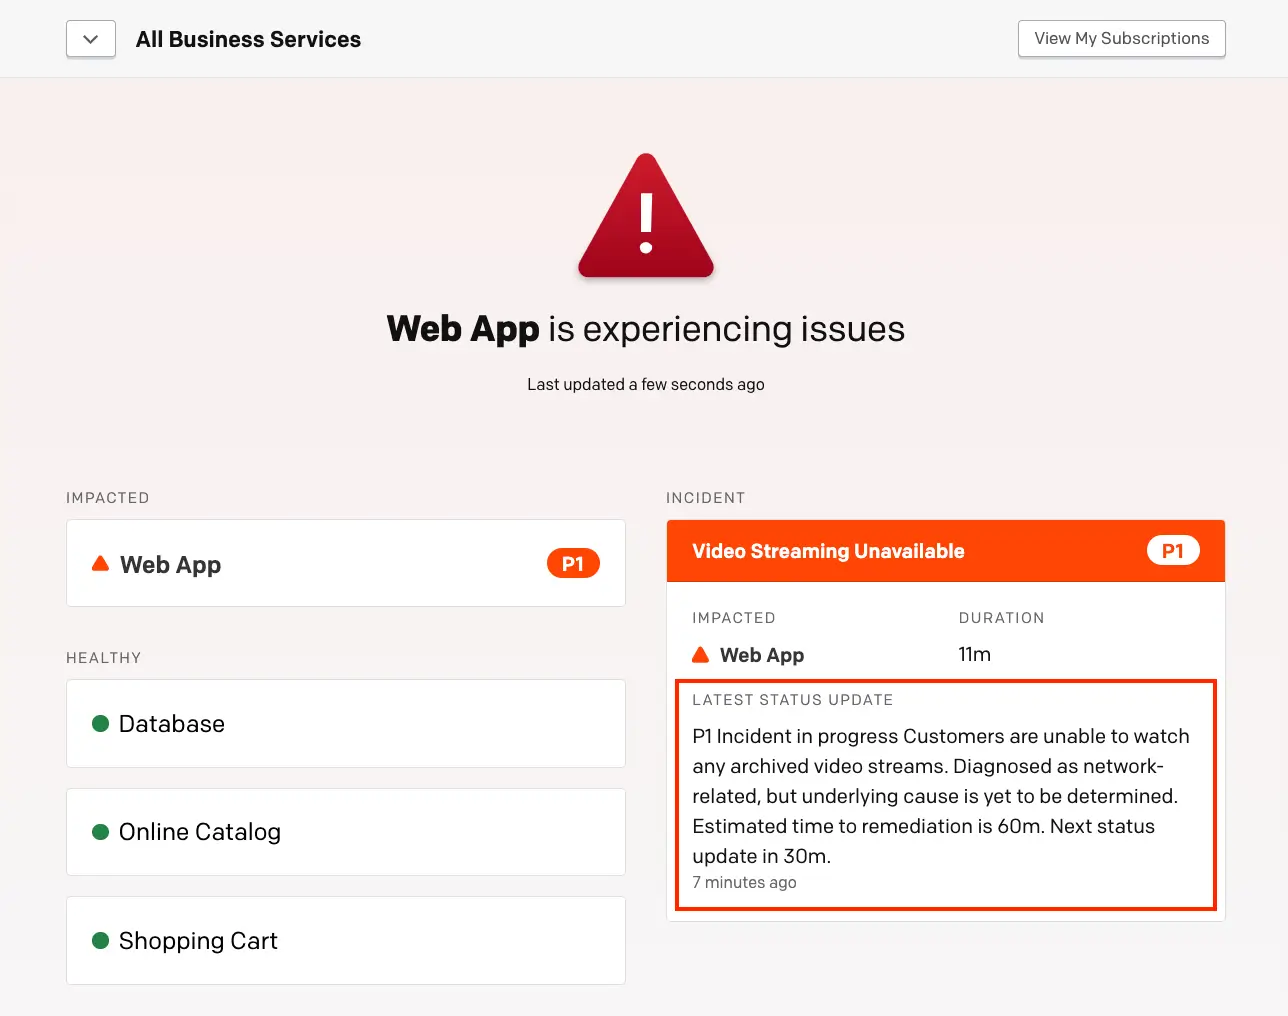
Internal Status Page update
Updated 15 days ago
