Basic Post-Incident Review Tutorial
Learn how to effectively prepare for your incident review with Jeli Post-Incident Reviews | Jeli Part of PagerDuty
Availability
Jeli is available to customers with a standalone Jeli plan, or the Enterprise plan for Incident Management.
Please contact our Sales Team to upgrade to an account plan with Jeli.
Prep for Your Incident Review Meeting
⏰ Time required: 30 mins to 1 hour
In this tutorial, you will learn how to prepare for your incident review meeting. You'll review your Slack transcript to create a Narrative timeline of your incident, prepare Questions you want to ask during the meeting, and capture a preliminary set of Action Items. These three topics will make up the agenda of your review meeting.
Step 1: Create the Jeli Post-Incident Review and Gather Evidence
To create your Jeli Post-Incident Review in Slack, navigate to the resolved incident in Slack and click Create a Post-Incident Review. This will automatically generate a report based on the channel's conversation history and details captured by PagerDuty Advance.
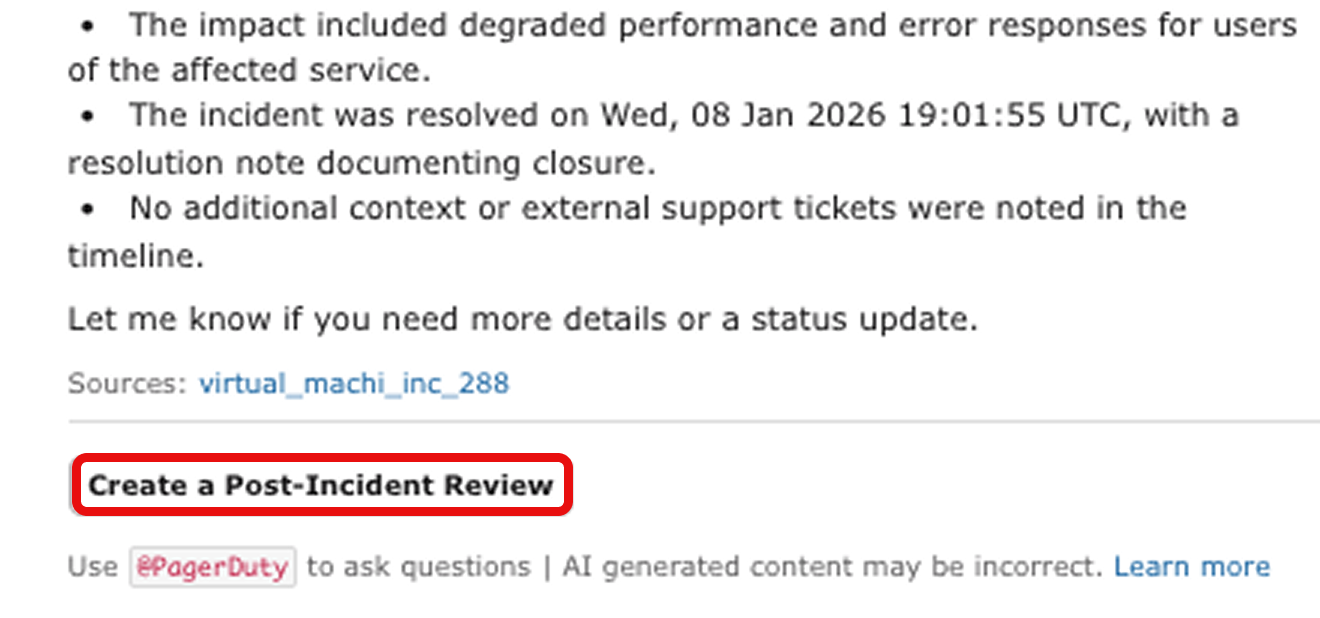
Step 2: Create a Narrative in the Narrative Builder
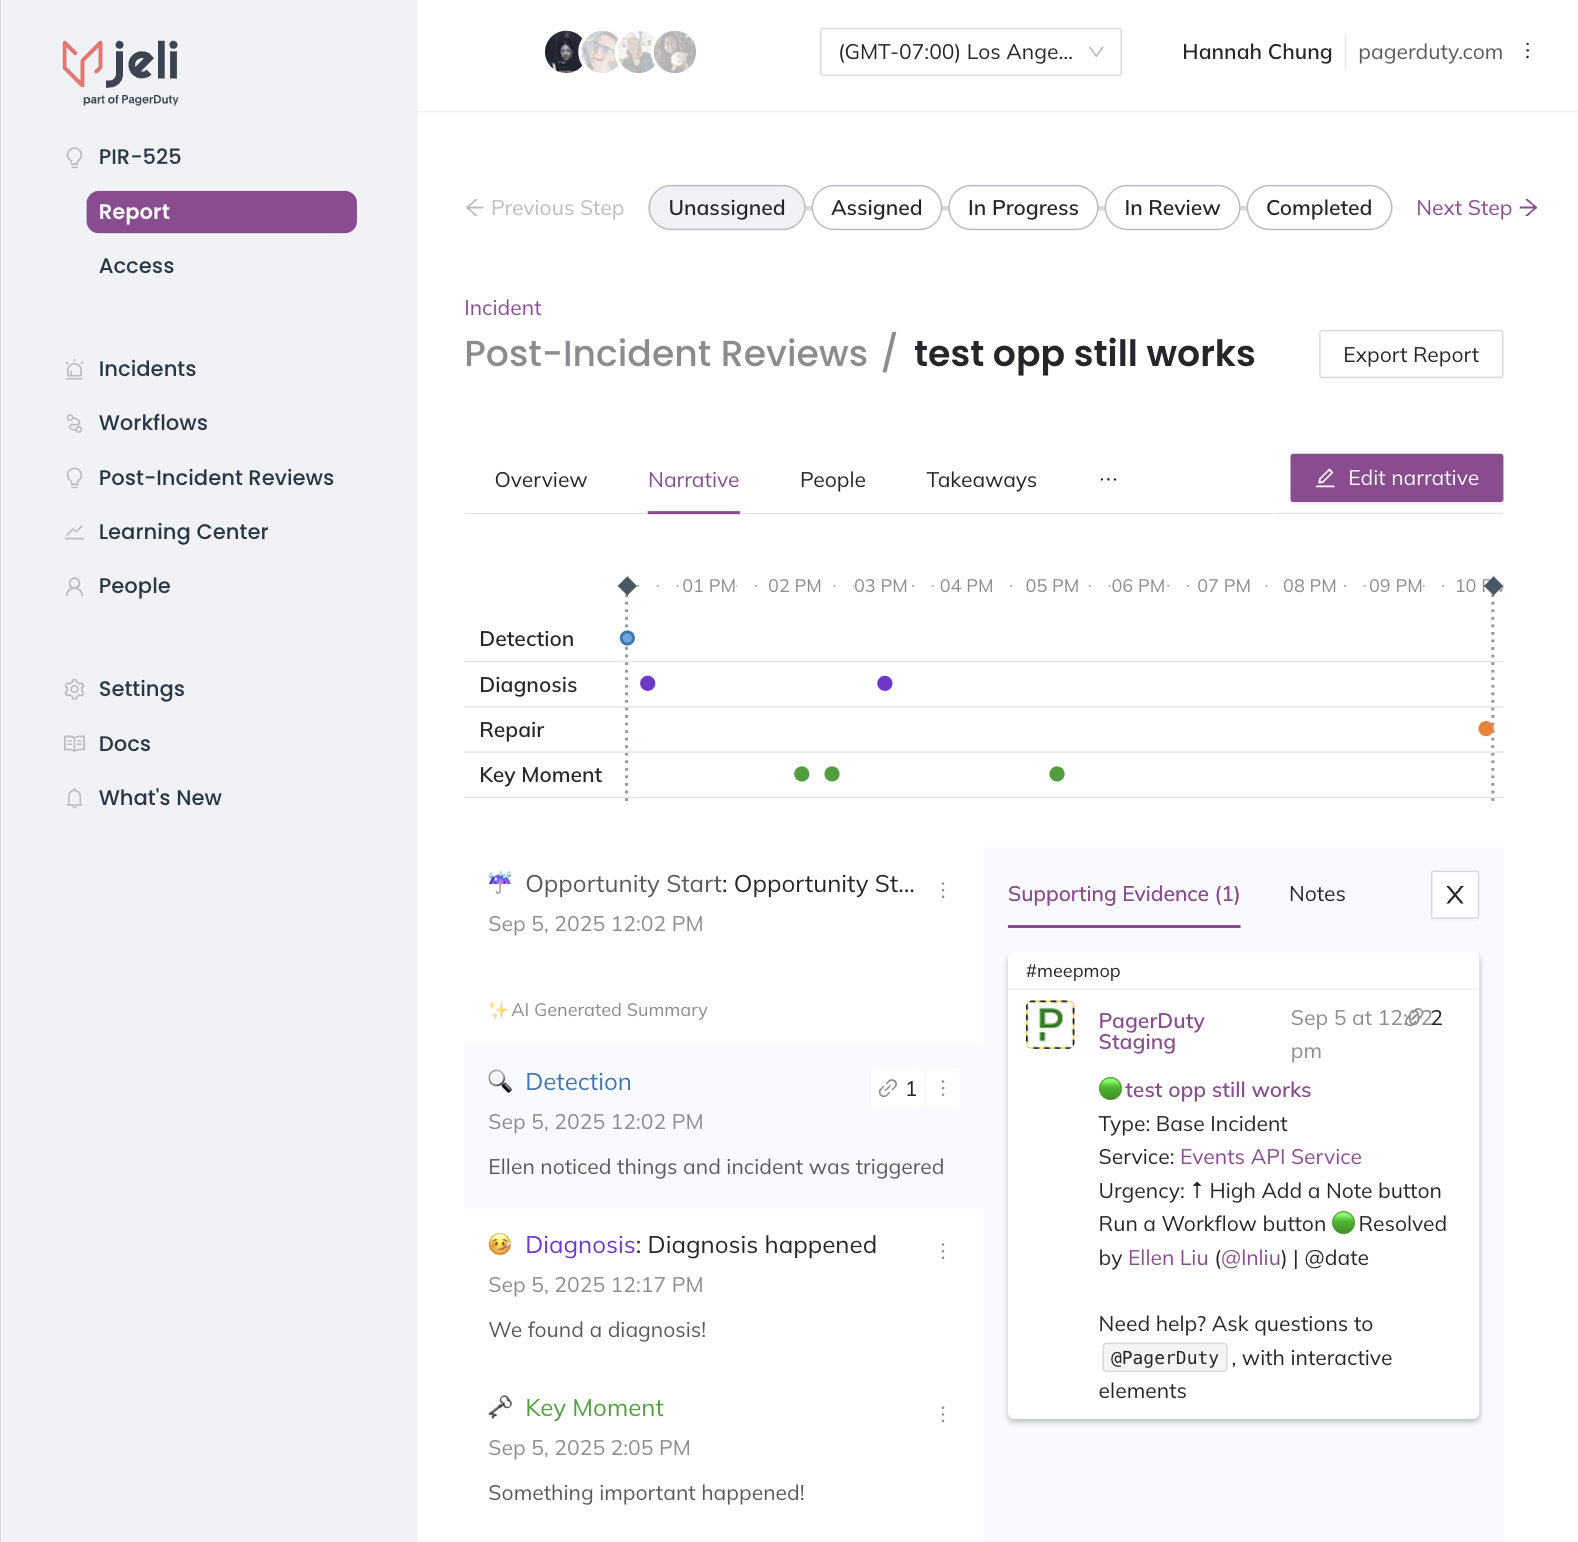
When you open your Post-Incident Review in Jeli, navigate to the Report Narrative tab.
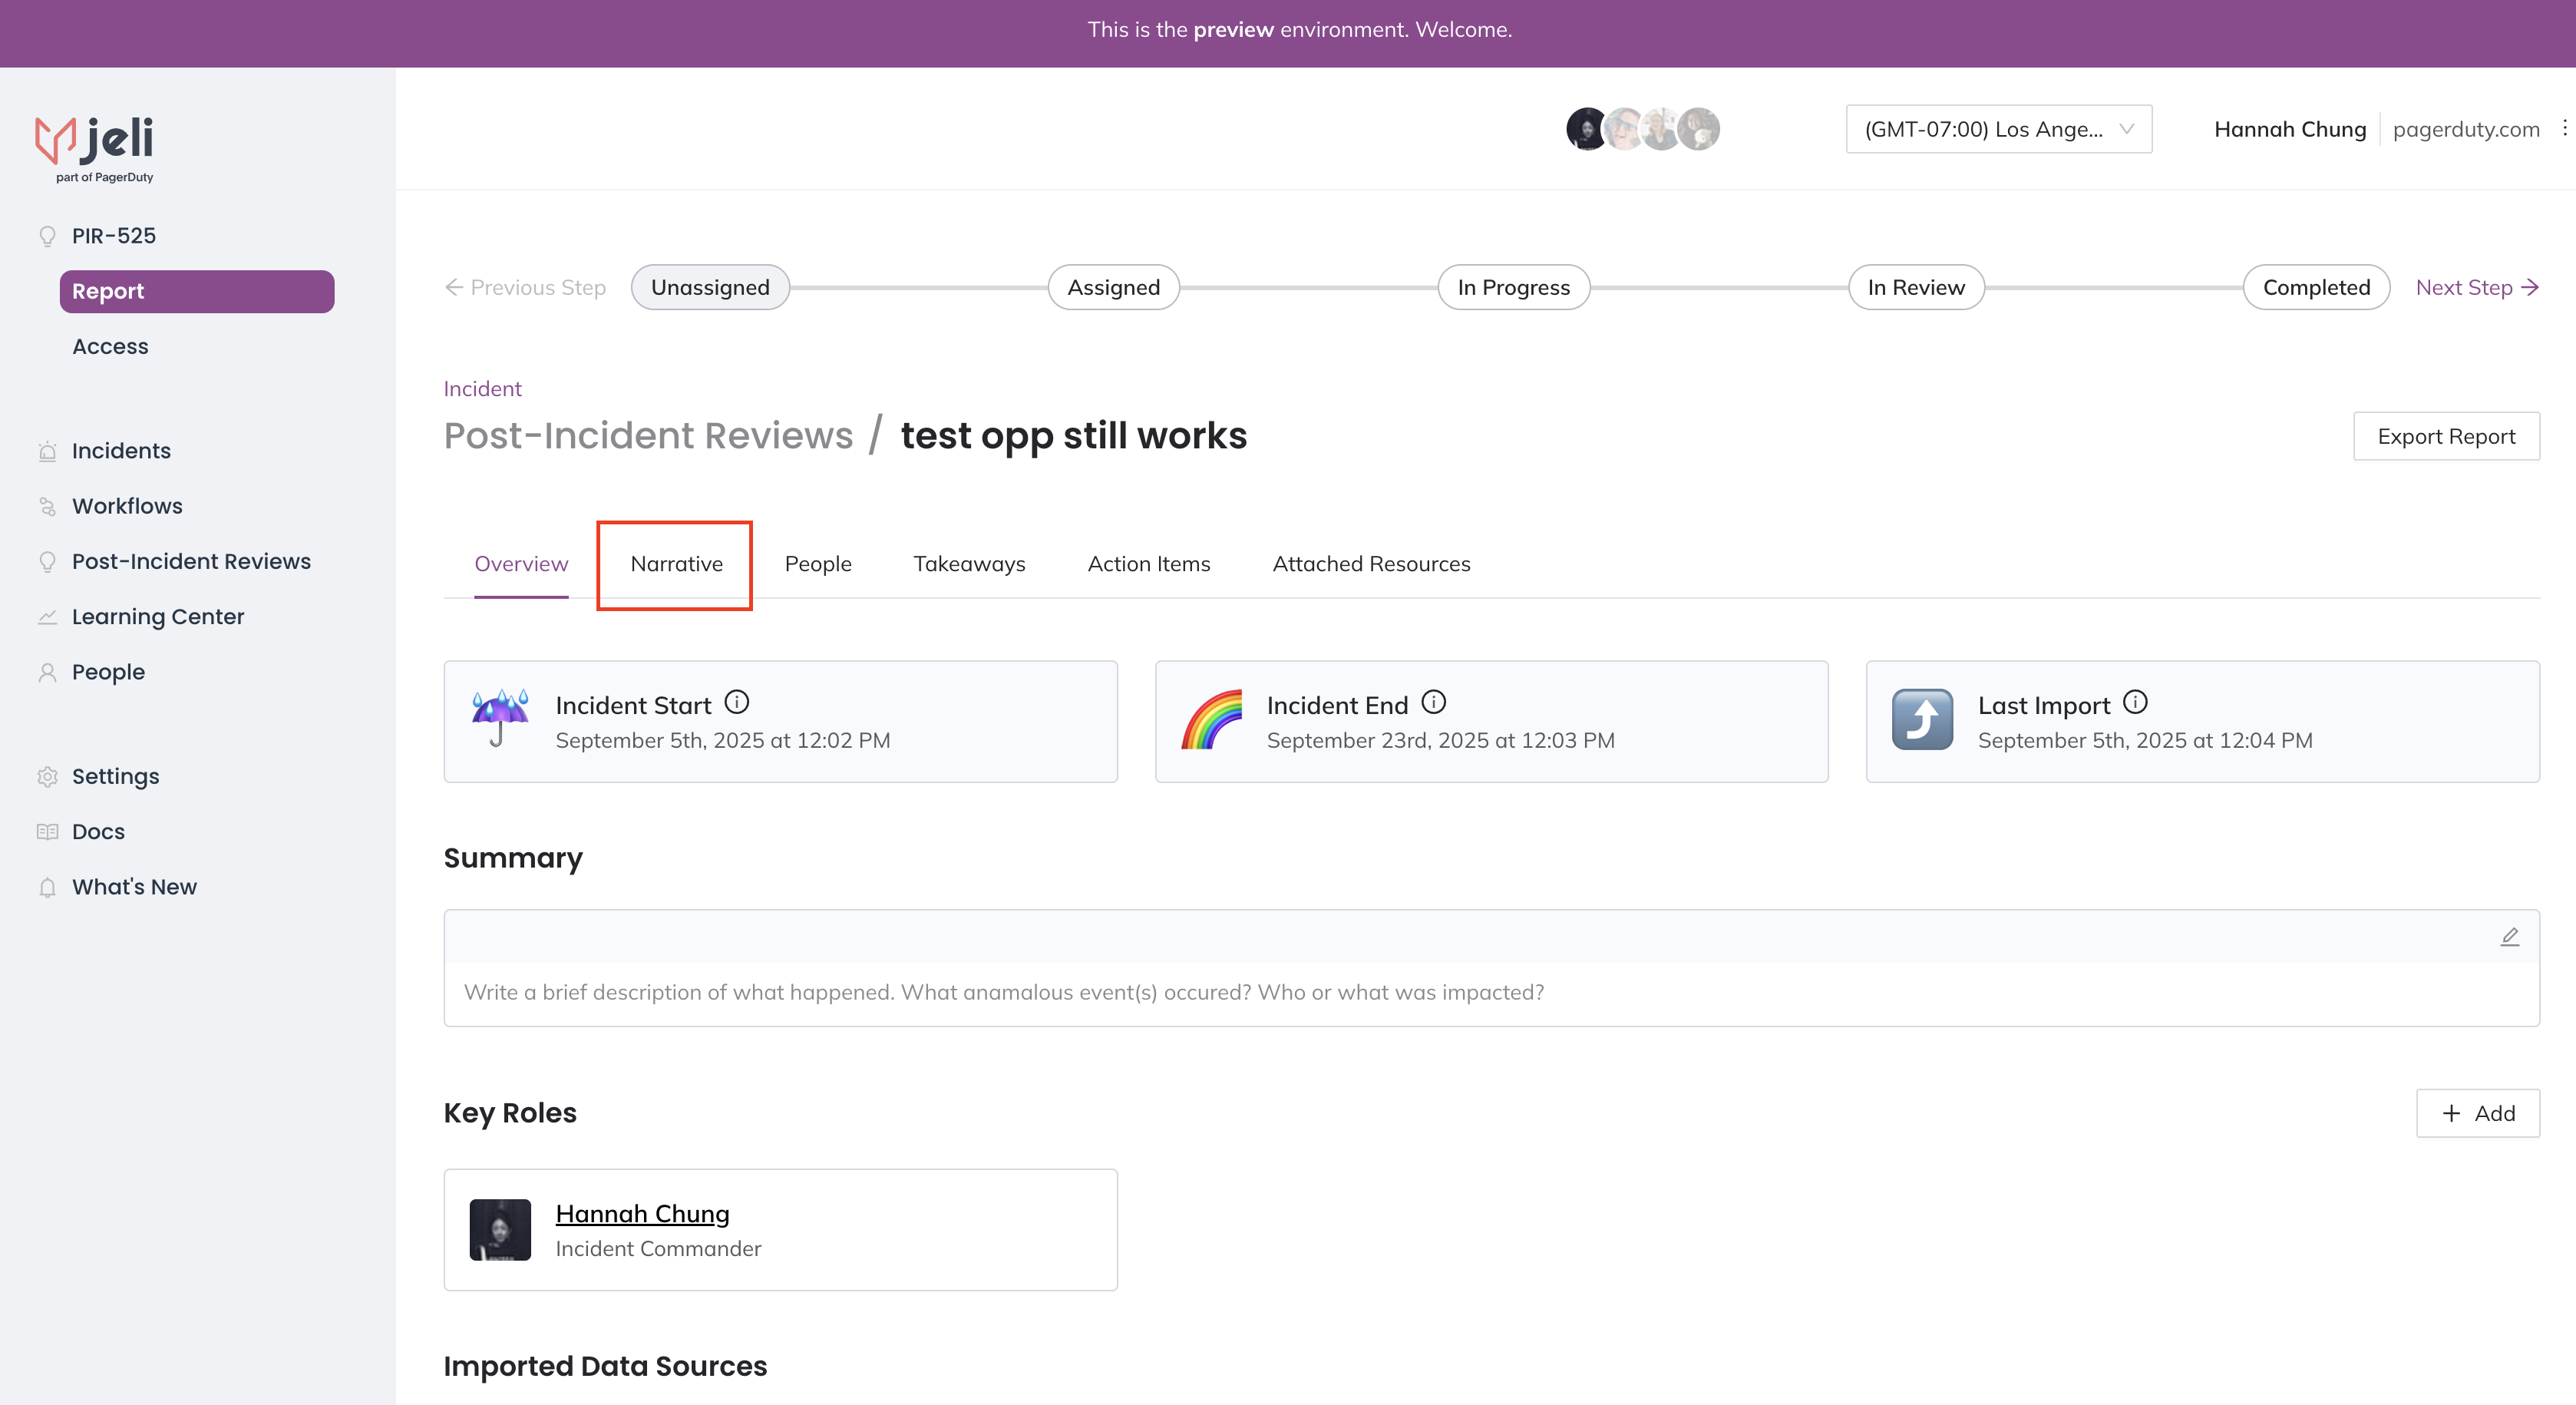
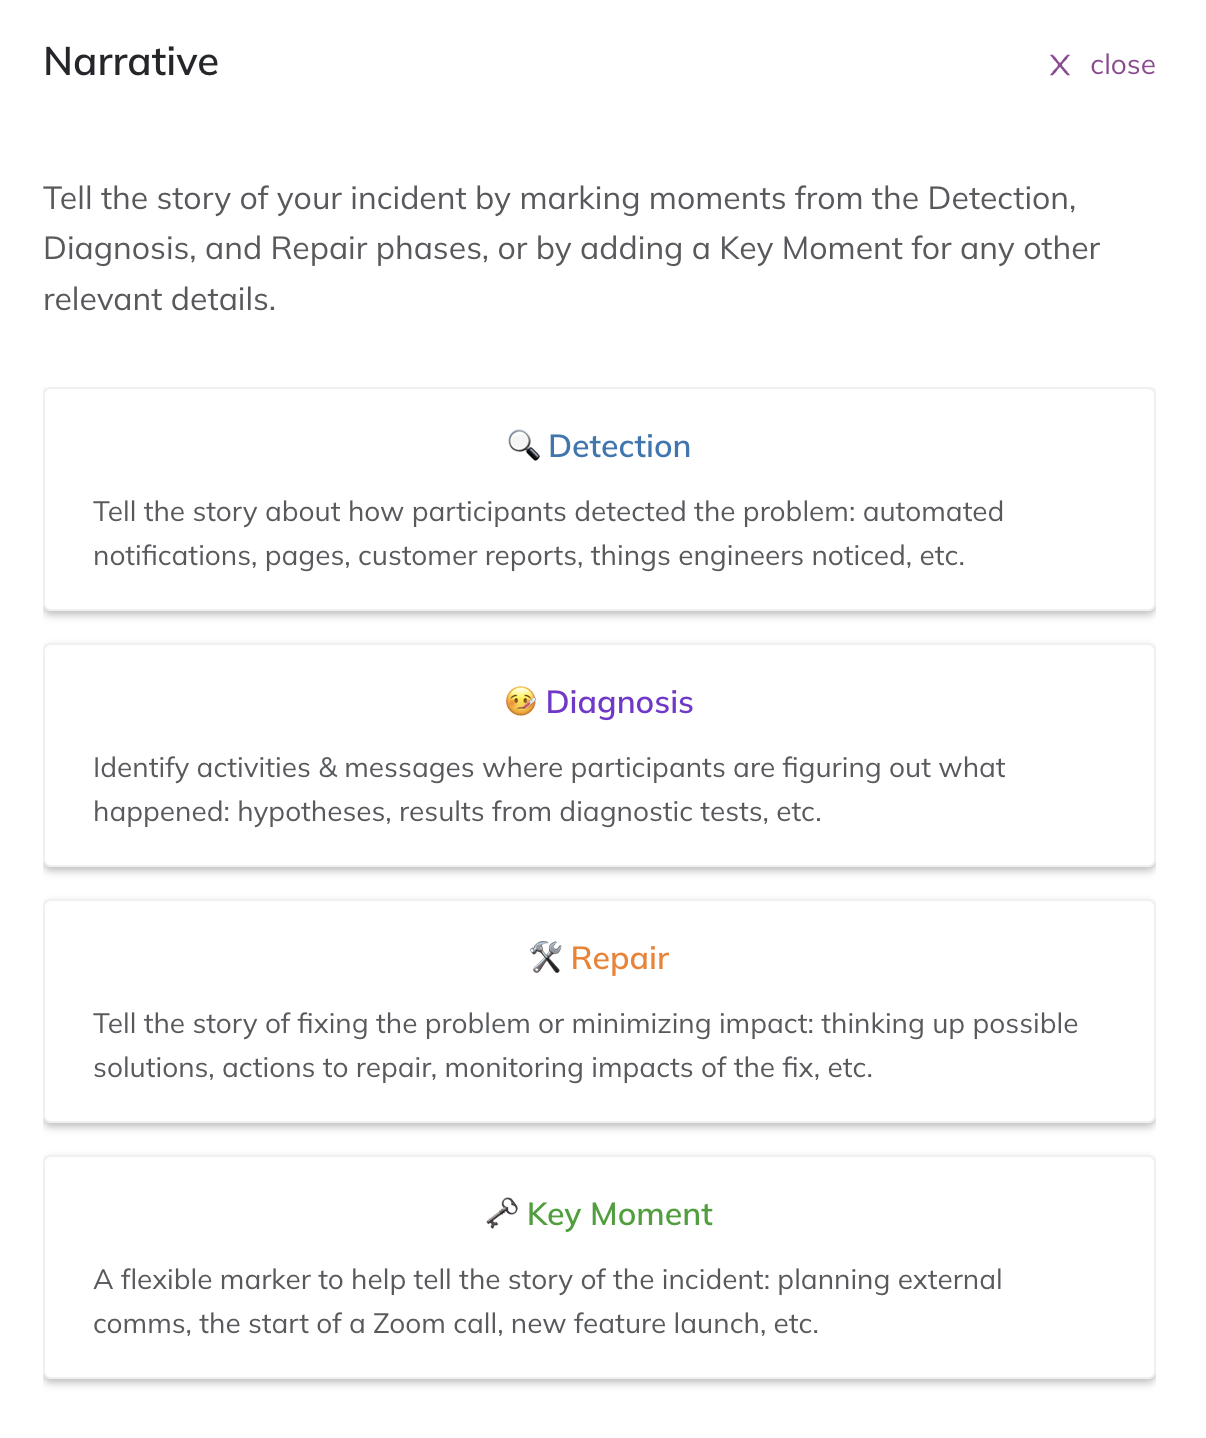
Click Edit Narrative and then Add Marker to start telling the story of your incident using the markers:
- Detection
- Diagnosis
- Repair
- Key Moment
Step 3: Add Narrative Marker Details
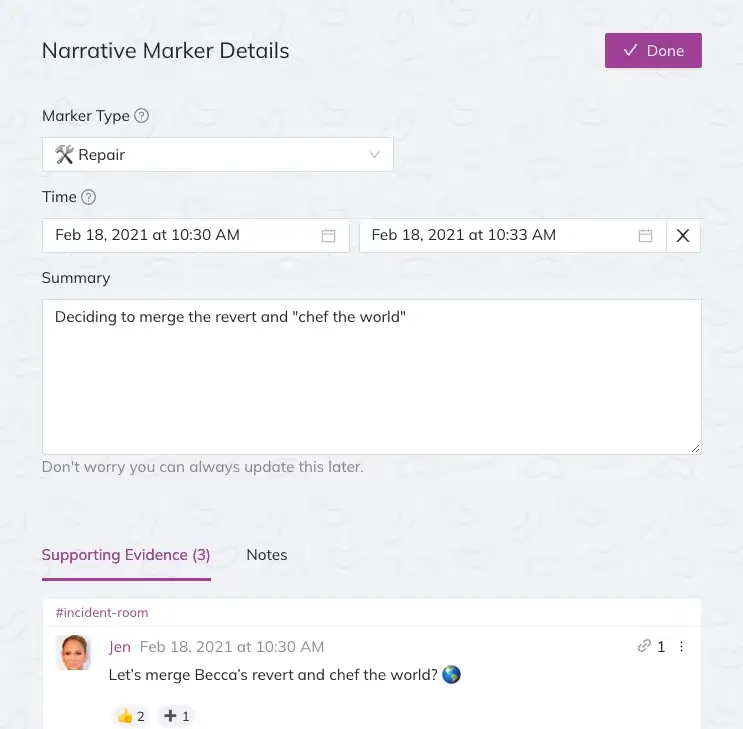
As you skim through the transcript, add additional information to further explain the story.
- Add a Summary to your marker to easily explain what is happening.
- Add messages directly from your sources as Supporting Evidence to each marker.
- Add Notes to each marker to highlight what you want to learn more about (i.e., questions for the review meeting).
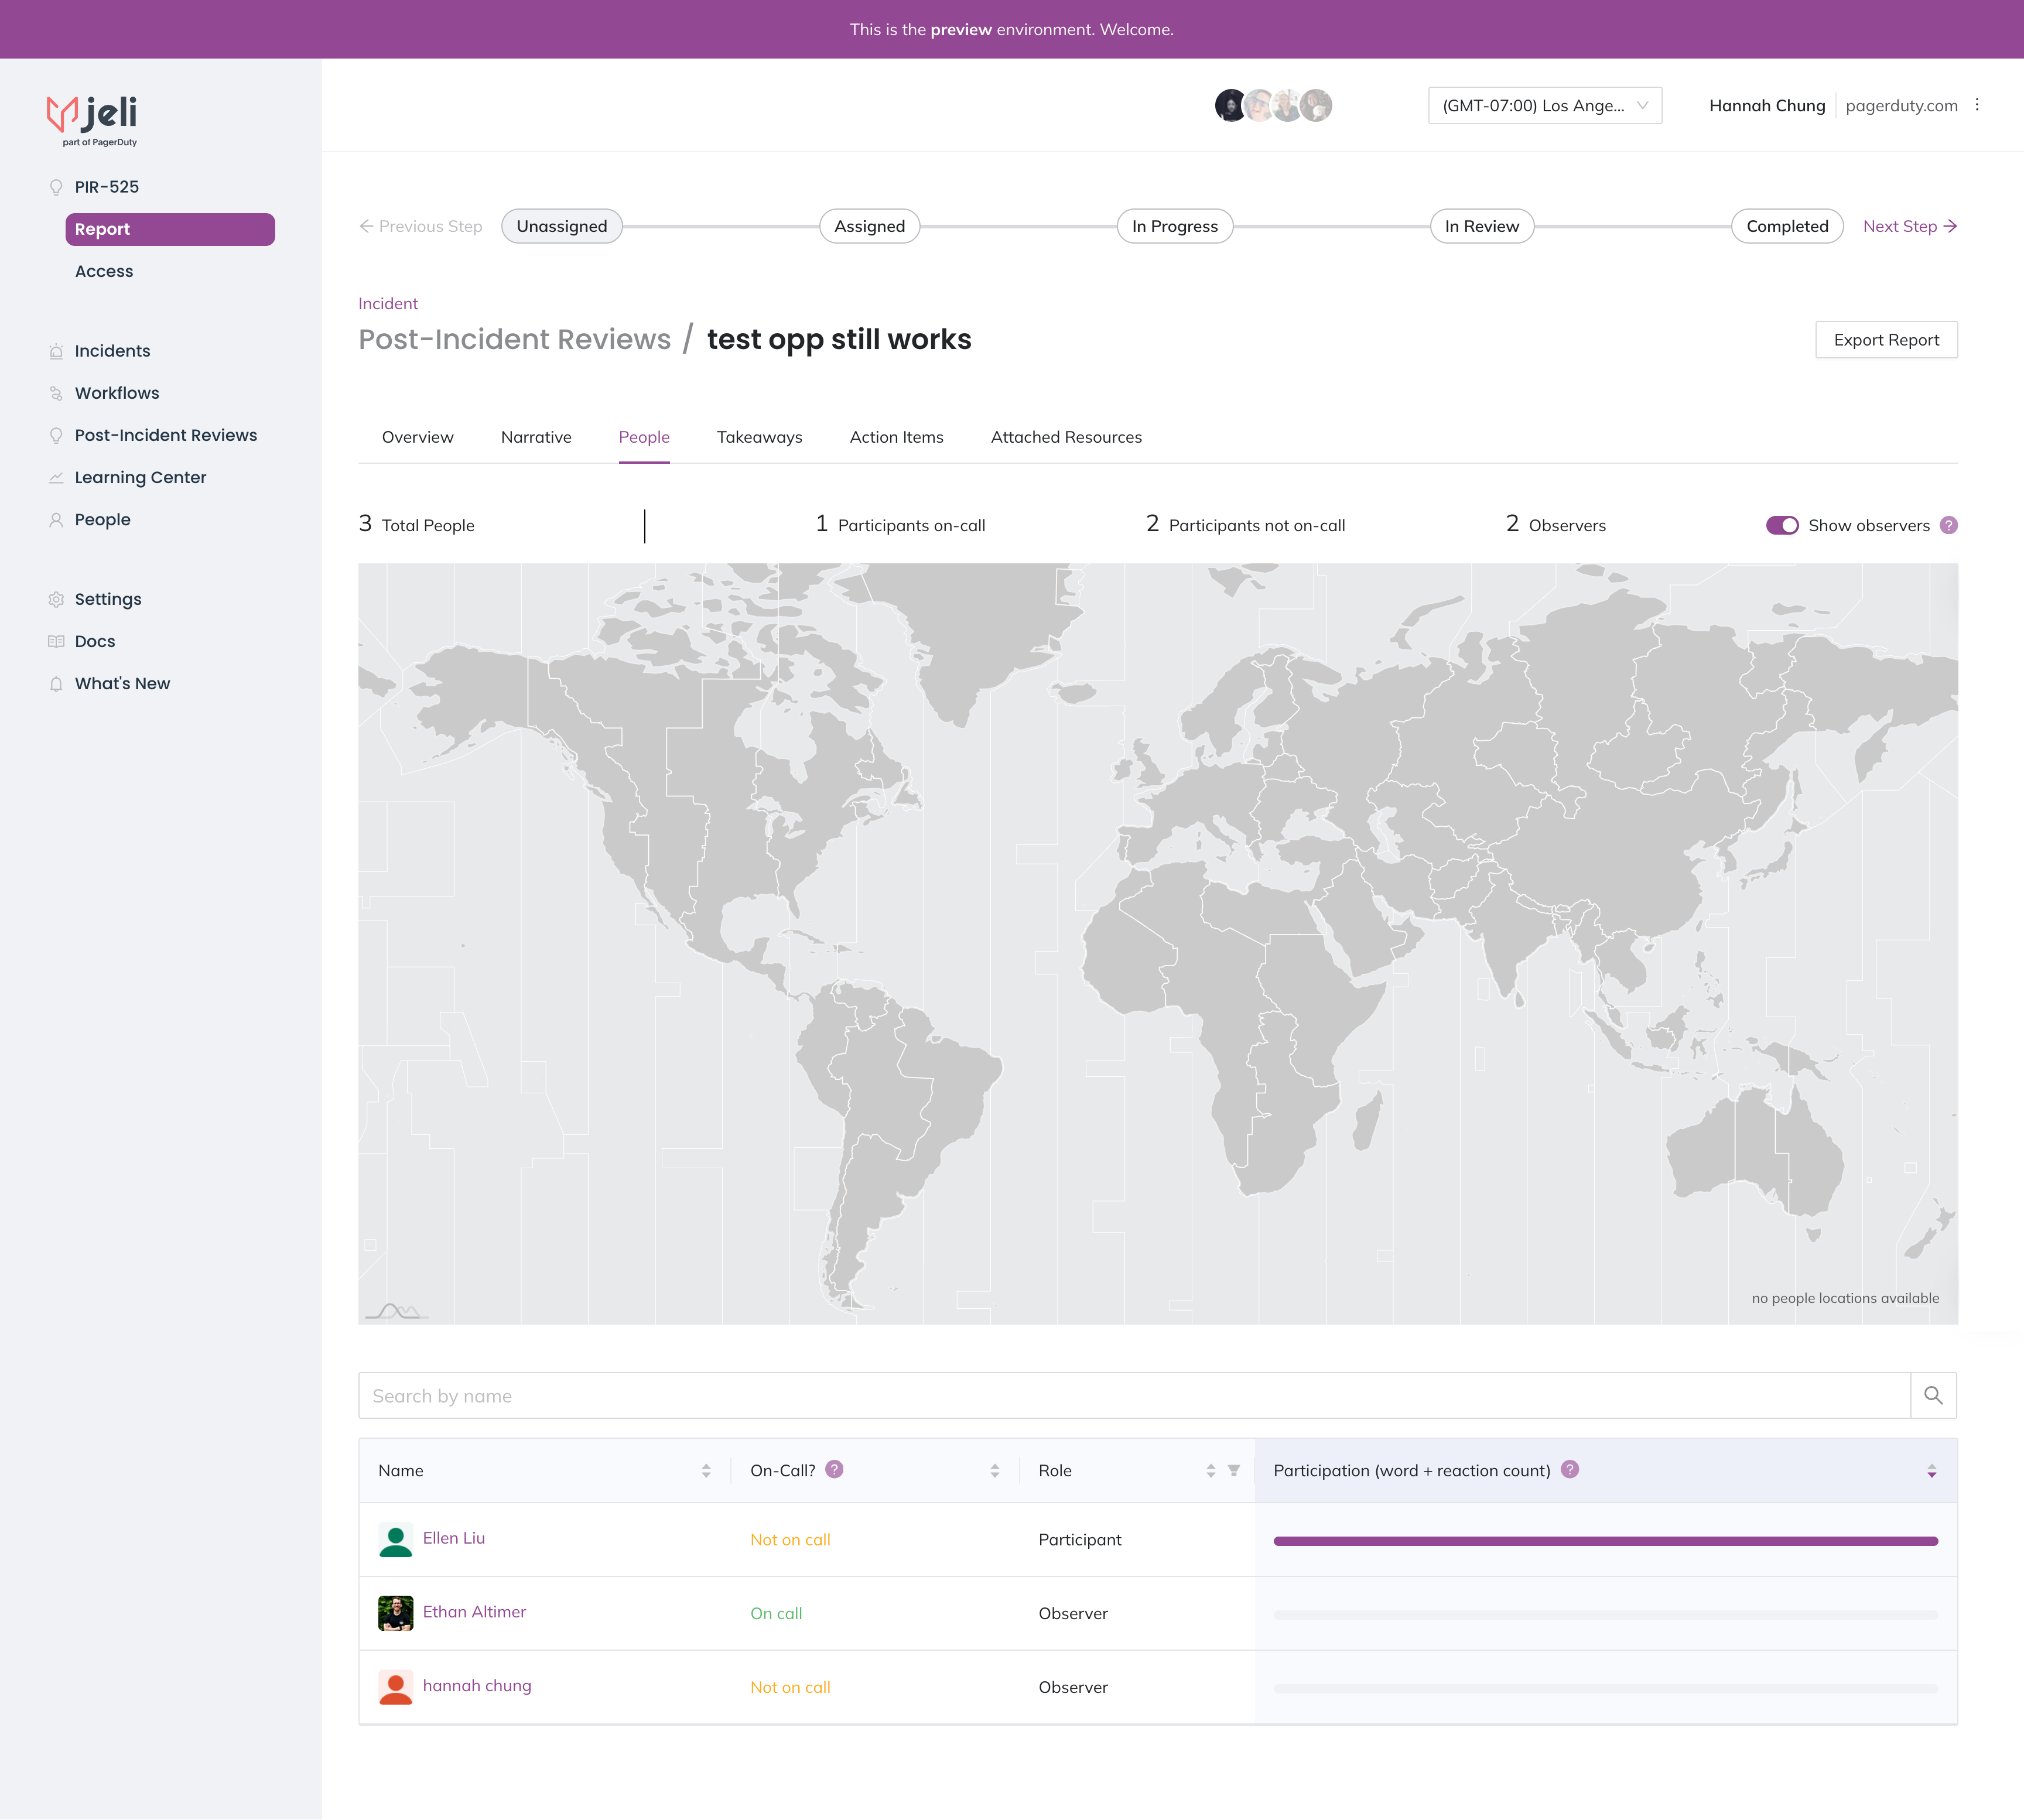
Step 4: Use the People View to Understand who was Involved in the Incident
Navigate back to the Post-Incident Review and select the People tab. The world map can help you see how folks coordinated during the incident in different time zones. The user list below the map displays who was involved in the incident, and you can use this to ensure your review meeting attendee list is complete.
During your Review Meeting
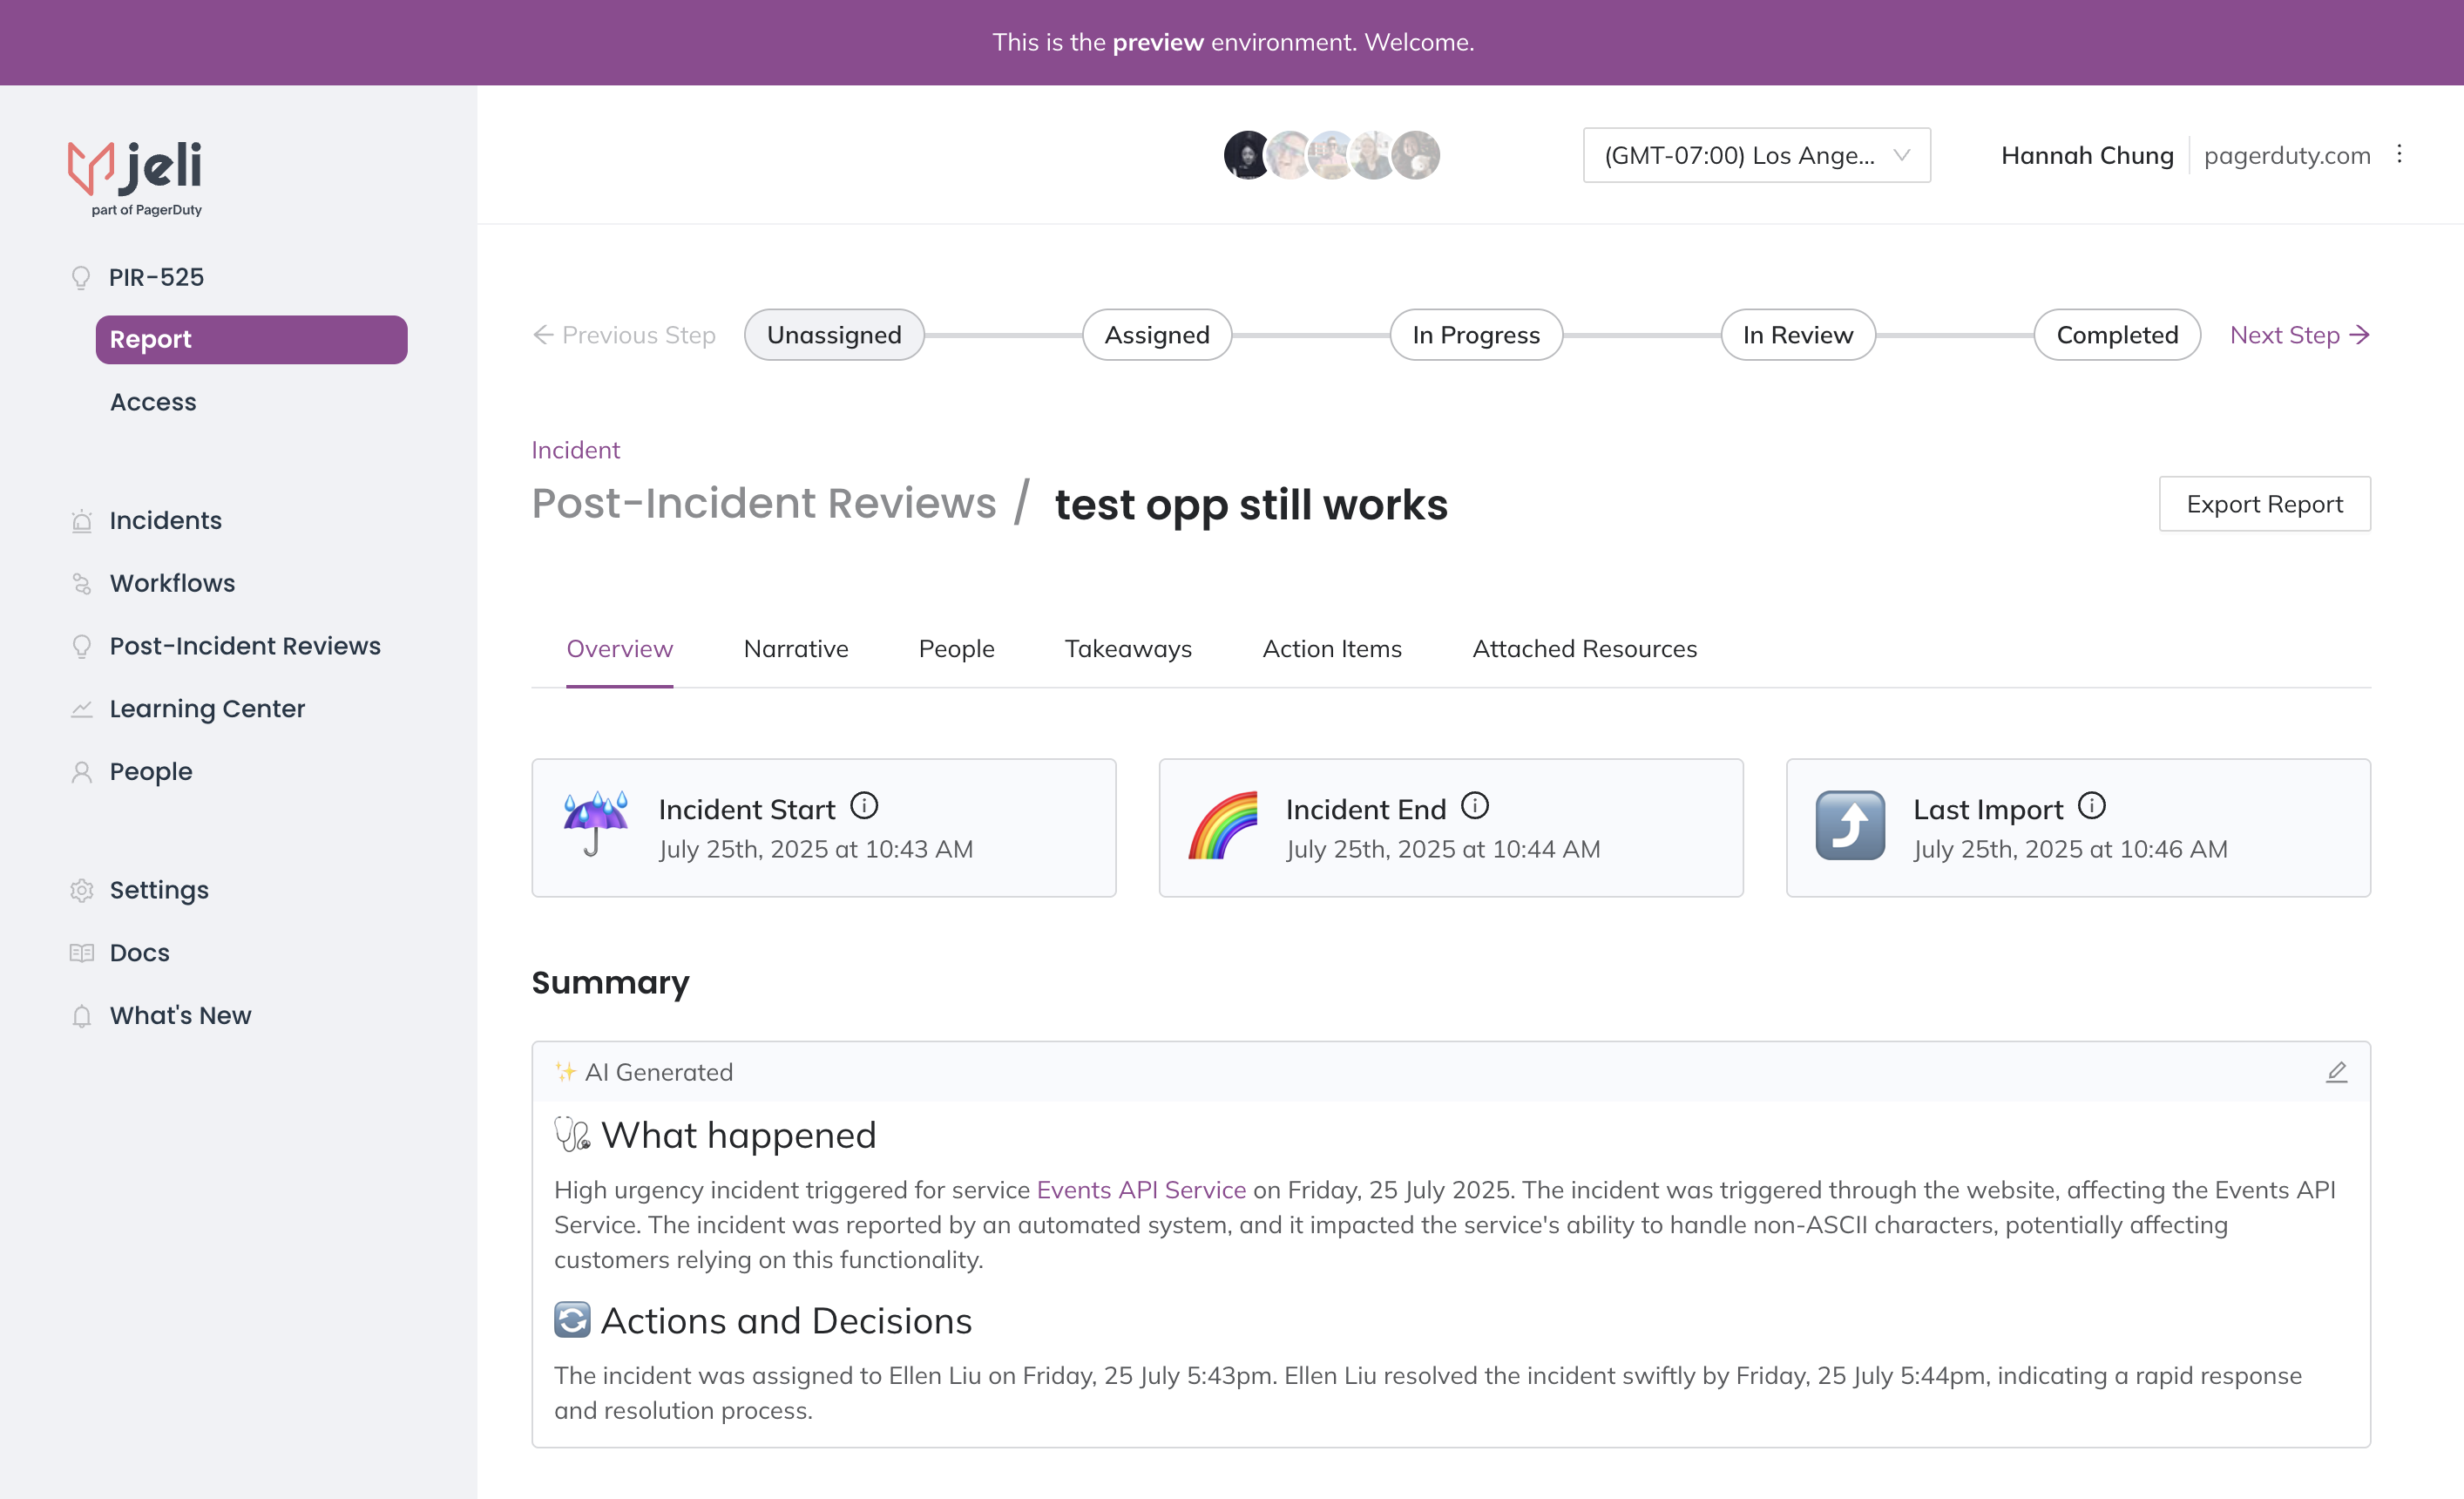
Step 1: Welcome Attendees by Summarizing the Incident
Go through the Summary and timing details.
Step 2: Review the Narrative Timeline
- Go through your narrative timeline in Jeli with the attendees.
- Bring up the questions you have noted and call on those who participated in the incident.
- Take down any possible action items (you can do this directly in Jeli).
- Clarify any closing thoughts and learnings.
After Your Meeting
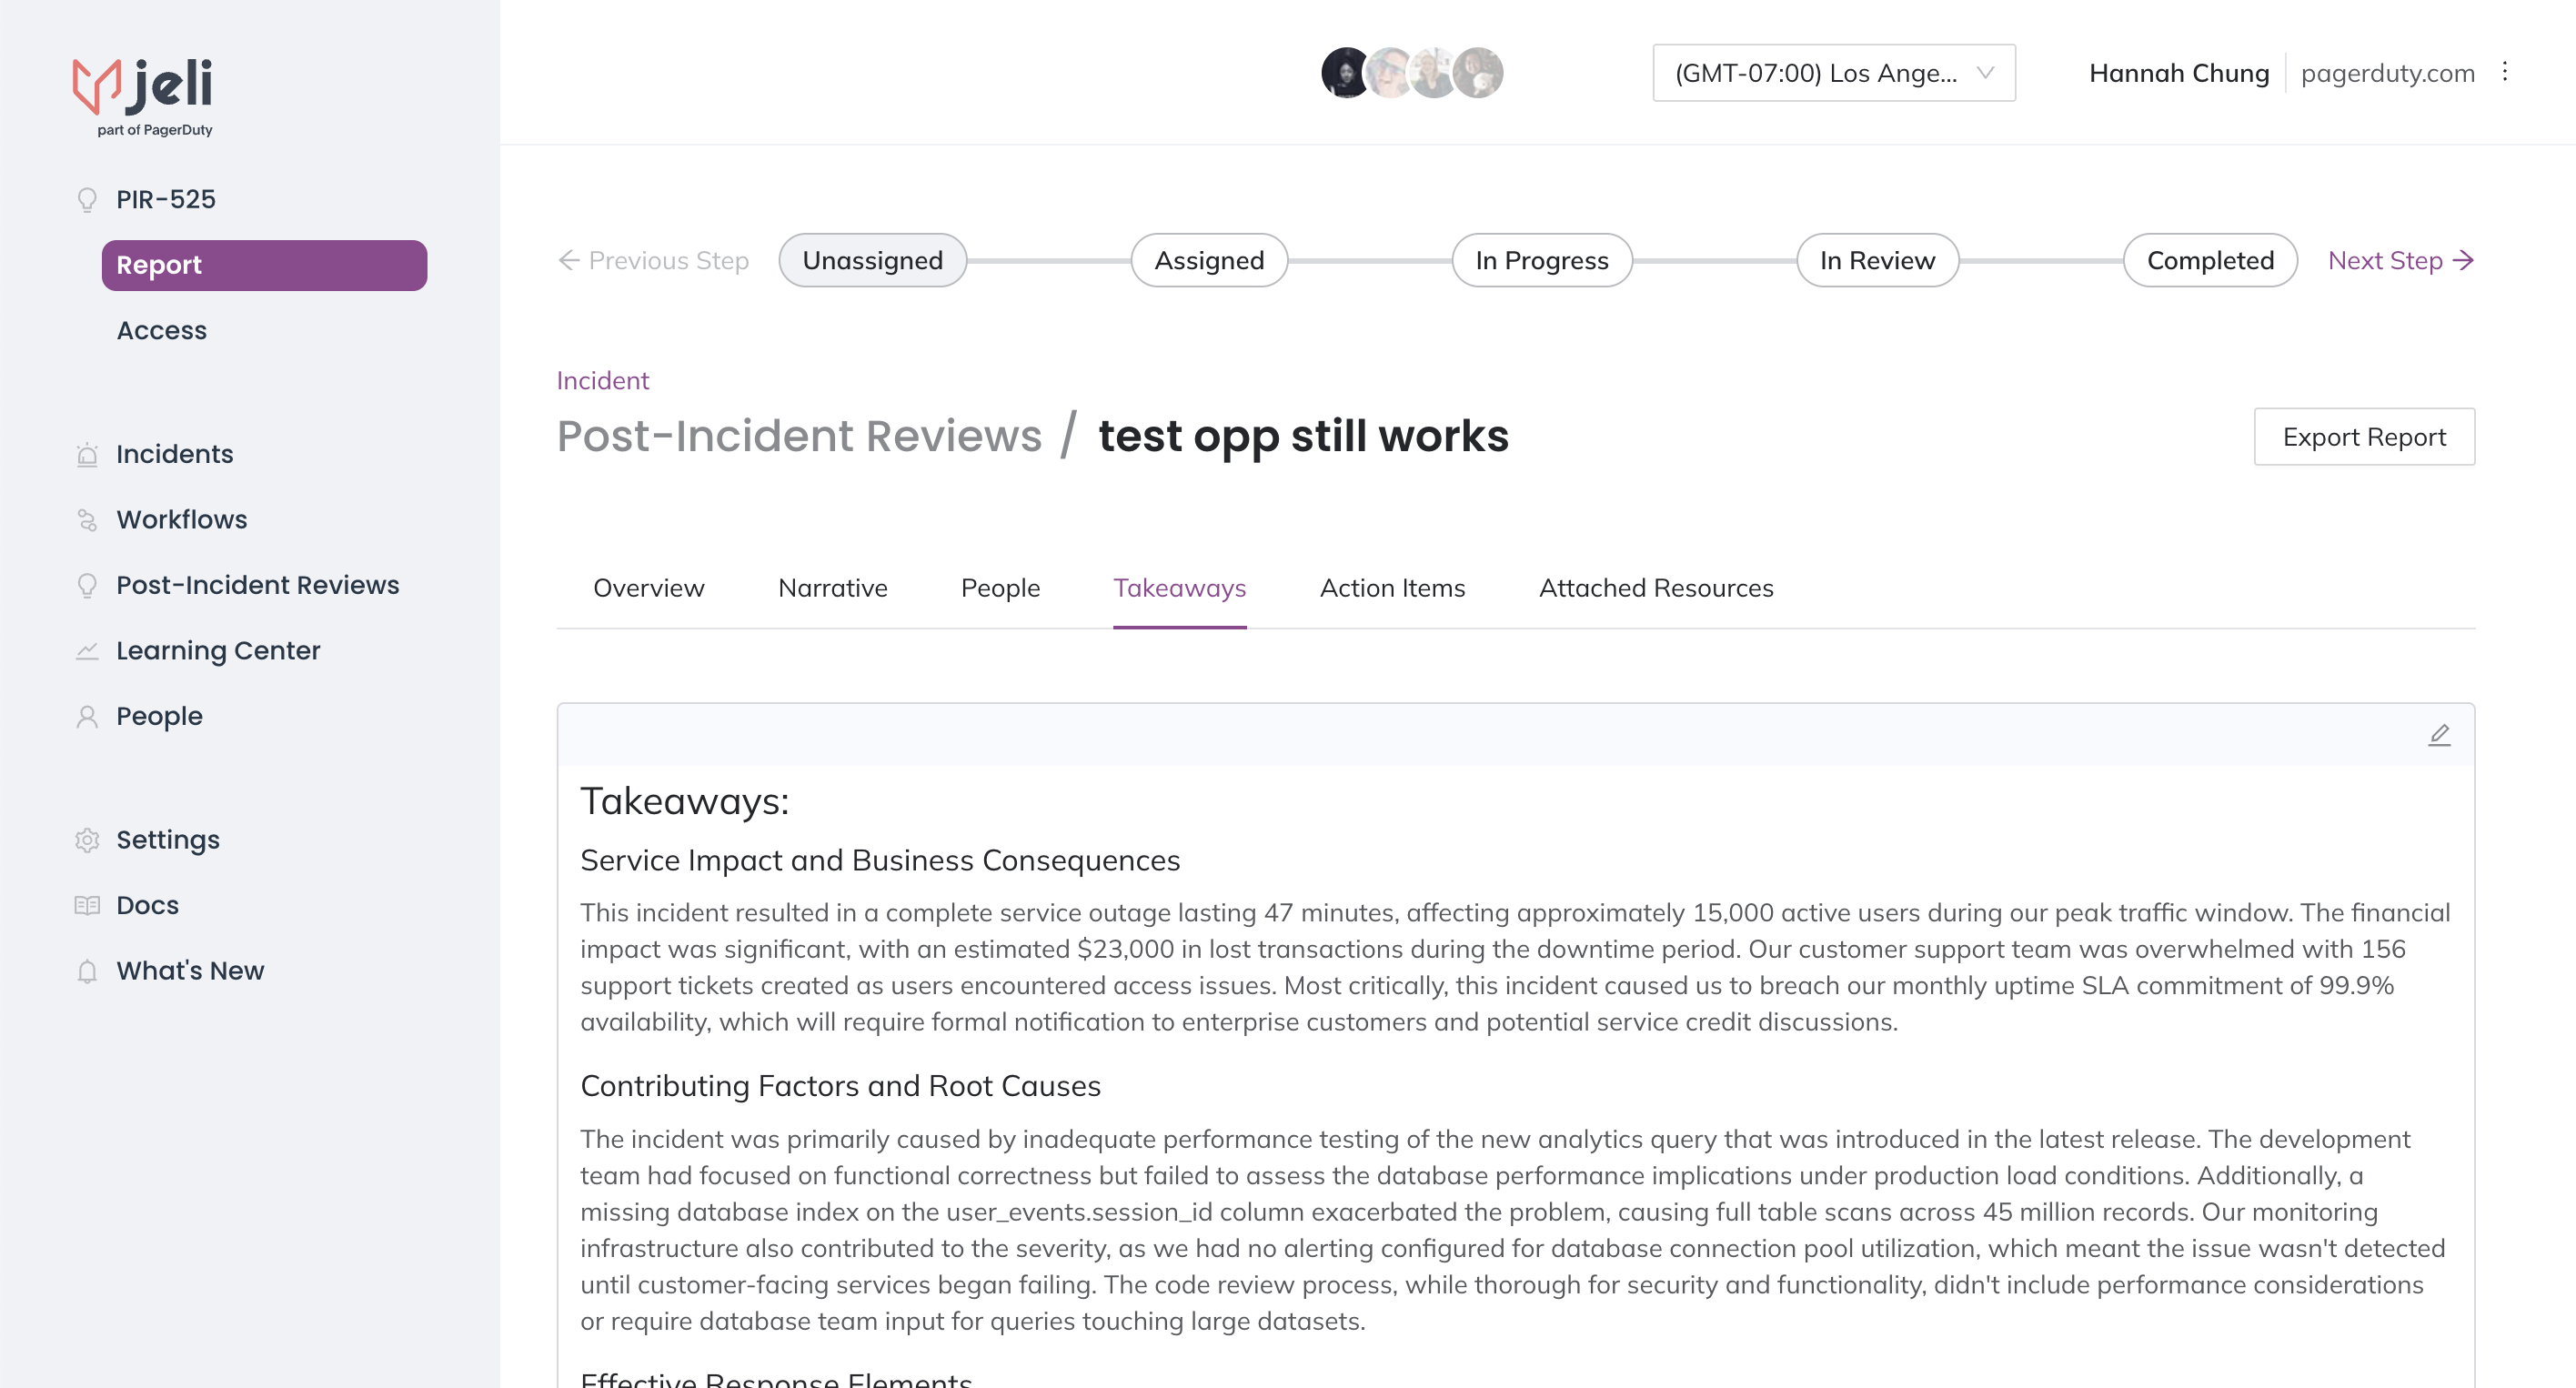
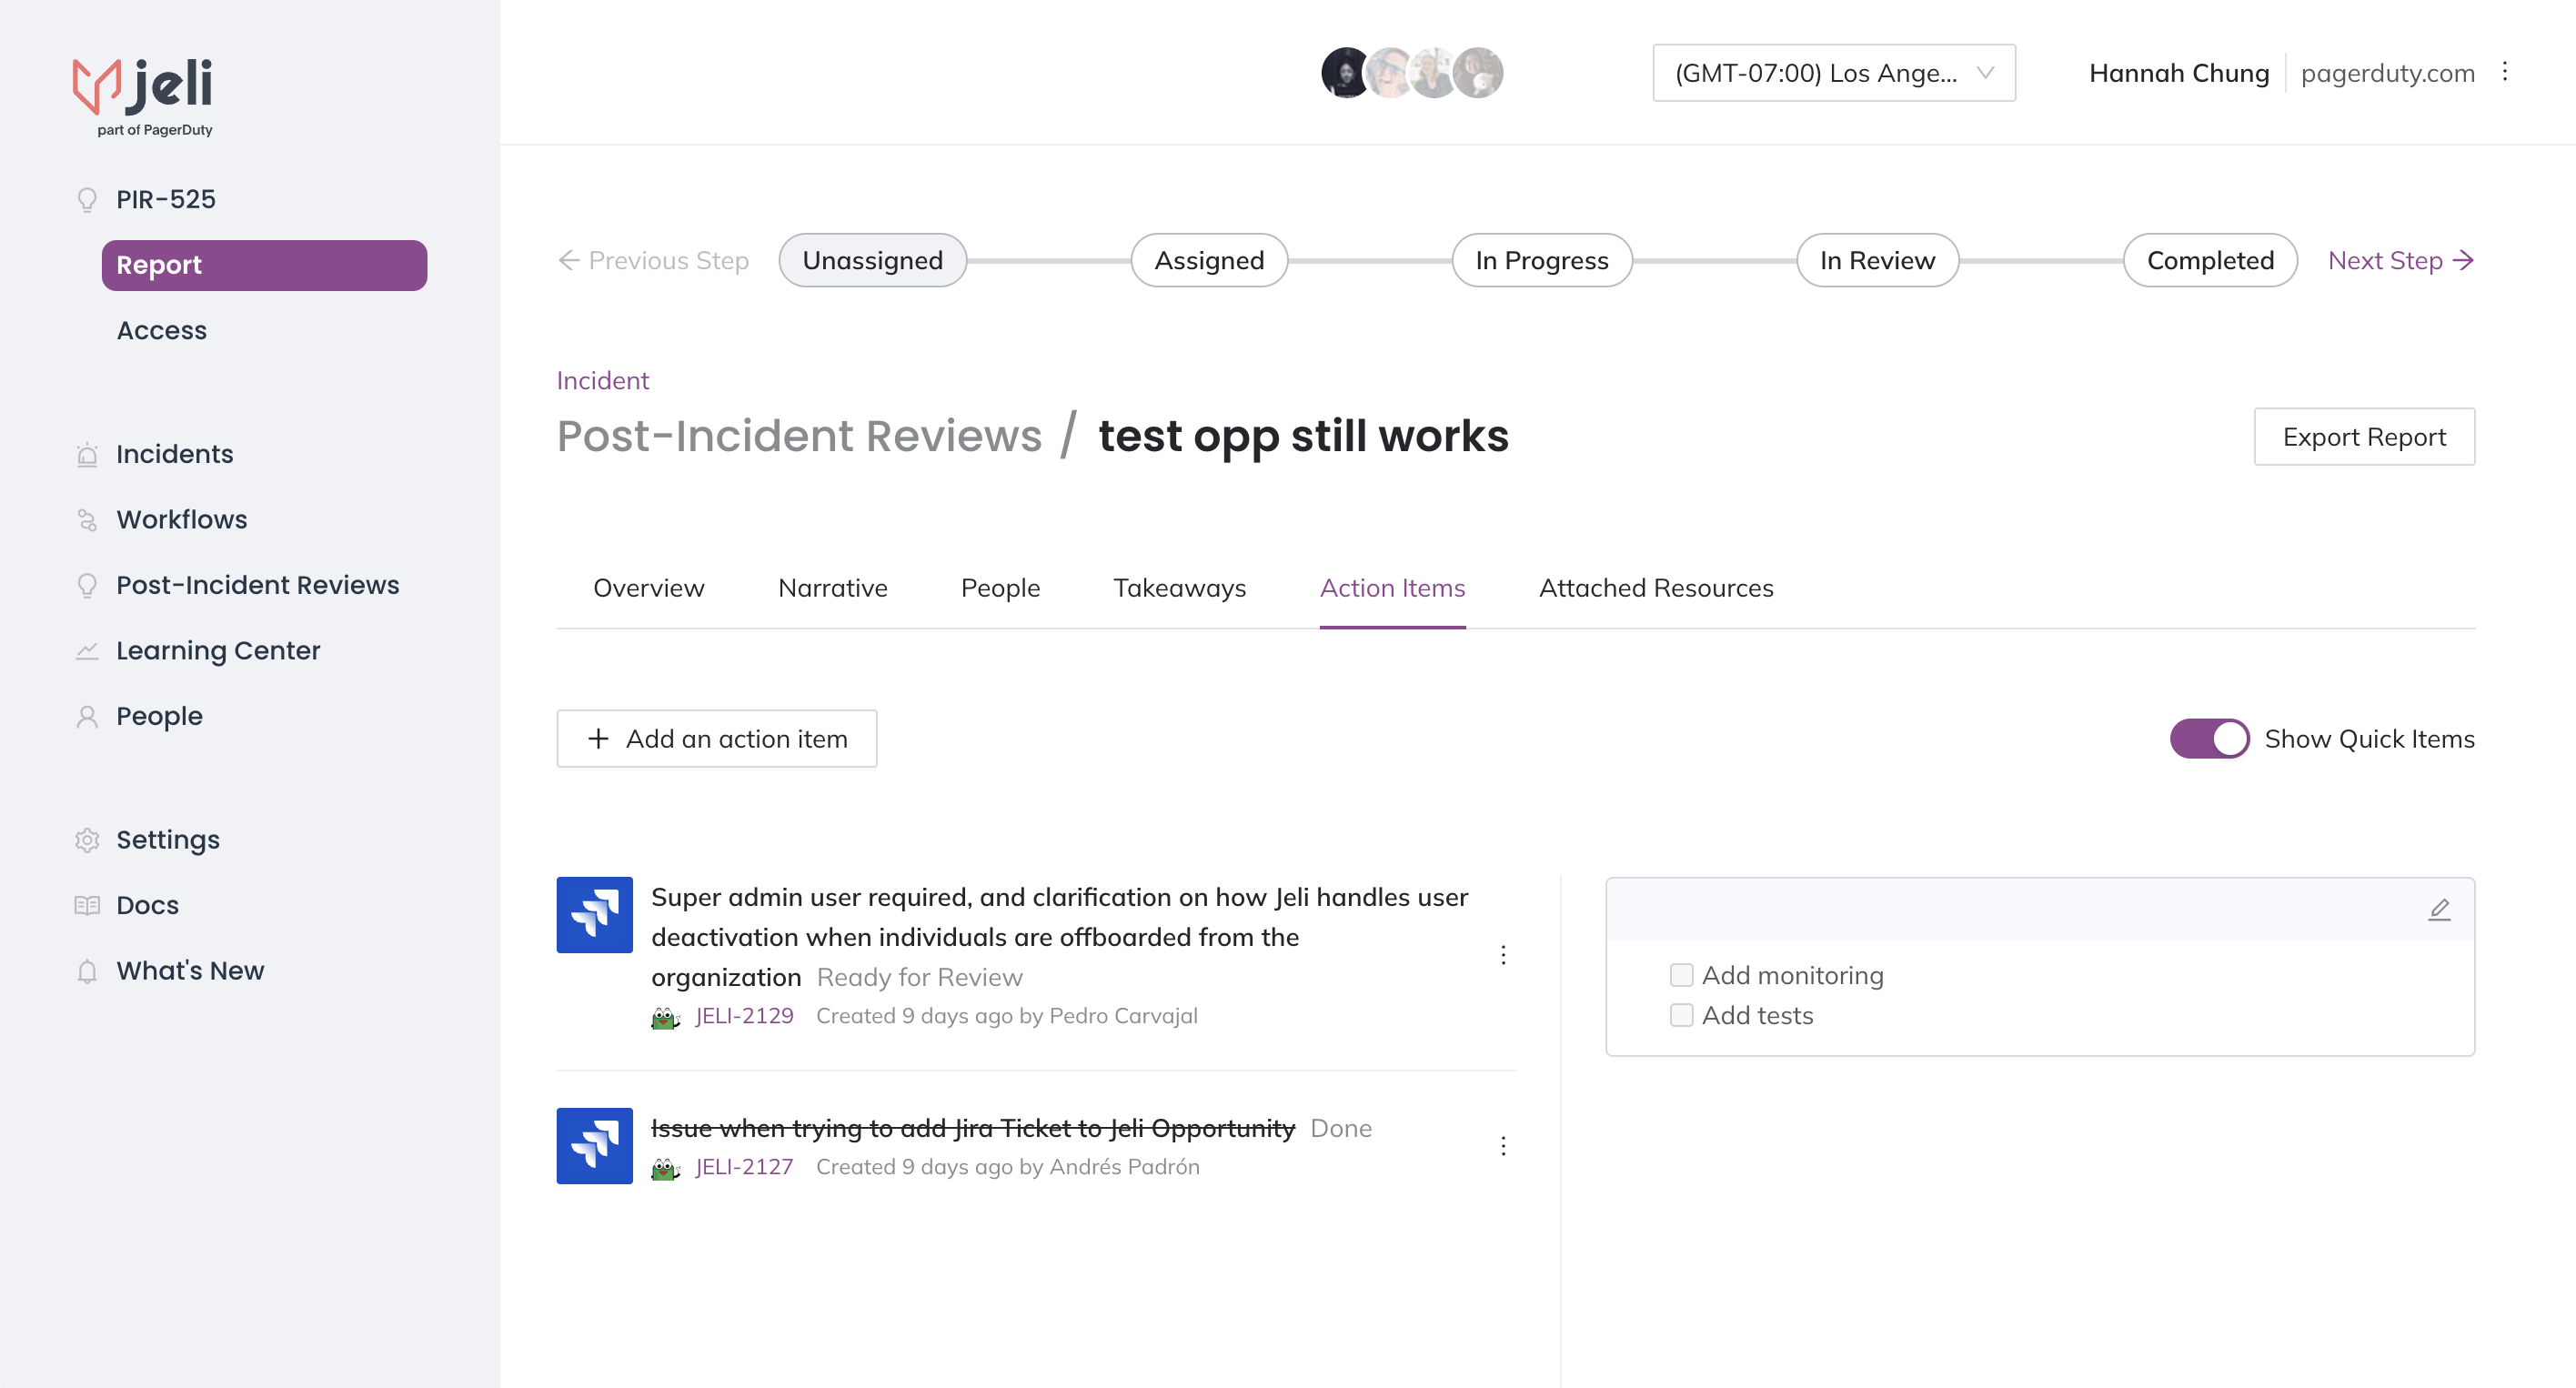
Step 1: Update Takeaways and Action Items
- You may include Takeaways and Action Items from your meeting directly in their respective tabs in the Post-Incident Review.
- You can summarize this information from notes, or delegate to meeting participants who have the best expertise to write them up.
Step 2: Share Your Post-Incident Review with Others in your Organization
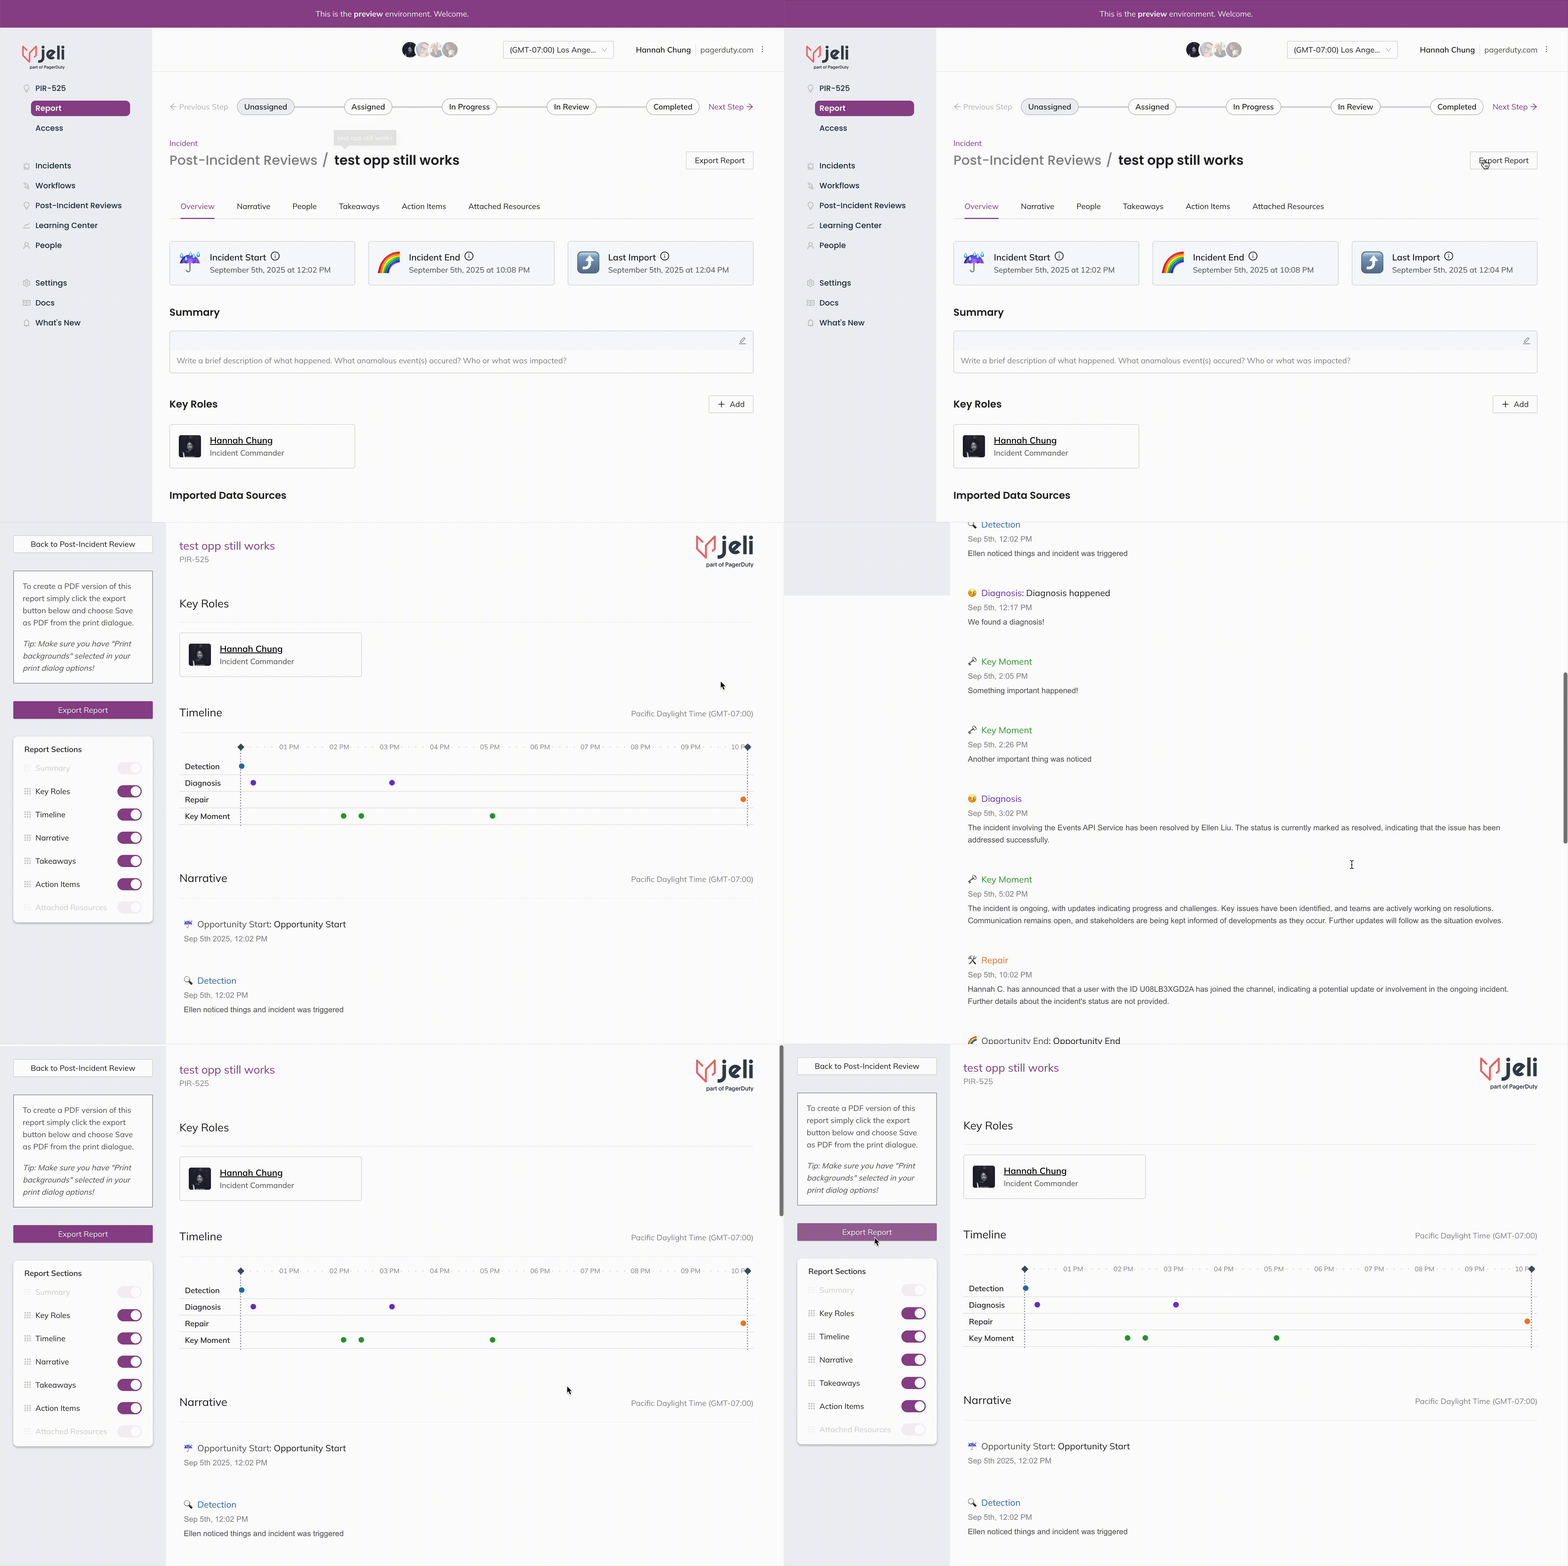
Export your report as a .pdf, choosing which parts of it you want to share depending on your audience. Click Export Report in the upper right of the Post-Incident Review and then use the left hand toggles to add/remove Report Sections. Click Export Report on the left to generate a .pdf version.
There are no user limits, so anyone at your company can benefit from your hard work. They’ll be able to see your timelines and notes, as well as explore for themselves.
Check out our blog post on the different ways you can share incident findings with your organization.
Updated 19 days ago
