
Quick Declare
Quick Declare lets you declare an incident without first selecting an impacted technical service. It is designed for incident responders and on-call engineers who know something is wrong but do not yet know which service or team owns the problem — for example, a suspected major issue where selecting the wrong technical service could mobilize the wrong team.
Quick Declare removes the service requirement so you can open an incident, pull in responders, and start coordinating right away, then set the impacted service once you know it. By removing this early decision, teams can assemble faster, validate impact sooner, and route the incident to the correct team with confidence.
AvailabilityQuick Declare is available on Free, Professional, Business, and Enterprise Incident Management (EIM) plans. It is not available for legacy Digital Operations plans.
User PermissionsAny user with permission to create an incident can use Quick Declare. Setting or reassigning the impacted service after declaration follows the same permissions as a standard service reassignment.
Configuration
Quick Declare does not require any configuration. It is available on the incident creation form in the web app and in Slack — the Impacted Service field is optional, and incidents declared without a service route through the built-in Default Mobilization Service.
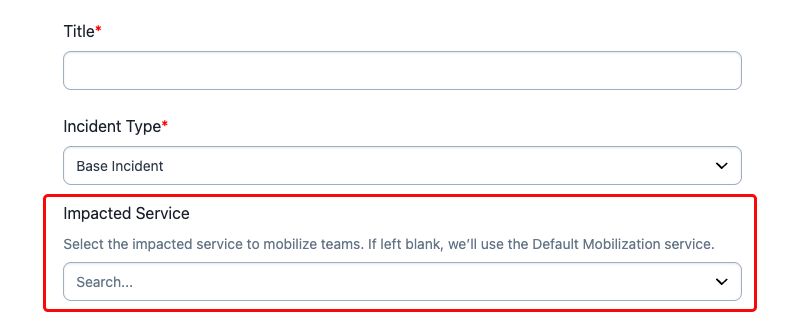
Impacted service field
Disable Default Mobilization
Default Mobilization is enabled by default. An administrator can disable it by navigating to Account Settings Incident Settings and deselecting Allow default mobilization. By disabling this, the Impacted Service field will be required when declaring incidents.
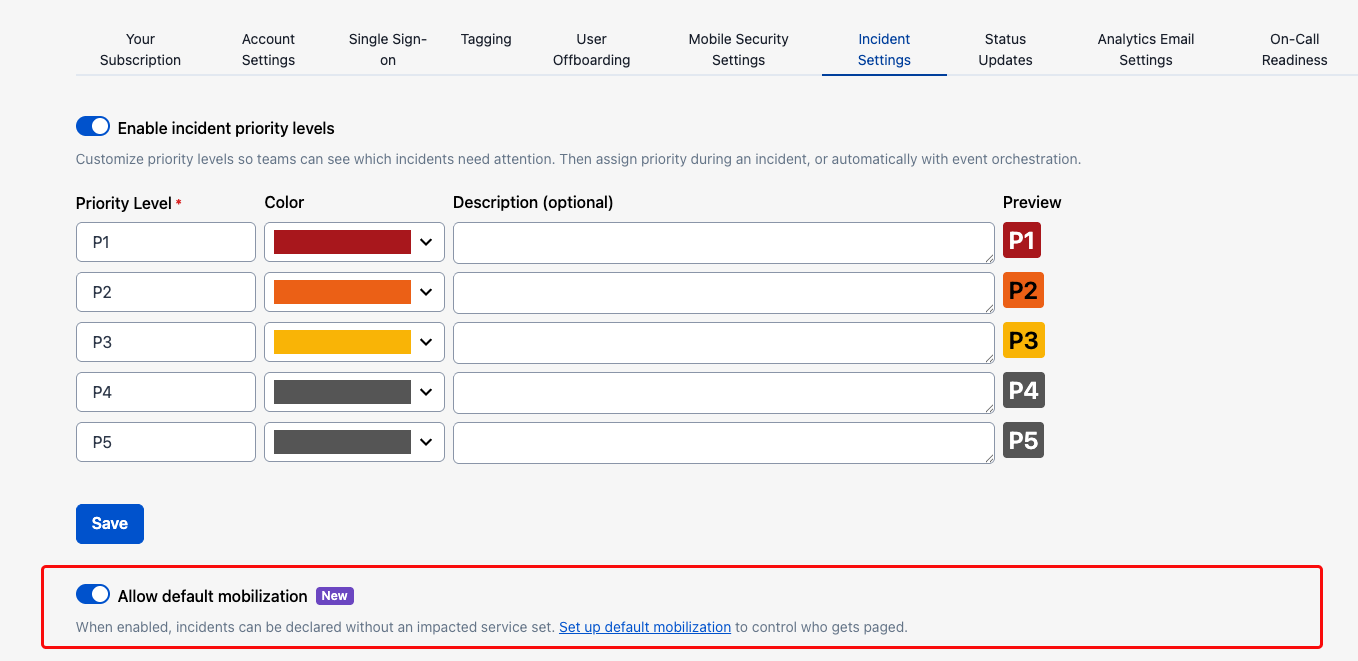
Allow default mobilization toggle
Core Concepts
The Default Mobilization Service
When you declare an incident without selecting a technical service, PagerDuty routes it to a built-in service called the Default Mobilization Service, so a serviceless incident never goes unassigned. What happens next depends on whether its escalation policy has responders assigned: by default the policy is empty, so no one is paged automatically — you become the incident owner and the incident is acknowledged. If an administrator has assigned responders, they are notified as the first responders. Either way, setting the impacted service is always the next step toward resolving the incident.
For how the Default Mobilization Service is structured, how to configure its escalation policy, and full behavior details, see Default Mobilization Service.
Impacted Service Display
When an incident is declared without a technical service, its Impacted Service shows as -- (not set) on the incident details page and in the incident list, so it is clear that a service has not yet been assigned.
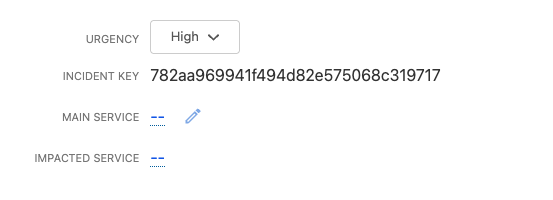
Impacted service display
Use Quick Declare
Declare an Incident in the Web App
- Click + New Incident.
- Enter an incident title.
- Leave the Impacted Service field blank. The field is optional, and there is no required-field indicator.
- Click Declare. The incident is created and routed through the Default Mobilization Service, and a call to action appears to add responders and set the impacted service.
Declare an Incident in Slack
- In your Slack channel, run
/pd declare. - Enter the incident name.
- Leave Impacted Service unselected. The field is optional.
- Click Declare. A confirmation card appears; its content depends on how the Default Mobilization Service escalation policy is configured.
| Escalation Policy Configuration | Confirmation Card |
|---|---|
| Responders configured | Confirms that responders were notified, and exposes Page and Set Impacted Service. |
| No responders configured | Notes that no responders were notified, and offers the same Page and Set Impacted Service actions. |
NoteTo declare an incident from Slack, your Slack account must be linked to a PagerDuty user. Unlinked Slack users cannot declare an incident and see an error message.
Set the Impacted Service or Add Responders
Once the incident is open, you have two primary next steps.
- Set the impacted service. Setting the impacted service on an open Quick Declare incident works as a standard service reassignment — it routes the incident to the correct team and triggers that service's escalation path. Once set, the incident behaves like any other incident tied to that service.
- Add responders. You can page additional users or escalation policies into the incident at any time, whether or not a service has been set.
Resolve a Quick Declare Incident
Sometimes an early signal turns out to be a false positive. You do not need to assign a technical service before resolving. An incident still assigned to the Default Mobilization Service can be resolved normally — there is no block and no requirement to pick a service first.
ExampleA report comes in that login is broken. You declare an incident (Impacted Service shows
--), quickly determine it is a false positive, and resolve it without ever assigning it to a service or mobilizing a team.
MobileOn the mobile app, the Default Mobilization Service is hidden from service selection. Existing incident workflows are unaffected. Declaring an incident without a service from mobile may be added in a later release.
FAQ
Do I have to select a service to declare an incident?
No. The impacted service is optional. If you do not select one, the incident routes through the Default Mobilization Service and its Impacted Service shows as --.
Will declaring without a service page anyone?
Only if an administrator has configured responders on the Default Mobilization Service escalation policy. By default, that policy is empty, so no one is paged automatically. You become the owner and the incident is acknowledged.
How do I get the incident to the right team?
Set the impacted service on the open incident. This performs a standard service reassignment and routes the incident to that service's on-call responders.
Can I resolve an incident that never had a service assigned?
Yes. You can resolve directly from the Default Mobilization Service without assigning a technical service first.
Can an administrator require a service on incident creation?
An account-level setting to require a service on incident creation preserves the previous behavior for accounts that want it. When that setting is off, Quick Declare is enabled. See Disable Default Mobilization.
Updated 3 months ago