
Edit Schedules
Add users, create overrides, or modify handoff times.
As individuals join and leave your on-call rotations, you must edit your schedules so that the correct people are on call and notified at the correct times.
Create a ScheduleIf you create a schedule for the first time, visit the Schedule Basics article.
User PermissionsYou can add all individuals, except Limited and Full Stakeholders, to schedules.
People with the following roles can add or remove teams while editing:
- Global Admin
- Account Owner
People with the following roles can make other edits to on-call schedules:
- Users
- Admins/Global Admins
- Manager base roles and team roles
- People with a Manager Team role can manage only their team’s schedules.
- Account Owner
Add or Remove Members from an Existing Schedule
- Navigate to People Schedules and select the schedule to update.
- On the rotation to modify, click and select Edit.
- In the Edit Rotation modal, configure the following:
| Action/Field | Description |
|---|---|
| Members Tab | Click this tab to manage rotation members. |
| Add members | Search for and select the members to add. Repeat this step until you add all required members. |
| Sequence | Drag and drop names to adjust the sequence if needed. Members move through the rotation in top-to-bottom order. |
| Remove Member | Click the icon next to a member to remove them from the rotation. |
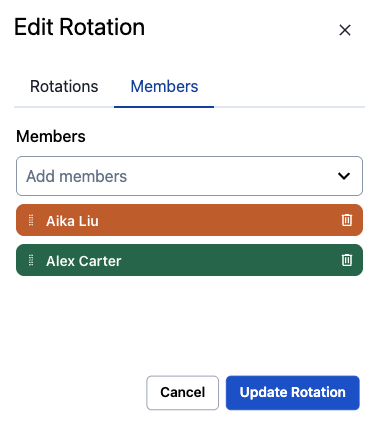
Edit Rotation
- Click Update Rotation.
- Click Save Schedule.
Deciding Between an Override and a Custom Shift
To determine the best option, ask yourself:
"Do you want to replace or add a responder?"
If Replace: Use an Override.
If Add: Use a Custom Shift.
Use a Custom Shift When
- Filling Empty Gaps: You need coverage during a time when no rotations are active, such as a one-off emergency block during a holiday or extending coverage past a rotation's end date.
- Adding Extra Support: You want an additional person on call without removing the person already scheduled. A common example is adding a second responder to assist during a high-risk deployment.
- Handling Irregular Windows: You need to cover a specific maintenance window that does not align with regular rotation boundaries or has nothing to do with the standard rotation.
- Expressing "Additive" Intent: The goal is to add a person to the on-call set rather than replacing whoever is currently scheduled.
Use an Override When
- Swapping Responders: You need to replace a specific member of a rotation who is unavailable (for example, Alice is sick, so Bob covers her specific shift).
- Performing a Scoped Replacement: You want to target a specific rotation or custom shift and change who is assigned to it for a set window of time.
Sanity Check
- If removing the override leaves the schedule with the correct on-call person, keep it as an override.
- If removing the override leaves a gap, you require a custom shift.
Create an Override in the Web App
Overrides allow you to make one-time manual adjustments to on-call schedules. Use them when someone is unavailable due to illness, vacation, or when team members need to swap on-call shifts.
- Navigate to People Schedules and select the schedule to create the override.
- Select a member within a rotation to override. You can create an override on any span of time on a schedule.
Override Option Not VisibleIf you click a member and do not see the Override option, the schedule is likely not finalized. To fix this, click Save Schedule and click the member again.
- Click + Override.
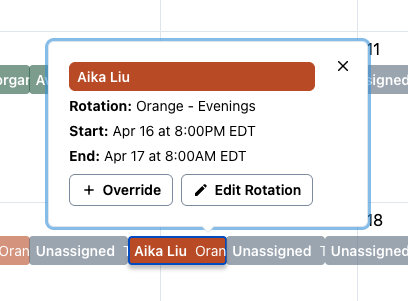
Create an Override
- In the Create an Override modal, select a member to cover the shift and click Create Override.
- Click Save Schedule.
You can also create overrides in My On-Call Shifts or via the API.
Delete an Override in the Web App
- Navigate to People Schedules and select the schedule with the override to delete.
- Click the override within a rotation. Overrides are clearly marked (Override).
- Click Remove.
- Click Save Schedule.
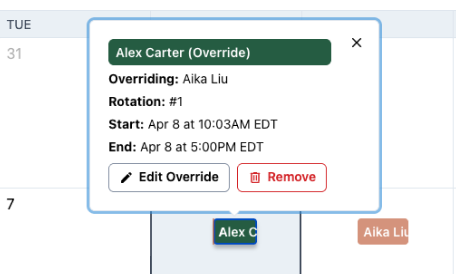
Remove an Override
Create an Open Schedule with Responder Sign-Ups
Open schedules allow responders to select their shifts.
- Navigate to People Schedules and click + Create Shift-Based Schedule.
- Configure your schedule details, then click + Create Rotation. Create a rotation with configured days and times, but do not assign members to the rotation.
- Create as many rotations as needed without assigning members.
- Click Save Schedule.
Responders can now add themselves to the schedule and choose their rotation.
Create a Custom Shift
Creating a one-off shift on top of an existing rotation allows you to handle temporary gaps or surge requirements without affecting the logic of your long-term recurring rotations.
- Navigate to People Schedules and select the schedule to create a shift.
- Under the Create Rotation dropdown, click Create Shift.
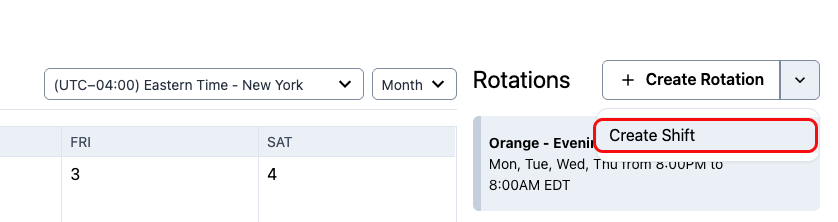
Create Shift Button
- In the Create Shift modal, enter the shift details. You can add a team member or leave the shift unassigned to keep it open for a team member to claim. Click Create Shift.
Duplicate a Schedule
Copying an existing schedule to make a new one with the same members and settings is an easy way to create new schedules at scale.
There are two places to duplicate a schedule in the web app:
Schedules List Page
1. Navigate to People Schedules.
2. Click next to the desired schedule and select Duplicate. This action creates a new schedule that copies all members and settings from the original schedule—except for the schedule name and team association.
3. On the next screen, configure the following fields and click Save Schedule:
| Field | Value |
|---|---|
| Schedule Name | Enter a new name for the schedule. |
| Team | Select a team from the dropdown. |
Schedule Details Page
1. Navigate to People Schedules and click the name of the schedule to duplicate.
2. On the right side, click Copy this Schedule. This action creates a new schedule that copies all members and settings from the original schedule—except for the schedule name and team association.
3. On the next screen, configure the following fields and click Save Schedule:
| Field | Value |
|---|---|
| Schedule Name | Enter a new name for the schedule. |
| Team | Select a team from the dropdown. |
Duplicate a Rotation
Copying a rotation is an easy way to ensure your settings transfer to another rotation when creating a schedule.
- Navigate to People Schedules and click the name of the desired schedule.
- On the rotation to duplicate, click and select Duplicate.
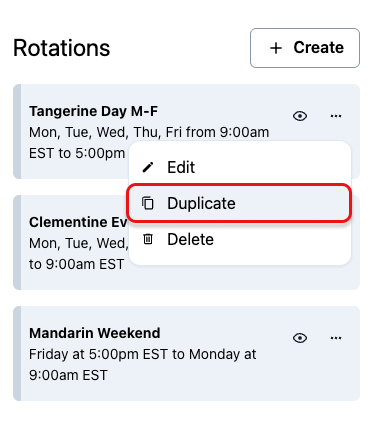
Duplicate Rotation
Hide or Unhide a Rotation
To remove a rotation without deleting it from a schedule, you can hide the rotation.
- Navigate to People Schedules and select the desired schedule.
- On the rotation to hide, click the icon.
- Click the greyed-out icon again to unhide the rotation.
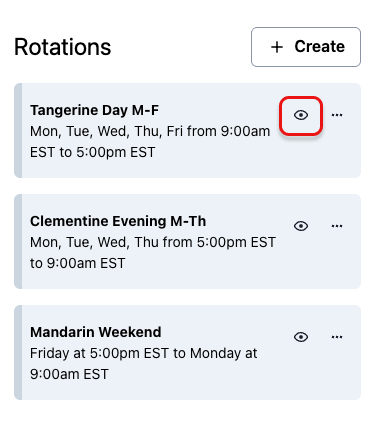
Hide Rotation
Pause or Deactivate an On-Call Schedule
Change the Escalation Policy for the Service
Visit the Escalation Policies and Schedules article for instructions on how to change a service’s escalation policy. This ensures that incidents triggered for the service do not alert the schedule to deactivate.
Remove a Schedule from a Team
Before you can remove a schedule from a team, note the following:
- If you manually added a schedule to a team via the instructions in teams, a person with a base role of Admin or higher can remove the schedule from the team.
- If you manually added an escalation policy with a schedule to a team via the instructions in escalation-policies, you must first remove the escalation policy from the team via the instructions in escalation-policies before removing the schedule.
To remove a schedule from a team:
- Navigate to People Schedules and select the desired schedule.
- Click the icon beside the schedule name.
- Under Teams, click the X to remove a team.
- Click Save Schedule.
End a Rotation
Schedule a rotation to end immediately or on a specific date for temporary coverage, such as holidays or short-term projects.
- Navigate to People Schedules and select the desired schedule.
- On the rotation card, select the menu and click End rotation.
- In the End Rotation modal, select an End method (either End Immediately or A specific end time) and click End Rotation.
- Click Save Schedule to apply the changes.
Updated 4 months ago