
PagerDuty Mobile App
The PagerDuty mobile app allows you to respond to incidents, view account objects, and manage settings on the go, wherever you are.
Download the Mobile App
The PagerDuty mobile app is available in the Apple Store and Google Play. Download the app by searching for PagerDuty in either app store, or tap one of the following buttons from your mobile device:


Supported Operating Systems and ConfigurationThe PagerDuty mobile app is supported on devices running iOS 17 and higher, or Android 12 and higher. You do not have access to the latest features if your device does not meet minimum requirements.
Rooted devices are not supported:
PagerDuty strengthens security by discontinuing support for the PagerDuty mobile app on rooted and jailbroken devices. Additionally, PagerDuty does not support emulators and tampered versions of the app. This update ensures the integrity of services and aligns with FedRAMP compliance.
Minimum OS Requirement ChangeTo keep the mobile app secure and up to date, PagerDuty is introducing new minimum operating system requirements. Starting November 16, 2026, new versions of the mobile app require iOS 18 or higher, or Android 13 or higher. Upgrade your device before this date to continue receiving mobile app updates.
Log In to the Mobile App
You log in to the mobile app by entering the email address associated with your PagerDuty user account. The app then guides you through the rest of the login process and presents you with the most relevant options. Read Log In to PagerDuty for more information.
Log In to Multiple PagerDuty Accounts in the Mobile App
- After you log in to one PagerDuty account, you can add other accounts to the app by navigating to More User Icon.
- Tap Plus Icon () at the top-right (iOS) or bottom-right (Android). If prompted, select the Environment you want to open the account in.
- Log in to the additional account. After you log in, you can see it in the list of accounts at More User Icon.
PagerDuty for IntunePagerDuty for Intune users cannot log in to multiple PagerDuty accounts in the mobile app.
Switch PagerDuty Accounts in the Mobile App
- After you log in to multiple PagerDuty accounts in the mobile app, you can find each account by navigating to More User Icon.
- To switch to another account, navigate to More User Icon and tap the desired account.
Remove a PagerDuty Account in the Mobile App
iOS
To remove an account from the iOS mobile app:
- Navigate to More User Icon.
- Tap Edit, then tap Minus Circle Icon () next to the account you want to remove.
- Tap Delete, then Remove to confirm your selection.
Android
To remove an account from the Android mobile app:
- Navigate to More User Icon.
- Tap Ellipsis Icon () to the right of the account you want to remove, and select Remove this Account.
- Tap Remove to confirm your selection.
Mobile App Walkthrough
Menu options are located at the bottom of the screen:
- Home
- Incidents
- My Shifts
- Services
- More
- Escalation Policies
- Resolved Incidents
- Schedules
- Status Dashboard
- Teams
- Users
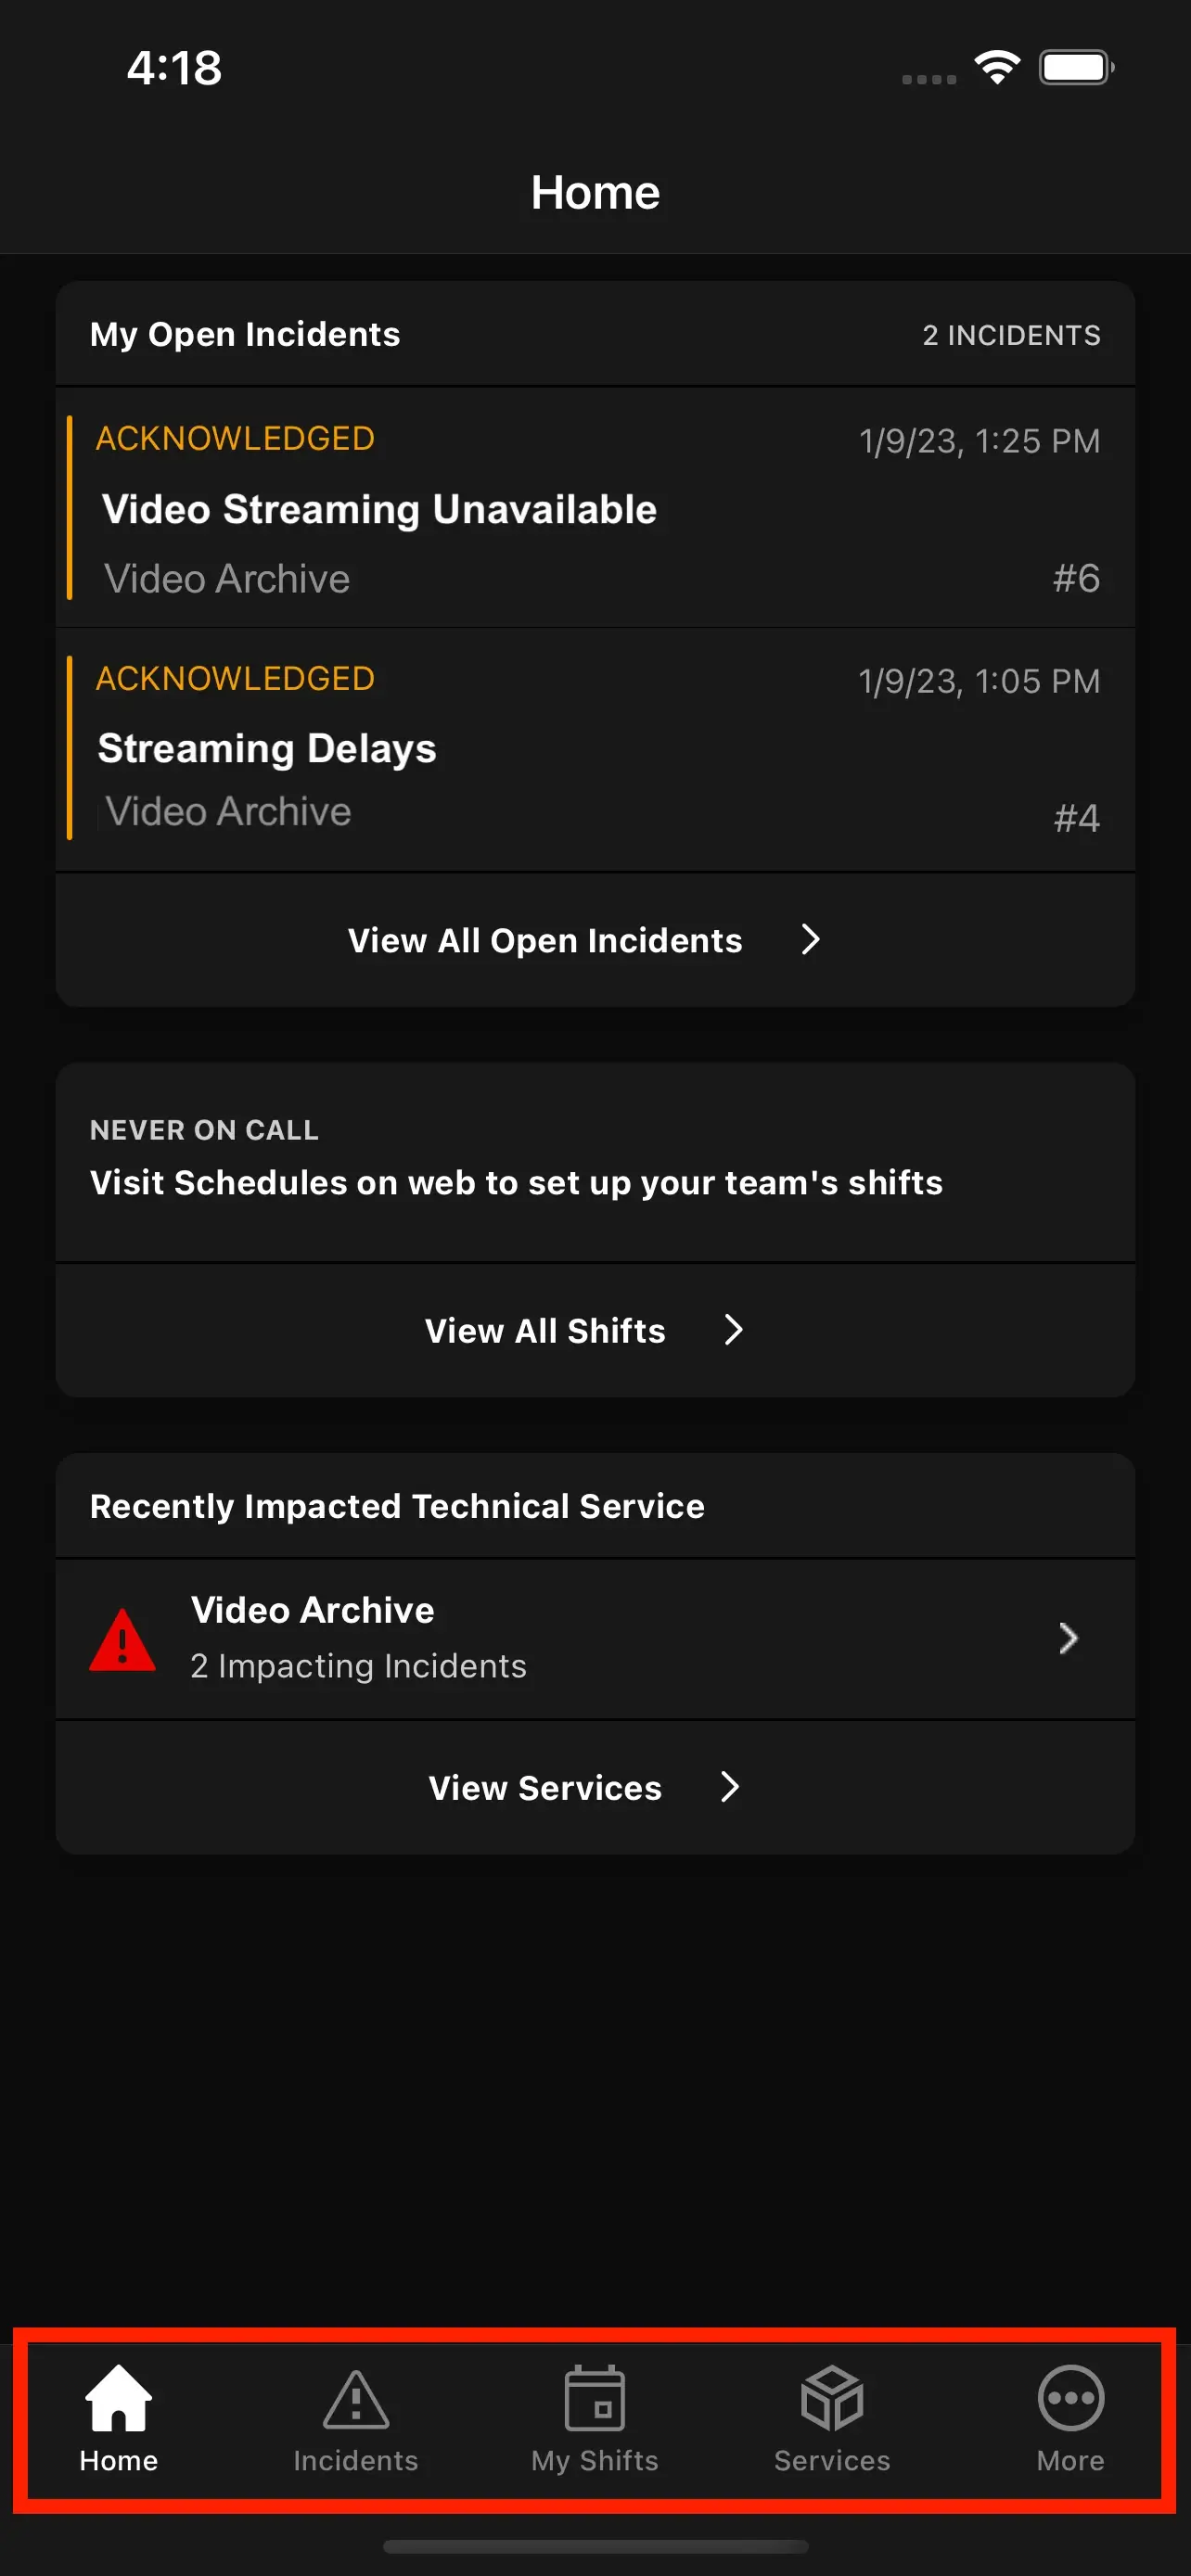
Mobile app overview
The app remembers which tab you were on when you navigate away. For example, if you were on the Incidents tab viewing an incident Timeline and then you switched to the Services tab, when you return to the Incidents tab you still view that incident's Timeline.
Home Screen
The mobile Home screen highlights top open incidents, and displays on-call shifts and service information, which broadens awareness and streamlines navigation to other important, non-incident information. Read Mobile Home Screen for more information.

Mobile app home screen
Open Incidents Screen
To view open incidents, select Incidents from the bottom navigation.
The Mine tab shows all triggered and acknowledged incidents assigned to you. The All tab shows all triggered and acknowledged incidents in the account. If you have a Responder role or higher, you also see the My Teams tab, which shows all incidents assigned to your teams.
This screen remembers your tab selection (such as Mine, My Teams, or All), so you can access relevant incidents faster when navigating here from other screens.
Sort Incidents
You can sort open incidents by tapping Sort By [x] and selecting Urgency, Priority, or Recent.
If you sort by urgency, high-urgency incidents display at the top of the queue and low-urgency incidents display at the bottom, regardless of their status (such as triggered or acknowledged).
Trigger or Declare an Incident
To trigger an incident in the mobile app:
iOS
- Navigate to Incidents at the bottom of the screen, tap Ellipsis Icon () in the top-right, and select New Incident.
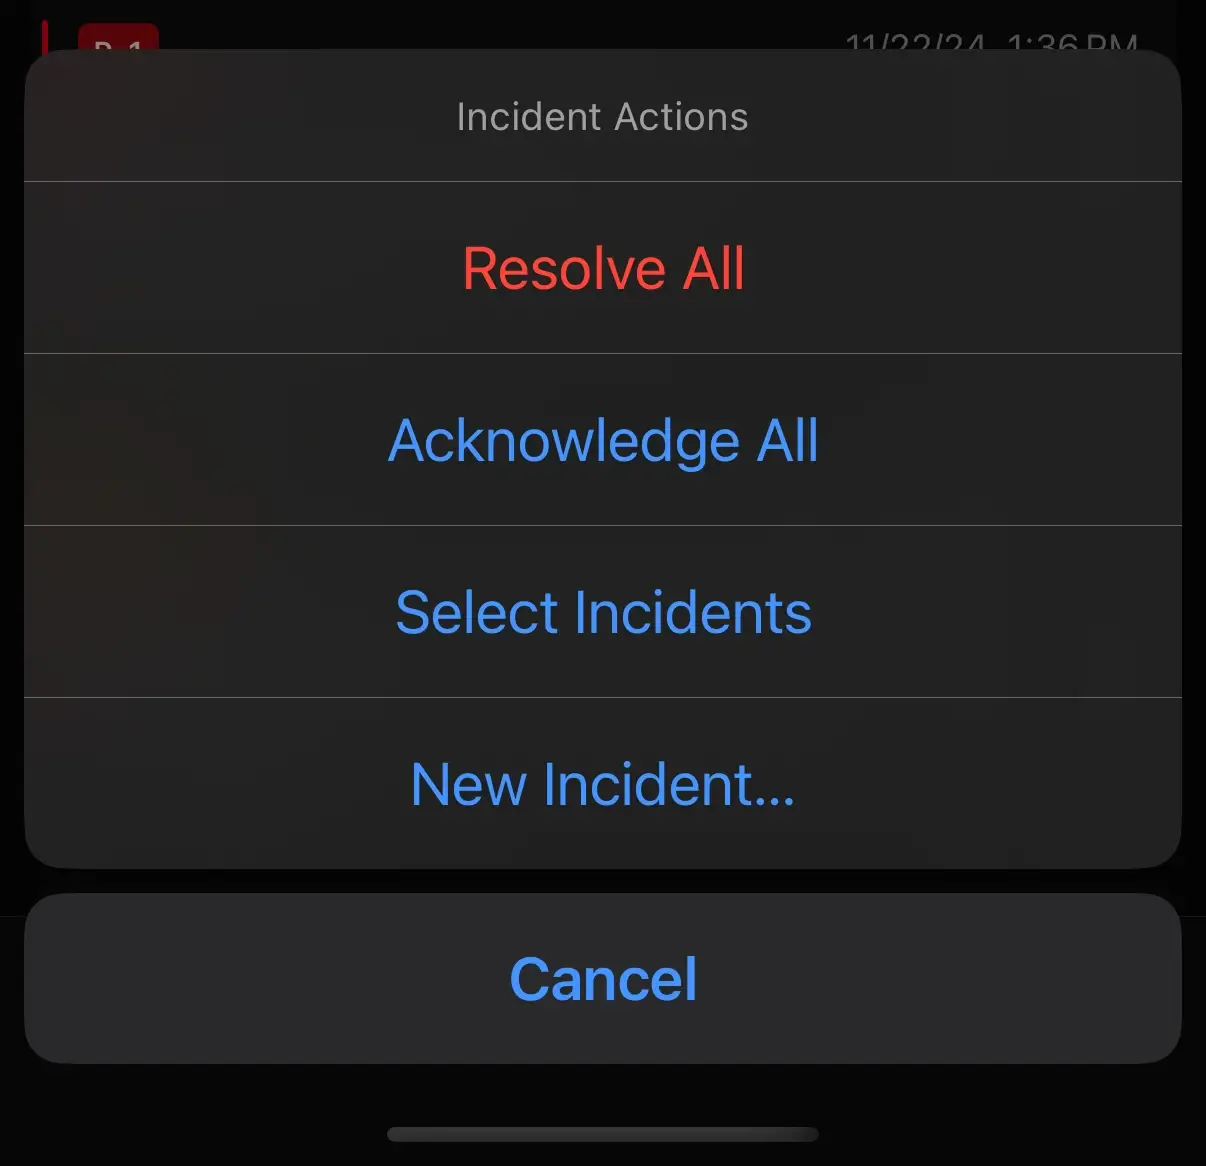
Incident actions
-
Complete the following fields on the screen:
Field Value Name A meaningful name for the incident. Description (optional) A meaningful description of the incident. Incident Type Select an incident type. Service Select the affected service. Assign to (optional) You can select an escalation policy or user other than the default escalation policy of the service. This overrides who the incident is assigned to. Priority (optional) Add an incident priority, if needed. -
Tap Create in the upper-right to trigger the incident.
Android
- Navigate to Incidents at the bottom of the screen, tap Vertical Ellipsis Icon () in the top-right, and select New Incident.
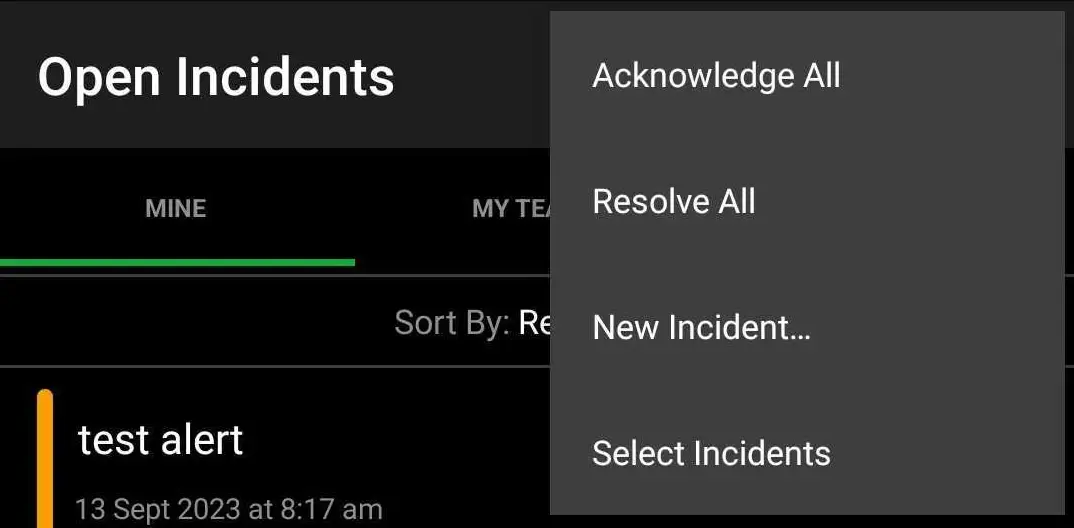
Open incidents
-
Complete the following fields on the screen:
Field Value Title A meaningful name for the incident. Incident Type Select an incident type. Impacted Service Select the affected service. Description (optional) A meaningful description of the incident. Assign to (optional) You can select an escalation policy or user other than the default escalation policy of the service. This overrides who the incident is assigned to. Priority (optional) Add an incident priority, if needed. -
Tap Create Incident.
Respond to Incidents in the Mobile App
Tap Incidents in the bottom navigation to see a list of all open incidents.
Incidents button
Acknowledge an Incident
If a triggered incident is assigned to you, the banner at the top turns red. Your incidents are under the Mine tab on the Open Incidents screen. There are three ways to acknowledge an incident:
- Swipe left on the incident and tap Ack.
- Tap the incident and tap the Ack button at the bottom of the incident details page.
- Acknowledge directly from a push notification by long pressing and tapping Ack (iOS). PagerDuty push notifications provide the incident number, service, and incident description.
After you acknowledge the incident, the banner turns yellow.
Snooze an Incident
There are two ways to snooze an incident in the mobile app:
- After you acknowledge an incident in the incident details page, the Ack button becomes a Snooze button.
- You can also snooze an incident by swiping left on an acknowledged incident.
Resolve an Incident
iOS
There are two ways to resolve an incident:
- Tap an incident to enter the details screen and tap Resolve at the bottom of the screen.
- On the Open Incidents page, swipe left on an incident and tap Resolve.
Android
There are two ways to resolve an incident:
- Tap an incident to enter the details screen and tap Resolve at the bottom of the screen.
- On the Open Incidents page, swipe right on an incident.
Incident Details and Other Actions
Tap an incident to enter the incident details screen. The incident details screen contains incident information, a timeline, and a status updates section.
Triage Tab
Tap the Triage tab to view the details of the incident and execute different PagerDuty actions:
- Automation Actions: Run an Automation Action.
- Run a Workflow: Run an incident workflow.
- Add Priority: Add a priority level to the incident.
- Custom Incident Actions: If your account has any custom incident actions configured, you see those specific actions as buttons.
- Add Note: Add a note to the incident.
- Status Update: Post a status update.
- Edit Title: Edit the incident’s title.
- Change Service: Reassign the incident's service.
- Change to [Urgency Level]: Change the urgency level from high to low or vice versa.
- Add Responder: Add responder(s) to the incident.
- Reassign: Reassign the incident to a different escalation policy or user.
- Escalate: Escalate the incident to a different user on the escalation policy.
Overview Tab
Tap the Overview tab to view the following incident details:
- Impacted Service: The service impacted by this incident. Tap the service name to see the details for the service.
- Responders: Responders currently responding to the incident. You can take the following actions:
- View Responder Details: Tap a responder’s name to view more details.
- Escalate: Escalate the incident to the next responder on the escalation policy.
- Add Responder: Add more responders to the incident.
- Reassign: Reassign the incident to a different escalation policy or user.
- Conference Bridge: If your account has a conference bridge configured, you see options to join the bridge and the meeting link.
- Latest Status Update: Status updates for the incident.
- [#] Subscribers: Users who are subscribed to the incident. To send a status update to subscribers, tap Post Status Update, enter your status update, and tap Paper Plane Icon () in the upper right.
- Timeline: An abridged incident timeline with the latest updates. Tap View Timeline to see the entire incident timeline.
- Triggered Alerts: Alerts for the incident.
- Past Incidents: Past incidents related to the current incident.
All Actions Button
The All Actions button provides quick and easy access to the actions available in the Triage tab and the following incident actions:
- Snooze: Snooze the incident.
- Unacknowledge: Unacknowledge the incident if you previously acknowledged it.
- Subscribe: Subscribe to the incident.
Custom Fields
The Custom Fields feature allows you to enrich PagerDuty incidents with critical and helpful metadata throughout the incident lifecycle. Read Custom Fields on Incidents for more information.
Related Incidents
AvailabilityThe Related Incidents feature is currently available with the PagerDuty AIOps add-on. If you want to sign up for a trial of this and other PagerDuty AIOps features, read PagerDuty AIOps Trials.
On the incident details screen, you can select the blue Related Incidents button to review suggested incidents that are impacting other responders and PagerDuty services.
You can select an incident under the Related Incidents list, which opens the corresponding incident details screen. Tap Left Chevron Icon () to return to the original incident.
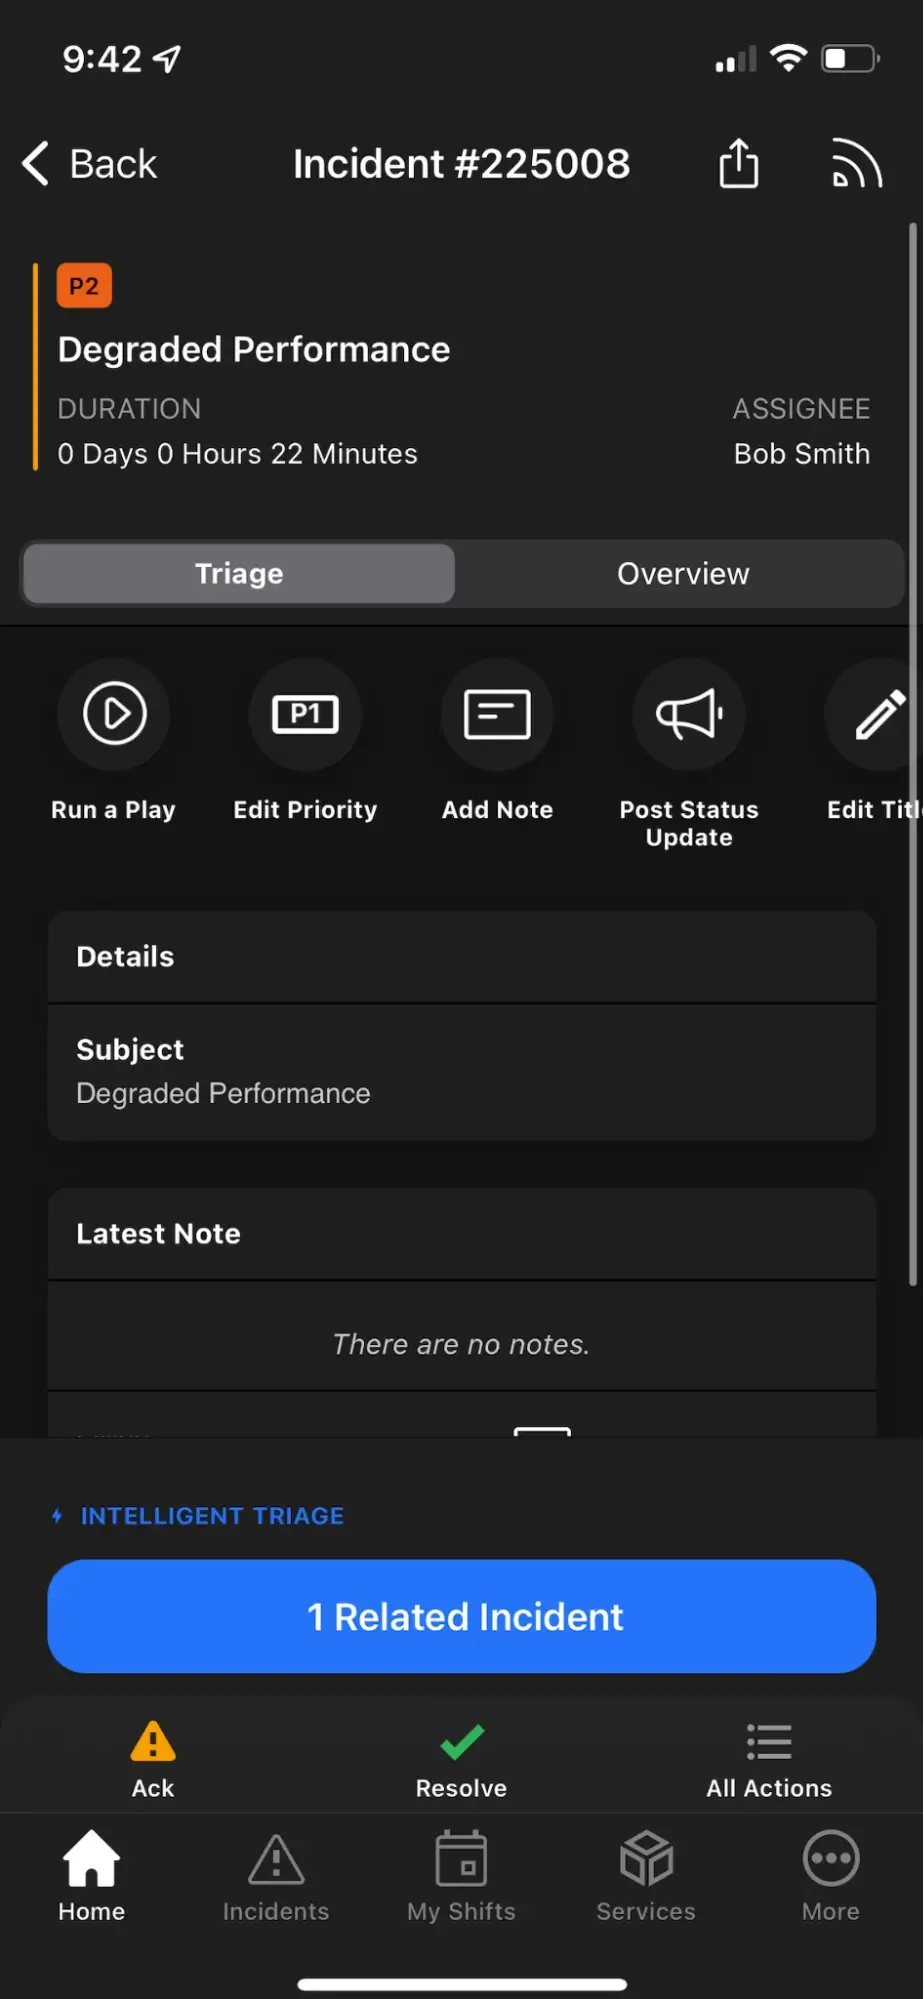
Related incidents
Resolved Incidents Screen
Navigate to More Resolved Incidents to view a list of all resolved incidents. Tap an incident to view its details. Select the My Teams tab to see incidents related to your teams, or select the All tab for all incidents across the entire account.
Service Directory Screen
Select Services in the bottom navigation to view the Service Directory. The Service Directory is a searchable, high-level view of all PagerDuty services in your organization and their corresponding owners.
To search the Service Directory screen, tap Search Icon () in the upper right and search by service name.
To filter services, select the My Teams tab for services related to your teams, or the All tab for all services account-wide.
Tap a service to view its details:
- Incidents: Open incidents occurring on the service.
- On Call Now: Responders who are currently on call on the service’s escalation policy.
- Team: The team associated with the service.
- Description: The description for the service.
- Escalation Policy: The escalation policy associated with the service.
- Dependencies: Services that have dependencies on the current service in the Uses and Used By directions.
- Change Events: Recent change events related to the service.
Users Screen
Navigate to More Users to view a list of users and their login email addresses. Select a user to show their contact methods and escalation policies where they are on call.
To search for a user, tap Search Icon () in the top right and search for their name or email address. You can email, call, or SMS a user from your device by tapping a user's email address or phone number.
On Android, tap Vertical Ellipsis Icon () to Add to Contacts or Edit Schedule Color.
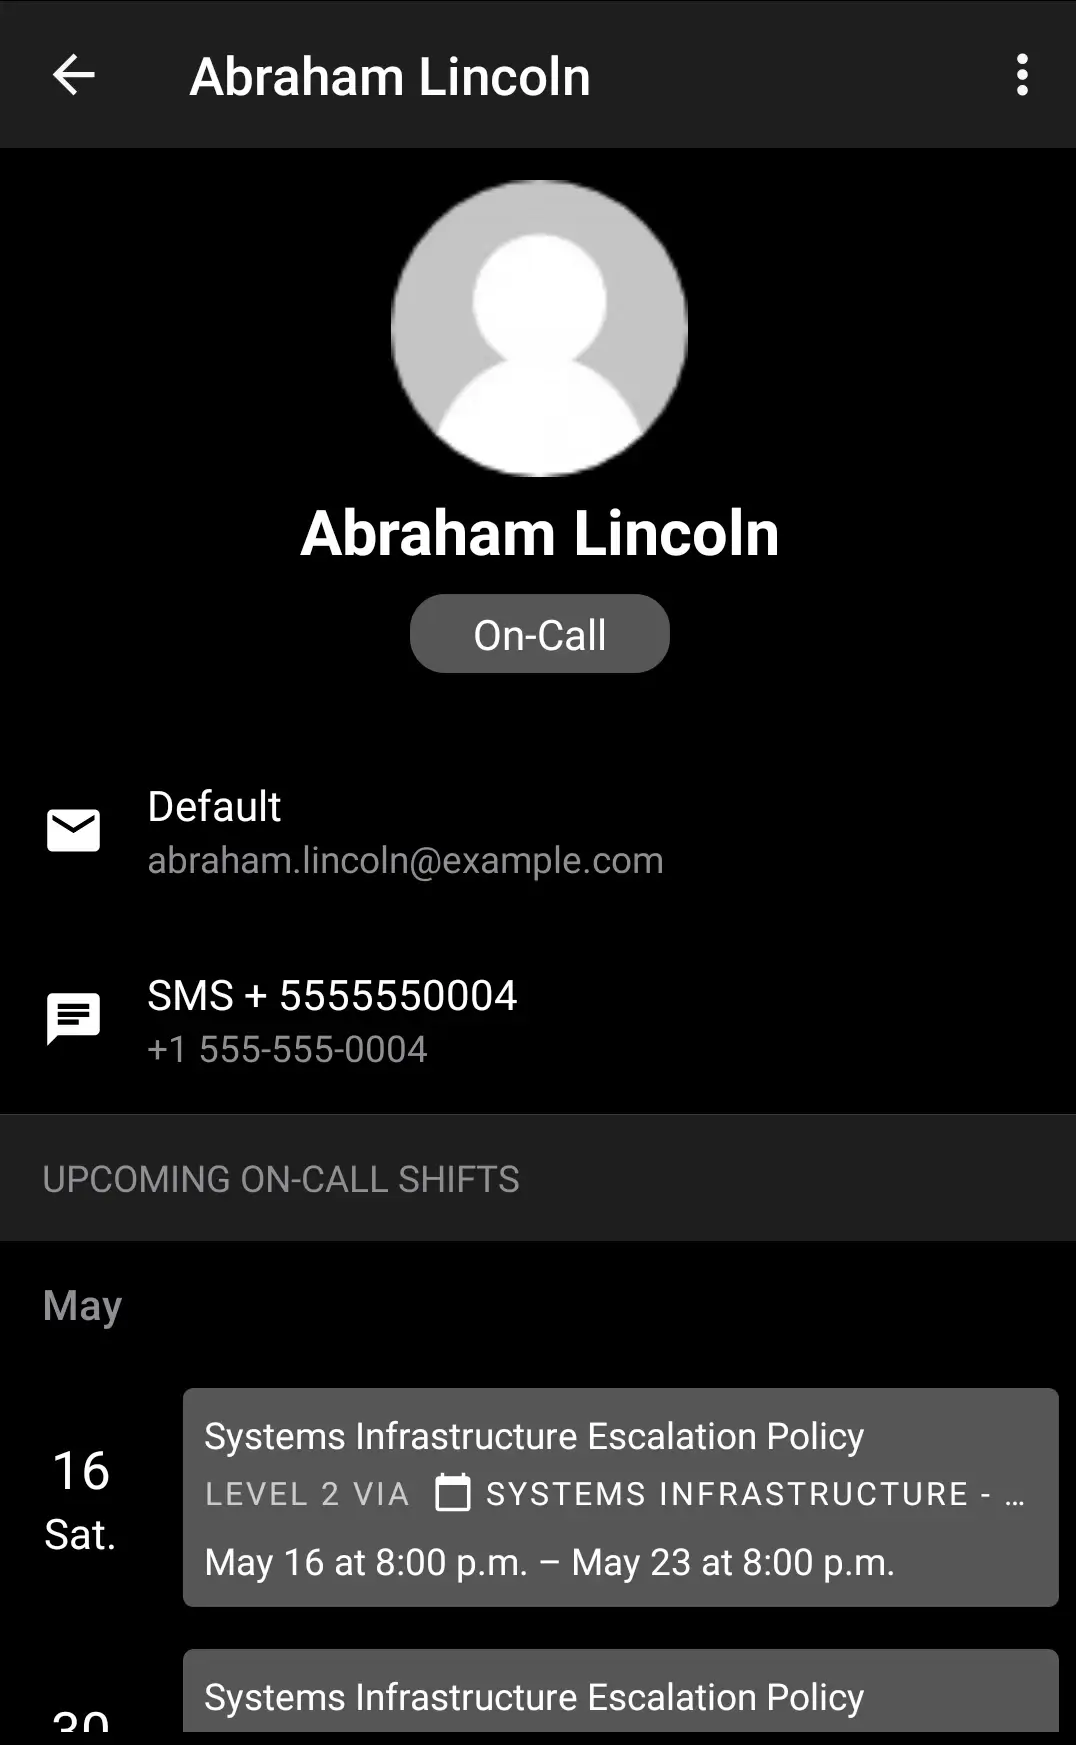
Contact screen
Schedules Screen
Navigate to More Schedules to view a list of schedules in your account. Tap a schedule to view its details. On the details screen, you see a calendar and a list of upcoming on-call shifts. Move forward and backward in the schedule using Right Chevron Icon () and Left Chevron Icon (), and tap a date to view who is on call for that day. Tap Calendar Icon () in the top-right to return to the current date.
To search schedules, tap Search Icon () in the upper-right and search by schedule name.
To filter schedules, you can select the My Teams tab for schedules related to your teams, or the All tab for all schedules account-wide.
Schedule Overrides
iOS
- To schedule an override, navigate to More Schedules and select your desired schedule.
- In the list of shifts, tap the shift you want to override.
- By default, the app sets you as the user overriding the shift. If you want another user to override the shift, tap your name and select another user from the list.
- Note: You can enter a search term on the user list screen to limit results.
- Optional: If needed, tap Starts or Ends to adjust the duration of the override. You can also tap Duration to select a predetermined override length:
- one hour
- six hours
- 12 hours
- 24 hours
- Until the rotation ends
- Tap Override in the top-right. Tap Override again in the confirmation modal.
Android
- To schedule an override, navigate to More Schedules and select your desired schedule.
- In the list of shifts, tap the shift you want to override.
- By default, the app sets you as the user overriding the shift. If you want another user to override the shift, tap your name, select another user from the list, and tap Done in the top-right.
- Note: You can tap Search Icon () and enter a search term on the Select User screen to limit results.
- Optional: If needed, tap the start date, end date, start time, or end time to adjust the duration of the override. You can also tap the Override Length to select a predetermined override duration:
- one hour
- six hours
- 12 hours
- 24 hours
- Until the rotation ends
- Tap Override in the top-right. Tap Override again in the confirmation modal.
Escalation Policies Screen
Navigate to More Escalation Policies to view the escalation policies for your account. Selecting an escalation policy shows who is on call at each level. Select a user to see their contact info and schedule details.
My On-Call Shifts Screen
Tap My Shifts in the bottom navigation to view My On-Call Shifts. My On-Call Shifts displays escalation policies that you are on call for and your upcoming shifts for the next month.
To view more details about the escalation policy, tap your shift and tap Go to Escalation Policy.
Status Dashboard Screen
Navigate to More Status Dashboard to view the incident status of all business services in your account. If your account has custom dashboards configured, you can switch dashboard views by tapping Chevron Circle Down Icon () in the top-right and selecting your preferred dashboard.
To view more details about a business service, tap its name. On the details screen, you can view supporting services. To view more details about a supporting service, tap its name.
To subscribe to a business service, tap the name of the business service and tap RSS Icon () in the top right.
Settings Screen
Navigate to More Settings Icon () in the top right to view the Settings screen. Here you can select a custom push notification sound and sounds for high- and low-urgency notifications.
For more information on notification configuration options, see Mobile App Settings.
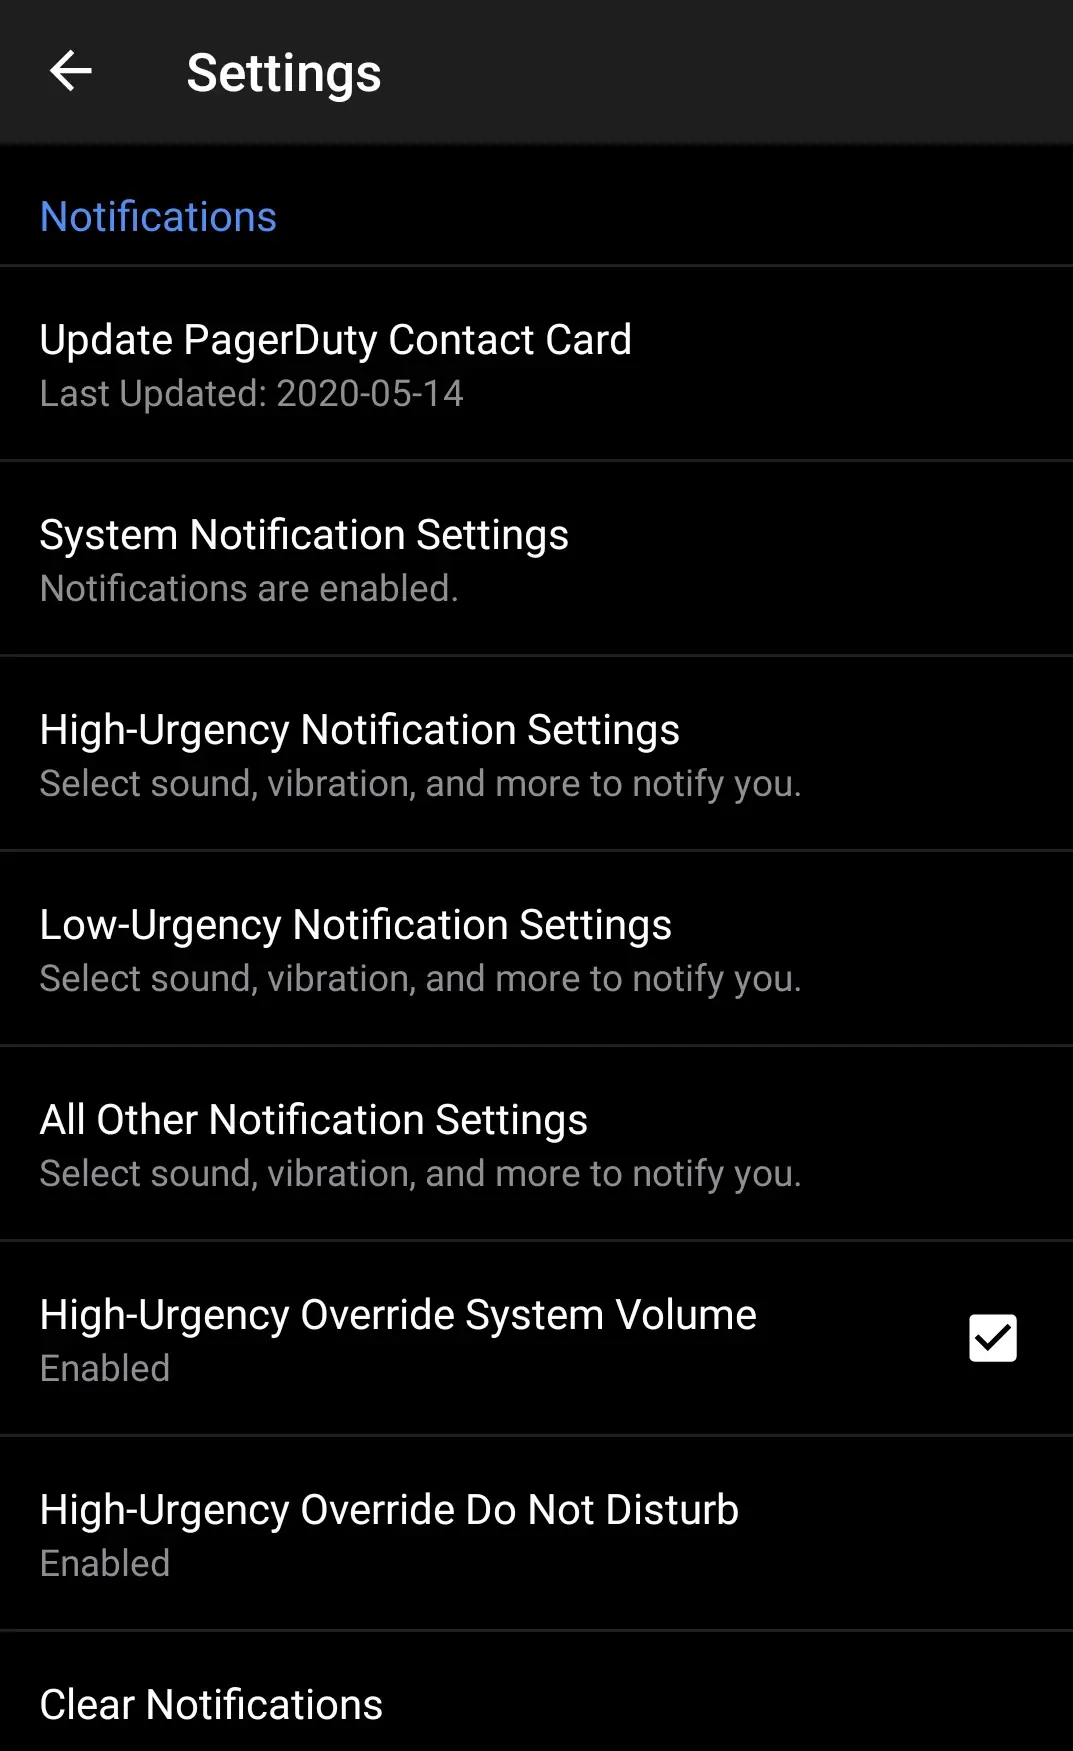
Settings
Mobile App Permissions
New downloads of the mobile app ask for permission to access your contacts the first time you log in. Existing app users can access this on the mobile app's Settings screen under Automatic Contact Card Management.
We request access to your contacts so that the app can import the PagerDuty vCard, which lets you know that a phone or SMS notification is from PagerDuty. The vCard is automatically kept up to date whenever a number is added to or removed from the vCard.
- We do not send messages, calls, or notifications to any contact within your contacts list.
- We do not use this permission for marketing, data gathering, or research purposes.
If you deny this permission, the app still functions as intended. However, you can miss calls if a PagerDuty phone number is blocked or marked as spam by your provider. For iOS users, installing the vCard allows you to enable an override for Do Not Disturb and ensures silencing unknown numbers does not affect calls from PagerDuty. You can also manually download the vCard from our Knowledge Base; however, you must periodically check to see if it has been updated, and if so, you must download it again.
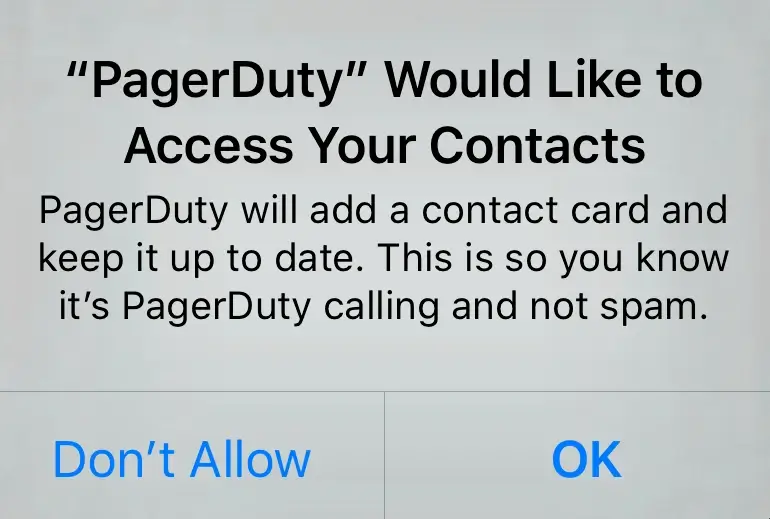
Access contacts screen
Advanced Mobile Security
Add an additional layer of mobile app security by setting up Advanced Mobile Security on your PagerDuty account.
Enabling this feature requires you to set a passcode (such as a PIN) after logging in to the mobile app. This passcode is stored locally on the device and you must enter it to access the app every time you close it or leave it in the background. On iOS, you can choose to use phone biometric features like Face ID. Administrators can also set a timeout which additionally requires the passcode when the timeout has elapsed, even if you have not minimized or closed the app.
RequirementsThe App Lock feature is available to customers on the following pricing plans: Business, Digital Operations (legacy), and Enterprise for Incident Management.
Note: You configure Advanced Mobile Security in the web app as opposed to the mobile app.
To set up App Lock:
-
In the PagerDuty web app, navigate to User Icon Account Settings Mobile Security Settings.
-
Complete the fields on the screen:
Field Value Mobile App Lock Setting Select On from the dropdown menu. App Lock Timeout Enter a value in minutes to determine how long it takes before the app locks itself and requires you to enter your passcode. -
Click Save.
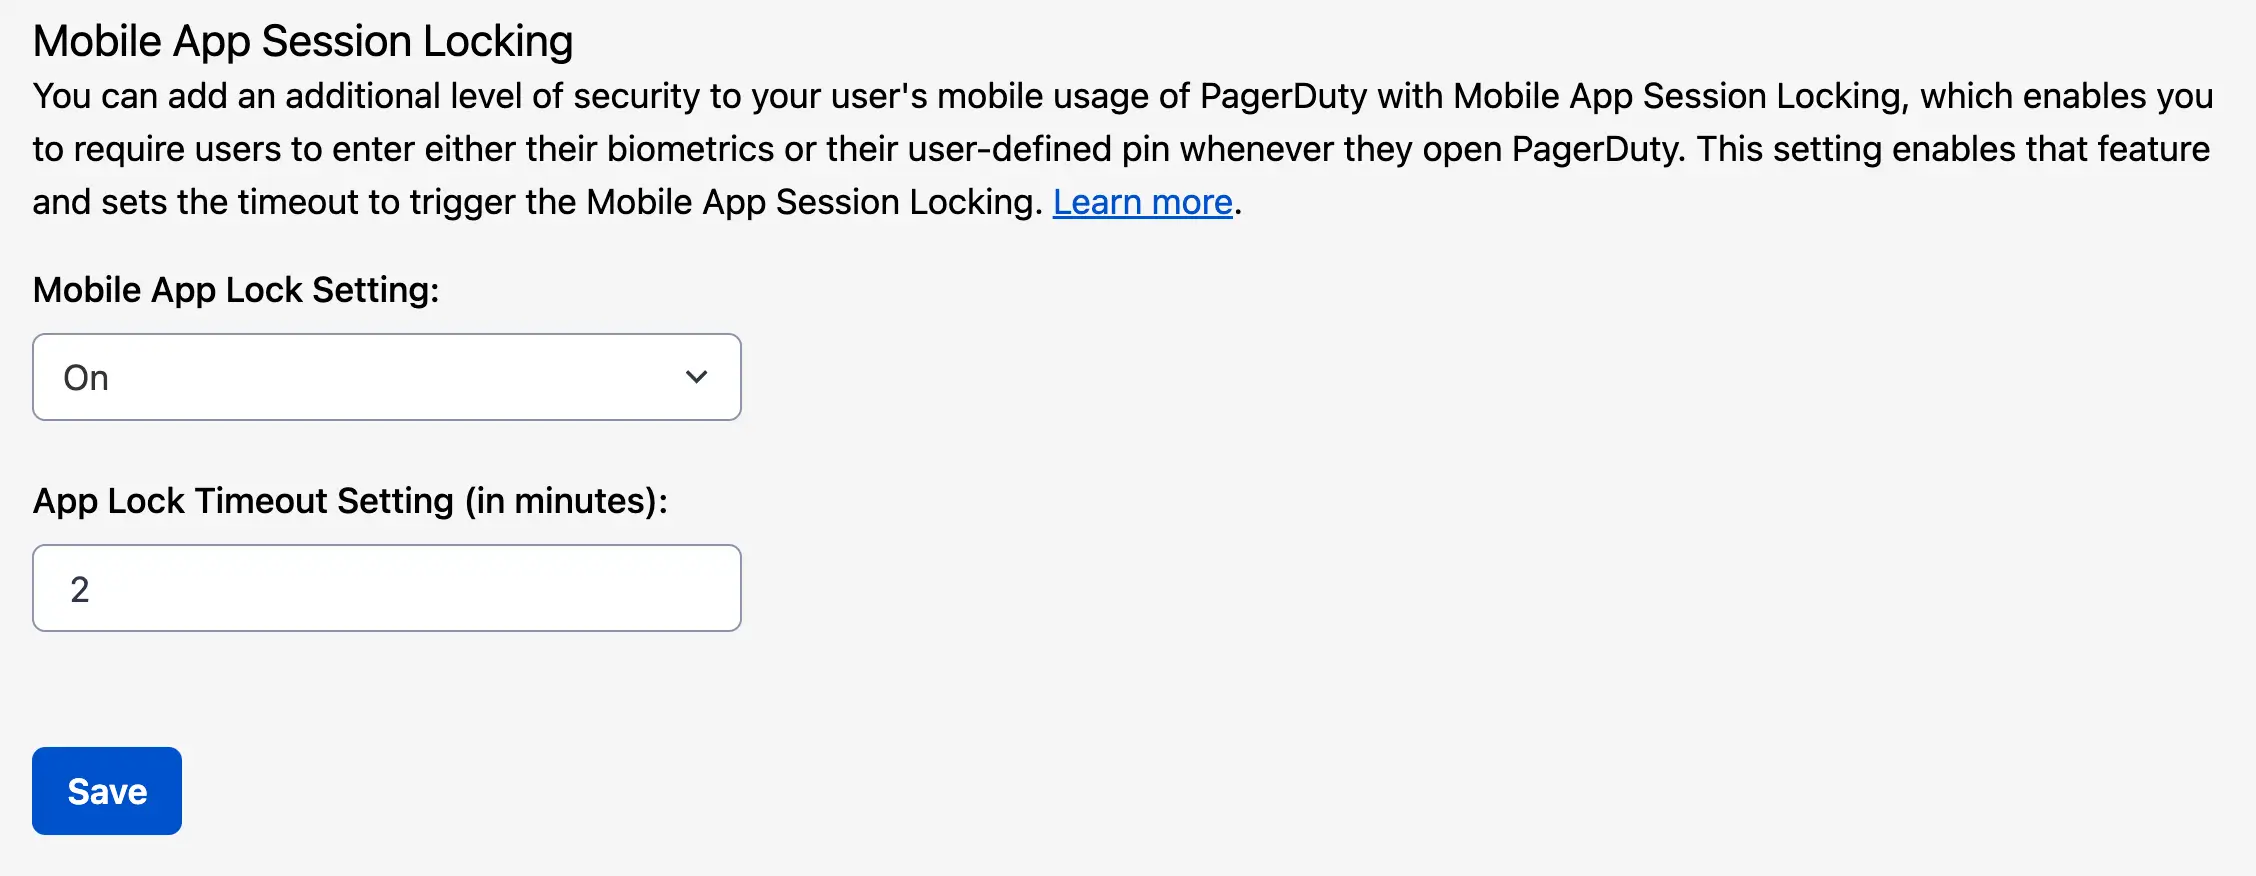
Mobile app session locking screen
After the setting is enabled, the app prompts you to enter a new passcode when you log into your PagerDuty mobile app.
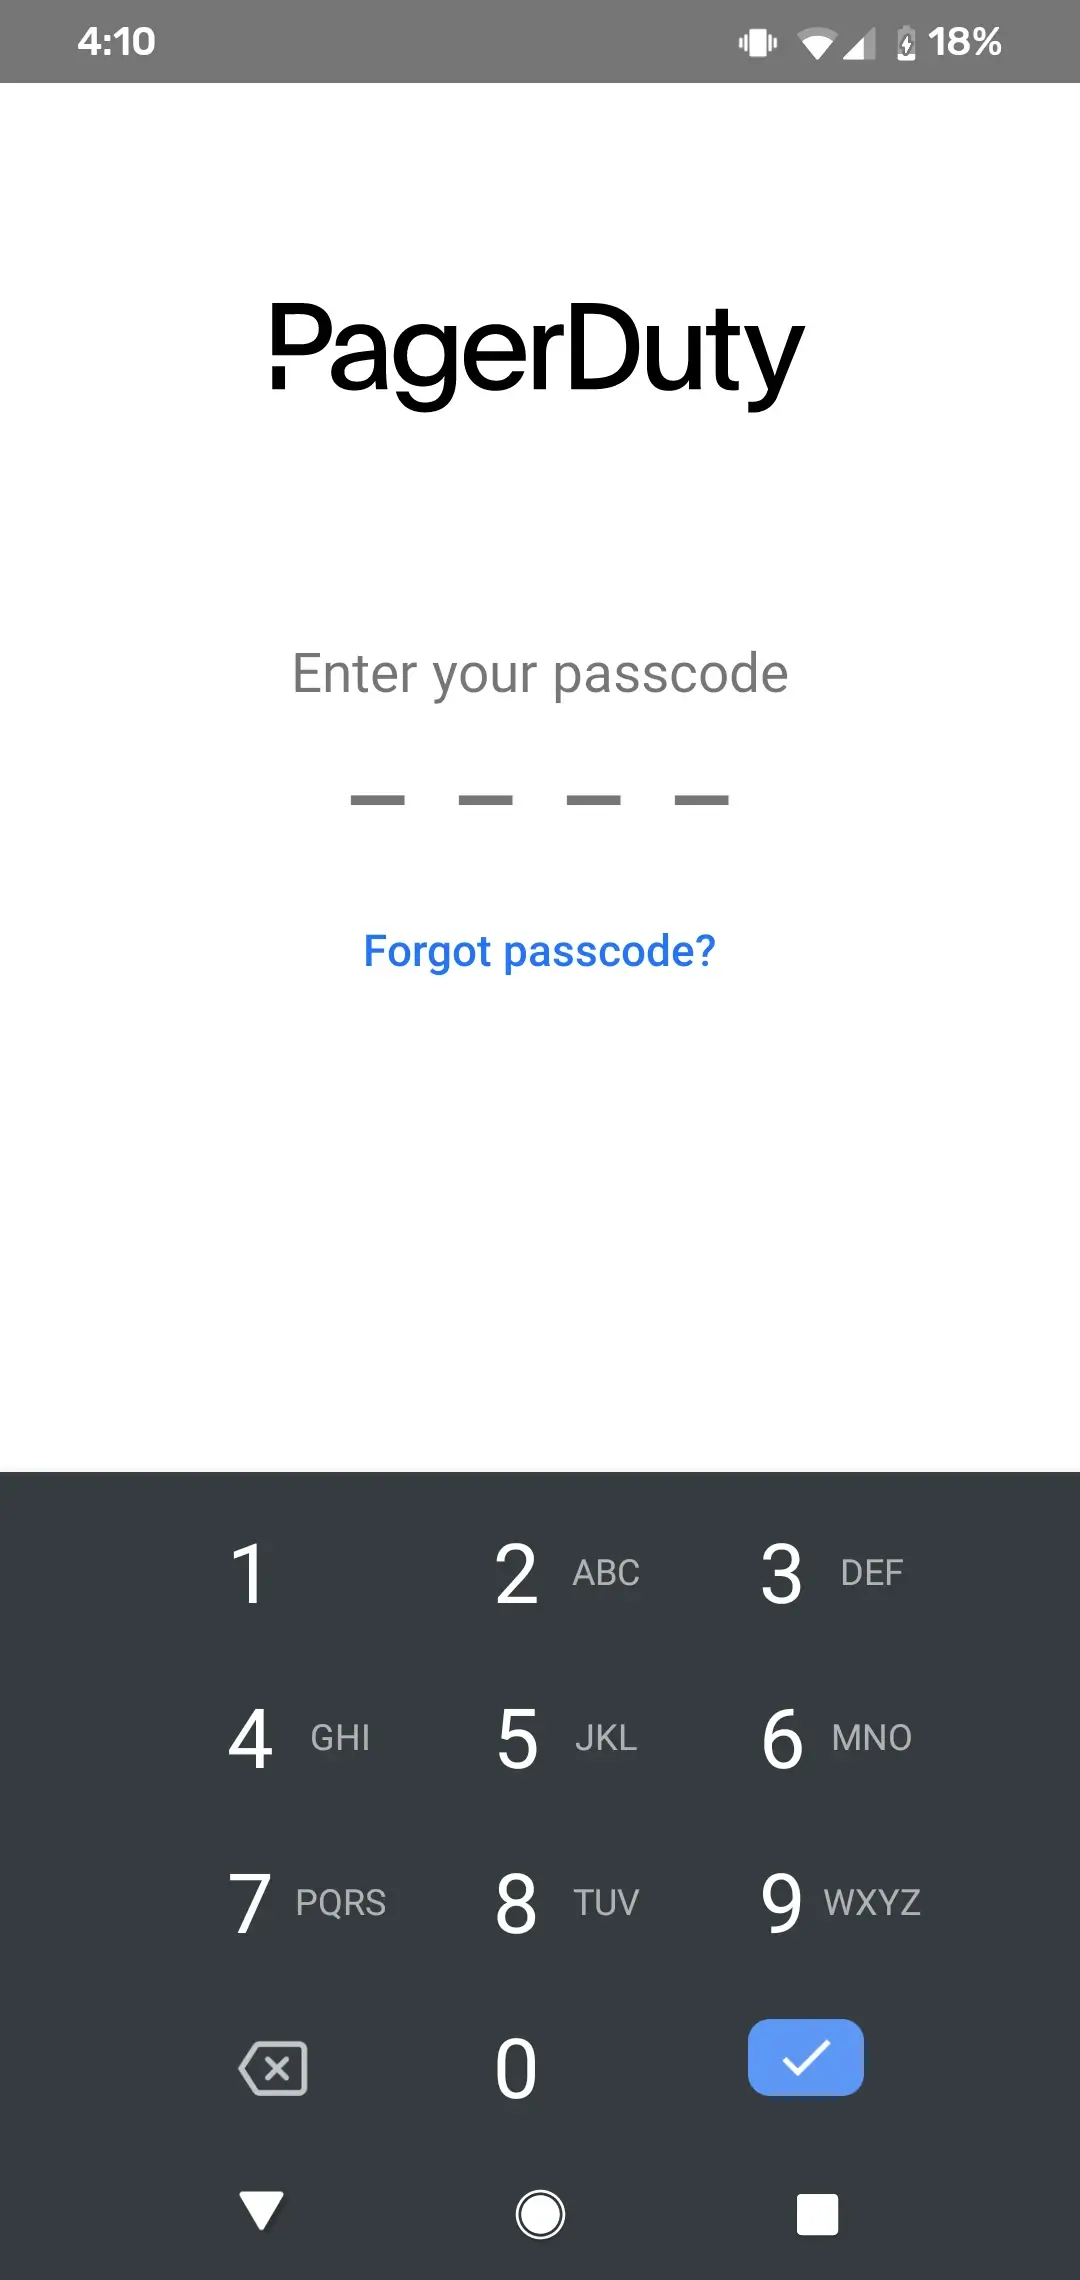
Mobile app lock screen
Reset PasscodeIf you forget your passcode or want to change it, you can click Forgot passcode?, which logs you out of the entire app to set up a new one.
FAQ
When logging in, do I need to select my service region?
You do not need to specify your Service Region (such as US or EU) when logging in. The login system works globally and logs you in to the appropriate account depending on the credentials you enter. If you use the same email and password combination for accounts in both the EU and US regions, you see a list of accounts, which indicates each account's service region.
I use Single Sign-On to log in. Why do I not see the option to enter my email and password, too?
Your PagerDuty administrator has configured the account to only allow login via single sign-on. Contact your PagerDuty administration to use an email and password to sign in to PagerDuty.
I have multiple accounts with the same email. Why do I not see a list of accounts to log in to?
You see a list of accounts that use the exact same email and password combination. If you use different passwords but the same email address for different accounts, the app does not present a list of accounts.
Can I use a password manager to log in?
Yes, the PagerDuty mobile app is compatible with industry-standard password managers, even if you have multiple PagerDuty accounts. If you use a unique password for each PagerDuty account, the app logs you in to the appropriate account.
If I have multiple PagerDuty accounts, should I use the same password for each?
No, using the same password across multiple accounts reduces security.
Updated about 4 hours ago